


 本文介绍了在小程序中使用canvas实现倒计时圆环的效果,重点提到了canvas-id的唯一性,以及在实现过程中遇到的命名错误和样式设置问题。通过代码示例展示了如何解决这些问题,并探讨了用view的border替代canvas背景的可能性。
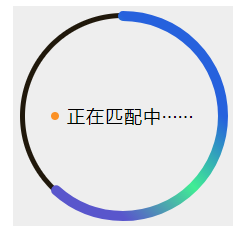
效果图如下


小程序官方文档一些 tips
tip:同一页面中的 canvas-id 不可重复,如果使用一个已经出现过的 canvas-id,该 canvas 标签对应的画布将被隐藏并不再正常工作。
canvas-id 是canvas 组件的唯一标识符,(若指定了 type 则无需再指定该属性)。
我遇到的几个小问题
我跟着别人的代码写的,写完不显示,后来发现canvas-id我写做了canvas_id,导致了JS找不到canvas元素。后来我又用canvas-id的值作为ID值赋CSS样式也没有成功,又加了class。canvas_id和id不是一回事。在小程序以外的页面canvas是用id做标识符来确定绘制上下文的区域的。
代码如下
 <view class="progress_box">
        <canvas  canvas-id="progress_bg" class="progress_bg"></canvas>
        <canvas  canvas-id="progress_canvas"></canvas>
        <view class="progress_txt">
            <view class="progress_dot"></view>
            <view class="progress_info">{{progress_txt}}</view>
        </view>
    </view>
    /**index.wxss**/
.progress_box{
    position: relative;
    width: 220px;
    height: 220px;
    display: flex;
    align-items: center;
    justify-content: center;
    background-color: #eee;
}
.progress_bg{
    position: absolute;
}
canvas{
    width: 220px;
    height: 220px;
}
.progress_txt{
    position: absolute;
    display: flex;
    align-items: center;
    justify-content: center;
}

.progress_dot{
    width: 16rpx;
    height: 16rpx;
    border-radius: 50%;
    background-color: #fb9126;
}
.progress_info{
    font-size: 36rpx;
    padding-left:16rpx;
    letter-spacing: 2rpx;
}
//index.js
//获取应用实例
const app = getApp()

Page({
  data:{
    progress_txt:"正在匹配中······",
    count:0,
    countTimer:null
  },
  onReady: function (e) {
    this.smile();
    this.countInterval();
  },
  countInterval: function(){
    this.countTimer = setInterval(()=>{
      if(this.data.count <= 60){
        this.progress_canvas(this.data.count/(60/2));
        this.data.count++;
      }else{
        this.setData({progress_txt:"匹配成功"});
      clearInterval(this.countTimer);
      }    },100)
  },
  smile:function (e) {
    // 使用 wx.createContext 获取绘图上下文 context
    var context = wx.createCanvasContext('progress_bg')
    context.setLineWidth(5)
    context.setStrokeStyle("#20180b")
    context.setLineCap('round')
    context.beginPath()
    context.arc(110, 110, 100, -Math.PI/2, 2 * Math.PI-Math.PI/2, false)
    context.stroke()
    context.draw()
  },
  progress_canvas:function (step) {
    // 使用 wx.createContext 获取绘图上下文 context
    var context = wx.createCanvasContext('progress_canvas')
     var gradient = context.createLinearGradient(200,100,100,200)
     gradient.addColorStop('0','#2661DD')
     gradient.addColorStop('0.5','#40ED94')
     gradient.addColorStop('1.0','#5956cc')
    context.setLineWidth(10)
    context.setStrokeStyle(gradient)
    context.setLineCap('round')
    context.beginPath()
    context.arc(110, 110, 100, -Math.PI/2, step * Math.PI-Math.PI/2, false)
    context.stroke()
    context.draw()
  }
  })
背景canvas用view的border代替的尝试
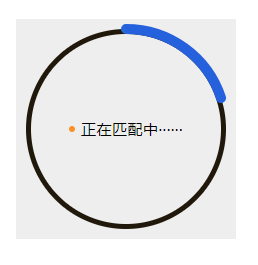
左图代码:
.progress_bg{
  position: absolute;
  width: 200px;
  height: 200px;
  border-radius: 50%;
  border: #20180b 5px solid;
}
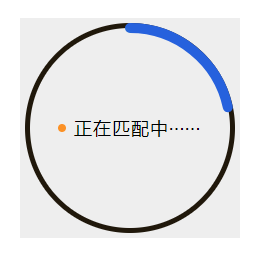
右图代码:
.progress_bg{
  position: absolute;
  width: 200px;
  height: 200px;
  border-radius: 50%;
  border: #20180b 5px solid;
  box-sizing: border-box;
}
这次的还可以,要动态的调整一下盒子的宽高值,数值变化时还要跟着调。实际运用中再取舍吧。代码如下:
.progress_bg{
    position: absolute;
    width: 206px;
    height: 206px;
    border-radius: 50%;
    border: #20180b 5px solid;
    box-sizing: border-box;
}
宽高调到206px。


 1539
1539

 被折叠的 条评论
为什么被折叠?
被折叠的 条评论
为什么被折叠?
 到【灌水乐园】发言


