


1.加swagger的pom依赖
<!-- Swagger依赖 -->
		<dependency>
			<groupId>io.springfox</groupId>
			<artifactId>springfox-swagger2</artifactId>
			<version>2.9.2</version>
		</dependency>
		<dependency>
			<groupId>io.springfox</groupId>
			<artifactId>springfox-swagger-ui</artifactId>
			<version>2.9.2</version>
		</dependency>
2.写一个swagger的配置类
package com.fyx.client.utils;

import io.swagger.annotations.Api;
import org.springframework.context.annotation.Bean;
import org.springframework.context.annotation.Configuration;
import springfox.documentation.builders.ApiInfoBuilder;
import springfox.documentation.builders.PathSelectors;
import springfox.documentation.builders.RequestHandlerSelectors;
import springfox.documentation.service.ApiInfo;
import springfox.documentation.spi.DocumentationType;
import springfox.documentation.spring.web.plugins.Docket;
import springfox.documentation.swagger2.annotations.EnableSwagger2;

/**
 * swagger配置类
 */
@Configuration   //让spring来加载该类配置
@EnableSwagger2   //开启swagger2
public class SwaggerConfig {

    /**
     * 创建api应用
     * apiInfo()增加API相关信息
     * 通过select()函数返回一个ApiSelectorBuilder实例,用来控制哪些接口暴漏给swagger进行展示
     * 本例采用指定扫描的包路径来定义指定要建立API的目录
     * @return
     */
    @Bean
    public Docket createRestApi() {
        return new Docket(DocumentationType.SWAGGER_2)
                .pathMapping("/")
                .select()
                //设置选择器,选择带api接口类的类
                .apis(RequestHandlerSelectors.withClassAnnotation(Api.class))
                //api包扫描
                .apis(RequestHandlerSelectors.basePackage("com.fyx.client.controller"))
                .paths(PathSelectors.any())
                .build()
                .apiInfo(testApiInfo());
    }

    /**
     * 创建该API的基本信息(这些基本信息会展示在文档页面中)
     * 访问地址:localhost:8081/swagger-ui.html
     * @return
     */
    private ApiInfo testApiInfo() {
        return new ApiInfoBuilder()
                .title("springboot利用swagger构建api文档")//标题
                .version("1.0")//版本
                .build();
    }


}
3.接口上注解
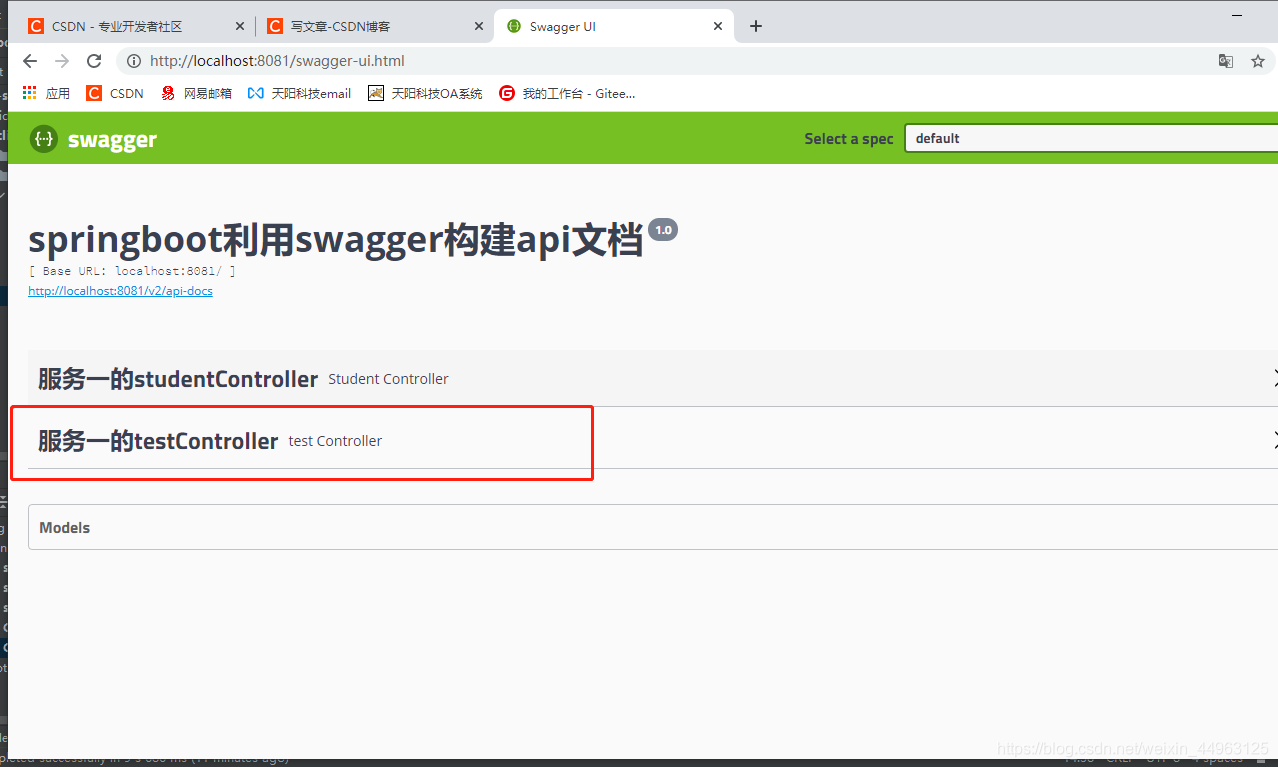
4.完成 测试


 870
870

 被折叠的 条评论
为什么被折叠?
被折叠的 条评论
为什么被折叠?
 到【灌水乐园】发言


