


 本文介绍了在NestJS中如何进行数据验证,重点使用DTO(Data Transfer Object)结合class-validator库来限制和验证前端传递的数据。内容包括:安装class-validator和class-transformer,全局启用ValidationPipe,编写DTO,以及在Controller和Service中应用验证。示例展示了用户名、密码、手机号码、邮箱和枚举类型的验证规则。
文章问题导向
如何 限制 和 验证 前端传递过来的数据?
如果你都有了答案,可以忽略本文章,或去nest学习导图寻找更多答案
验证方式
常用:dto(data transfer object数据传输对象) + class-validator,自定义提示内容,还能集成swagger
其他:@hapi/joi,不常用,提示不友好
这里主要使用dto的方式
class-validator的验证项装饰器
更多请查阅官网,github官网地址
@IsOptional() //可选的
@IsNotEmpty({ message: ‘不能为空’ })
@MinLength(6, {message: ‘密码长度不能小于6位’})
@MaxLength(20, {message: ‘密码长度不能超过20位’})
@IsEmail({}, { message: ‘邮箱格式错误’ }) //邮箱
@IsMobilePhone(‘zh-CN’, {}, { message: ‘手机号码格式错误’ }) //手机号码
@IsEnum([0, 1], {message: ‘只能传入数字0或1’}) //枚举
@ValidateIf(o => o.username === ‘admin’) //条件判断,条件满足才验证,如:这里是传入的username是admin才验证
第一步:安装
yarn add class-validator class-transformer
第二步:全局使用内置管道ValidationPipe ,不然会报错,无法起作用
import { NestFactory } from '@nestjs/core';
import { Logger, ValidationPipe } from '@nestjs/common';
import { AppModule } from './app.module';

async function bootstrap() {
  const app = await NestFactory.create(AppModule);
  app.useGlobalPipes(new ValidationPipe()); //全局内置管道
  await app.listen(3000);
}
bootstrap();
第三步:编写dto,使用class-validator的校验项验证
创建DTO:只需要用户名,密码即可,两种都不能为空
import { IsNotEmpty, MinLength, MaxLength } from 'class-validator';

export class CreateUserDto {
  @IsNotEmpty({ message: '用户名不能为空' })
  username: string;

  @IsNotEmpty({ message: '密码不能为空' })
  @MinLength(6, {
    message: '密码长度不能小于6位',
  })
  @MaxLength(20, {
    message: '密码长度不能超过20位',
  })
  password: string;
}
修改DTO:用户名,密码,手机号码,邮箱,性别,状态,都是可选的
import {
  IsEnum,
  MinLength,
  MaxLength,
  IsOptional,
  IsEmail,
  IsMobilePhone,
} from 'class-validator';
import { Type } from 'class-transformer';

export class UpdateUserDto {
  @IsOptional()
  username: string;

  @IsOptional()
  @MinLength(6, {
    message: '密码长度不能小于6位',
  })
  @MaxLength(20, {
    message: '密码长度不能超过20位',
  })
  password: string;

  @IsOptional()
  @IsEmail({}, { message: '邮箱格式错误' })
  email: string;

  @IsOptional()
  @IsMobilePhone('zh-CN', {}, { message: '手机号码格式错误' })
  mobile: string;

  @IsOptional()
  @IsEnum(['male', 'female'], {
    message: 'gender只能传入字符串male或female',
  })
  gender: string;

  @IsOptional()
  @IsEnum({ 禁用: 0, 可用: 1 },{
    message: 'status只能传入数字0或1',
  })
  @Type(() => Number) //如果传递的是string类型,不报错,自动转成number类型
  status: number;
}
第四步:controller和service一起使用
controller
user.controller.ts

import {
  Controller,
  Post,
  Body,
  HttpCode,
  HttpStatus,
} from '@nestjs/common';
import { UserService } from './user.service';
import { CreateUserDto } from './dto/create-user.dto';

@Controller('user')
export class UserController {
  constructor(private readonly userService: UserService) { }

  @Post()
  @HttpCode(HttpStatus.OK)
  async create(@Body() user: CreateUserDto) { //使用创建dto
    return await this.userService.create(user);
  }

  @Patch(':id')
    async update(@Param('id') id: string, @Body() user: UpdateUserDto) {  //使用更新dto
      return await this.userService.update(id, user);
    }
  }
service
user.service.ts

import { Injectable } from '@nestjs/common';
import { Repository } from 'typeorm';
import { InjectRepository } from '@nestjs/typeorm';
import { UsersEntity } from './entities/user.entity';
import { ToolsService } from '../../utils/tools.service';
import { CreateUserDto } from './dto/create-user.dto';


@Injectable()
export class UserService {
  constructor(
    @InjectRepository(UsersEntity)
    private readonly usersRepository: Repository<UsersEntity>,
  ) { }

  async create(user: CreateUserDto) { //使用dto
    do some thing....
  }
}
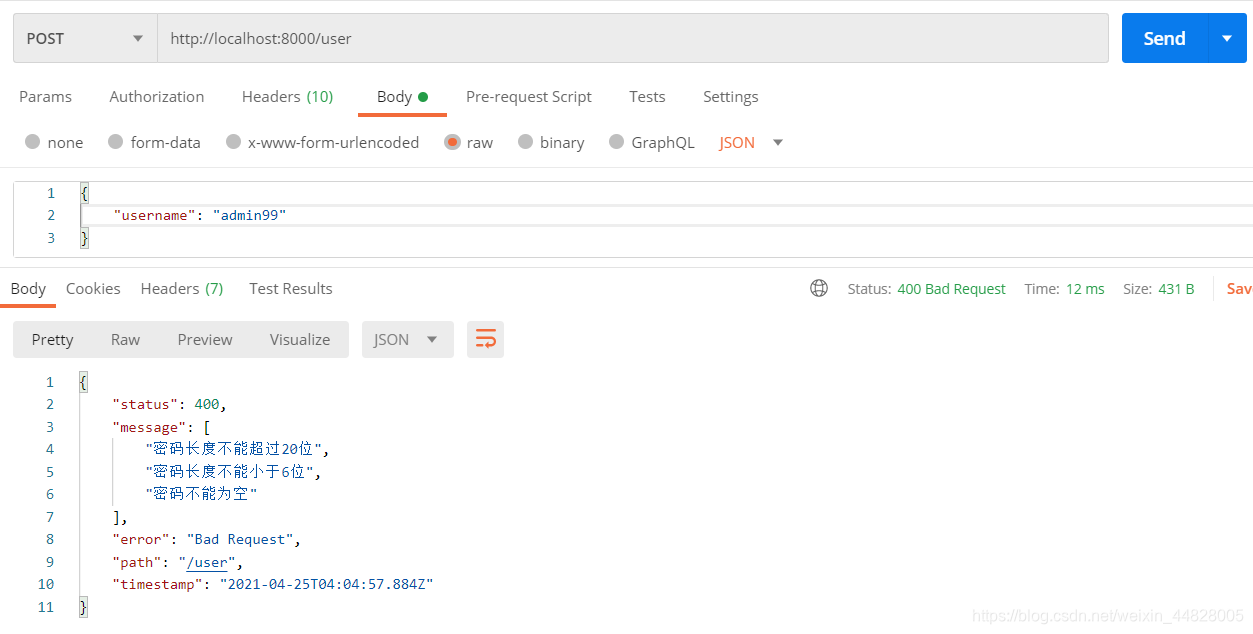
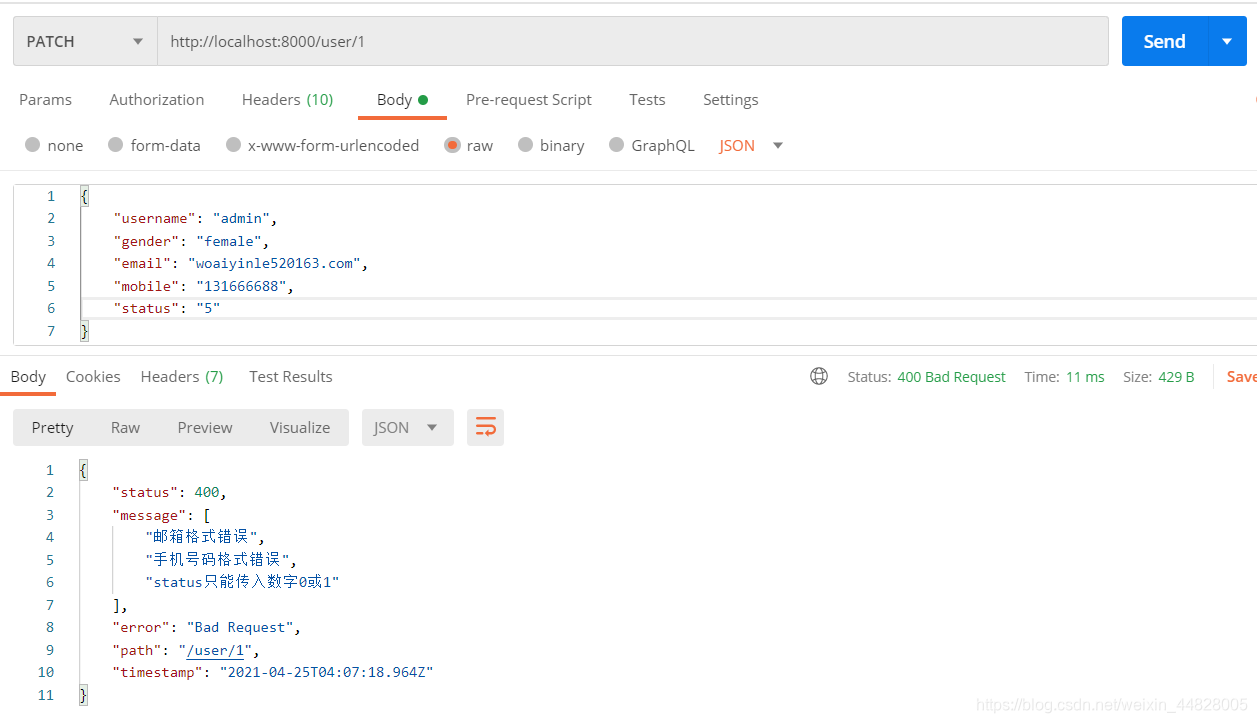
postman测试
post
update
学习更多


 584
584

 被折叠的 条评论
为什么被折叠?
被折叠的 条评论
为什么被折叠?
 到【灌水乐园】发言


