


步骤一:首先创建mave工程(之前一定要了解过maven)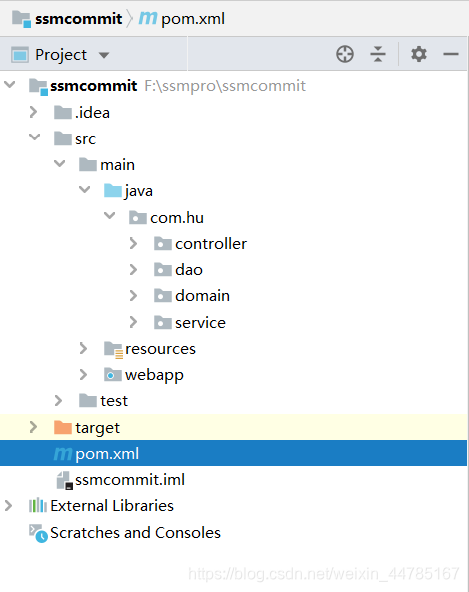
然后在pom.xml中导入坐标依赖`:
<?xml version="1.0" encoding="UTF-8"?>

<project xmlns="http://maven.apache.org/POM/4.0.0" xmlns:xsi="http://www.w3.org/2001/XMLSchema-instance" xsi:schemaLocation="http://maven.apache.org/POM/4.0.0 http://maven.apache.org/xsd/maven-4.0.0.xsd">
  <modelVersion>4.0.0</modelVersion>
  <groupId>com.hu</groupId>
  <artifactId>ssmcommit</artifactId>
  <version>1.0-SNAPSHOT</version>
  <!-- 统一管理jar包版本 -->
  <packaging>war</packaging>
  <properties>
    <spring.version>5.0.2.RELEASE</spring.version>
    <slf4j.version>1.6.6</slf4j.version>
    <log4j.version>1.2.12</log4j.version>
    <shiro.version>1.2.3</shiro.version>
    <mysql.version>5.1.6</mysql.version>
    <mybatis.version>3.4.5</mybatis.version>
    <spring.security.version>5.0.1.RELEASE</spring.security.version>
  </properties>
  <!-- 锁定jar包版本 -->
  <dependencyManagement>
    <dependencies>
      <dependency>
        <groupId>org.springframework</groupId>
        <artifactId>spring-context</artifactId>
        <version>${spring.version}</version>
      </dependency>
      <dependency>
        <groupId>org.springframework</groupId>
        <artifactId>spring-web</artifactId>
        <version>${spring.version}</version>
      </dependency>
      <dependency>
        <groupId>org.springframework</groupId>
        <artifactId>spring-webmvc</artifactId>
        <version>${spring.version}</version>
      </dependency>
      <dependency>
        <groupId>org.springframework</groupId>
        <artifactId>spring-tx</artifactId>
        <version>${spring.version}</version>
      </dependency>
      <dependency>
        <groupId>org.springframework</groupId>
        <artifactId>spring-test</artifactId>
        <version>${spring.version}</version>
      </dependency>
      <dependency>
        <groupId>org.mybatis</groupId>
        <artifactId>mybatis</artifactId>
        <version>${mybatis.version}</version>
      </dependency>
    </dependencies>
  </dependencyManagement>
  <!-- 项目依赖jar包 -->
  <dependencies>
    <!-- spring -->
    <dependency>
      <groupId>org.aspectj</groupId>
      <artifactId>aspectjweaver</artifactId>
      <version>1.6.8</version>
    </dependency>
    <dependency>
      <groupId>org.springframework</groupId>
      <artifactId>spring-aop</artifactId>
      <version>${spring.version}</version>
    </dependency>
    <dependency>
      <groupId>org.springframework</groupId>
      <artifactId>spring-context</artifactId>
      <version>${spring.version}</version>
    </dependency>
    <dependency>
      <groupId>org.springframework</groupId>
      <artifactId>spring-context-support</artifactId>
      <version>${spring.version}</version>
    </dependency>
    <dependency>
      <groupId>org.springframework</groupId>
      <artifactId>spring-web</artifactId>
      <version>${spring.version}</version>
    </dependency>
    <dependency>
      <groupId>org.springframework</groupId>
      <artifactId>spring-orm</artifactId>
      <version>${spring.version}</version>
    </dependency>
    <dependency>
      <groupId>org.springframework</groupId>
      <artifactId>spring-beans</artifactId>
      <version>${spring.version}</version>
    </dependency>
    <dependency>
      <groupId>org.springframework</groupId>
      <artifactId>spring-core</artifactId>
      <version>${spring.version}</version>
    </dependency>
    <dependency>
      <groupId>org.springframework</groupId>
      <artifactId>spring-test</artifactId>
      <version>${spring.version}</version>
    </dependency>
    <dependency>
      <groupId>org.springframework</groupId>
      <artifactId>spring-webmvc</artifactId>
      <version>${spring.version}</version>
    </dependency>
    <dependency>
      <groupId>org.springframework</groupId>
      <artifactId>spring-tx</artifactId>
      <version>${spring.version}</version>
    </dependency>
    <dependency>
      <groupId>junit</groupId>
      <artifactId>junit</artifactId>
      <version>4.12</version>
      <scope>test</scope>
    </dependency>
    <dependency>
      <groupId>mysql</groupId>
      <artifactId>mysql-connector-java</artifactId>
      <version>${mysql.version}</version>
    </dependency>
    <dependency>
      <groupId>javax.servlet</groupId>
      <artifactId>javax.servlet-api</artifactId>
      <version>3.1.0</version>
      <scope>provided</scope>
    </dependency>
    <dependency>
      <groupId>javax.servlet.jsp</groupId>
      <artifactId>jsp-api</artifactId>
      <version>2.0</version>
      <scope>provided</scope>
    </dependency>
    <dependency>
      <groupId>jstl</groupId>
      <artifactId>jstl</artifactId>
      <version>1.2</version>
    </dependency>
    <!-- log start -->
    <dependency>
      <groupId>log4j</groupId>
      <artifactId>log4j</artifactId>
      <version>${log4j.version}</version>
    </dependency>
    <dependency>
      <groupId>org.slf4j</groupId>
      <artifactId>slf4j-api</artifactId>
      <version>${slf4j.version}</version>
    </dependency>
    <dependency>
      <groupId>org.slf4j</groupId>
      <artifactId>slf4j-log4j12</artifactId>
      <version>${slf4j.version}</version>
    </dependency>
    <!-- log end -->
    <dependency>
      <groupId>org.mybatis</groupId>
      <artifactId>mybatis</artifactId>
      <version>${mybatis.version}</version>
    </dependency>
    <dependency>
      <groupId>org.mybatis</groupId>
      <artifactId>mybatis-spring</artifactId>
      <version>1.3.0</version>
    </dependency>
    <dependency>
      <groupId>c3p0</groupId>
      <artifactId>c3p0</artifactId>
      <version>0.9.1.2</version>
      <type>jar</type>
      <scope>compile</scope>
    </dependency>
    <dependency>
      <groupId>com.github.pagehelper</groupId>
      <artifactId>pagehelper</artifactId>
      <version>5.1.2</version>
    </dependency>
    <dependency>
      <groupId>org.springframework.security</groupId>
      <artifactId>spring-security-web</artifactId>
      <version>${spring.security.version}</version>
    </dependency>
    <dependency>
      <groupId>org.springframework.security</groupId>
      <artifactId>spring-security-config</artifactId>
      <version>${spring.security.version}</version>
    </dependency>
    <dependency>
      <groupId>org.springframework.security</groupId>
      <artifactId>spring-security-core</artifactId>
      <version>${spring.security.version}</version>
    </dependency>
    <dependency>
      <groupId>org.springframework.security</groupId>
      <artifactId>spring-security-taglibs</artifactId>
      <version>${spring.security.version}</version>
    </dependency>
    <dependency>
      <groupId>com.alibaba</groupId>
      <artifactId>druid</artifactId>
      <version>1.0.9</version>
    </dependency>
  </dependencies>

 project>
步骤二:创建mybatis框架;首先 创建数据库名称为:maven
然后建一张表:
CREATE TABLE `items`  (
  `id` int(10) NOT NULL AUTO_INCREMENT,
  `name` varchar(20) CHARACTER SET utf8 COLLATE utf8_general_ci NULL DEFAULT NULL,
  `price` float(10, 0) NULL DEFAULT NULL,
  `pic` varchar(40) CHARACTER SET utf8 COLLATE utf8_general_ci NULL DEFAULT NULL,
  `createtime` datetime(0) NULL DEFAULT NULL,
  `detail` varchar(200) CHARACTER SET utf8 COLLATE utf8_general_ci NULL DEFAULT NULL,
  PRIMARY KEY (`id`) USING BTREE
) ENGINE = InnoDB AUTO_INCREMENT = 9 CHARACTER SET = utf8 COLLATE = utf8_general_ci ROW_FORMAT = Dynamic;
添加字段
INSERT INTO `items` VALUES (1, '迎娶白富美', 1000, NULL, '2019-10-19 09:29:30', '带我走上人生巅峰');**步骤三:**创建实体类domain 和dao层
这是实体类:
package com.hu.domain;

import java.util.Date;

public class Items {
    private Integer id;
    private String name;
    private Double price;
    private String pic;
    private Date createtime;
    private String detail;

    public int getId() {
        return id;
    }

    public void setId(Integer id) {
        this.id = id;
    }

    public String getName() {
        return name;
    }

    public void setName(String name) {
        this.name = name;
    }

    public double getPrice() {
        return price;
    }

    public void setPrice(double price) {
        this.price = price;
    }

    public String getPic() {
        return pic;
    }

    public void setPic(String pic) {
        this.pic = pic;
    }

    public Date getCreatetime() {
        return createtime;
    }

    public void setCreatetime(Date createtime) {
        this.createtime = createtime;
    }

    public String getDetail() {
        return detail;
    }

    public void setDetail(String detail) {
        this.detail = detail;
    }
}
这是dao
package com.hu.dao;

import com.hu.domain.Items;
import org.springframework.stereotype.Repository;

@Repository
public interface ItemsDao {

    public Items findById(int id);
}
步骤四:然后在resources下写加载映射配置文件
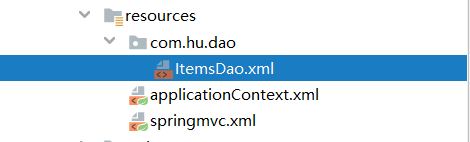
结构入上图 ,在resources 中创建一个mapper配置文件 com.hu.dao (方便管理)下 ItemsDao.xml 对数据库进行直接操作
<?xml version="1.0" encoding="UTF-8" ?>
<!DOCTYPE mapper
        PUBLIC "-//mybatis.org//DTD Mapper 3.0//EN"
        "http://mybatis.org/dtd/mybatis-3-mapper.dtd">
<mapper namespace="com.hu.dao.ItemsDao">
    <select id="findById" resultType="items" parameterType="int">
        select * from items where id = #{id}

    </select>
</mapper>
在resources下直接创建mybati 的配置文件 applicationContext.xml
<?xml version="1.0" encoding="UTF-8"?>
<beans xmlns="http://www.springframework.org/schema/beans"
       xmlns:xsi="http://www.w3.org/2001/XMLSchema-instance"
       xmlns:context="http://www.springframework.org/schema/context"
       xmlns:aop="http://www.springframework.org/schema/aop"
       xmlns:tx="http://www.springframework.org/schema/tx"
       xmlns:mvc="http://www.springframework.org/schema/mvc"
       xsi:schemaLocation="http://www.springframework.org/schema/beans
             http://www.springframework.org/schema/beans/spring-beans.xsd
             http://www.springframework.org/schema/context
             http://www.springframework.org/schema/context/spring-context.xsd
             http://www.springframework.org/schema/aop
             http://www.springframework.org/schema/aop/spring-aop.xsd
             http://www.springframework.org/schema/tx
             http://www.springframework.org/schema/tx/spring-tx.xsd
             http://www.springframework.org/schema/mvc
             http://www.springframework.org/schema/mvc/spring-mvc.xsd">
<!--dao层配置文件开始-->
<!--    配置连接池-->
    <bean id="dataSource" class="com.alibaba.druid.pool.DruidDataSource">
        <property name="driverClassName" value="com.mysql.jdbc.Driver"/>
        <property name="url" value="jdbc:mysql:///maven"/>
        <property name="username" value="root"/>
        <property name="password" value="123456"/>
    </bean>
<!--配置SQLsession工厂-->
    <bean id="SqlSessionFactory" class="org.mybatis.spring.SqlSessionFactoryBean">
        <property name="dataSource" ref="dataSource"/>
<!--配置扫描pojo,给包下所有pojo对象器别名-->
        <property name="typeAliasesPackage" value="com.hu.domain"/>
    </bean>
<!--扫描接口包路径,生成包下所有的接口代理对象 并且放入spring容器中-->
    <bean class="org.mybatis.spring.mapper.MapperScannerConfigurer">
        <property name="basePackage" value="com.hu.dao"/>
    </bean>
<!--    dao层配置文件结束-->~
这里mybatis框架写完了 然后测试一下是否正确
package com.hu.test;

import com.hu.dao.ItemsDao;
import com.hu.domain.Items;
import com.hu.service.ItemService;
import org.junit.Test;
import org.springframework.context.ApplicationContext;
import org.springframework.context.support.ClassPathXmlApplicationContext;

public class ItemsTest {
    @Test
    public void findById(){

        ApplicationContext ac = new ClassPathXmlApplicationContext("applicationContext.xml");
        ItemsDao itemsDao = ac.getBean(ItemsDao.class);
//        测试mybatis
        Items items = itemsDao.findById(1);
        System.out.println(items.getName());

    }
}
~
运行结果:
mybatis框架结束
**步骤五:**配置spring 框架开始
(1)首先 将service层代码写出来
ItemService :
package com.hu.service;

import com.hu.domain.Items;

public interface ItemService {

    public Items findById(int id);
}
~
ItemServiceImpl:(通过注解 @Autowired的方式拿到dao层的方法)
package com.hu.service.Impl;

import com.hu.dao.ItemsDao;
import com.hu.domain.Items;
import com.hu.service.ItemService;
import org.springframework.beans.factory.annotation.Autowired;
import org.springframework.stereotype.Service;

@Service
public class ItemServiceImpl implements ItemService {
    @Autowired
    private ItemsDao itemsDao;


    public Items findById(int id) {
        return itemsDao.findById(id);
    }
}
~
(2)设置sprig的配置文件:spring配置文件还是放在applicationContext.xml中
<!--service配置文件开始-->
    <!--组件扫描配置 注意扫描的包名与你的service一致-->
    <context:component-scan base-package="com.hu.service"/>

    <!--aop面向切面编程,切面就是切入点和通知的组合-->
    <!--配置事务管理器-->
    <bean id="transactionManager" class="org.springframework.jdbc.datasource.DataSourceTransactionManager">
        <property name="dataSource" ref="dataSource"/>
    </bean>
    <!--配置事务的通知-->
    <tx:advice id="advice">
        <tx:attributes>
            <tx:method name="save*" propagation="REQUIRED"/>
            <tx:method name="update*" propagation="REQUIRED"/>
            <tx:method name="delete*" propagation="REQUIRED"/>
            <tx:method name="find*" read-only="true"/>
            <tx:method name="*" propagation="REQUIRED"/>
        </tx:attributes>
    </tx:advice>

    <!--配置切面-->
    <aop:config>
        <aop:pointcut id="pointcut" expression="execution(* com.hu.service.Impl.*.*(..))"/>
        <aop:advisor advice-ref="advice" pointcut-ref="pointcut"/>
    </aop:config>
<!--    service配置文件结束-->~
(3)测试spring
`
package com.hu.test;

import com.hu.dao.ItemsDao;
import com.hu.domain.Items;
import com.hu.service.ItemService;
import org.junit.Test;
import org.springframework.context.ApplicationContext;
import org.springframework.context.support.ClassPathXmlApplicationContext;

public class ItemsTest {
    @Test
    public void findById(){

        ApplicationContext ac = new ClassPathXmlApplicationContext("applicationContext.xml");
        ItemsDao itemsDao = ac.getBean(ItemsDao.class);
//        测试mybatis
//        Items items = itemsDao.findById(1);
//        System.out.println(items.getName());

//        测试spring
        ItemService itemService = ac.getBean(ItemService.class);
        Items items=itemService.findById(1);
        System.out.println(items.getName());
    }


}
运行结果:

步骤六 写springmvc框架*
(1)建一个controller的包,再ItemsController类
package com.hu.controller;

import com.hu.domain.Items;
import com.hu.service.ItemService;
import org.springframework.beans.factory.annotation.Autowired;
import org.springframework.stereotype.Controller;
import org.springframework.ui.Model;
import org.springframework.web.bind.annotation.RequestMapping;

@Controller
@RequestMapping("/items")
public class ItemsController {
    @Autowired
    private ItemService itemService;
    @RequestMapping("/findDetail")
    public String findDetail(Model model){
        Items items= itemService.findById(1);
        model.addAttribute("item",items);
        return "itemDetail";
        //http://localhost:8080/ssmcommit/items/findDetail
    }
}
(2)在resources下配置springmvc 的xml配置文件
<?xml version="1.0" encoding="UTF-8"?>
<beans xmlns="http://www.springframework.org/schema/beans"
       xmlns:xsi="http://www.w3.org/2001/XMLSchema-instance"
       xmlns:context="http://www.springframework.org/schema/context"
       xmlns:aop="http://www.springframework.org/schema/aop"
       xmlns:tx="http://www.springframework.org/schema/tx"
       xmlns:mvc="http://www.springframework.org/schema/mvc"
       xsi:schemaLocation="http://www.springframework.org/schema/beans
             http://www.springframework.org/schema/beans/spring-beans.xsd
             http://www.springframework.org/schema/context
             http://www.springframework.org/schema/context/spring-context.xsd
             http://www.springframework.org/schema/aop
             http://www.springframework.org/schema/aop/spring-aop.xsd
             http://www.springframework.org/schema/tx
             http://www.springframework.org/schema/tx/spring-tx.xsd
             http://www.springframework.org/schema/mvc
             http://www.springframework.org/schema/mvc/spring-mvc.xsd">
<!--扫描组件-->
    <context:component-scan base-package="com.hu.controller"/>
<!--    处理映射器,处理适配器-->
    <mvc:annotation-driven/>
<!--    视图解析器-->
    <bean id="internalResourceViewResolver" class="org.springframework.web.servlet.view.InternalResourceViewResolver">
<!--        视图解析路径-->
         <property name="prefix" value="/WEB-INF/pages/"/>
         <property name="suffix" value=".jsp"/>
    </bean>
<!--释放静态资源-->
    <mvc:default-servlet-handler/>


</beans>
(3)在WEB-INF下编写web.xml
<?xml version="1.0" encoding="UTF-8"?>
<web-app xmlns="http://java.sun.com/xml/ns/javaee"
       xmlns:xsi="http://www.w3.org/2001/XMLSchema-instance"
       xsi:schemaLocation="http://java.sun.com/xml/ns/javaee
          http://java.sun.com/xml/ns/javaee/web-app_3_0.xsd"
       version="3.0">
   <!--编码过滤器-->
   <filter>
      <filter-name>encoding</filter-name>
      <filter-class>org.springframework.web.filter.CharacterEncodingFilter</filter-class>
      <init-param>
         <param-name>encoding</param-name>
         <param-value>UTF-8</param-value>
      </init-param>
      <init-param>
         <param-name>forceEncoding</param-name>
         <param-value>true</param-value>
      </init-param>
   </filter>
   <filter-mapping>
      <filter-name>encoding</filter-name>
      <url-pattern>/*</url-pattern>
   </filter-mapping>

   <!--配置spring核心监听器-->
   <listener>
      <listener-class>org.springframework.web.context.ContextLoaderListener</listener-class>
   </listener>
   <!--重新指定spring配置文件的路径-->
   <context-param>
      <param-name>contextConfigLocation</param-name>
      <param-value>classpath:applicationContext.xml</param-value>
   </context-param>

   <!--springmvc的核心servlet-->
   <servlet>
      <servlet-name>springmvc</servlet-name>
      <servlet-class>org.springframework.web.servlet.DispatcherServlet</servlet-class>
      <init-param>
         <param-name>contextConfigLocation</param-name>
         <param-value>classpath:springmvc.xml</param-value>
      </init-param>
      <load-on-startup>1</load-on-startup>
   </servlet>
   <servlet-mapping>
      <servlet-name>springmvc</servlet-name>
      <url-pattern>/</url-pattern>
   </servlet-mapping>


</web-app>
(4)编辑前端代码, 在WEB-INF下创建一个pages文件 ,然后在pages下编写一个itemDetail.jsp
<%@ page language="java" contentType="text/html; charset=UTF-8"
    pageEncoding="UTF-8"%>
<%@ taglib uri="http://java.sun.com/jsp/jstl/core" prefix="c" %>
<%@ taglib uri="http://java.sun.com/jsp/jstl/fmt"  prefix="fmt"%>

<!DOCTYPE html PUBLIC "-//W3C//DTD HTML 4.01 Transitional//EN" "http://www.w3.org/TR/html4/loose.dtd">
<html>
<head>
<meta http-equiv="Content-Type" content="text/html; charset=UTF-8">
<title>Insert title here</title>
</head>
<body>
   <form>
      <table width="100%" border=1>
         <tr>
            <td>商品名称</td>
            <td> ${item.name } </td>
         </tr>
         <tr>
            <td>商品价格</td>
            <td> ${item.price } </td>
         </tr>
         <tr>
            <td>生成日期</td>
            <td> <fmt:formatDate value="${item.createtime}" pattern="yyyy-MM-dd HH:mm:ss"/> </td>
         </tr>
         <tr>
            <td>商品简介</td>
            <td>${item.detail} </td>
         </tr>
      </table>
   </form>
</body>
</html>步骤七测试SSM框架
在maven下的Tomcat8.5 ,点击可以加载Tomcat 然后输入http://localhost:8080/ssmcommit/items/findDetail 到浏览器 运行截图如下:


 被折叠的 条评论
为什么被折叠?
被折叠的 条评论
为什么被折叠?
 到【灌水乐园】发言


