


前言
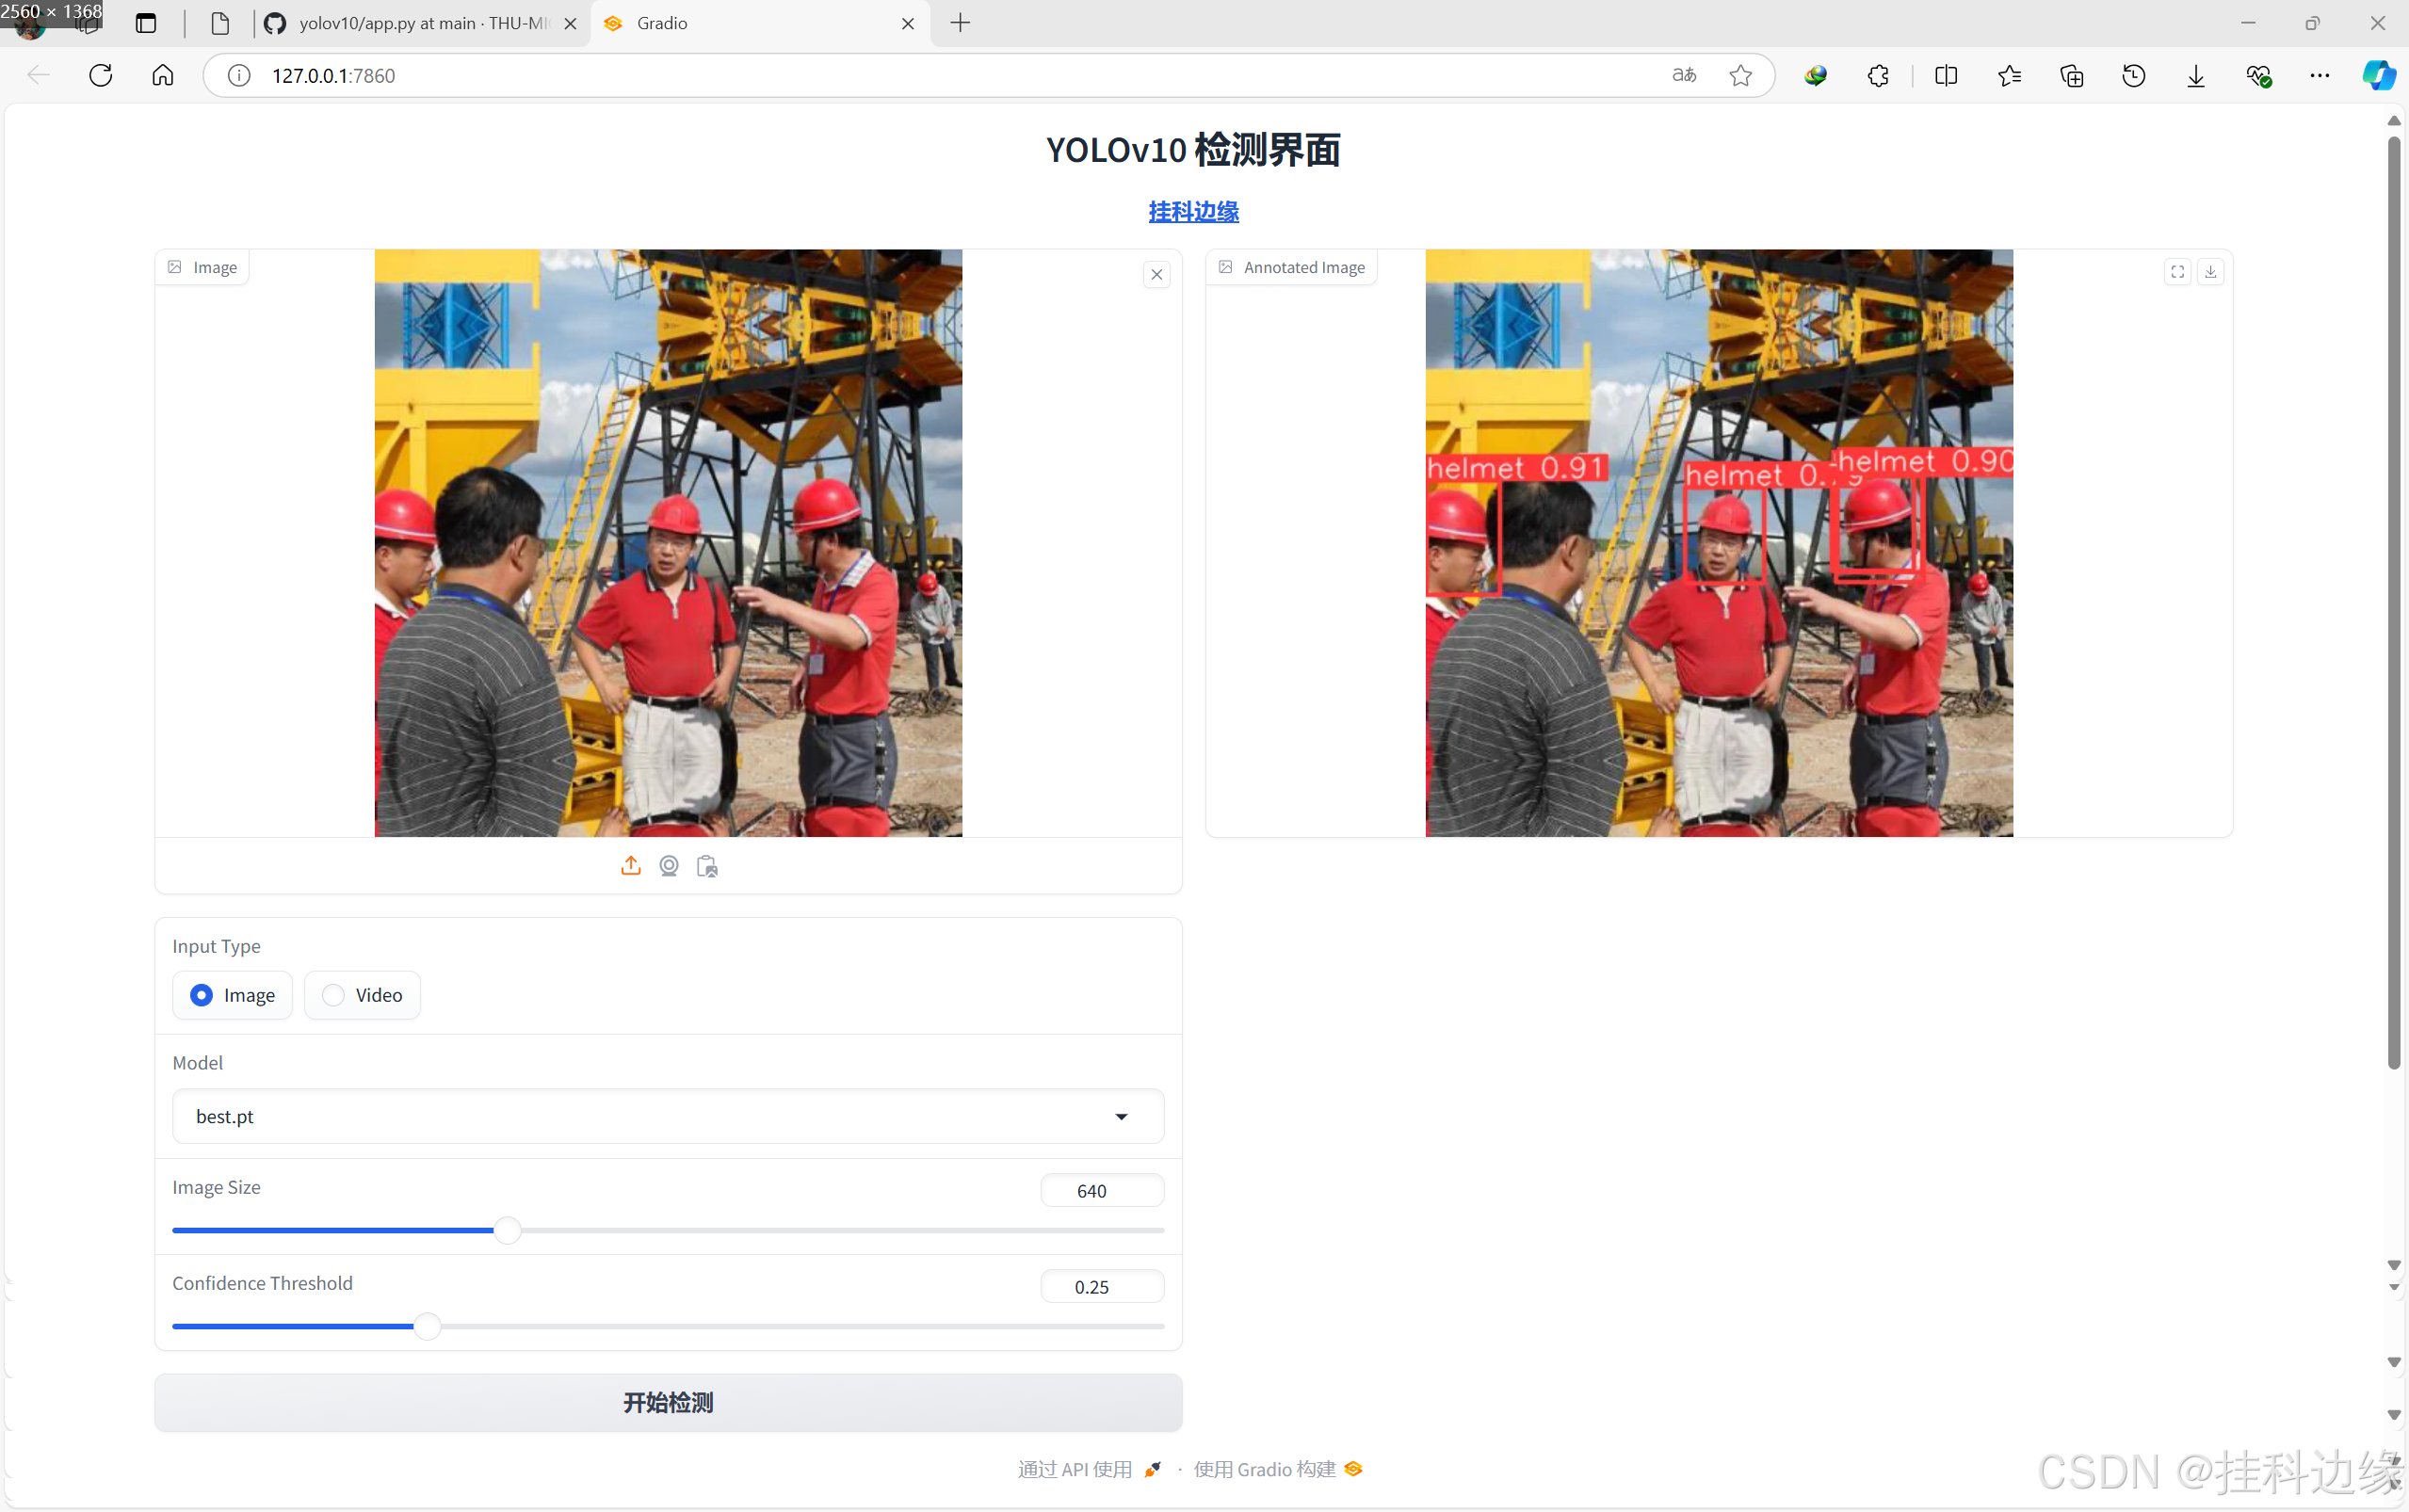
Gradio 是一个开源 Python 库,用于快速构建和共享机器学习模型的 Web 界面。开发者可以通过简单的 Python 代码将机器学习模型封装成交互式应用,无需复杂的设置即可在浏览器中使用自己训练好模型。接下来手把手教你运行 YOLOv10 的一个简单 Web 界面推理自己的模型。话不多说上检测结果:
🎓一、YOLOv10原始版本代码下载
官网的源码下载地址 : YOLOv10官网代码
官网打不开的话,从我的网盘下载就行,网盘下载地址: YOLOv10原始版本源码下载,提取码: js2i
注意注意注意:如果在我之前的文章下载过 YOLOv10 源码,不用重新下载了,没有特殊说明都是用同一个版本的源码
🎓二、app.py代码
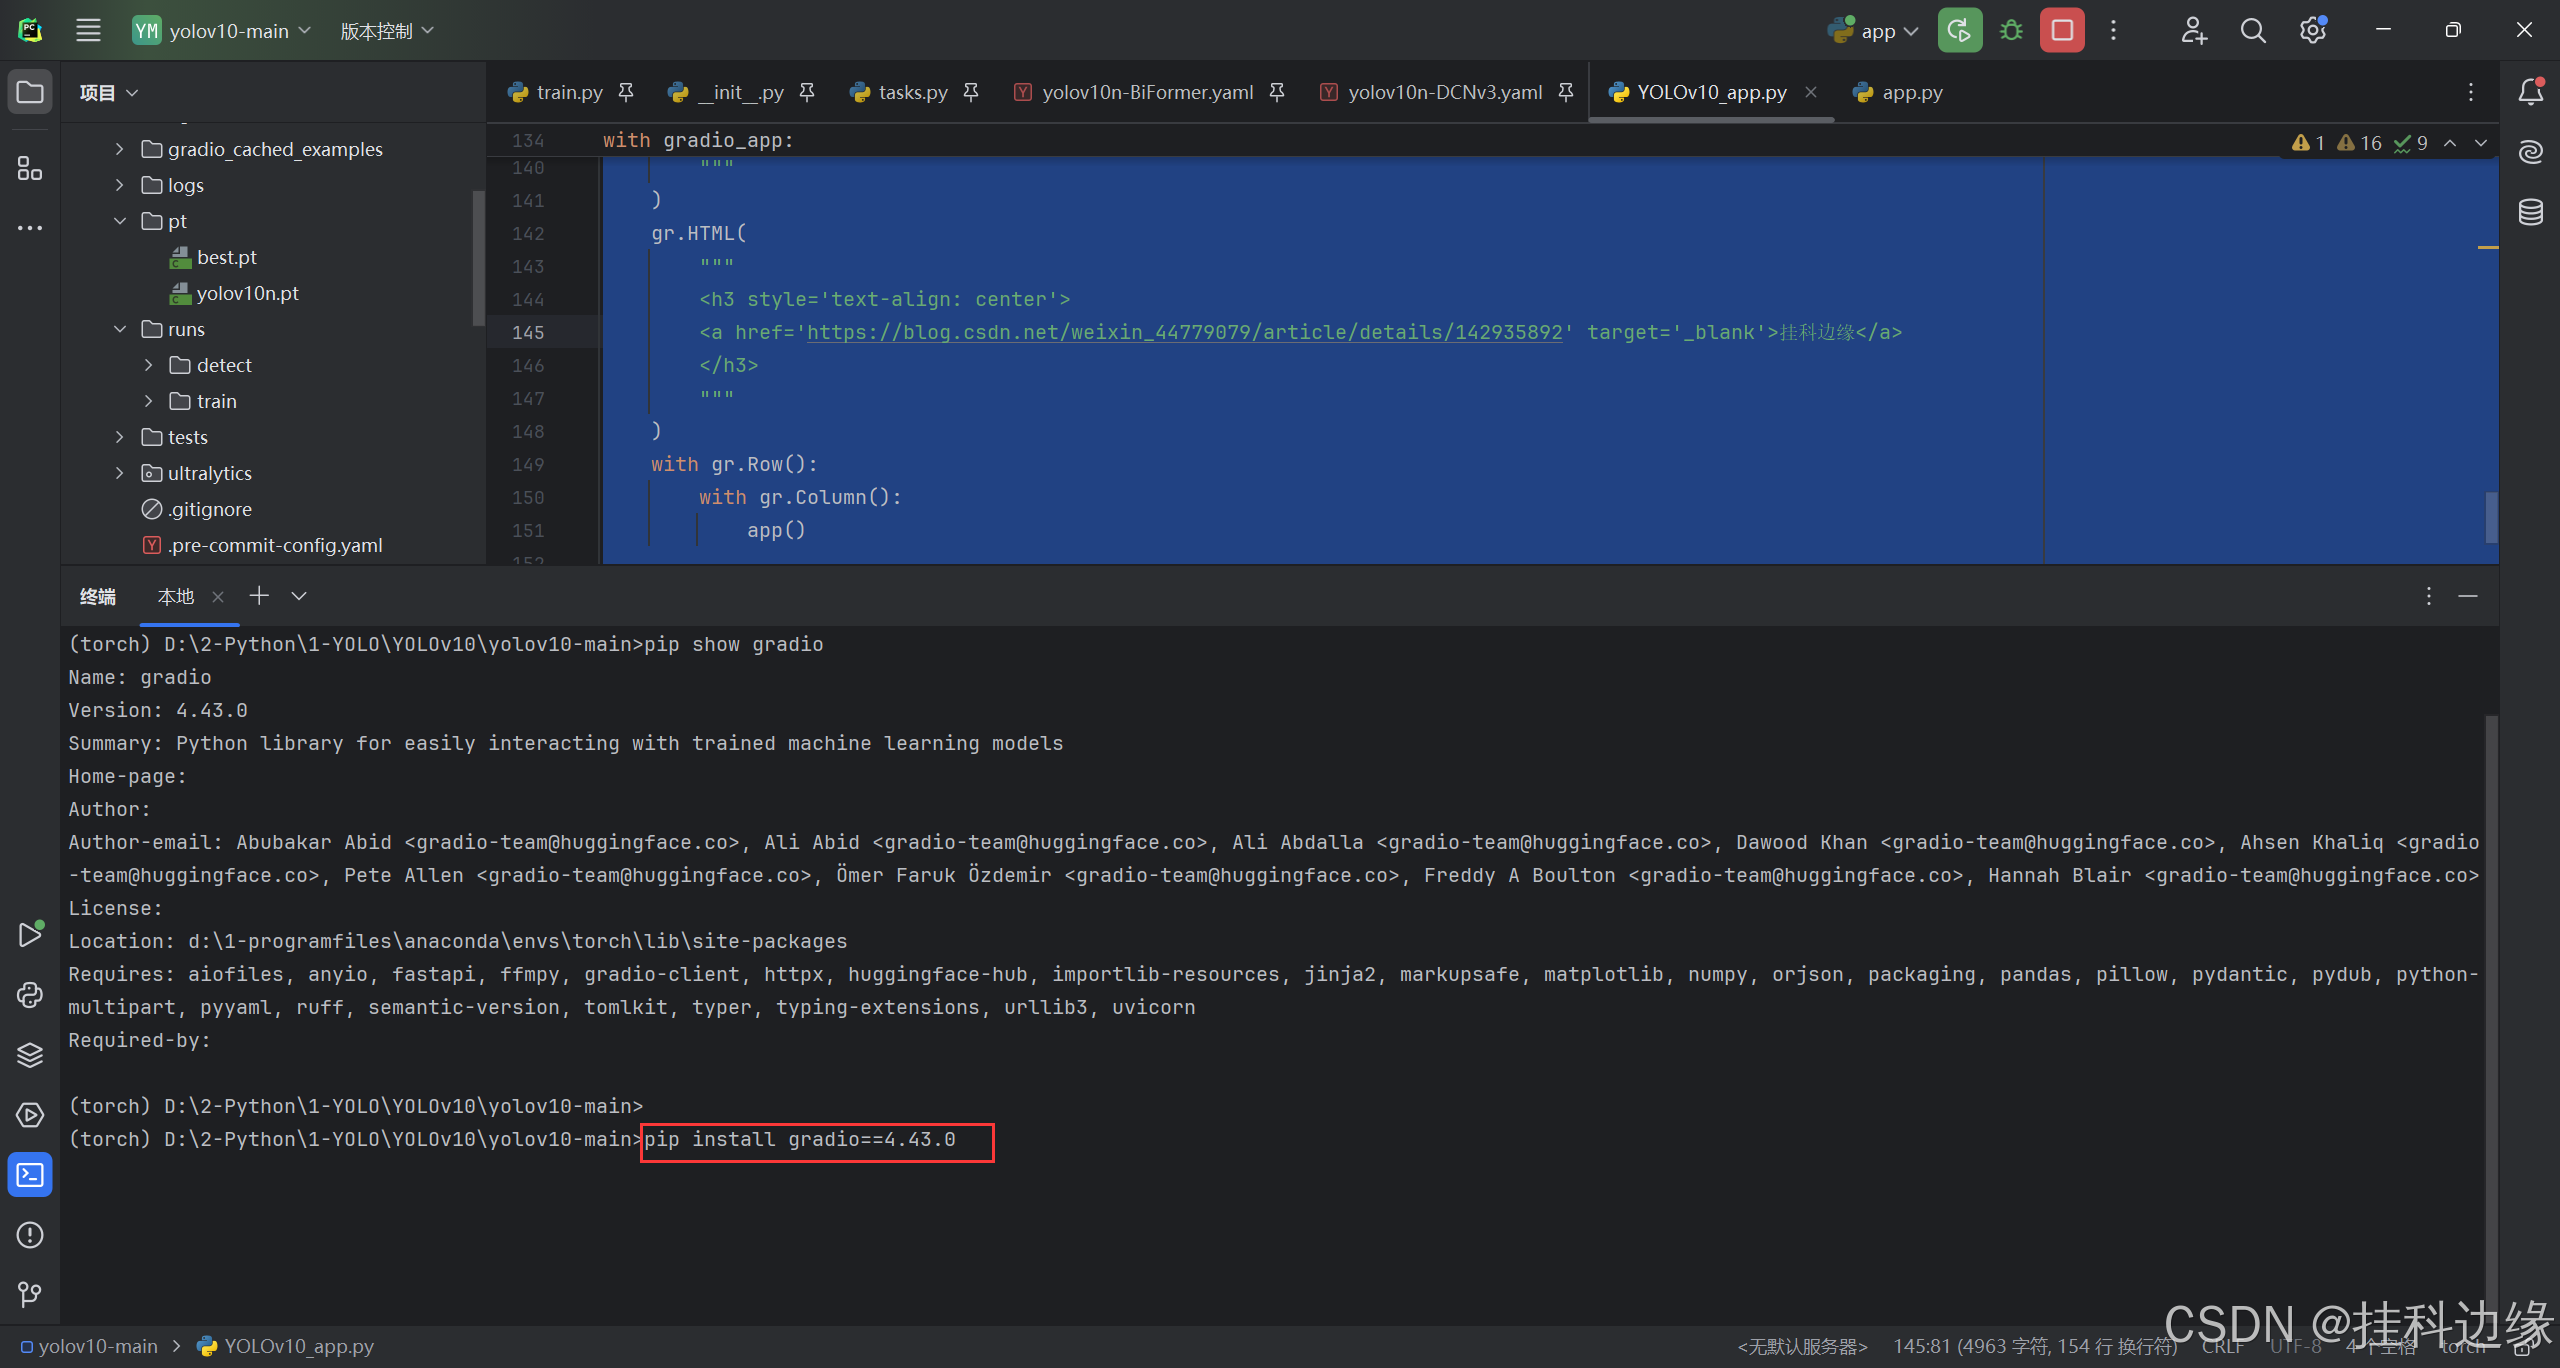
运行代码需要先安装 YOLOv10 的环境依赖,可以看往期教程安装,之后在安装 Gradio,在你的虚拟环境安装,命令为:pip install gradio==4.43.0
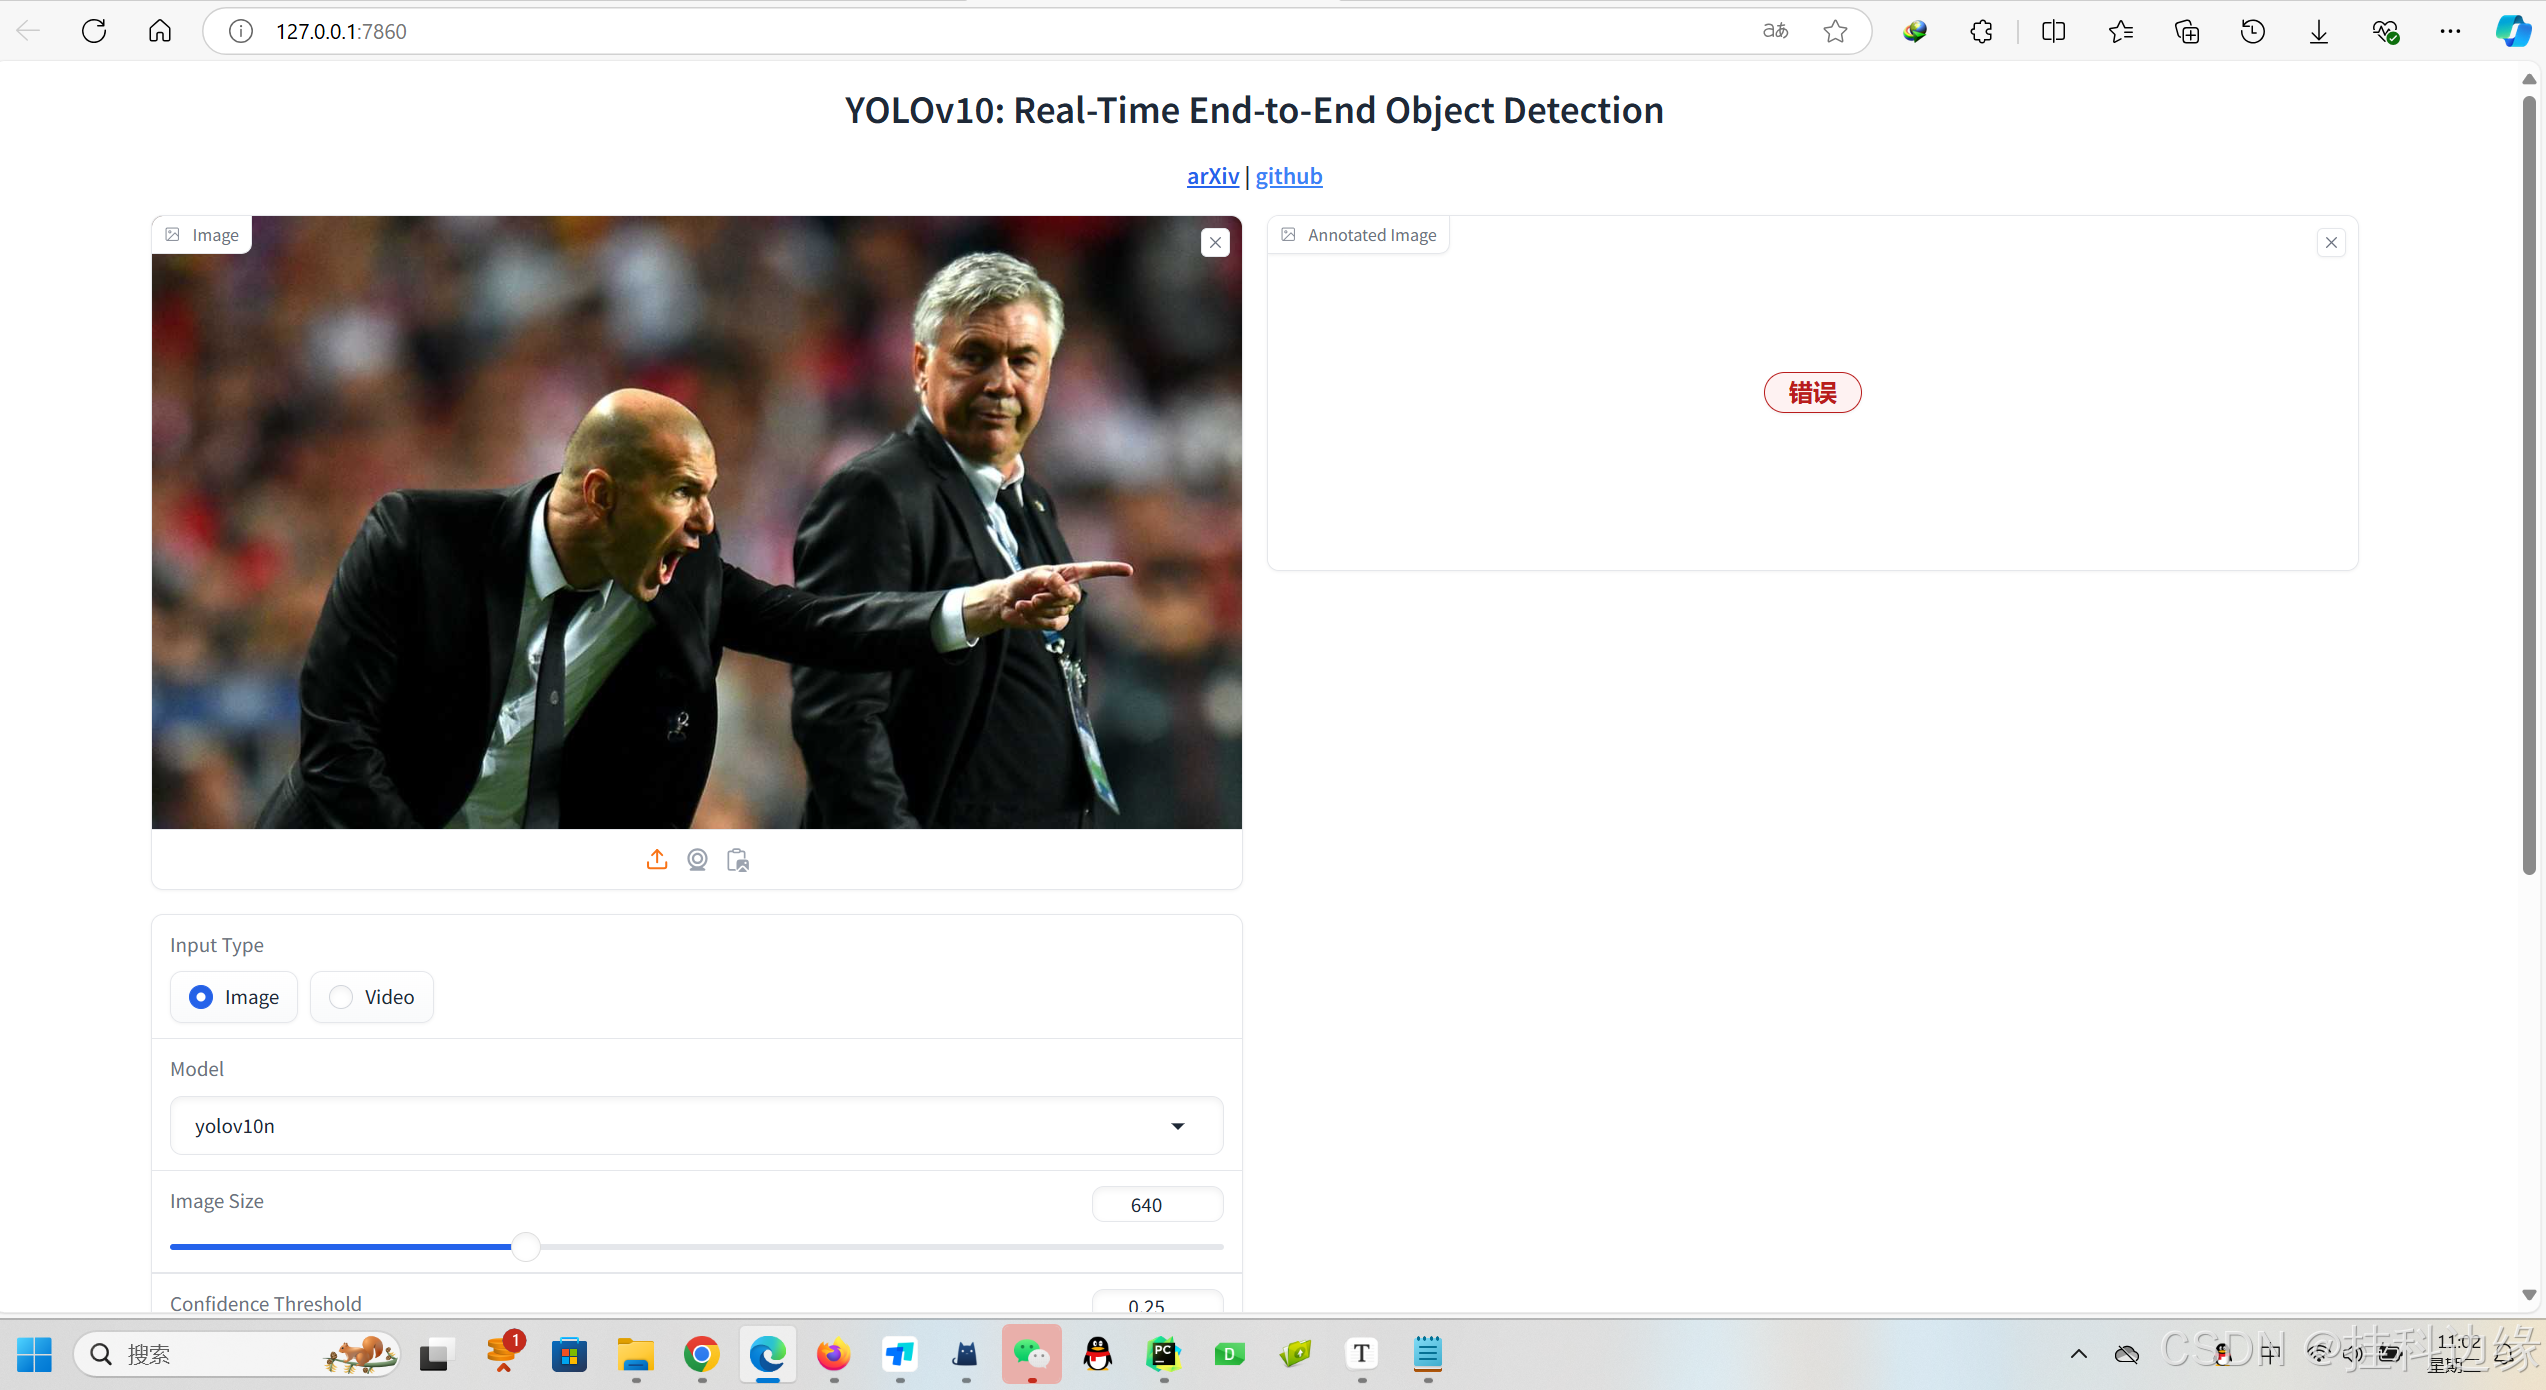
官网的代码运行起来有 bug,推理报错网页端显示错误
下面是我修改好的代码,复制粘贴到你的app.py就行
# -*- coding: utf-8 -*-
"""
@Auth :挂科边缘
@File :YOLOv10_app.py
@IDE :PyCharm
@Motto :学习新思想,争做新青年
"""
import gradio as gr
import cv2
import tempfile
from ultralytics import YOLOv10
def yolov10_inference(image, video, model_id, image_size, conf_threshold):
model = YOLOv10(model=f'pt/{model_id}')
if image:
results = model.predict(source=image, imgsz=image_size, conf=conf_threshold)
annotated_image = results[0].plot()
return annotated_image[:, :, ::-1], None
else:
video_path = tempfile.mktemp(suffix=".webm")
with open(video_path, "wb") as f:
with open(video, "rb") as g:
f.write(g.read())
cap = cv2.VideoCapture(video_path)
fps = cap.get(cv2.CAP_PROP_FPS)
frame_width = int(cap.get(cv2.CAP_PROP_FRAME_WIDTH))
frame_height = int(cap.get(cv2.CAP_PROP_FRAME_HEIGHT))
output_video_path = tempfile.mktemp(suffix=".webm")
out = cv2.VideoWriter(output_video_path, cv2.VideoWriter_fourcc(*'vp80'), fps, (frame_width, frame_height))
while cap.isOpened():
ret, frame = cap.read()
if not ret:
break
results = model.predict(source=frame, imgsz=image_size, conf=conf_threshold)
annotated_frame = results[0].plot()
out.write(annotated_frame)
cap.release()
out.release()
return None, output_video_path
def yolov10_inference_for_examples(image, model_path, image_size, conf_threshold):
annotated_image, _ = yolov10_inference(image, None, model_path, image_size, conf_threshold)
return annotated_image
def app():
with gr.Blocks():
with gr.Row():
with gr.Column():
image = gr.Image(type="pil", label="Image", visible=True)
video = gr.Video(label="Video", visible=False)
input_type = gr.Radio(
choices=["Image", "Video"],
value="Image",
label="Input Type",
)
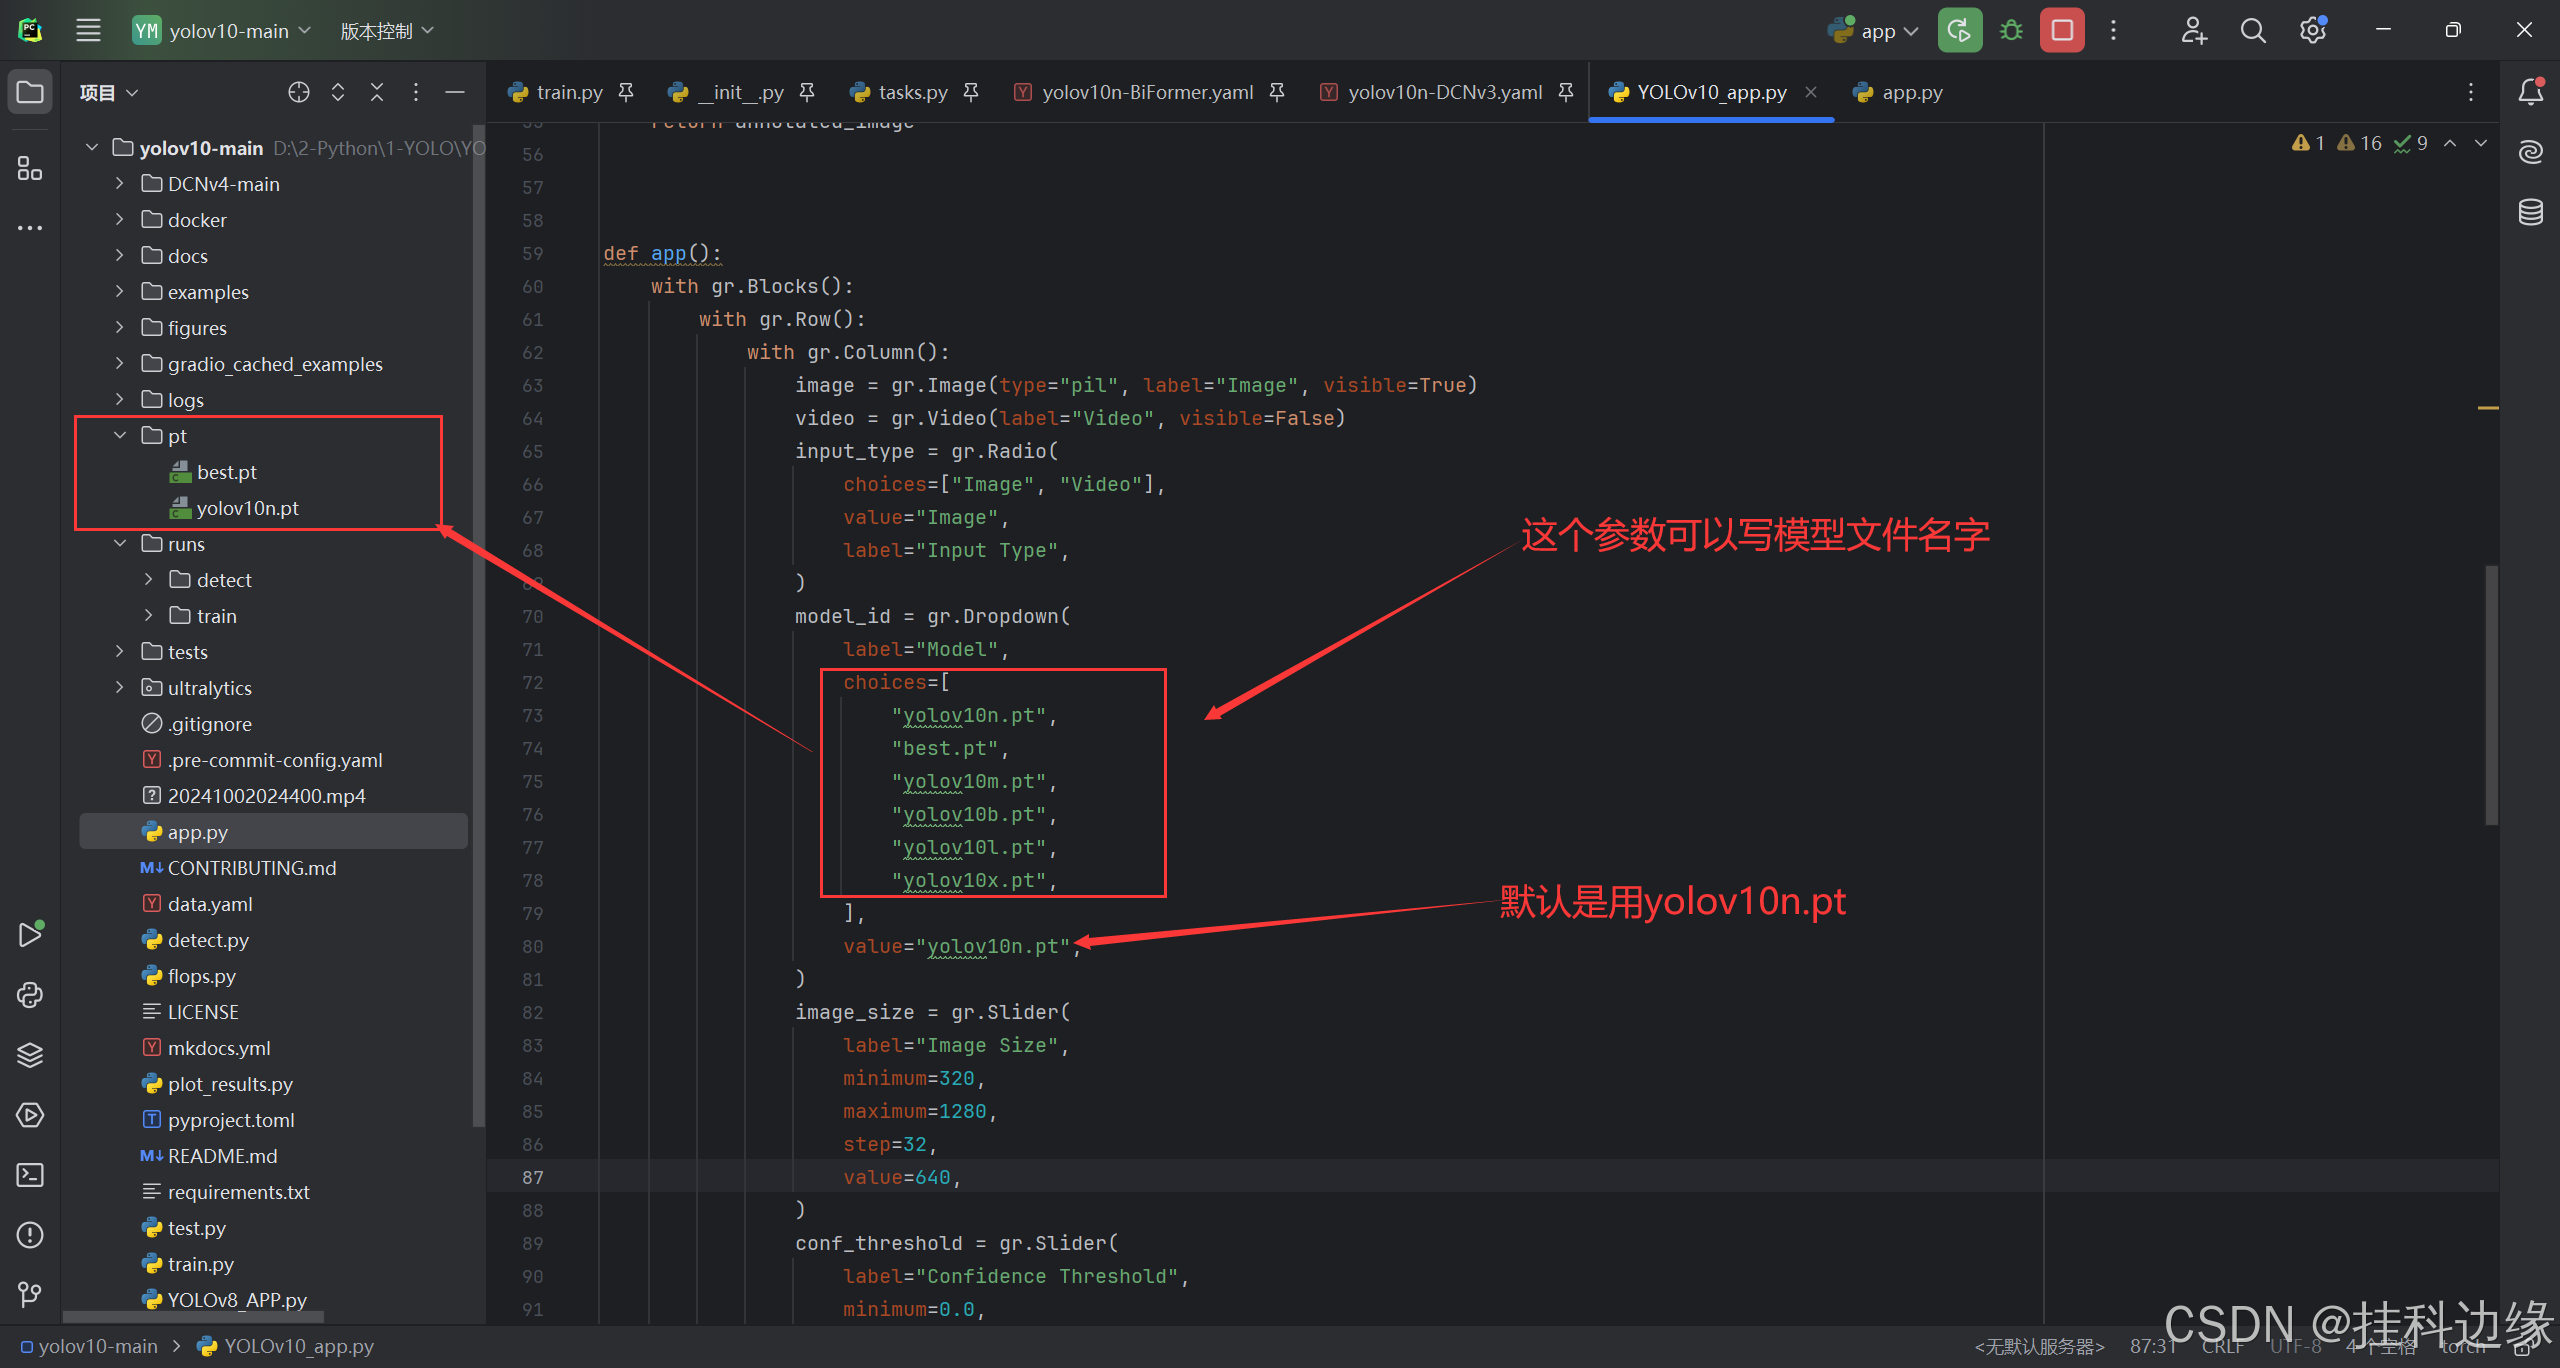
model_id = gr.Dropdown(
label="Model",
choices=[
"yolov10n.pt",
"best.pt",
"yolov10m.pt",
"yolov10b.pt",
"yolov10l.pt",
"yolov10x.pt",
],
value="yolov10n.pt",
)
image_size = gr.Slider(
label="Image Size",
minimum=320,
maximum=1280,
step=32,
value=640,
)
conf_threshold = gr.Slider(
label="Confidence Threshold",
minimum=0.0,
maximum=1.0,
step=0.05,
value=0.25,
)
yolov10_infer = gr.Button(value="开始检测")
with gr.Column():
output_image = gr.Image(type="numpy", label="Annotated Image", visible=True)
output_video = gr.Video(label="Annotated Video", visible=False)
def update_visibility(input_type):
image_visible = gr.update(visible=True) if input_type == "Image" else gr.update(visible=False)
video_visible = gr.update(visible=False) if input_type == "Image" else gr.update(visible=True)
output_image_visible = gr.update(visible=True) if input_type == "Image" else gr.update(visible=False)
output_video_visible = gr.update(visible=False) if input_type == "Image" else gr.update(visible=True)
return image_visible, video_visible, output_image_visible, output_video_visible
input_type.change(
fn=update_visibility,
inputs=[input_type],
outputs=[image, video, output_image, output_video],
)
def run_inference(image, video, model_id, image_size, conf_threshold, input_type):
if input_type == "Image":
return yolov10_inference(image, None, model_id, image_size, conf_threshold)
else:
return yolov10_inference(None, video, model_id, image_size, conf_threshold)
yolov10_infer.click(
fn=run_inference,
inputs=[image, video, model_id, image_size, conf_threshold, input_type],
outputs=[output_image, output_video],
)
gradio_app = gr.Blocks()
with gradio_app:
gr.HTML(
"""
<h1 style='text-align: center'>
YOLOv10 检测界面
</h1>
"""
)
gr.HTML(
"""
<h3 style='text-align: center'>
<a href='https://blog.youkuaiyun.com/weixin_44779079/article/details/142935892' target='_blank'>挂科边缘</a>
</h3>
"""
)
with gr.Row():
with gr.Column():
app()
if __name__ == '__main__':
gradio_app.launch()
注意注意注意:需要在 YOLOv10 源码根目录下,新建一个 pt 文件夹,pt 文件夹存放模型文件,可以放训练好的模型
总结
创作不易,请帮忙点一个爱心,关注我,带你不挂科!


 1万+
1万+

 被折叠的 条评论
为什么被折叠?
被折叠的 条评论
为什么被折叠?
 到【灌水乐园】发言


