


 本文介绍如何使用SpringBoot框架整合Mybatis,包括项目搭建过程、关键配置文件详解及必要的依赖引入。通过具体步骤演示,帮助读者快速上手。
废话不多说,直接奔入主题吧
新建一个SpringBoot项目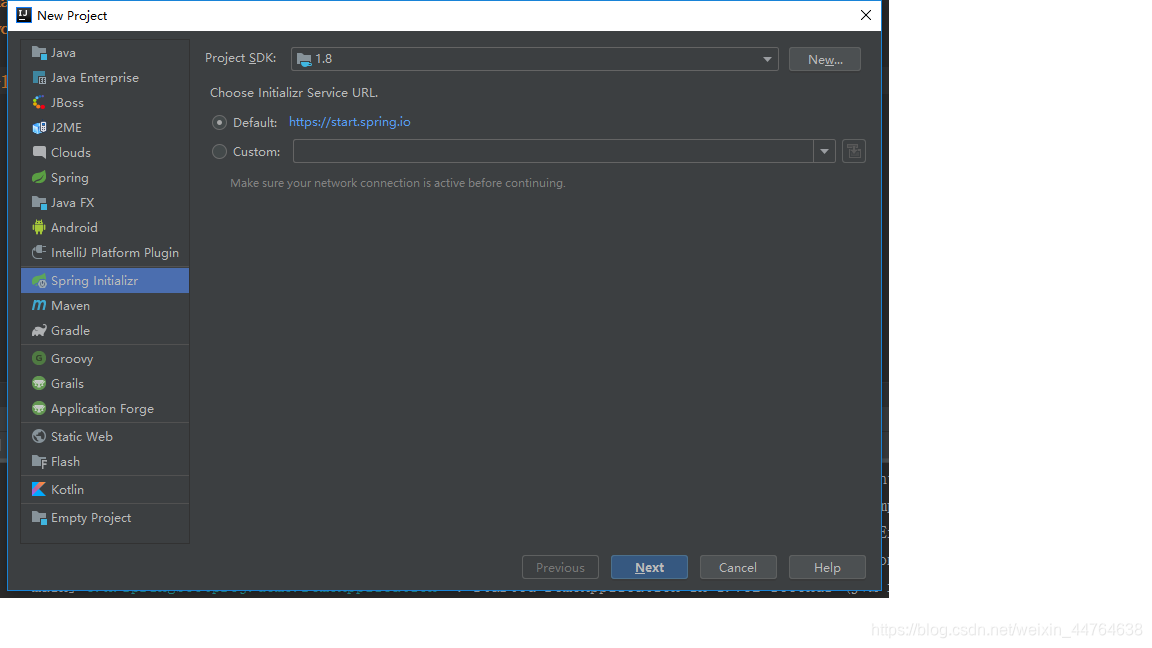
一路next,直到建完整个项目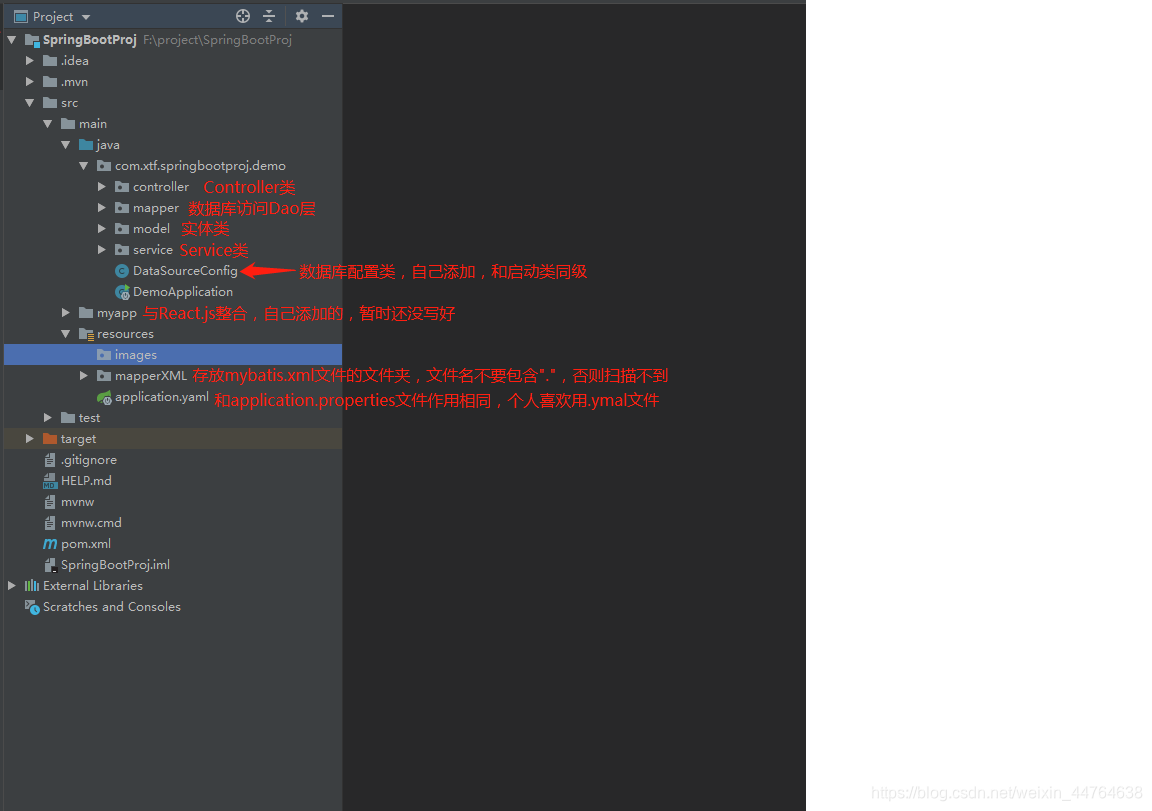 生成的项目为这样的目录结构,如果你的项目缺少部分包或者文件夹,请自行添加,注意添加的位置。
然后就是添加文件配置了
pom.xml文件
<?xml version="1.0" encoding="UTF-8"?>
<project xmlns="http://maven.apache.org/POM/4.0.0" xmlns:xsi="http://www.w3.org/2001/XMLSchema-instance"
         xsi:schemaLocation="http://maven.apache.org/POM/4.0.0 http://maven.apache.org/xsd/maven-4.0.0.xsd">
    <modelVersion>4.0.0</modelVersion>
    <parent>
        <groupId>org.springframework.boot</groupId>
        <artifactId>spring-boot-starter-parent</artifactId>
        <version>2.1.3.RELEASE</version>
        <relativePath/> <!-- lookup parent from repository -->
    </parent>
    <groupId>com.xtf.SpringBootProj</groupId>
    <artifactId>demo</artifactId>
    <version>0.0.1-SNAPSHOT</version>
    <name>demo</name>
    <description>Demo project for Spring Boot</description>

    <properties>
        <java.version>1.8</java.version>
        <project.build.sourceEncoding>utf-8</project.build.sourceEncoding>
        <project.reporting.outputEncoding>utf-8</project.reporting.outputEncoding>
    </properties>

    <dependencies>

        <dependency>
            <groupId>org.springframework.boot</groupId>
            <artifactId>spring-boot-starter-web</artifactId>
        </dependency>

        <dependency>
            <groupId>mysql</groupId>
            <artifactId>mysql-connector-java</artifactId>
            <version>8.0.13</version>
        </dependency>

        <dependency>
            <groupId>org.springframework.boot</groupId>
            <artifactId>spring-boot-starter-jdbc</artifactId>
            <exclusions>
                <exclusion>
                    <groupId>org.apache.tomcat</groupId>
                    <artifactId>tomcat-jdbc</artifactId>
                </exclusion>
            </exclusions>
        </dependency>

        <dependency>
            <groupId>com.alibaba</groupId>
            <artifactId>druid</artifactId>
            <version>1.1.6</version>
        </dependency>

        <dependency>
        <groupId>org.mybatis.spring.boot</groupId>
        <artifactId>mybatis-spring-boot-starter</artifactId>
        <version>1.3.1</version>
        </dependency>


        <dependency>
            <groupId>org.apache.poi</groupId>
            <artifactId>poi</artifactId>
            <version>3.17</version>
        </dependency>

        <dependency>
            <groupId>org.apache.poi</groupId>
            <artifactId>poi-ooxml</artifactId>
            <version>3.17</version>
        </dependency>


        <dependency>
            <groupId>org.springframework.boot</groupId>
            <artifactId>spring-boot-starter-test</artifactId>
            <scope>test</scope>
        </dependency>

    </dependencies>

    <build>
        <plugins>
            <plugin>
                <groupId>org.springframework.boot</groupId>
                <artifactId>spring-boot-maven-plugin</artifactId>
            </plugin>
        </plugins>
    </build>

</project>
application.yaml文件
spring:
  datasource:
    url: jdbc:mysql://localhost:3306/spring_boot?useUnicode=true&characterEncoding=utf8&useSSL=false&serverTimezone=UTC
    driverClassName: com.mysql.jdbc.Driver
    username: root
    password: 12345678
mybatis:
  mapper-locations: classpath:mapperXML/*.xml
.yaml一定要记得配置mybatis;而且mybatis要和spring对齐
.yaml一定要记得配置mybatis;而且mybatis要和spring对齐.
yaml一定要记得配置mybatis;而且mybatis要和spring对齐
重要的事情说三遍,个人因为这个没有配置搞了一天才配好。
DataSourceConfig.java文件
package com.xtf.springbootproj.demo;


import com.alibaba.druid.pool.DruidDataSource;
import org.springframework.beans.factory.annotation.Autowired;
import org.springframework.context.annotation.Bean;
import org.springframework.context.annotation.ComponentScan;
import org.springframework.context.annotation.Configuration;
import org.springframework.core.env.Environment;

import javax.sql.DataSource;

@ComponentScan
@Configuration
public class DataSourceConfig {

    @Autowired
    private Environment env;

    @Bean
    public DataSource getDataSource(){
        DruidDataSource dataSource = new DruidDataSource();
        dataSource.setUrl(env.getProperty("spring.datasource.url"));
        dataSource.setDriverClassName(env.getProperty("spring.datasource.driverClassName"));
        dataSource.setUsername(env.getProperty("spring.datasource.username"));
        dataSource.setPassword(env.getProperty("spring.datasource.password"));
        return dataSource;
    }
}
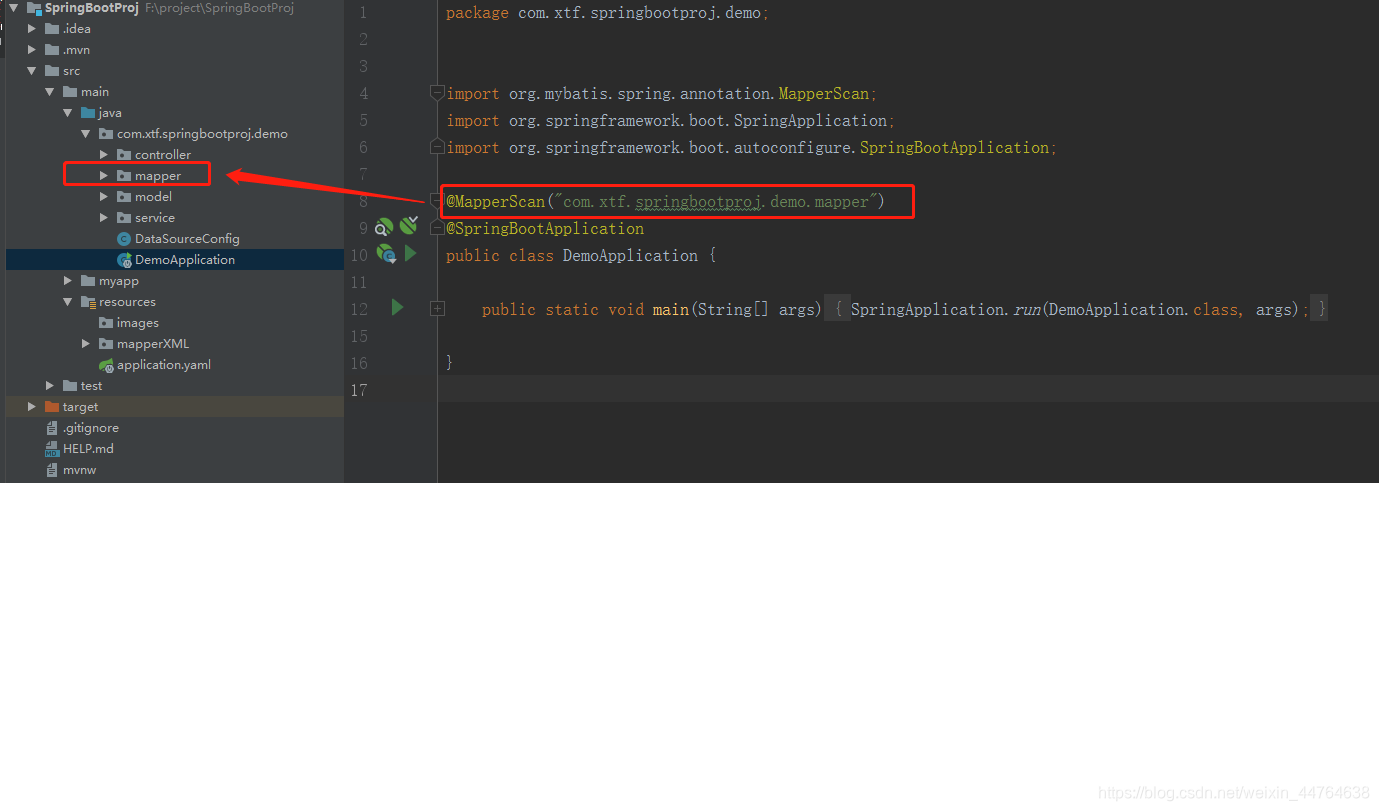
启动类要加一个注解
rt.js/
以上就是个人SpringBoot整合Mybatis的过程,有任何问题欢迎朋友们提出哈!


 被折叠的 条评论
为什么被折叠?
被折叠的 条评论
为什么被折叠?
 到【灌水乐园】发言


