


Nginx 是一个高性能的 HTTP 和反向代理 web 服务器,同时也提供了 IMAP/POP3/SMTP 服务 。
1、查看可用的 Nginx 版本
访问 Nginx 镜像库地址: https://hub.docker.com/_/nginx?tab=tags。
可以通过 Sort by 查看其他版本的 Nginx,默认是最新版本 nginx:latest。
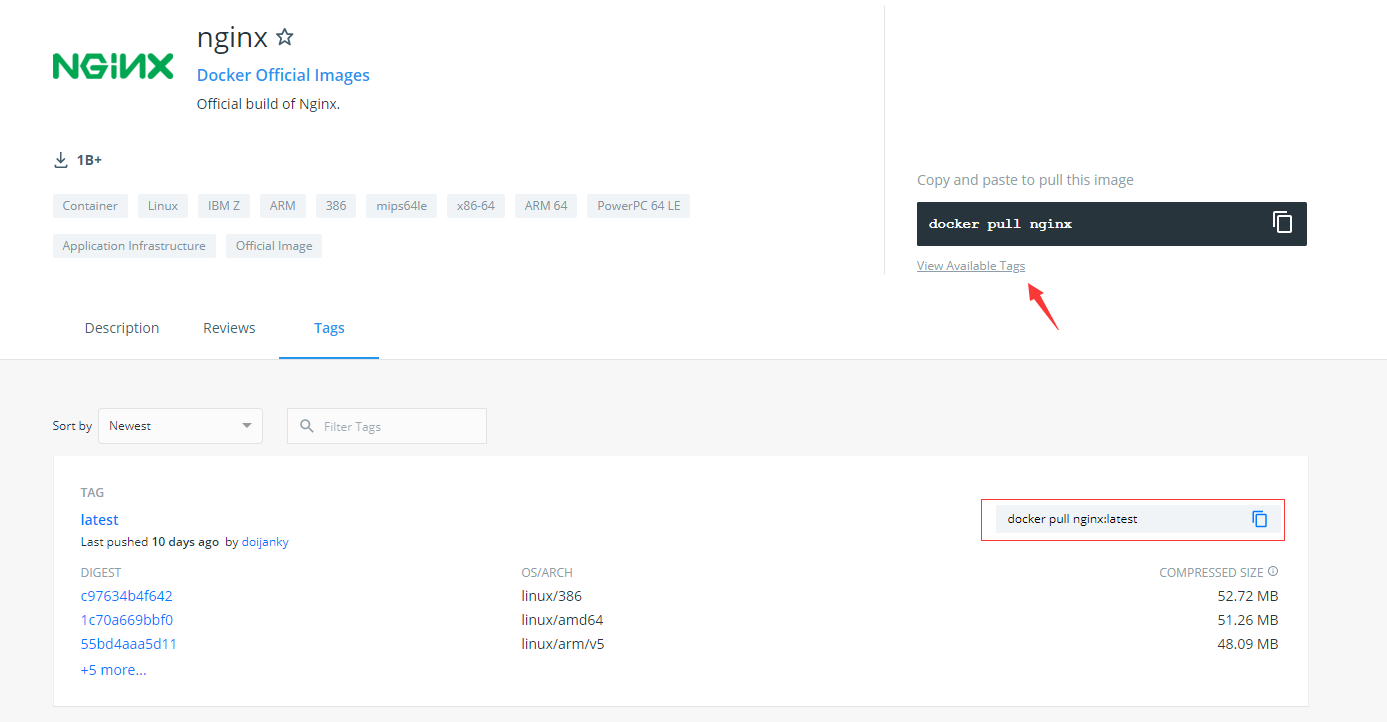
找到你自己要下载的版本。只需复制pull后面的名称即可。
2、下载镜像并运行
docker run --restart=always --name nginx -v /data/nginx/html:/usr/share/nginx/html -v /data/nginx/conf/nginx.conf:/etc/nginx/nginx.conf -p 8080:80 -d nginx
解释:
--restart=always docker重启后容器自动重启
--name: 容器名
-v: 将容器内的目录映射至本地, 前面的路径为本机路径
-d: 镜像名
注意事项
这里有的系统会出现错误,无法将nginx.conf映射至本机,映射出来也会变成一个文件夹。

解决方法:
- 我们可以在启动之前事先创建这个目录及复制一份完整的nginx.conf至路径中。
- 也可以启动之后将生成的nginx.conf文件夹删除掉,复制一份新的nginx.conf,然后重启。重启命令: docker restart 容器名
nginx.conf文件内容如下:
# For more information on configuration, see:
#   * Official English Documentation: http://nginx.org/en/docs/
#   * Official Russian Documentation: http://nginx.org/ru/docs/

<strong>user root; #这里注意一下  你使用那个用户启动的nginx 你就写哪个用户</strong>
worker_processes auto;
error_log /var/log/nginx/error.log;
pid /run/nginx.pid;

# Load dynamic modules. See /usr/share/nginx/README.dynamic.
include /usr/share/nginx/modules/*.conf;

events {
    worker_connections 1024;
}

http {
    log_format  main  '$remote_addr - $remote_user [$time_local] "$request" '
                      '$status $body_bytes_sent "$http_referer" '
                      '"$http_user_agent" "$http_x_forwarded_for"';

    access_log  /var/log/nginx/access.log  main;

    sendfile            on;
    tcp_nopush          on;
    tcp_nodelay         on;
    keepalive_timeout   65;
    types_hash_max_size 20480;
    client_max_body_size 100m;
    client_header_timeout 1m;
    client_body_timeout 1m;
    proxy_connect_timeout       600;
    proxy_send_timeout          600;
    proxy_read_timeout          600;
    send_timeout                600;

    include             /etc/nginx/mime.types;
    default_type        application/octet-stream;

    # Load modular configuration files from the /etc/nginx/conf.d directory.
    # See http://nginx.org/en/docs/ngx_core_module.html#include
    # for more information.
    include /etc/nginx/conf.d/*.conf;

    server {
        listen       80 default_server;
        listen       [::]:80 default_server;
        server_name  _;
        root         /usr/share/nginx/html;

        # Load configuration files for the default server block.
        include /etc/nginx/default.d/*.conf;

        location / {
        }

        error_page 404 /404.html;
            location = /40x.html {
        }

        error_page 500 502 503 504 /50x.html;
            location = /50x.html {
        }
    }

}
3、查看运行状态
docker ps 或者docker ps -a # -a显示所有容器,包括未运行的容器。 没有-a 只显示运行的容器

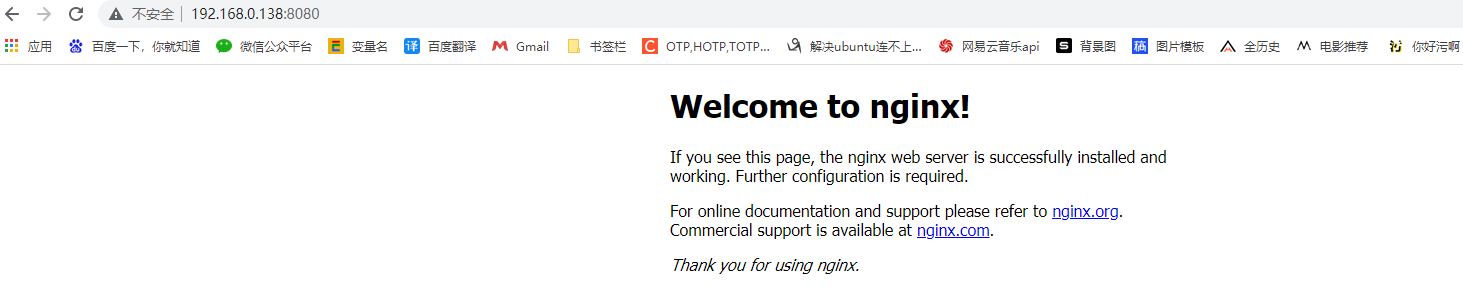
4、安装成功
最后我们可以通过浏览器可以直接访问 8080 端口的 nginx 服务:

其实出现这个就代表已经安装成功了。导致403的原因也挺简单,就是nginx反射的页面时空的。
正式环境是把前端服务都要丢在我们反射的路径里的。 这里我们就那一个简单的页面测试一下。

我们去刷新一下页面:
大功告成。
如果大家还有什么疑问,或遇到什么问题可以添加右下角微信,欢迎骚扰。
还可以通过点击我的gitee来获取其他项目的源码!本次分享就到这啦,拜拜!


 被折叠的 条评论
为什么被折叠?
被折叠的 条评论
为什么被折叠?
 到【灌水乐园】发言


