


 本文详细介绍了Android中ImageView的scaleType属性,探讨了不同属性值如matrix、fitXY、fitStart、fitCenter、fitEnd、center、centerCrop和centerInside对图片缩放和显示的影响,帮助开发者更好地控制图片在ImageView中的显示效果。
一、ImageView控件
ImageView控件主要是用来显示图片,android:src用来引用图片资源。
二、scaleType属性
scaleType主要是设置图片的缩放,在这里可能会出现一个问题,就是原图的尺寸大小会决定它的缩放,会存在一个效果的不同,这就是图片尺寸的问题,本质在于它是根据原图的缩放而缩放。先确定ImageView的大小,然后图片再根据scaleType属性来进行缩放。
下面就来看看吧!
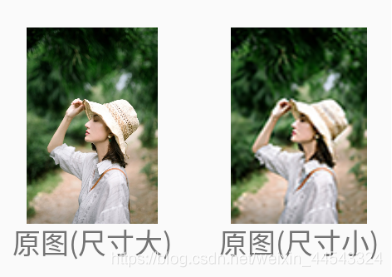
原图的效果:我们可以清晰地看到尺寸小的是相对模糊的,尺寸大的相对清晰
<LinearLayout
    android:layout_width="wrap_content"
    android:layout_height="wrap_content"
    android:orientation="vertical"
    android:layout_marginLeft="5dp">
    <ImageView
        android:layout_width="90dp"
        android:layout_height="90dp"
        android:src="@drawable/test1"/>
    <TextView
        android:layout_width="match_parent"
        android:layout_height="wrap_content"
        android:gravity="center"
        android:textSize="13dp"
        android:text="原图(尺寸大)"/>
</LinearLayout>
<LinearLayout
    android:layout_width="wrap_content"
    android:layout_height="wrap_content"
    android:orientation="vertical"
    android:layout_marginLeft="5dp">
    <ImageView
        android:layout_width="90dp"
        android:layout_height="90dp"
        android:src="@drawable/test2"/>
    <TextView
        android:layout_width="match_parent"
        android:layout_height="wrap_content"
        android:gravity="center"
        android:textSize="13dp"
        android:text="原图(尺寸小)"/>
</LinearLayout>
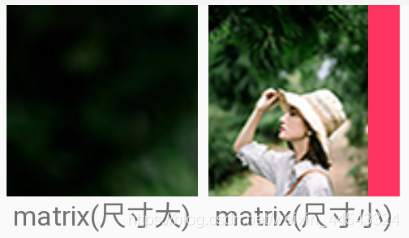
matrix:使用矩阵的方式缩放,从左上角开始缩放
android:scaleType=“matrix”
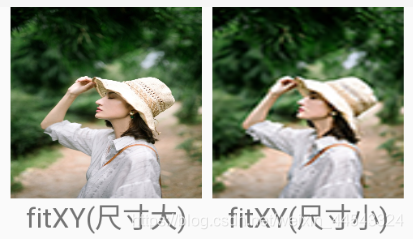
fitXY:对图片横向进行缩放,使图片完全填充ImageView的宽高,会有点变形
android:scaleType=“fitXY”
fitStart:按控件比例来缩放图片,图片的高与ImageView的高对应边一致,显示在ImageView的左边
android:scaleType=“fitStart”

fitCenter:按控件比例来缩放图片,图片的高与ImageView的高对应边一致,显示在ImageView的中间
android:scaleType=“fitCenter”

fitEnd:按控件比例来缩放图片,图片的高与ImageView的高对应边一致,显示在ImageView的右边
android:scaleType=“fitEnd”

center:按原图大小来显示图片,不缩放,图片显示在ImageView的中间
android:scaleType=“center”

centerCrop:按控件比例放大原图至ImageView的宽高显示,使图片能完全覆盖ImageView
android:scaleType=“centerCrop”

centerInside:按原图宽高比缩放,使ImageView能完全显示图片android:scaleType=“centerInside”


 863
863

 被折叠的 条评论
为什么被折叠?
被折叠的 条评论
为什么被折叠?
 到【灌水乐园】发言


