


 本文详细介绍了如何使用Retrofit在Android应用中实现网络请求,包括依赖添加、接口定义、请求参数处理、响应解析及服务器端代码实现。
·Maven管理依赖 开发工具:idea Android studio
客户端依赖添加
    implementation 'com.squareup.retrofit2:retrofit:2.4.0'
    implementation 'com.squareup.retrofit2:converter-gson:2.4.0'
    implementation 'com.squareup.retrofit2:adapter-rxjava2:2.4.0'
先创建接口统一管理你的网络请求地址
public interface Api {


    /**
     * 测试自己的API http://xxxxx:8080/testspringmvc/city/test?start=3&perpageCities=6
     *
     */
    @Headers("Content-Type:application/json")
    @GET("testspringmvc/city/test")
    Call<ResponseBody> getTestData(
            @Query("start") Integer start,
            @Query("perpageCities") Integer perpageCities);

}xxxxx为你的地址,确保手机与服务器端在同一个局域网下,所得的ip地址,注意关闭防火墙,如果不能解决设置入站规则,找到JAVA相关的TCP规则开放你的tomcat端口,我用的是8080
本例用的请求地址是带2个参数。所谓的分页其实是指定从某某位置开始到某某位置结束。涉及到的mysql的查询语句是
select * from city limit start,count
我的表的表名是city用来测试的
设置@Headers,可能本例也不需要,如果是一些HTTPS的请求地址,别人给你提供的文档还涉及到一些参数才允许准入的话可以在这个注解处添加你的headers。方法为get请求。2个请求参数分别使用了@Query注解,如上方代码所示
在测试之前先验证本地tomcat启动的服务是否可以访问,使用postman这个工具进行url的调试
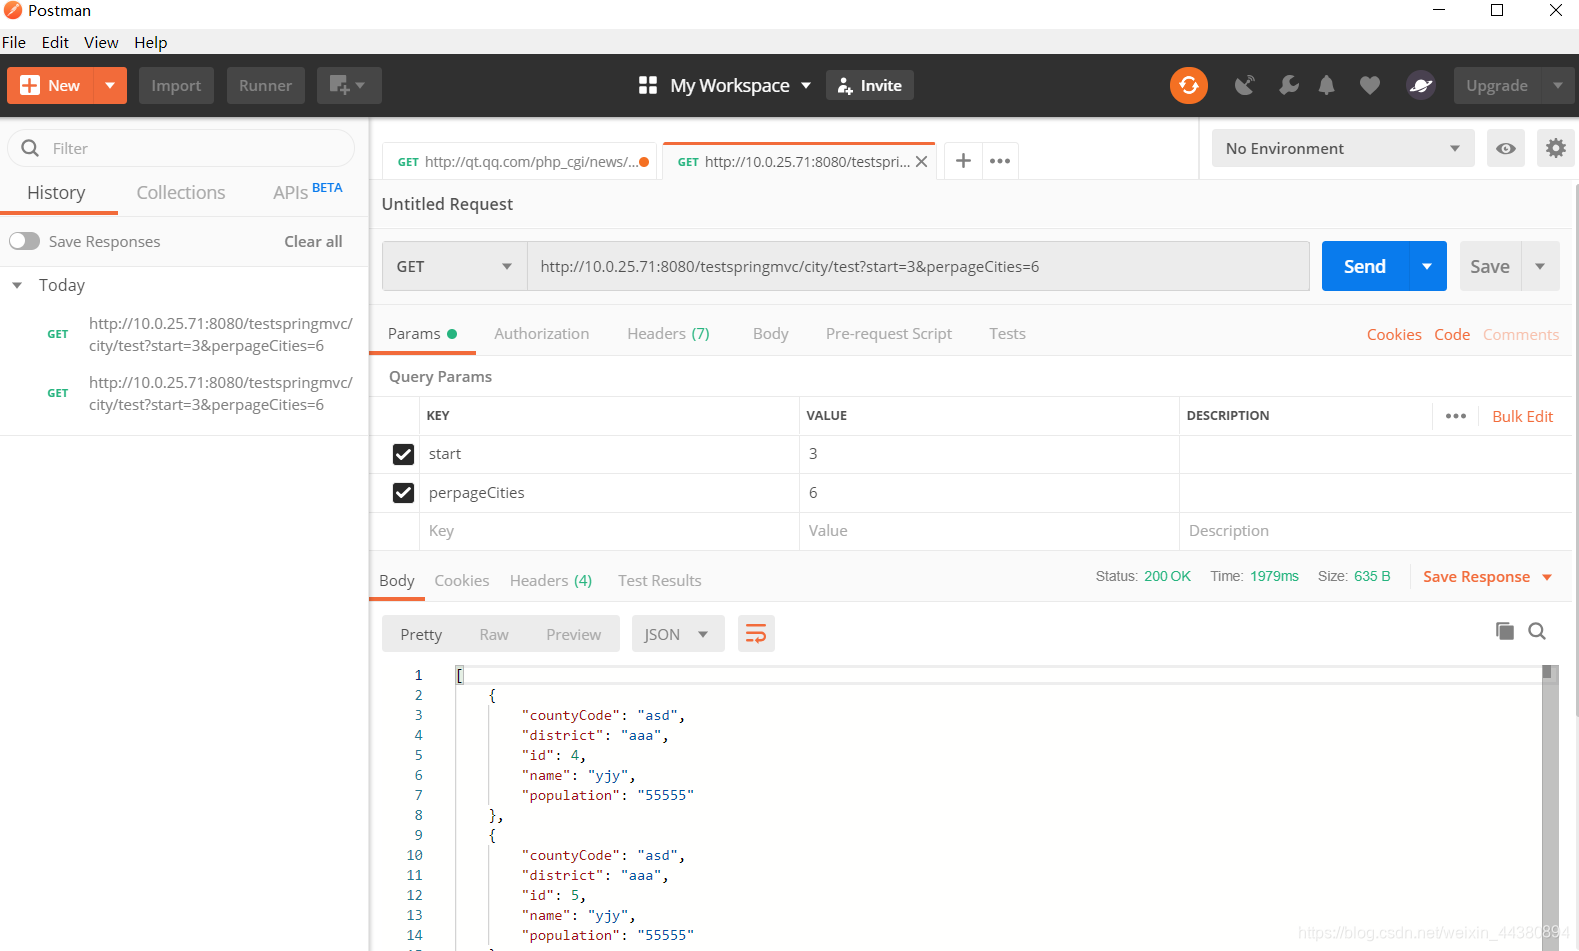
测试结果表明接口可以使用,接口部分的代码之后在服务器端一并给出
接下来是javabean的编写,比较简单可以使用json的转换插件也可以自行编写
public class testEntity {

    /**
     * countyCode : asd
     * district : aaa
     * id : 4
     * name : yjy
     * population : 55555
     */

    private String countyCode;
    private String district;
    private int id;
    private String name;
    private String population;

    public String getCountyCode() {
        return countyCode;
    }

    public void setCountyCode(String countyCode) {
        this.countyCode = countyCode;
    }

    public String getDistrict() {
        return district;
    }

    public void setDistrict(String district) {
        this.district = district;
    }

    public int getId() {
        return id;
    }

    public void setId(int id) {
        this.id = id;
    }

    public String getName() {
        return name;
    }

    public void setName(String name) {
        this.name = name;
    }

    public String getPopulation() {
        return population;
    }

    public void setPopulation(String population) {
        this.population = population;
    }
}
这里一并给出
接下来是在Activity中的测试,先构造一个Retrofit。定义一个请求的基础地址
private String TEST_URL="http://xxxxx:8080/";注意以“/”结尾,没加的话也会清楚提示你加上斜杠
 Retrofit retrofit=new Retrofit.Builder()
                .baseUrl(TEST_URL)
                .build();
然后告诉其Api是在何处调用,调用方法,创建队列。Retrofit是以okhttp为基础的,所以看到后面的形式也觉得倍加亲切
 retrofit.create(Api.class)
                .getTestData(3,6)
                .enqueue(new Callback<ResponseBody>() {
                    @Override
                    public void onResponse(Call<ResponseBody> call, Response<ResponseBody> response) {
                        try {
                            String body=response.body().string();
                            Type listType=new TypeToken<List<testEntity>>() {}.getType();
                            List<testEntity> entityList = new Gson().fromJson(body, listType);
                            String district=entityList.get(0).getDistrict();
                            Log.e("xyh", "onResponse:" + body);
                        } catch (IOException e) {
                            e.printStackTrace();
                        }
                    }

                    @Override
                    public void onFailure(Call<ResponseBody> call, Throwable t) {

                    }
                    });
这里一并把gson的解析放在请求成功的队列中,接口写的形式是以json数组返回的
所以加上需要做一些处理
Type listType=new TypeToken<List<testEntity>>() {}.getType();
List<testEntity> entityList = new Gson().fromJson(body, listType);
成功的话注意留意logcat里面红字的提示,建议使用debug模式观察,至此客户端部分的代码介绍到此为止。
服务器端使用Maven管理依赖,搭建mvc的过程省略,其他人也有给出搭建好的demo,可以作为你的框架,如果你是个安卓开发者可以选择拿别人写好的可以作为简单框架使用的demo,引入几个包便可以继续操作
        <dependency>
            <groupId>com.alibaba</groupId>
            <artifactId>fastjson</artifactId>
            <version>1.1.41</version>
        </dependency>
在你的servlet控制器当中的注解驱动器下添加
            <!-- 配置Fastjson支持 -->
            <bean class="com.alibaba.fastjson.support.spring.FastJsonHttpMessageConverter">
                <property name="supportedMediaTypes">
                    <list>
                        <value>text/html;charset=UTF-8</value>
                        <value>application/json</value>
                    </list>
                </property>
然后我们定义一下dao(@Repository)
@Select("select * from city limit #{start},#{perpageCities}")
    List<City> findCitiesByPage(@Param("start") int start, @Param("perpageCities") int perpageCities) throws Exception;
以这种形式省略xml文件的编写,如果您的项目已经有xml可能直接照搬会出现一些别的错误,这些请自行解决。
我们接下来创建一个service接口
public interface CityService {


    List<City> getCitiesByPage(int start,int perpageCities) throws Exception;
}
在新建一个文件夹impl,创建其实现类
@Service("cityService")
public class CityServiceImpl implements CityService {
    @Autowired
    CityDao cityDao;


    @Override
    public List<City> getCitiesByPage(int start, int perpageCities) throws Exception{
        return cityDao.findCitiesByPage(start,perpageCities);
    }


}
POJO文件夹下的
@Data
public class City {
    private Integer id;
    private String name;
    private String CountyCode;
    private String District;
    private String Population;

    @Override
    public String toString() {
        return "City{" +
                "id=" + id +
                ", name='" + name + '\'' +
                ", CountyCode='" + CountyCode + '\'' +
                ", District='" + District + '\'' +
                ", Population='" + Population + '\'' +
                '}';
    }
}
使用了lombok,您可以自己生成get和set方法。
最后我们来到controller
@Controller
@RequestMapping("/city")
public class CityController {
    @Resource
    private CityServiceImpl cityService;

    @RequestMapping(value = "/test",produces="application/json;charset=UTF-8")
    public @ResponseBody
    List<City> list( @RequestParam int start, @RequestParam int perpageCities) throws Exception{
        try {
            List list=cityService.getCitiesByPage(start,perpageCities);
            return list;
        } catch (Exception e) {
            e.printStackTrace();
        }
        return null;
    }
}
由于前面配置了阿里爸爸的fastjson,我们使用@ResponseBody来直接返回json数据。
我们在Android里面debug一遍,来验证我们的操作

![]()
至此简单的自给自足的demo写完了


 被折叠的 条评论
为什么被折叠?
被折叠的 条评论
为什么被折叠?
 到【灌水乐园】发言


