


 本文详细介绍了Python的openpyxl库如何创建、读取、修改Excel文件,包括创建工作簿、处理数据、数据存储、载入文件等方面的操作。通过实例展示了如何获取和设置单元格、工作表的属性,以及使用公式、插入图片等功能。适合Python初学者和数据处理人员学习。
分步骤进行学习:
① 对 openpyxl 的 Tutorial 进行翻译理解
② 在初步掌握整个运行逻辑及功能后尝试小工具制作
③ 最终进行总结
源地址:https://openpyxl.readthedocs.io/en/stable/tutorial.html#create-a-workbook
Tutorial Part
01 创建工作簿(Create a workbook)
There is no need to create a file on the filesystem to get started with openpyxl. Just import the Workbook class and start work.
使用openpyxl时无需先在系统中创建一个实体文件。只需要调用Workbook这个Class即可。
# 从 openpyxl 中调用 Workbook
# 使用 Workbook() 新建一个excel工作簿,同时将这个工作簿赋值给 wb

from openpyxl import Workbook
wb = Workbook()
- 在 openpyxl 中并不需要现在系统中创建一个 excel 文件,也就是说就如同直接使用 MS Excel 新建文件一样,会新建一个“未保存”的临时文件供使用。
A workbook is always created with at least one worksheet. You can get it by using the Workbook.active property
一个工作簿创建时至少存在一个工作表,它可以通过 Workbook.active 来被调用。
sht = wb.active # 不少文章中都是用 ws 来代替 worksheet 的,不过我还是比较习惯 sht 的写法呐
- 一个工作簿创建时至少会带有一个工作表——这点感觉是使用除去VB以外控制excel的通用情况,实际上新建的工作簿应该会有3个sheet(直接使用MS Office Excel创建的话)。
- 新鲜出炉的工作簿,可以通过 Workbook.active 这个属性来获取这张工作表。
>>> 小语の胡思乱想
在VB中其实也有类似的写法,不过可能会更加直观一些。
例如正在使用的工作簿、工作表直接会被标记成 Activeworkbook, Activeworksheet,然后赋值的话需要将这些object运用Set来确定赋值关系。在Python中似乎只需要将这些object像value一样赋值给变量就可以了——所以其实很好奇,是不是python中的变量可以是任何内容?甚至说,其实并不是赋值,而是一种链接关系呢?
—— Note ——
This is set to 0 by default. Unless you modify its value, you will always get the first worksheet by using this method.
这个 wb.active 会被默认放在0号位置(第一张表)。除非你重新定义他的值,否则你始终可以通过这个方法来调取第一张表。
You can create new worksheets using the Workbook.create_sheet() method.
*你可以通过 Workbook.create_sheet() 方法来新建工作表。
TempSht = wb.create_sheet("MySheet",0)
# 在0号位置创建一张表格(相当于在最前面插入一张新表),并取名为 MySheet
# 若 wb.create_sheet("MySheet") 则新建并插入到最后
Sheets are given a name automatically when they are created. They are numbered in sequence (Sheet, Sheet1, Sheet2, …). You can change this name at any time with the Worksheet.title property
工作表在创建时会自动生成一个名称。他们通常按照数字进行编号(如Sheet,Sheet1,Sheet2等等)。你可以在任何时候使用 Worksheet.title 这个属性来改变它的名称。
TempSht.title = "NewSheet"
- 这一点其实非常类似VB中获取Sheet名称的方法,也是通过属性。不过VB用的是 .Name,在Python的openpyxl中,使用的是 .title。
The background color of the tab holding this title is white by default. You can change this providing an RRGGBB color code to the Worksheet.sheet_properties.tabColor attribute.
界面上承载工作表名称的tab按钮默认是白色背景。你可以通过改变 Worksheet.sheet_properties.tabColor 属性的RRGGBB(RGB代码)来改变颜色。
TempSht.sheet_properties.tabColor = "1072BA"
- 这个功能其实还是比较辅助性的,虽然对于数据来说没有决定性的作用,但至少是增加了一种区别数据的途径,还是相当不错的。
Once you gave a worksheet a name, you can get it as a key of the workbook.
一旦你给一张工作表取了名字,那么你就可以在这个工作簿中通过名字来索引到这张表。
sht = wb["TempSht"]
- 其实,这点python与vb有很大的区别呢:
- 在vb中,通过名称来索引工作表通常是 ThisWorkbook.sheets(“TempSht”) 或者 Set wb = ActiveWorkbook ⇒ sht = wb.sheets(“TempSht”) 这类
- 在python中,则是直接在 wb 当中去定位,并没有 sheets 这样的集合;即 workbook ⇒ worksheet,中间不再有sheets这个中间层的感觉吧!
这点在接下来的部分也能够感受到。
You can review the names of all worksheets of the workbook with the Workbook.sheetname attribute.
你可以通过 Workbook.sheetname 来查看整个工作簿所有工作表的名称。
>>> print(wb.sheetnames)
['Sheet2', 'New Title', 'Sheet1']
You can loop through worksheets.
你也可以在所有工作表中进行循环操作。
>>> for sheet in wb:
...     print(sheet.title)
- 在这里,就很类似VB中遍览所有sheet来做指定操作的方式(for循环)
You can create copies of worksheets within a single workbook: Workbook.copy_worksheet() method.
你可以在一个工作簿中通过 Workbook.copy_worksheet() 方法来复制工作表。
source = wb.active
target = wb.copy_worksheet(source)
—— Note ——
Only cells (including values, styles, hyperlinks and comments) and certain worksheet attribues (including dimensions, format and properties) are copied. All other workbook / worksheet attributes are not copied - e.g. Images, Charts.
复制的仅仅是单元格(包括值、样式、超链接以及注释)和特定的工作表属性(包括范围、格式和属性)。其他工作簿或工作表属性是不会被复制的,例如图片、图表。
You also cannot copy worksheets between workbooks. You cannot copy a worksheet if the workbook is open in read-only or write-only mode.
在多个工作簿中是无法通过这个方法来复制工作表的。另外,一个以只读或只写模式打开的工作簿也不能通过这个方法来复制工作表。
02 处理数据(Playing with data)
02.1 获取单个单元格(Accessing one cell)
Now we know how to get a worksheet, we can start modifying cells content. Cells can be accessed directly as keys of the worksheet.
既然我们知道了如何去定位一张工作表,那么就可以开始修改单元格内容了。所有单元格都可以直接通过工作表索引来获取。
c = TempSht['A4']
This will return the cell at A4, or create one if it does not exist yet. Values can be directly assigned.
如此就会将A4单元格返回到变量中,或者当不存在A4时(也就是A4单元格还未被使用的情况下)创建一个。它的值可以直接被赋予,如下。
TempSht['A4'] = 42
There is also the Worksheet.cell() method.
This provides access to cells using row and column notation:
这边也存在 Worksheet.cell() 方法,以此来通过行、列来获取单元格。
d = TempSht.cell(row=4, column=2, value=10)
—— Note ——
When a worksheet is created in memory, it contains no cells. They are created when first accessed.
当一个工作表在内存中被创建时,它实际上是没有单元格的(若直接使用MSOffice Excel,这些单元格被认为是没有被使用的,VB中也有类似情况)。单元格会在第一次被获取的时候进行创建。
—— Warning ——
Because of this feature, scrolling through cells instead of accessing them directly will create them all in memory, even if you don’t assign them a value.
因此用检视所有单元格的方法来代替直接获取他们将会导致所有单元格在内存中被创建,即便你根本没有给他们赋值。
Something like this will create 100×100 cells in memory, for nothing.
例如下面这段检视将会在内存中创建100×100范围的单元格,却无任何用处。>>> for x in range(1,101): ... for y in range(1,101): ... ws.cell(row=x, column=y)
02.2 获取多个单元格(Accessing many cells)
Ranges of cells can be accessed using slicing.
单元格的范围可以通过切片来获取。
cell_range = TempSht['A1':'C2']
- VB中的range与python的range还是有很大区别呐!= =+
- Excel中,若是要取得范围,主要还是通过 cells 以及 range 函数来进行的,但实际上 openpyxl 的范围获取依然是基于 worksheet 的——总觉得 python 这边的操作已经省略掉了大量的中间集合,例如 worksheets, cells 这类。
Ranges of rows or columns can be obtained similarly.
整行整列的获取方法也很类似。
colC = sht['C']
col_range = sht['C:D']
row10 = sht[10]
row_range = sht[5:10]
- 这里也是直接取代了VB中的 Columns 以及 Rows 函数,其实总觉得更方便了?一切都从 worksheet 中获取,要什么就切出来多少,不用过多关心要使用什么函数。
You can also use the Worksheet.iter_rows() method.
此外,你还可以使用 Worksheet.iter_rows() 方法来获取范围内的单元格。
– row iteration 行迭代
>>> for row in ws.iter_rows(min_row=1, max_col=3, max_row=2):
...    for cell in row:
...        print(cell)
<Cell Sheet1.A1>
<Cell Sheet1.B1>
<Cell Sheet1.C1>
<Cell Sheet1.A2>
<Cell Sheet1.B2>
<Cell Sheet1.C2>
Likewise the Worksheet.iter_cols() method will return columns.
类似的 Worksheets.iter_cols() 方法会返回列。
>>> for col in ws.iter_cols(min_row=1, max_col=3, max_row=2):
...     for cell in col:
...         print(cell)
<Cell Sheet1.A1>
<Cell Sheet1.A2>
<Cell Sheet1.B1>
<Cell Sheet1.B2>
<Cell Sheet1.C1>
<Cell Sheet1.C2>
—— Note ——
For performance reasons the Worksheet.iter_cols() method is not available in read-only mode.
出于性能原因 Worksheet.iter_cols() 工作表.列迭代方法并不能在只读模式中使用。
If you need to iterate through all the rows or columns of a file, you can instead use the Worksheet.rows property.
如果你想要申明一个文件中的所有行、所有列,你可以选择使用 Worksheet.rows 这个属性。
>>> ws = wb.active
>>> ws['C9'] = 'hello world'
>>> tuple(ws.rows)
((<Cell Sheet.A1>, <Cell Sheet.B1>, <Cell Sheet.C1>),
(<Cell Sheet.A2>, <Cell Sheet.B2>, <Cell Sheet.C2>),
(<Cell Sheet.A3>, <Cell Sheet.B3>, <Cell Sheet.C3>),
(<Cell Sheet.A4>, <Cell Sheet.B4>, <Cell Sheet.C4>),
(<Cell Sheet.A5>, <Cell Sheet.B5>, <Cell Sheet.C5>),
(<Cell Sheet.A6>, <Cell Sheet.B6>, <Cell Sheet.C6>),
(<Cell Sheet.A7>, <Cell Sheet.B7>, <Cell Sheet.C7>),
(<Cell Sheet.A8>, <Cell Sheet.B8>, <Cell Sheet.C8>),
(<Cell Sheet.A9>, <Cell Sheet.B9>, <Cell Sheet.C9>))
or the Worksheet.columns property.
或者 Worksheet.columns 属性。
>>> tuple(ws.columns)
((<Cell Sheet.A1>,
<Cell Sheet.A2>,
<Cell Sheet.A3>,
<Cell Sheet.A4>,
<Cell Sheet.A5>,
<Cell Sheet.A6>,
...
<Cell Sheet.B7>,
<Cell Sheet.B8>,
<Cell Sheet.B9>),
(<Cell Sheet.C1>,
<Cell Sheet.C2>,
<Cell Sheet.C3>,
<Cell Sheet.C4>,
<Cell Sheet.C5>,
<Cell Sheet.C6>,
<Cell Sheet.C7>,
<Cell Sheet.C8>,
<Cell Sheet.C9>))
- columns 和 rows 总是并存的!= =+ 无论哪儿都是呢,2333~
—— Note ——
For performance reasons the Worksheet.columns property is not available in read-only mode.
一样,出于性能原因 Worksheet.columns 属性在只读文件中是不能使用的。
02.3 仅获取值(Values only)
If you just want the values from a worksheet you can use the Worksheet.values property. This iterates over all the rows in a worksheet but returns just the cell values.
如果你仅仅想要从一张工作表中获取值,那你可以使用 Worksheet.values 属性。这样将查看工作表中所有行但只返回单元格的值。
for row in ws.values:
    for value in row:
        print(value)
03 数据存储(Data storage)
Once we have a Cell, we can assign it a value.
只要有单元格,我们就可以给他赋值。
>>> c.value = 'hello, world'
>>> print(c.value)
'hello, world'

>>> d.value = 3.14
>>> print(d.value)
3.14
- 这里的 c 和 d 是已经赋值过单元格的变量,此刻就等同于是 ws[‘A1’] 这样的单元格。
- 而这里打印的,实际上也就是单元格的值,相当于是 sht.Cells(1,1).Value / sht.Range(“A1”).Value(不过VB中单元格.value经常省略不写而已)。
03.1 保存到文件(Saving to a file)
The simplest and safest way to save a workbook is by using the Workbook.save() method of the Workbook object.
保存工作簿最方便快捷的方法是运用 Workbook.save() 方法。
>>> wb = Workbook()            # 新建工作簿
>>> wb.save('balances.xlsx')   # 将此工作簿保存,并命名为 balances.xlsx
—— Warning ——
This operation will overwrite existing files without warning.
这个操作将在无警告的情况下直接覆盖已存在的文件。
—— Note ——
The filename extension is not forced to be xlsx or xlsm, although you might have some trouble opening it directly with another application if you don’t use an official extension.
储存的时候,文件名扩展名(也就是后缀吧)并不强制要求使用 xlsx 或 xlsm,不过当你用其他软件直接打开并未使用官方扩展名的excel文件时会遇到些麻烦。
- 这里有一点补充。其实 excel 文件时常为了某些原因使用非官方的扩展名(例如.dat或者其他奇怪的扩展名),但是用VB来调用的时候依然可以很顺利的打开并改写内容。此处说的用“另一个软件”打开会遇到问题,其实并不是因为扩展名的关系,而是文件本身不匹配的关系吧。
—— Note ——
As OOXML files are basically ZIP files, you can also end the filename with .zip and open it with your favourite ZIP archive manager.
因为Office开放文档格式(OOXML)基本上就是压缩文件,所以你也可以用 .zip 结尾来命名文件,同时可以用你喜欢的解压缩工具(ZIP 归档管理器)来打开它。
03.2 流存(Saving as a stream)
If you want to save the file to a stream, e.g. when using a web application such as Pyramid, Flask or Django then you can simply provide a NamedTemporaryFile().
当年想要将文件保存到流中,例如在使用一些类似Pyramid、Flask以及Django这类web应用时,你就可以提供一个 NamedTemporaryFile() 。
>>> from tempfile import NamedTemporaryFile
>>> from openpyxl import Workbook
>>> wb = Workbook()
>>> with NamedTemporaryFile() as tmp:
        wb.save(tmp.name)
        tmp.seek(0)
        stream = tmp.read()
- 感觉,就是用 openpyxl 新建一个 excel文件,然后用 workbook.save() 方法将文件存储到临时的 NamedTemporaryFile() 中(tmp.name),然后将 tmp 赋值给 stream。酱紫?
- 这一块还是不太明白,待日后学习更多内容再理一下吧!=w=
You can specify the attribute template=True, to save a workbook as a template.
你也可以通过设置属性(template=True)将一个工作簿保存为模板。
>>> wb = load_workbook('document.xlsx')
>>> wb.template = True
>>> wb.save('document_template.xltx')
or set this attribute to False (default), to save as a document.
或者将这个属性设置为 Flase(默认)来保存为一个文档。
>>> wb = load_workbook('document_template.xltx')
>>> wb.template = False
>>> wb.save('document.xlsx', as_template=False)
- 这里能看到再入一个已有的文档,可以使用 load_workbook(‘FilePath’) 了呢!
—— Warning ——
You should monitor the data attributes and document extensions for saving documents in the document templates and vice versa, otherwise the result table engine can not open the document.
无论设置 template 属性为 True 还是 False,你都必须监控即将存为模板的文档中的数据属性和文件扩展名,否则储存的文件将无法被打开。
—— Note ——
The following will fail:>>> wb = load_workbook('document.xlsx') >>> # Need to save with the extension *.xlsx >>> wb.save('new_document.xlsm') >>> # MS Excel can't open the document >>> >>> # or >>> >>> # Need specify attribute keep_vba=True >>> wb = load_workbook('document.xlsm') >>> wb.save('new_document.xlsm') >>> # MS Excel will not open the document >>> >>> # or >>> >>> wb = load_workbook('document.xltm', keep_vba=True) >>> # If we need a template document, then we must specify extension as *.xltm. >>> wb.save('new_document.xlsm') >>> # MS Excel will not open the document
04 载入一个文件(Loading from a file)
The same way as writing, you can use the openpyxl.load_workbook() to open an existing workbook.
与写文件一样,你可以使用 openpyxl.load_workbook() 来打开一个已经存在的工作簿。|
>>> from openpyxl import load_workbook     # 先将load_workbook方法从openpyxl中导入
>>> wb2 = load_workbook('test.xlsx')       # 运用load_workbook方法打开指定文件
>>> print wb2.sheetnames                   # 使用workbook.sheetnames打印所有工作表名称
['Sheet2', 'New Title', 'Sheet1']
Simple Usage
01 修改工作簿(Write a workbook)
from openpyxl import Workbook
from openpyxl.compat import range
from openpyxl.utils import get_column_letter

# 使用 Workbook() 方法创建一个新工作簿
wb = Workbook()

# 利用变量 dest_filename 储存工作簿名称
fileName = 'empty_book'
filePath = 'E:\学习素材\PythonStudy\Data\\' + fileName + '.xlsx'

# 将当前工作表赋值 workbook.active ,便于指定使用
# 使用 worksheet.title 来修改工作表名称
ws1 = wb.active
ws1.title = 'range names'

# 使用 .compat 中的 range来填充[行]
for row in range(1,40):
    ws1.append(range(600))

# 使用 workbook.create_sheet() 方法新建工作表,并命名为 Pi
ws2 = wb.create_sheet(title="Pi")
ws2['F1'] = 3.14

ws3 = wb.create_sheet(title="Data")

# 在10~19行、27~53列之间填充每个单元格所在的列名称
for row in range(10,20):
    for col in range(27,54):
        _ = ws3.cell(column=col,row=row,value="{0}".format(get_column_letter(col)))

print(ws3['AA10'].value)

wb.save(filename=filePath)
- 运用到的知识:
- 新建空白工作簿:Workbook()
- 指定路径:filePath = ‘E:\学习素材\PythonStudy\Data\’ + fileName + ‘.xlsx’
- 修改工作表名称:ws1.title = ‘newName’
- 新建工作表并命名:ws3 = wb.create_sheet(title=“Data”)
- 直接使用单元格索引定位单元格:ws2[‘F1’]
- 获取单元格所在列的名称:get_column_letter(col)【如果写row返回的虽然是行,但仍然是字母哟】
- 给单元格赋值(表达式):ws3.cell(column=col,row=row,value=1)
- 保存工作簿:wb.save(filename)【这里的filename其实直接填写路径即可,但如果要指定模式就要写完整咯】
- 观察到最后一处ws3的循环中,运用到了“下划线”,查了一些资料后感觉这里的用法应该是:“下划线”是大多数Python REPL中的一个特殊变量,它表示由解释器评估的最近一个表达式的结果。详见这位大大的整理:https://blog.youkuaiyun.com/tcx1992/article/details/80105645#t4
02 读取一个工作簿(Read an existing workbook)
from openpyxl import load_workbook

fileName = 'empty_book'
filePath = 'E:\学习素材\PythonStudy\Data\\' + fileName + '.xlsx'

wb = load_workbook(filename=filePath)
sheet_ranges = wb['range names']
print(sheet_ranges['D18'].value)
- 运用到的知识:
- 通过 load_workbook 加载xlsx文件:wb = load_workbook(filename=filePath, read_only=True)【当仅需要读取的时候设置为T,否则就是False哟】
- 直接通过名称定位工作表:sheet_ranges = wb[‘range names’]
—— Note ——
There are several flags that can be used in load_workbook.
在 load_workbook 中存在几个标识可以使用。
- guess_types will enable or disable (default) type inference when reading cells.
guess_type将在读取单元格时允许或禁止推断类型。- data_only controls whether cells with formulae have either the formula (default) or the value stored the last time Excel read the sheet.
data_only控制当读取Excel表格时对于带有公式的单元格读取的是公式(默认)还是最后存储的值。- keep_vba controls whether any Visual Basic elements are preserved or not (default). If they are preserved they are still not editable.
keep_vba控制是否保留VB相关的内容,默认是不保留的。(也因此xlsm的文件经常在使用中出现问题)不过,即便VBA被保留了,但他们也无法被编辑。
—— Warning ——、
openpyxl does currently not read all possible items in an Excel file so images and charts will be lost from existing files if they are opened and saved with the same name.
openpyxl目前并不能读取Excel文件中的所有可能项,所以如果图片和图表都是用相同的名称储存的话,openpyxl打开时很有可能就丢失了。
03 数字格式(Using number formats)
from datetime import datetime, timedelta
from openpyxl import Workbook

wb = Workbook()
ws = wb.active

str_to_date = datetime.strptime("21/11/06 16:30","%d/%m/%y %H:%M")
print(str_to_date)


# set date using a Python datetime
ws['A1'] = datetime(2019,1,1,12,21)
ws['A2'] = datetime.date(datetime.now())
ws['A3'] = datetime.date(datetime(2019,1,1,12,21))
ws['A3'] = ws['A3'].value + timedelta(days=10)
print(ws['A1'].value)
print(ws['A2'].value)
print(ws['A3'].value)

ws['A1'].number_format
'yyyy-mm-dd h:mm:ss'
wb.guess_type = True
ws['B1'] = '3.14%'
wb.guess_type = False
print(ws['B1'].value)
print(ws['B1'].number_format)

ws['C1'] = datetime.now()
ws['D1'] = datetime.utcnow()
print(ws['C1'].value)
print(ws['D1'].value)

fileName = 'empty_book'
filePath = 'E:\学习素材\PythonStudy\Data\\' + fileName + '.xlsx'
wb.save(filePath)
- 用到的知识:
- 设置单元格数字格式的方法:cell.number_format ‘yyyy-mm-dd h:mm:ss’
这里需要说明的是,按照标准写法的话,如上代码中,cell.number_format 换行后用引号将格式括起来即可(不过似乎不换行,直接括起来也ok,但是标准化后就会换行了呢)。 - 获取单元格的格式名称:cell.number_format
- Python处理日期和时间的标准库,datetime模块:
(注) 参考资料:https://www.cnblogs.com/xiao1/p/5935128.html
3.1 获取当前日期与时间,获取年月日小时分钟秒
3.2 将字符串转换成日期格式#1 按照 Openpyxl 原文中使用的格式,是直接 import datetime 来使用的 import datetime now = datetime.datetime.now() # 现在的时间 thatDay = datetime.datetime(2018,1,1) # 特定的时间(这是时间格式,并非日期) dateToday = datetime.date.today() # 今天的日期 dateDay = datetime.date.fromtimestamp(thatDay) # 将时间转换成日期 #2 另一种则是另一种引用,而且后续若对日期和时间有许多处理的话,建议写这种 from datetime import datetime now = datetime.now() # 现在的时间 thatDay = datetime(2018,1,1,12,21) # 特定的时间(时间)y,m,d,h,m,s dateToday = datetime.date(datetime.now()) # 今天的日期(括号换成thatDay就是特定日期) # 无论引入的是哪种模块,都可以用 .year, .month, .day, .hour, .minute, .second 来调用
3.3 对时间进行运算:timedelta可以进行一些较为完整的时间加减import datetime str_to_date = datetime.datetime.strptime("21/11/06 16:30","%d/%m/%y %H:%M") # 当 from datetime import datetime 时,后面只需要使用 datetime.strptime 即可
3.4 计算相差的秒数:直接相加减,可以用total_seconds()来计算相差的秒数import datetime new_date = datetime.datetime.now() + datetime.timedelta(days=10) #比现在加10天 new_date = datetime.datetime.now() + datetime.timedelta(days=-10) #比现在减10天 new_date = datetime.datetime.now() + datetime.timedelta(hours=-10) #比现在减10小时 new_date = datetime.datetime.now() + datetime.timedelta(seconds=120) #比现在+120s # 当 from datetime import datetime, timedelta 时,直接 timedelta(days=1) 做值运算即可 # timedelta ==> days,seconds,hours import datetime from datetime, timedelta thatDay = datetime.now() + timedelta(days=1) thatDay = datetime.now() - timedelta(days=now.isoweekday()) # 上周日 thatDay = datetime.now() - timedelta(days=now.weekday()) # 这周一 thatDay = datetime.now() - timedelta(days=now.day) # 上个月最后一天
参考资料:https://www.cnblogs.com/zknublx/p/6017094.html
3.5 将字符串转化为时间,以及反向操作from datetime import datetime, timedelta t0 = datetime(2019,1,6,14,30,30) t1 = datetime.now timespan = t1 - t0 print(timespan.total_seconds()) timespan = timedelta(days=1) print(timespan) print(timespan.total_seconds())
3.6 标准转换格式符号说明(时间日期)【从上方转换就能发现一定的规则】from datetime import datetime now = datetime.now() thisDayStr = datetime.strftime(now,'%Y-%m-%d %H:%M:%S') # 转成字符串 thisDayTime = datetime.strptime(thisDayStr,'%Y-%m-%d %H:%M:%S') # 转成时间
参考资料:https://www.jb51.net/article/142446.htm%a 本地星期的短名称 如:Sun, Mon, ..., Sat (en_US); So, Mo, ..., Sa (de_DE) %A 本地星期全名称 如 :Sunday, Monday, ..., Saturday (en_US);Sonntag, Montag, ..., Samstag (de_DE) %w 星期的数字表示,0表示周日,6表示周六 如:0,1,2,,,6 %d 日的数字表示,并且使用0来填补(0-9),如:01, 02, ..., 31 %b 月份的短名称显示,英文单词简写,如:Jan, Feb, ..., Dec (en_US);Jan, Feb, ..., Dez (de_DE) %B 月份的全名称显示,如:January, February, ..., December (en_US);Januar, Februar, ..., Dezember (de_DE) %m 月份数字显示,并且用0来补全,如:01, 02, ..., 12 %y 年份的数字表示,两位表示,如:00, 01, ..., 99 %Y 年份的数字表示,四位表示,如:0001, 0002, ..., 2013, 2014, ..., 9998, 9999 %H 24小时制表示,如:00, 01, ..., 23 %I 12小时制表示,如:01, 02, ..., 12 %p 上下午的表示,如:AM,PM %M 分钟,并且用0补全(0-9),如:00, 01, ..., 59 %S 秒钟,并且用0补全(0-9),如:00, 01, ..., 59 %f 微妙表示,如:000000, 000001, ..., 999999 %z 时区偏移量,如:(empty), +0000, -0400, +1030 %Z 时区名称,如:(empty), UTC, EST, CST %j 全年中的哪一个,用0补全,如:001, 002, ..., 366 %U 全年中的第几个星期,sunday为第一天如:00, 01, ..., 53 %W 全年中的第几个星期,monday为第一天如:00, 01, ..., 53 %c 本地时间,如:06/24/17 15:43:10 %x 本地日期,如:08/16/88 (None); %X 本地时间,如:21:30:00 (en_US); %% %符号
04 使用公式(Using formulae)
from openpyxl import Workbook
wb = Workbook()
ws = wb.active
ws['A1'] = "=SUM(1,1)"
wb.save("formula.xlsx")	# 这个文件会储存在该python文件同目录下
—— Warning ——
NB you must use the English name for a function and function arguments must be separated by commas and not other punctuation such as semi-colons.
注意:你必须使用函数的英语名字来写并且每个函数参数也必须用逗号分隔,而不是用类似于分号这样的其他标点符号。
openpyxl never evaluates formula but it is possible to check the name of a formula.
openpyxl并不会计算公式但是会检查公式的名称是否正确。
>>> from openpyxl.utils import FORMULAE
>>> "HEX2DEC" in FORMULAE
True
If you’re trying to use a formula that isn’t known this could be because you’re using a formula that was not included in the initial specification. Such formulae must be prefixed with _xlfn. to work.
如果你正试图使用一个公式却无法被识别,这很有可能是因为这个公式并没有被包含在初始规范内。这类公式必须预先通过_xlfn.加载到文件中。
- 使用公式方面,感觉还是偏向于【将公式输入到单元格中】,而不是像VB那样直接拥有部分函数的样子?emmm……不过,其实也可以通过 def 自定义函数来实现一些功能吧!
05 合并/拆分单元格(Merge / Unmerge cells)
When you merge cells all cells but the top-left one are removed from the worksheet. See Styling Merged Cells for information on formatting merged cells.
当你合并单元格的时候,除了左上角第一个单元格外,其他单元格都会从工作表中杯移出。关于给合并后的单元格设置格式的信息可以参考 Styling Merged Cells 相关信息。
(注) 关于格式方面,打算在后面一起查看,这里就不整理啦。
from openpyxl import Workbook

wb = Workbook()
ws = wb.active
ws.merge_cells("A2:D2")
ws.unmerge_cells("A2:D2")

# or

ws.merge_cells(start_row=2, start_column=1, end_row=4, end_column=4)
ws.unmerge_cells(start_row=2, start_column=1, end_row=4, end_column=4)

wb.save('sample.xlsx')
- 用到的知识点:
- 当知道准确的范围时:
(1) 合并单元格:worksheet.merge_cells(“A2:D2”)
(2) 拆分单元格:worksheet.unmerge_cells(“A2:D2”) - 对矩形四角有变化或者不确定时:
(1) 起始行:start_row=2
(2) 起始列:start_column=1
(3) 结束行:end_row=4 或 end_row=endRow(使用变量)
(4) 结束列:end_column=4 或 end_column=endCol(使用变量)
(5) 合并单元格:worksheet.merge_cells(四边)
(6) 拆分单元格:worksheet.unmerge_cells(四边)
06 插入图片(Inserting an image)
from openpyxl import Workbook
from openpyxl.drawing.image import Image

wb = Workbook()
ws = wb.active
ws['A1'] = 'You should see three logos below'

img = Image('logo.png')   # 这里若未安装 PIL / pillow 库,则会提示报错
ws['A2'] = str(img.height) + 'px'
ws['A3'] = str(img.width) + 'px'
ws['A4'] = img.format
ws['A5'] = img.path
ws['A6'] = img.anchor
ws['A7'] = img.ref


ws.column_dimensions['A'].width = img.width / 7.9	# px => 列宽(非精确)
ws.row_dimensions[8].height = img.height / 1.3		# px => 行高(非精确)

ws.add_image(img,'A8')
wb.save('logo.xlsx')
- 用到的知识点:
- Python处理图片需要使用 PIL 库(2.7以上使用 Pillow 库)
- 将图片赋值给变量:img = Image(‘logo.png’)
- 在指定单元格上插入图片:worksheet.add_image(img,‘A8’)
- 调整列宽:worksheet.column_dimensions[‘A’].width
- 调整行高:worksheet.row_dimensions[8].height
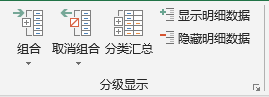
07 折叠(组合)(Fold (outline))
from openpyxl import Workbook

wb = Workbook()
ws = wb.create_sheet()
ws.column_dimensions.group('A','D',hidden=True)
ws.row_dimensions.group(1,10,hidden=True)
wb.save('group.xlsx')
- 使用的知识点:
- 新建工作表:ws = wb.create_sheet()
- 组合功能:.group
(1) 折叠/组合列:ws.column_dimensions.group(‘A’,‘D’,hidden=True 将列从A到D进行组合,并选择折叠(隐藏属性为真嘛)。
(2) 折叠/组合行:ws.row_dimensions.group(1,10,hidden=True) 将行从1到10进行组合,并折叠。
Performance(表现)
这个章节就省略啦!= =+
总之,Openpyxl想要告诉用户:我们最牛叉!用我用我用我!
[ xlrd & xlwt:黑人问号脸 ]
只读模式(Read-only mode)
Sometimes, you will need to open or write extremely large XLSX files, and the common routines in openpyxl won’t be able to handle that load. Fortunately, there are two modes that enable you to read and write unlimited amounts of data with (near) constant memory consumption.
通常你需要读或写极大的xlsx文件,而这时那样的量级对于openpyxl的常规程序而言是无法处理的。幸运的是,我们还提供两种模式来允许在内存消耗稳定或接近稳定的情况下读或写不设限制的数据文件。
Introducing openpyxl.worksheet.read_only.ReadOnlyWorksheet:
from openpyxl import load_workbook
wb = load_workbook(filename='large_file.xlsx', read_only=True)
ws = wb['big_data']

for row in ws.rows:
	for cell in row:
		print(cell.value)
—— Warning ——
openpyxl.worksheet.read_only.ReadOnlyWorksheet is read-only.
使用只读模式打开的工作表是只能够读取的。
Cells returned are not regular openpyxl.cell.cell.Cell but openpyxl.cell.read_only.ReadOnlyCell.
反馈到的单元格也不是普通的 openpyxl单元格 而是 openpyxl只读单元格。
工作表维度(Worksheet dimensions)
Read-only mode relies on applications and libraries that created the file providing correct information about the worksheets, specifically the used part of it, known as the dimensions. Some applications set this incorrectly. You can check the apparent dimensions of a worksheet using ws.calculate_dimension(). If this returns a range that you know is incorrect, say A1:A1 then simply resetting the max_row and max_column attributes should allow you to work with the file:
ws.max_row = ws.max_column = None只读模式依赖于创建文件的应用程序和库能够提供工作表的正确信息,尤其是已使用的部分,即维度。有些程序可能会在维度上设置错误。为了解决这个,你可以使用 ws.calculate_dimension() 来检查一个工作表的明显维度。如果返回的范围很显然是错误的(A1:A1),那么只要重置 max_row 和 max_column 属性就可以允许你继续使用改文件工作。
只写模式(Write-only mode)
Here again, the regular openpyxl.worksheet.worksheet.Worksheet has been replaced by a faster alternative, the openpyxl.writer.write_only.WriteOnlyWorksheet. When you want to dump large amounts of data make sure you have lxml installed.
同样,常规的 openpyxl.worksheet.worksheet.Worksheet 存在一个更快的选择 openpyxl.writer.write_only.WriteOnlyWorksheet。当你想要写入量级极大的数据,请确保你安装了lxml(lxml是python的一个解析库,支持HTML和XML的解析,支持XPath解析方式,而且解析效率非常高XPath,全称XML Path Language,即XML路径语言)。
from openpyxl import Workbook

wb = Workbook(write_only=True)
ws = wb.create_sheet()

for irow in range(100):
    ws.append(['%d' % i for i in range(200)])

wb.save('new_big_file.xlsx')
- 用到的知识点:
- 用只写模式新建工作簿:wb = Workbook(write_only=True)
- 用只写模式载入工作簿:wb = load_workbook(filename, write_only=True)
- 感受了一下,的确是非常快!!!= =+ 所以如果只是要写入数据的话,可以考虑用只写模式呢,这样运行效率会更高。(比用VB控制excel打开写要快许多)


 2034
2034

 被折叠的 条评论
为什么被折叠?
被折叠的 条评论
为什么被折叠?
 到【灌水乐园】发言


