


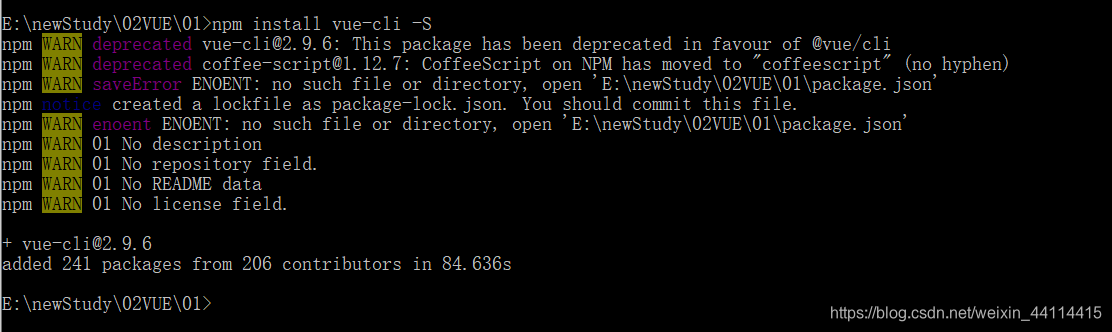
- 安装 vue-cli
npm install vue-cli -S本地安装
npm install vue-cli -G全局安装
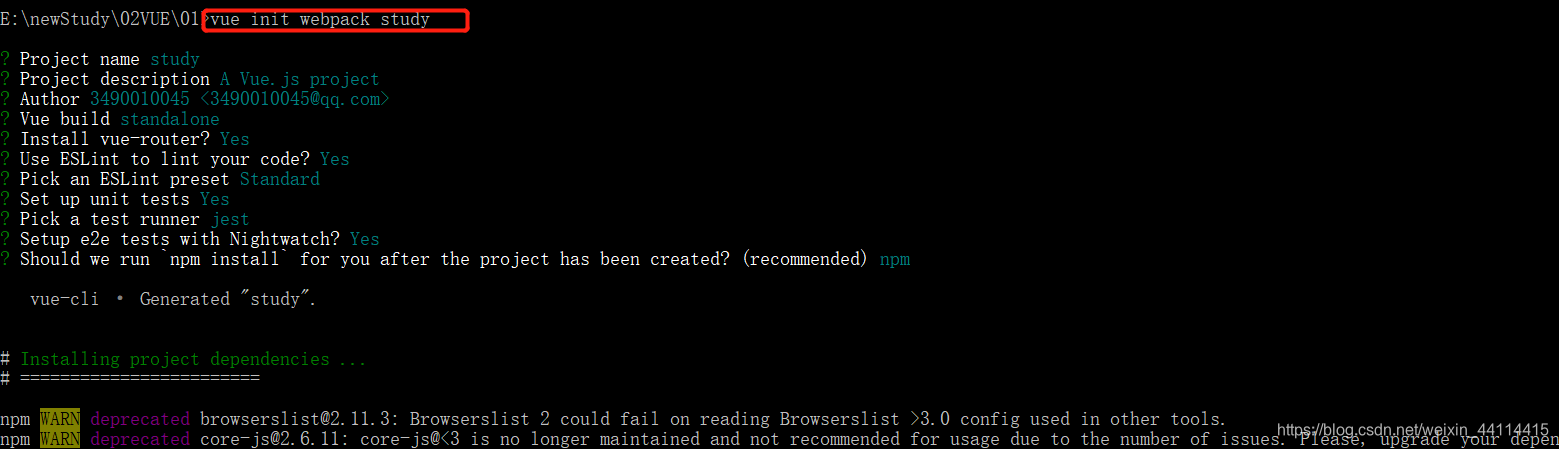
- 用vue-cli来构建项目
vue init webpack study
study是自定义的项目名称,命令执行之后,会在当前目录生成一个以该名称命名的项目文件夹。
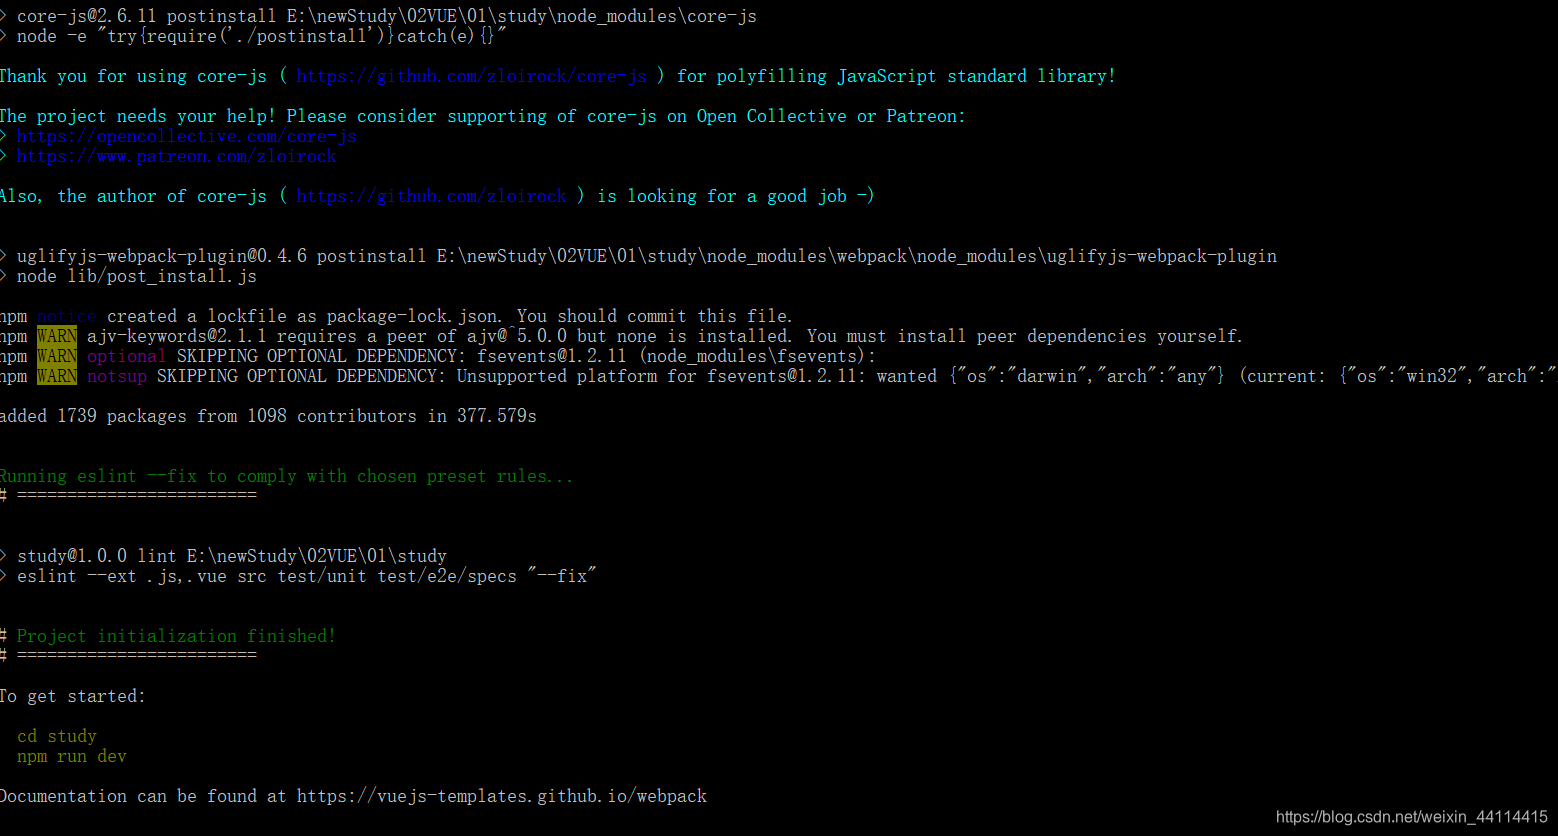
- 项目创建成功
- cd 到项目目录

npm run dev启动项目

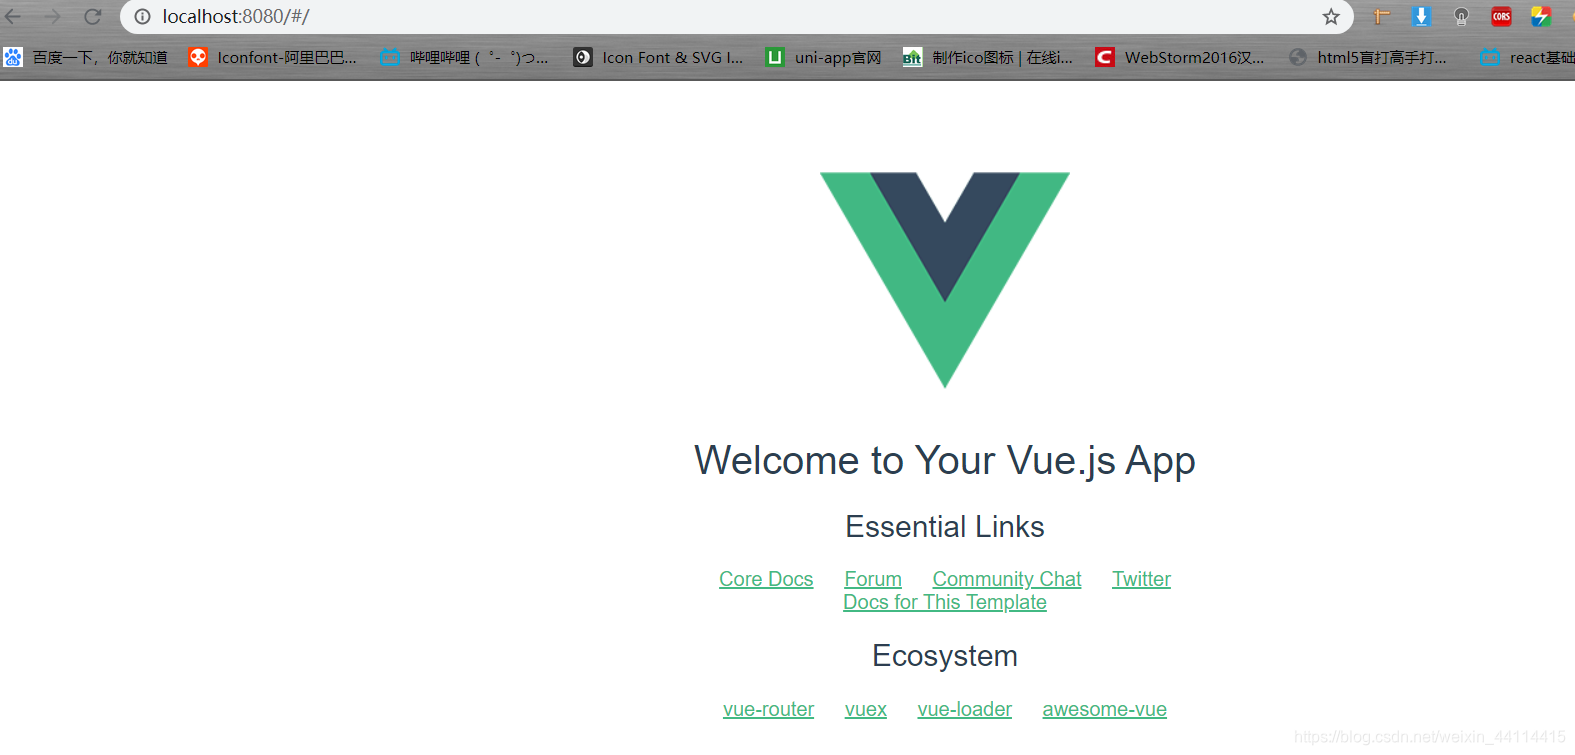
- 简单使用
vue-cli 打包
1.将 config/index.js 中的build:{}中的 assetsPublicPath: ‘/’,改为 assetsPublicPath: ‘./’,
  build: {
    // Template for index.html
    index: path.resolve(__dirname, '../dist/index.html'),

    // Paths
    assetsRoot: path.resolve(__dirname, '../dist'),
    assetsSubDirectory: 'static',
    assetsPublicPath: './', //改这里!!!!!
2.执行命令:
npm run build
3.安装http-server 后 运行http-server 可本地服务器访问
*常用技巧
1.打包后ttf字体图标路径问题
更改 build/utils.js 文件中 ExtractTextPlugin 插件的options 配置:
if (options.extract) {
  return ExtractTextPlugin.extract({
    use: loaders,
    publicPath: '../../',         // 注意配置这一部分,根据目录结构自由调整
    fallback: 'vue-style-loader'
  })
} else {
  return ['vue-style-loader'].concat(loaders)
}
2.如果在config -> index.js 中的 build 代码中的 productionSourceMap的值设为false ,打包后文件体积可以减少百分之八十
3.如果设置build文件夹下的webpack.prod.conf.js中HtmlWebpackPlugin插件配置参数添加hash: true,即会使打包生成的index.html中的js和css路径带有?+随机字符串,也就是版本控制
![[外链图片转存失败,源站可能有防盗链机制,建议将图片保存下来直接上传(img-Sc6Wy7tT-1578577182027)(img/1567767340397.png)]](https://i-blog.csdnimg.cn/blog_migrate/90352524c9e8c55ba4453d070c596ff0.png)
在bulid/webpack.base.conf.js
module: {
rules: [
...(config.dev.useEslint ? [createLintingRule()] : []),
点进config.dev.useEslint,发现在config/index.js里配置:
useEslint: true, // 改为false即可。
然后在重新执行:
cnpm run dev
prettier版本兼容问题
![[外链图片转存失败,源站可能有防盗链机制,建议将图片保存下来直接上传(img-Pqb9oRNP-1578577182029)(img/1567767302265.png)]](https://i-blog.csdnimg.cn/blog_migrate/4f374113207ccab52925b5724ec39d12.png)
-
解决方案
- 更新到14.2.4,虽然当前最新的是15.6.5版本,不过从v14迁移到v15会有不少变更,配置不好也会报错,具体参见https://vue-loader.vuejs.org/zh/migrating.html
npm install -D vue-loader@14.2.4
.路由懒加载
const Foo = resolve => require(['./Foo.vue'],resolve) //列子
import Home from '@/components/home'  //默认
//懒加载
const Home = resolve =>require(['@/components/home'],resolve)


 1万+
1万+

 被折叠的 条评论
为什么被折叠?
被折叠的 条评论
为什么被折叠?
 到【灌水乐园】发言


