


 本文详细介绍了Linux中的Shell,包括各种类型的Shell如Bourne Shell、Bash、Korn Shell和C Shell的特点。讲解了Bash的特性,如命令记忆、自动补全、别名设置、作业控制等。此外,还探讨了Shell脚本的创建、执行、注释规范以及变量类型。文章最后讨论了Bash中的命令和文件自动补齐、命令历史记忆、别名等功能,以及输入输出重定向、管道和生成随机数的方法。
一.概述
- 1.1shell概念
Shell又称命令解释器,它能识别用户输入的各种命令,并传递给操作系统。它的作用类似于Windows操作系统中的命令行,但是,Shell的功能远比命令行强大的多。在UNIX或者localhost中,Shell既是用户交互的界面,也是控制系统的脚本语言
- 1.2shell的种类
① Bourne Shell:标识为sh,该Shell由Steve Bourne在贝尔实验室时编写。在许多Unix系统中,该Shell是root用户的默认的Shell。
② Bourne-Again Shell:标识为bash,该Shell由Brian Fox在1987年编写,是绝大多数linux发行版的默认的Shell。
③ Korn Shell:标识为ksh,该Shell由贝尔实验室的David Korn在二十世纪八十年代早期编写。它完全向上兼容 Bourne Shell 并包含了C Shell 的很多特性。
④C Shell:标识为csh,该Shell由Bill Joy在BSD系统上开发。由于其语法类似于C语言,因此称为C Shell。
⑤CentOS liunx系统默认的shell为bash
bash shell:
(1)命令的记忆能力
history
(2)命令和文件补全
[tab]
(3)命令的别名设置
alias
(4)作业控制,前台,后台的控制
job fg bg
(5)程序脚本
(6)通配符
- 查看系统shell
[root@localhost ~]# cat /etc/shells
/bin/sh
/bin/bash
/sbin/nologin
/usr/bin/sh
/usr/bin/bash
/usr/sbin/nologin
/bin/tcsh
/bin/csh
- 查看系统默认shell
[root@localhost ~]# echo $SHELL
/bin/bash
[root@localhost ~]# grep root /etc/passwd
root:x:0:0:root:/root:/bin/bash
- 查看系统的bash版本
[root@localhost ~]# cat /etc/redhat-release
CentOS Linux release 7.3.1611 (Core) liunx环境版本
[root@localhost ~]# bash --version
GNU bash, 版本 4.2.46(1)-release (x86_64-redhat-linux-gnu) bash 版本
- 查看bash是否安全:
(两年老版本的bash被暴露出存在较为严重的安全信息,凭借漏洞,攻击者可能会接管计算机的整个系统。)
[root@localhost ~]# env x='(){:;}; echo be careful ' bash -c "echo this is a test"
this is a test
如果返回
be careful
this ia a test
则需要升级系统。
[root@localhost ~]# yum -y update bash
[root@localhost ~]# rpm -qa bash
bash-4.2.46-29.el7_4.x86_64
2 .shell脚本
当命令或程序语句不在命令行下执行,而是通过一个程序文件来执行,该程序文件即脚本。
常见的脚本语言以及其优缺点
php语言 : 优势在于小型网站系统的开发
perl语言 : 优势在于开发较为复杂的运维工具软件、web界面的管理工具和web业务的开发(例如:、跳板机、批量管理软件saltstack)等。python语言 :上层语言,类似于Java,go等编程语言(cmdb自动化运维平台,openstack)
shell语言 : 优势在于处理偏操作系统底层的业务,使用shell更符合liunx运维简单、易用、高效的原则。
2.1shell脚本的建立与执行
当shell脚本运行时,他首先查找系统环境变量ENV,该变量制定了环境文件(加载顺序通常是/etc/profile 、~/.bash_profile 、~/.bashrc 、/etc/bashrc等),在加载了以上环境变量文件后,shell就开始执行shell脚本中的内容。
1.5 shell脚本的运行
- 方法一:bash script-name\sh script-name: 脚本文件本身没有执行权限时使用,或者脚本文件开头没有指定解释器时使用。
[root@localhost ~]# cat >test.sh
echo 'this is a text.txt'
-rw-r--r--. 1 root root 26 11月 7 16:52 test.sh
[root@localhost ~]# sh test.sh
this is a text.txt
[root@localhost ~]# bash test.sh
this is a text.txt
- 方法二:path/script-name或者./script-name: 指定在当前目录下执行脚本,但是脚本需要有执行权限
[root@localhost ~]# ./test.sh
bash: ./test.sh: 权限不够
[root@localhost ~]# ~/test.sh
bash: /root/test.sh: 权限不够
- 方法三:source script-name或者. script-name : 通常是使用source或‘.’ 读入或加在指定的shell脚本文件,然后依次执行指定的shell脚本文件中的所有语句。这些语句将在当前父shell脚本进程中运行,因此使用source或者'.'可以将脚本中的变量值或者函数等的返回值传递到当前父shell脚本中使用。
[root@localhost ~]# vim test1.sh
[root@localhost ~]# cat test1.sh
userdir=`pwd`
[root@localhost ~]# sh test1.sh
[root@localhost ~]# echo $userdir[root@localhost ~]# source test1.sh
[root@localhost ~]# echo $userdir
/root
通过方法三执行的脚本,由于是在当前shell中执行的脚本,因此在脚本结束之后,脚本中的变量(函数)值在当前shell中依然存在,而方法一中执行脚本都会启动新的子shell执行,执行完后,退回到父shell。
- 方法四:sh <script-name或者 cat script-name | sh :
2.2 shell脚本注释
通过在代码中增加注释可以提高程序的可读性。传统的Shell只支持单行注释,其表示方法是一个井号“#”,从该符号开始一直到行尾都属于注释的内容。
#多行如何注释?
用户还可以通过其他的一些变通的方法来实现多行注释,其中,最简单的方法就是使用冒号“:”配合here document,语法如下:
:<<BLOCK
....注释内容
BLOCK
2.3 shell脚本规范
(1)开头指定脚本解释器
#!/bin/sh或#!/bin/bash
其他行#表示注释
名称见名知义 backup_mysql.sh,以sh结尾
(2)开头加版本版权等信息
#Date:创建日期
#Author:作者
#Mail:联系方式
#Function:功能
#Version:版本
(3)脚本中尽量不用中文注释
别吝啬添加注释,必要的注释方便自己别人理解脚本逻辑和功能;
尽量用英文注释,防止本机或切换系统环境后中文乱码的困扰;
单行注释,可以放在代码行的尾部或代码行的上部;
多行注释,用于注解复杂的功能说明,可以放在程序体中,也可以放在代码块的开始部分
代码修改时,对修改的内容
(4)多使用内部命令
内部命令可以在性能方面为你节省很多。
(5)没有必要使用cat命令
cat /etc/passwd | grep guru
使用以下方式即可
grep guru etc/passwd(6)代码缩进
(7)仔细阅读出错信息
有时候我们修改了某个错误并再次运行后,系统依旧会报错。然后我们再次修改,但系统再次报错。这可能会持续很长时间。但实际上,旧的错误可能已经被纠正,只是由于出现了其它一些新错误才导致系统再次报错
(8)脚本以.sh为扩展名
eg:script-name.sh
3 变量
[root@www network-scripts]# oldboy="i am a anliu"
[root@www network-scripts]# echo $oldboy
i am a anliu
3.1 变量类型
变量可分为环境变量和普通变量
- 环境变量(全剧变量):可以在创建他们的shell以及派生出来的任意子进程shell中使用,又可分为:自定义环境变量和bash内的环境变量。
- 普通变量(局部变量):只能在创建他们的shell函数或shell脚本中使用。
环境变量的名字均采用大写形式。
3.2 变量的导出
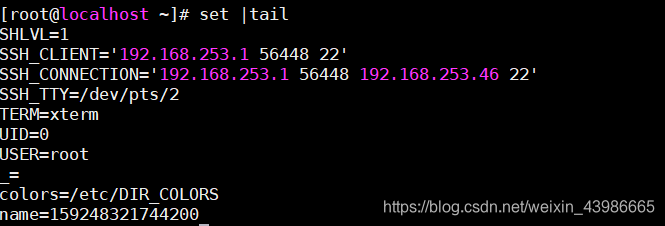
set:输出所有变量
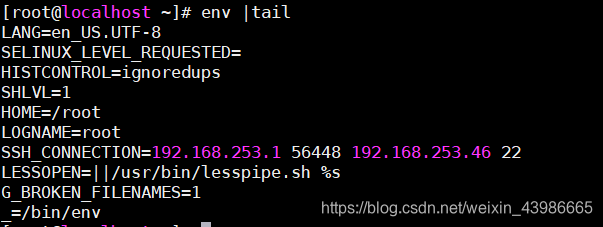
env:输出全剧变量
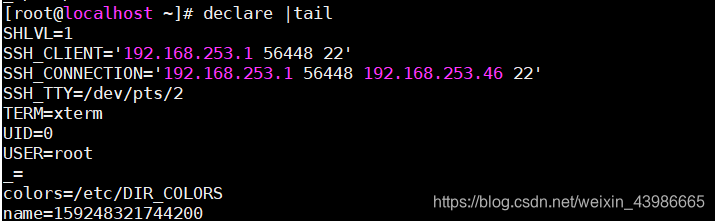
declare:输出所有变量、函数、和已经导出的变量
- [root@www network-scripts]# env |tail
- [root@www network-scripts]# declare |tail
- [root@www network-scripts]# set |tail
3.3 自定义全局变量
[root@localhost ~]# export NAME=anliu
[root@localhost ~]# env |grep NAME
HOSTNAME=localhost.localdomain
NAME=anliu
LOGNAME=root
[root@localhost ~]# AGE=18;export AGE
[root@localhost ~]# env |grep AGE
AGE=18
[root@localhost ~]# declare -x JOB=zuomeng
[root@localhost ~]# env |grep JOB
JOB=zuomeng
[root@www network-scripts]# cat /etc/profile
3.4自定义局部变量
[root@www network-scripts]# a=192.168.1.1
[root@www network-scripts]# b='192.168.1.1'
[root@www network-scripts]# c="192.168.1.1"
[root@www network-scripts]# echo "a=$a"
a=192.168.1.1
[root@www network-scripts]# echo "a=$b"
a=192.168.1.1
[root@www network-scripts]# echo "a=$c"
a=192.168.1.1
[root@www network-scripts]# a=192.168.1.1
[root@www network-scripts]# a=192.168.1.1-$a
[root@www network-scripts]# b='192.168.1.1-$a' 强引用
[root@www network-scripts]# c="192.168.1.1-$a" 弱引用
[root@www network-scripts]# echo "a=$a"
a=192.168.1.1-192.168.1.1
[root@www network-scripts]# echo "a=$b"
a=192.168.1.1-$a
[root@www network-scripts]# echo "a=$c"
a=192.168.1.1-192.168.1.1-192.168.1.1
[root@www network-scripts]# pwd
/etc/sysconfig/network-scripts
[root@www network-scripts]# CMD=$(pwd)
[root@www network-scripts]# echo $CMD
/etc/sysconfig/network-scripts
3.5 变量永久生效
[root@localhost ~]# cat /root/.bash_profile
[root@localhost ~]# cat /root/.bashrc
[root@localhost ~]# cat /etc/profile
[root@localhost ~]# cat /etc/bashrc
[root@localhost ~]# cat /etc/profile.d/
3.6 设置登录提示
方法一:
vim /etc/motd
方法二:
vim /etc/profile.d/anliu.sh
3.7 环境变量初始化与对应文件的生效顺序
系统运行shell的方式:
(1)通过系统用户登录后默认运行的shell
(2)非交互式运行Shell
(3)执行脚本运行非交互式shellPATH=/bin:/sbin:/usr/bin:/usr/sbin:/usr/local/bin:/user/local/sbin:~/bin
export APTH
4 .bash shell
1. 命令和文件自动补齐
2. 命令历史记忆功能 上下键、!number、!string、!$、!!、^R
3. 别名功能 alias、unalias cp、~username/.bashrc、\cp -rf /etc/hosts .
4. 快捷键 ^R、^D、^A、^E、^L、^U、^K、^S、^Q
5. 前后台作业控制 &、nohup、^C、^Z、bg %1、fg %1、kill %3、screen
6. 输入输出重定向 0,1,2 > >> 2> 2>> 2>&1 &> cat < /etc/hosts cat <<EOF cat >file1 <<EOF
[root@locaklhost ~]# ll /dev/std*
lrwxrwxrwx 1 root root 15 Sep 1 2015 /dev/stderr -> /proc/self/fd/2
lrwxrwxrwx 1 root root 15 Sep 1 2015 /dev/stdin -> /proc/self/fd/0
lrwxrwxrwx 1 root root 15 Sep 1 2015 /dev/stdout -> /proc/self/fd/1
7. 管道 | tee
ip addr |grep 'inet ' |grep eth0
ip addr |grep 'inet ' |tee test |grep eth0 覆盖
ip addr |grep 'inet ' |tee -a test |grep eth0 -a 追加df |grep '/$'
df |tee df.txt |grep '/$'
8.生成加密码:
Centos 6:
grub-md5-crypt
Centos 7:
grub2-mkpasswd-pbkdf2
grub-md5-crypt >> /etc/grub.conf
grub-md5-crypt |tee -a /etc/grub.conf
9.生成自然数
- 方法一:
[root@localhost ~]# echo {0..10}
0 1 2 3 4 5 6 7 8 9 10
[root@localhost ~]# echo {01..10}
01 02 03 04 05 06 07 08 09 10
[root@localhost ~]# for i in {1..5};do echo $i;done
[root@localhost ~]# cat 4.sh
END=5
for i in `eval echo {1..$END}`
do
echo $i
done
[root@localhost ~]# sh 4.sh
1
2
3
4
5
eval会对后面的cmdLine进行两遍扫描,如果在第一遍扫面后cmdLine是一个普通命令,则执行此命令;如果cmdLine中含有变量的间接引用,则保证简介引用的语义。
[root@localhost ~]# set 11 22 33 44
[root@localhost ~]# echo $4
44
[root@localhost ~]# echo $#
4
[root@localhost ~]# eval echo "\$$#"= "$4"
44
- 方法二:
seq命令用于产生从某个数到另外一个数之间的所有整数。
seq [选项]... 尾数
seq [选项]... 首数 尾数
seq [选项]... 首数 增量 尾数
-f, --format=格式 使用printf 样式的浮点格式
-s, --separator=字符串 使用指定字符串分隔数字(默认使用:\n)
-w, --equal-width 在列前添加0 使得宽度相同
% 后面指定数字的位数 默认是"%g",
[root@localhost ~]# seq -f "%2g" 8 12
8
9
10
11
12
[root@localhost ~]# seq -f "%03g" 8 12
008
009
010
011
012
[root@localhost ~]# seq -w 8 12
08
09
10
11
9
10
11
12[root@localhost ~]# seq -s" " -f"str%02g" 9 11
str09 str10 str11
[root@localhost ~]# seq -s"`echo -e "\t"`" 9 11
9 10 11
[root@localhost ~]# seq -s"`echo -e "\n"`" 9 11
19293949596979899910911
[root@localhost ~]# seq -s"=" 9 11
9=10=11
10.生成随机数
(1)通过内部系统变量($RANDOM)
- echo $RANDOM
要求:生成0-32767之间的整数随机数,若超过5位可以加个固定10位整数,然后进行求余。
生成400000~500000的随机数:
#!/bin/bash

function rand(){
    min=$1
    max=$(($2-$min+1))
    num=$(($RANDOM+1000000000)) #增加一个10位的数再求余
    echo $(($num%$max+$min))
}

rnd=$(rand 400000 500000)
echo $rnd
 exit 0
(2)使用awk的随机函数
[root@Gin scripts]# awk 'BEGIN{srand();print rand()*1000000}' ##可以加上if判断,779644
918520
[root@localhost ~]# awk 'BEGIN{srand();print rand()*100000}'
49615.8
(3)openssl rand产生随机数
openssl rand 用于产生指定长度个bytes的随机字符。-base64或-hex对随机字符串进行base64编码或用hex格式显示。
[root@Gin scripts]# openssl rand -base64 8
[root@Gin scripts]# openssl rand -base64 8|md5sum
[root@Gin scripts]# openssl rand -base64 8|md5sum|cut -c 1-8 #八位字母和数字的组合[root@Gin scripts]# openssl rand -base64 8|cksum|cut -c 1-8 #八位数字
(4)通过时间获得随机数(date)
date -s "20091112 18:30:50" &&hwclock --systohc 设置时间永久
[root@Gin scripts]# date +%s%N #生成19位数字
[root@Gin scripts]# date +%s%N|cut -c 6-13 #取八位数字
[root@Gin scripts]# date +%s%N|md5sum|head -c 8 #八位字母和数字的组合
#生成1~50的随机数:
function rand(){
    min=$1
    max=$(($2-$min+1))
    num=$(date +%s%N)
    echo $(($num%$max+$min))
}

rnd=$(rand 1 50)
echo $rnd

exit 0
(5)通过系统内唯一数据生成随机数(/dev/random及/dev/urandom)
- /dev/random存储系统当前运行的环境的实时数据,可以看作系统某时候的唯一值数据,提供优质随机数。
- /dev/urandom是非阻塞的随机数产生器,读取时不会产生阻塞,速度更快、安全性较差的随机数发生器。
[root@Gin scripts]# cat /dev/urandom|head -n 10|md5sum|head -c 10
[root@Gin scripts]# cat /dev/urandom|strings -n 8|head -n 1 #生成全字符的随机字符串
[root@Gin scripts]# cat /dev/urandom|strings -n 8|head -n 1 生成文件中第一行的前8个字符
[root@Gin scripts]# cat /dev/urandom|sed -e 's#[^a-zA-Z0-9]##g'|strings -n 8|head -n 1
#生成数字加字母的随机字符串,其中 strings -n设置字符串的字符数,head -n设置输出的行数。
[root@Gin scripts]# head -200 /dev/urandom|cksum|cut -d " " -f1
1182233652
#urandom的数据很多使用cat会比较慢,在此使用head读200行,cksum将读取文件内容生成唯一的表示整型数据,cut以” “分割然后得到分割的第一个字段数据
(6)读取Linux的uuid码
UUID码全称是通用唯一识别码 (Universally Unique Identifier, UUID),UUID格式是:包含32个16进制数字,以“-”连接号分为五段,形式为8-4-4-4-12的32个字符。
linux的uuid码也是有内核提供的,在/proc/sys/kernel/random/uuid这个文件内。cat/proc/sys/kernel/random/uuid每次获取到的数据都会不同。
- [root@Gin scripts]# cat /proc/sys/kernel/random/uuid |cksum|cut -f1 -d " " #获取不同的随机整数
- [root@Gin scripts]# cat /proc/sys/kernel/random/uuid |md5sum|cut -c 1-8 #数字加字母的随机数
使用linux uuid 生成100~500随机数:
function rand(){
    min=$1
    max=$(($2-$min+1))
    num=$(cat /proc/sys/kernel/random/uuid | cksum | awk -F ' ' '{print $1}')
    echo $(($num%$max+$min))
}

rnd=$(rand 100 500)
echo $rnd
exit 0
(7)从元素池中随机抽取取
pool=(a b c d e f g h i j k l m n o p q r s t 1 2 3 4 5 6 7 8 9 10)
num=${#pool[*]}
result=${pool[$((RANDOM%num))]}
用于生成一段特定长度的有数字和字母组成的字符串,字符串中元素来自自定义的池子。
#!/bin/bash
length=8
i=1

seq=(0 1 2 3 4 5 6 7 8 9 a b c d e f g h i j k l m n o p q r s t u v w x y z A B C D E F G H I J K L M N O P Q R S T U V W X Y Z)

num_seq=${#seq[@]}

while [ "$i" -le "$length" ]
do
 seqrand[$i]=${seq[$((RANDOM%num_seq))]}
 let "i=i+1"
done

echo "The random string is:"
for j in ${seqrand[@]}
do
 echo -n $j
done
echo
执行该脚本得到以下结果:
[root@Gin scripts]# sh seqrand.sh
The random string is:
aOvZcYOZ
[root@Gin scripts]# sh seqrand.sh
The random string is:
Eylv8JHr
[root@Gin scripts]# sh seqrand.sh
The random string is:
1sJd2GT8
11.生成随机UUID
[root@localhost ~]# cat /proc/sys/kernel/random/uuid
e052cb3f-94cb-4880-93d4-be8adc62f21c
[root@localhost ~]# cat /proc/sys/kernel/random/uuid
6a5b6d60-7299-47de-bb6e-9b7adb7129e2
12 生成随机MAC地址
[root@localhost ~]# echo "00:60:2F$(dd bs=1 count=3 if=/dev/random 2>/dev/null |hexdump -v -e '/1 ":%02X"')"
00:60:2F:09:82:C6
[root@localhost ~]# echo "00:60:2F$(dd bs=1 count=3 if=/dev/random 2>/dev/null |hexdump -v -e '/1 ":%02X"')"
00:60:2F:25:8A:C9
[root@localhost ~]# echo "$(hexdump -n3 -e'/3 "00:60:2F" 3/1 ":%02X"' /dev/random)"
00:60:2F:39:21:04
[root@localhost ~]# printf '00:60:2F:%02X:%02X:%02X\n' $[RANDOM%256] $[RANDOM%256] $[RANDOM%256]
00:60:2F:CF:FC:0C
[root@localhost ~]# echo 00:60:2f:`openssl rand -hex 3 | sed 's/\(..\)/\1:/g; s/.$//'`
00:60:2f:f9:96:61
[root@localhost ~]# echo 00:60:2f:`openssl rand -hex 3 | sed 's/\(..\)/\1:/g; s/.$//'`
13. 命令排序
; 不具备逻辑判断
cd; eject
&& || 具备逻辑判断
./configure && make && make install (命令返回值 echo $?)
mkdir /var/111/222/333 && echo ok
mkdir -p /var/111/222/333 && echo ok
ls /home/111/222/333/444 || mkdir -p /home/111/222/333/444
[ -d /home/111/222/333/444 ] || mkdir -p /home/111/222/333/444
ping -c1 172.16.8.4 &>/dev/null && echo up || echo down
============================================================
注意:
command & 后台执行
command &>/dev/null 混合重定向(标准输出1,错误输出2)
command1 && command2 命令排序,逻辑判断
============================================================
14. shell通配符(元字符)表示的不是本意
| * | 匹配任意多个字符 |
| ? | 匹配任意一个字符 |
| [] | 匹配括号中任意一个字符 |
| () | 在子shell中执行 |
| {} | 集合 |
- ls in* rm -rf * rm -rf *.pdf find / -iname "*-eth0"
- touch love loove live l7ve; ll l?ve
- [abc] [a-z] [0-9] [a-zA-Z0-9] [^a-zA-Z0-9] ll l[io]ve ll l[^a-z]ve
- (cd /boot;ls) (umask 077; touch file1000)
- touch file{1..9}
- # mkdir /home/{111,222} mkdir -pv /home/{333/{aaa,bbb},444}
# cp -rv /etc/sysconfig/network-scripts/ifcfg-eth0 /etc/sysconfig/network-scripts/ifcfg-eth0.old
# cp -rv /etc/sysconfig/network-scripts/{ifcfg-eth0,ifcfg-eth0.old}
# cp -rv /etc/sysconfig/network-scripts/ifcfg-eth0{,.old}
\ 转义符,让元字符回归本意
# echo *
# echo \*mkdir \\
echo -e "atb"
echo -e "a\tb"
echo -e "anb"
echo -e "a\nb"
PROMPT_COMMAND="history -a" 把历史命令同步到文件中
HISTTIMEFORMAT="%F %T" 历史命令打印出时间
csh 安装
env x='(){:;};echo be careful' bash -c "echo this is a test" 检查bash是否要更新
- 求字符串长度
- [root@localhost ~]# echo "$b" |awk '{print length($0)}'
- [root@localhost ~]# expr length "$b"
- [root@localhost ~]# echo $b |wc -L
- [root@localhost ~]# echo ${#b}


 被折叠的 条评论
为什么被折叠?
被折叠的 条评论
为什么被折叠?
 到【灌水乐园】发言


