


 本文详细介绍了SpringMVC的入门步骤,包括配置DispatcherServlet、编写配置文件、创建控制器以及对应的JSP页面。同时,深入讲解了SpringMVC中@RequestMapping、RequestParam、RequestBody、RequestHeader、CookieValue和ModelAttribute等注解的使用方法和作用,展示了如何处理请求参数和响应数据。
一、入门程序
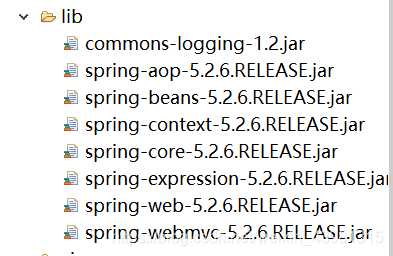
1.1、导入相应的jar包
1.2、配置web.xml,注册DispatcherServlet
<?xml version="1.0" encoding="UTF-8"?>
<web-app xmlns:xsi="http://www.w3.org/2001/XMLSchema-instance" xmlns="http://xmlns.jcp.org/xml/ns/javaee" xsi:schemaLocation="http://xmlns.jcp.org/xml/ns/javaee http://xmlns.jcp.org/xml/ns/javaee/web-app_4_0.xsd" version="4.0">

 <servlet>
		<servlet-name>springDispatcherServlet</servlet-name>
		<servlet-class>org.springframework.web.servlet.DispatcherServlet</servlet-class>
		<!-- 配置DispatcherServlet的初始化参数:SpringMvc配置文件的位置和名称 -->
		<init-param>
			<param-name>contextConfigLocation</param-name>
			<param-value>classpath:springmvc.xml</param-value>
		</init-param>
		<load-on-startup>1</load-on-startup>
	</servlet>
	<!-- Map all requests to the DispatcherServlet for handling -->
	<servlet-mapping>
		<servlet-name>springDispatcherServlet</servlet-name>
		<url-pattern>/</url-pattern>
	</servlet-mapping>
</web-app>
1.3、配置springmvc.xml(放置在类路径下)
<?xml version="1.0" encoding="UTF-8"?>
<beans xmlns="http://www.springframework.org/schema/beans"
       xmlns:xsi="http://www.w3.org/2001/XMLSchema-instance"
       xmlns:context="http://www.springframework.org/schema/context"
       xmlns:aop="http://www.springframework.org/schema/aop"
       xmlns:mvc="http://www.springframework.org/schema/mvc"
       xsi:schemaLocation="http://www.springframework.org/schema/beans http://www.springframework.org/schema/beans/spring-beans.xsd
       http://www.springframework.org/schema/context http://www.springframework.org/schema/context/spring-context.xsd
       http://www.springframework.org/schema/aop http://www.springframework.org/schema/aop/spring-aop.xsd
       http://www.springframework.org/schema/mvc http://www.springframework.org/schema/mvc/spring-mvc.xsd">

    <context:component-scan base-package="com.atguigu.spring.handler"></context:component-scan>


	<!-- 配置视图解析器 -->
	<bean class="org.springframework.web.servlet.view.InternalResourceViewResolver">
	<!-- 返回地址前缀 -->
      <property name="prefix" value="/"></property>
      <!-- 返回地址后缀 -->
      <property name="suffix" value=".jsp"></property>
	</bean>
</beans>
1.4、编写控制器并注解配置
import org.springframework.stereotype.Controller;
import org.springframework.web.bind.annotation.RequestMapping;

@Controller
public class HelloWorld {

	@RequestMapping("/helloworld")//注意此处需要添加‘/’
	public String hello() {
		System.out.println("hello world");
		return "success";
	}
}
1.5、编写相应的jsp页面
- index.jsp:
<%@ page language="java" contentType="text/html; charset=utf-8"
    pageEncoding="utf-8"%>
<!DOCTYPE html>
<html>
<head>
<meta charset="utf-8">
<title>Insert title here</title>
</head>
<body>
	<a href="helloworld">连接</a>
</body>
</html>
- success.jsp:
<%@ page language="java" contentType="text/html; charset=ISO-8859-1"
    pageEncoding="ISO-8859-1"%>
<!DOCTYPE html>
<html>
<head>
<meta charset="ISO-8859-1">
<title>Insert title here</title>
</head>
<body>
	<h3>success page</h3>
</body>
</html>
二、SpringMVC的注解解释
1、RequestMapping
-
1.1、作用:用于建立请求 URL 和处理请求方法之间的对应关系。
-
1.2、作用位置:
(1)类上方:请求 URL 的第一级访问目录。此处不写的话,就相当于应用的根目录。写的话需要以/开头。它出现的目的是为了使我们的 URL 可以按照模块化管理;
(2)方法上方:请求 URL 的第二级访问目录。 -
1.3、属性:
(1)value:用于指定请求的 URL。它和 path 属性的作用是一样的。
(2)method:用于指定请求的方式(RequestMethod.POST/RequestMethod.GET)。
(3)params:用于指定限制请求参数的条件。它支持简单的表达式。要求请求参数的 key 和 value 必须和配置的一模一样。
(4)headers:用于指定限制请求消息头的条件。
注意:以上四个属性只要出现 2 个或以上时,他们的关系是与的关系。
- 1.4、请求参数的绑定机制
(1)示例:在如下的示例当中可以看出,在SpringMVC表单的请求参数可以通过请求参数名称与控制器中的控制方法里的参数相同而达到将请求参数赋值到方法的参数的目的;
@RequestMapping("/helloworld")
	public String hello(String user,String age) {
		System.out.println("user:"+user+"\tage:"+age);
		return "success";
	}
<a href="user/helloworld?user=abc&age=10">连接</a>
(2)支持的数据类型
 - 基本类型参数:包括基本类型和 String 类型
 - POJO 类型参数:包括实体类,以及关联的实体类
 - 数组和集合类型参数:包括 List 结构和 Map 结构的集合(包括数组)
(3)使用要求
a)如果是基本类型或者 String 类型:要求我们的参数名称必须和控制器中方法的形参名称保持一致。(严格区分大小写);
b)如果是 POJO 类型,或者它的关联对象:要求表单中参数名称和 POJO 类的属性名称保持一致。并且控制器方法的参数类型是 POJO 类型。
c)如果是集合类型,有两种方式:
第一种:要求集合类型的请求参数必须在 POJO 中。在表单中请求参数名称要和 POJO 中集合属性名称相同。给 List 集合中的元素赋值,使用下标。给 Map 集合中的元素赋值,使用键值对。
第二种:接收的请求参数是 json 格式数据。需要借助一个注解实现。
pojo类型作为参数:注意getter和setter方法命名必须正确。
示例:
public class User{

	private String id;

	private String name;

	private String phone;

	private Address address;

	public String getId() {
		return id;
	}

	public void setId(String id) {
		this.id = id;
	}

	public String getName() {
		return name;
	}

	public void setName(String name) {
		this.name = name;
	}

	public String getPhone() {
		return phone;
	}

	public void setPhone(String phone) {
		this.phone = phone;
	}

	public Address getAddress() {
		return address;
	}

	public void setAddress(Address address) {
		this.address = address;
	}

	@Override
	public String toString() {
		return "User [id=" + id + ", name=" + name + ", phone=" + phone + ", address=" + address + "]";
	}
}
public class Address {
	private String province;
	private String city;
	public String getProvince() {
		return province;
	}
	public void setProvince(String province) {
		this.province = province;
	}
	public String getCity() {
		return city;
	}
	public void setCity(String city) {
		this.city = city;
	}
	@Override
	public String toString() {
		return "Address [province=" + province + ", city=" + city + "]";
	}

}
<form action="pojo/param" method="post">
		<input type="text" name="id"/>
		<input type="text" name="name"/>
		<input type="text" name="phone"/>
		<input type="text" name="address.province"/>
		<input type="text" name="address.city"/>
		<input type="submit" name="提交">
	</form>
集合类型表单写法示例:
<form action="account/updateAccount" method="post">
用户名称:<input type="text" name="username" ><br/>
用户密码:<input type="password" name="password" ><br/>
用户年龄:<input type="text" name="age" ><br/>
账户 1 名称:<input type="text" name="accounts[0].name" ><br/>
账户 1 金额:<input type="text" name="accounts[0].money" ><br/>
账户 2 名称:<input type="text" name="accounts[1].name" ><br/>
账户 2 金额:<input type="text" name="accounts[1].money" ><br/>
账户 3 名称:<input type="text" name="accountMap['one'].name" ><br/>
账户 3 金额:<input type="text" name="accountMap['one'].money" ><br/>
账户 4 名称:<input type="text" name="accountMap['two'].name" ><br/>
账户 4 金额:<input type="text" name="accountMap['two'].money" ><br/>
<input type="submit" value="保存">
</form>
2、RequestParam
- 2.1、作用:把请求中的指定名称的参数传递给控制器中的形参赋值
- 2.2、属性:
(1) value:请求参数中的名称
(2) required:请求参数中是否必须提供此参数,默认值是true,必须提供
//由于使用了RequestParam注解,使用了value值属性;
//所以此时请求参数名称可以与方法名称不同;
//required属性值为false,使得name即使为空,也可以正确传入。
	@RequestMapping("/param")
	public String hello(@RequestParam(value="name",required = false)String username) {
		System.out.println("username:"+username);
		return "success";
	}
3、RequestBody
3.1、作用: 用于获取请求体的内容(注意:get方法不可以)
3.2、属性: required:是否必须有请求体,默认值是true
@RequestMapping("/param")
	public String hello(@RequestBody() String body) {
		System.out.println("requestBody:"+body);
		return "success";
	}
4、RequestHeader
4.1、作用: 获取指定请求头的值
4.2、属性: value:请求头的名称
@RequestMapping("/param")
	public String hello(@RequestHeader(value="cookie") String cookie) {
		System.out.println("requestHeader:"+cookie);
		return "success";
	}
5、CookieValue
**4.1. 作用:**用于获取指定cookie的名称的值
4.2. 属性: value:cookie的名称
@RequestMapping("/param")
	public String hello(@CookieValue(value = "JSESSIONID")String cookie) {
		System.out.println("cookie:"+cookie);
		return "success";
	}
6. ModelAttribute注解
1. 作用:
(1)出现在方法上:表示当前方法会在控制器方法执行前线执行。
(2)出现在参数上:获取指定的数据给参数赋值。
2. 应用场景: 当提交表单数据不是完整的实体数据时,保证没有提交的字段使用数据库原来的数据。
(1)出现在方法上,并且方法具有返回值时,此时要注意返回的属性名称要与方法的参数名称相同才可以成功调用;
	@ModelAttribute
	public User setUser(){
		User user=new User();
		user.setId("1");
		user.setName("fang");
		user.setPhone("24354657");
		Address address=new Address();
		address.setCity("guangzhou");
		address.setProvince("guangdong");
		user.setAddress(address);
		return user;
	}

	@RequestMapping("/modelAttribute")
	public String ModelAttributetext(User user) {
		System.out.println(user);
		return "success";
	}
(2)出现在方法上,且方法不具有返回值时:此时该方法需要有Map集合的参数,使得要返回的值形成key=value,使得之后可以调用;
出现在参数上:正确使用key值即可调用到相应的value。
@ModelAttribute
	public void setUser(Map<String, User> map){
		User user=new User();
		user.setId("1");
		user.setName("fang");
		user.setPhone("24354657");
		Address address=new Address();
		address.setCity("guangzhou");
		address.setProvince("guangdong");
		user.setAddress(address);
		map.put("abc", user);
	}

	@RequestMapping("/modelAttribute")
	public String ModelAttributetext(@ModelAttribute("abc")User user) {
		System.out.println(user);
		return "success";
	}


 950
950

 被折叠的 条评论
为什么被折叠?
被折叠的 条评论
为什么被折叠?
 到【灌水乐园】发言


