


 本文介绍了如何在Spring Boot项目中整合Spring Security,包括添加依赖、配置WebSecurity、禁用CSRF和设置登录验证。通过示例演示了如何利用Spring Security实现声明式安全访问控制,以及自定义用户配置。
SpringSecurity
喜欢使用SpringSecurity框架的可以看过来,本篇文章涉及到springboot整合mybatis-plus有疑问可以点当前链接进入学习
介绍
Spring Security是为基于Spring的企业应用系统提供声明式的安全访问控制解决方案的安全框架。它提供了完整的安全性解决方案,可以在Web请求级别和方法调用级别处理身份认证和授权充分利用了Spring IOC,DI(控制反转Inversion of Control ,DI:Dependency Injection 依赖注入)和AOP(面向切面编程)功能,为应用系统提供声明式的安全访问控制功能。
使用
话不多说直接开整,首先pom文件夹中需要导入的依赖有
<dependencies>
    <dependency>
        <groupId>org.springframework.boot</groupId>
        <artifactId>spring-boot-starter-security</artifactId>
    </dependency>
    <dependency>
        <groupId>org.springframework.boot</groupId>
        <artifactId>spring-boot-starter-thymeleaf</artifactId>
    </dependency>
    <dependency>
        <groupId>org.springframework.boot</groupId>
        <artifactId>spring-boot-starter-web</artifactId>
    </dependency>

    <dependency>
        <groupId>org.thymeleaf.extras</groupId>
        <artifactId>thymeleaf-extras-springsecurity5</artifactId>
    </dependency>

    <dependency>
        <groupId>org.springframework.boot</groupId>
        <artifactId>spring-boot-devtools</artifactId>
        <scope>runtime</scope>
        <optional>true</optional>
    </dependency>
    <dependency>
        <groupId>org.springframework.boot</groupId>
        <artifactId>spring-boot-starter-test</artifactId>
        <scope>test</scope>
    </dependency>
    <dependency>
        <groupId>org.springframework.security</groupId>
        <artifactId>spring-security-test</artifactId>
        <scope>test</scope>
    </dependency>
    <dependency>
        <groupId>org.projectlombok</groupId>
        <artifactId>lombok</artifactId>
        <version>1.18.18</version>
    </dependency>
</dependencies>
SecurityConfig配置类编写
@EnableWebSecurity
@Configuration
public class SecurityConfig extends WebSecurityConfigurerAdapter {

    @Override
    protected void configure(HttpSecurity http) throws Exception {
        // 禁用csrf
        http.csrf().disable();
        // 所有资源必须登录后访问
        http.authorizeRequests()
                .anyRequest().authenticated()
                .and()
                .formLogin();
    }

    @Override
    public void configure(WebSecurity web) {
        // 主要用来释放静态资源
    }
}
等依赖导入完成项目构建完成之后就可以去启动项目,访问项目地址会出现一下的登录页面,这个页面是SpringSecurity内部自定义的登录页面,默认账号是user密码在项目启动时会打印在控制台上
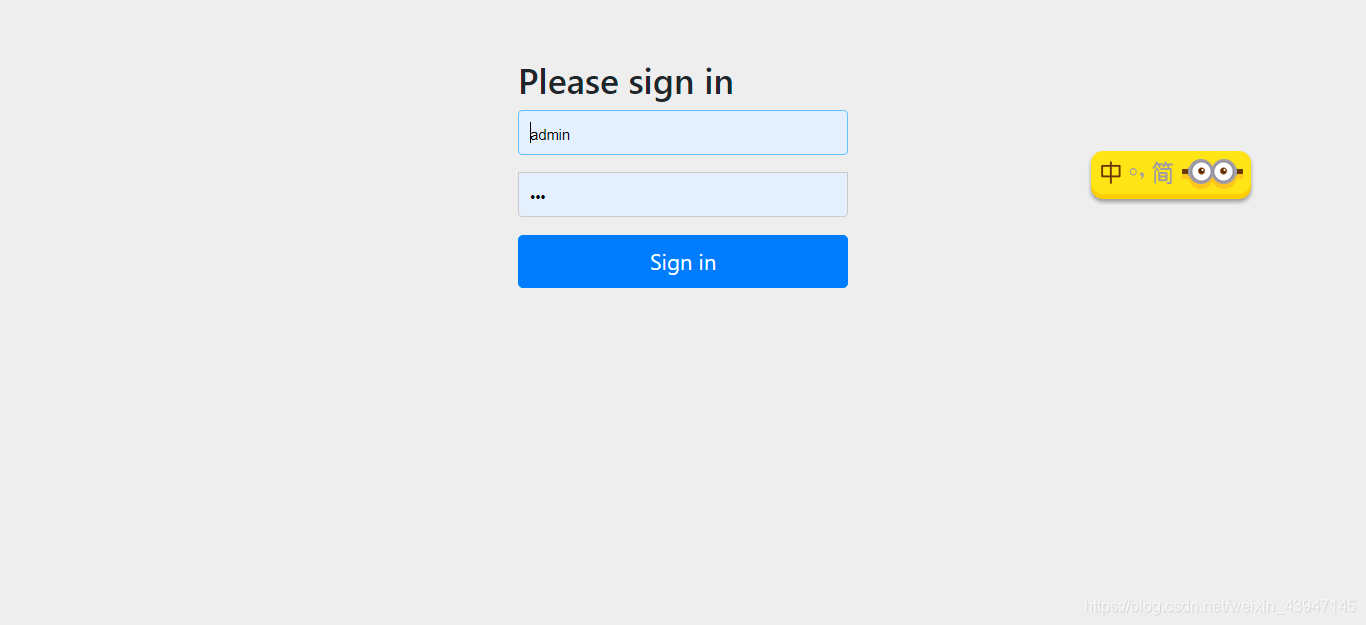

这样就可以简单的使用SpringSecurity的功能,也可以自定义用户名和密码在yaml文件里面配置
spring:
  security:
    user:
      name: XXXX
      password: XXXXX
      roles: admin


 277
277

 被折叠的 条评论
为什么被折叠?
被折叠的 条评论
为什么被折叠?
 到【灌水乐园】发言


