


 本文详细介绍了如何使用Vue.js的el-upload组件实现文件上传功能,包括限制文件类型、大小,处理上传前、上传后的行为。同时,讲解了文件下载的两种方式:通过el-upload组件和在表格中展示的文件链接。提供了完整的代码示例和注意事项,帮助开发者理解文件操作的实现过程。
参考代码会放到最后
1.上传
用el-upload组件上传文件
<el-upload
        class="upload-file"
        action="xxxxxx/xxxxxxx/xxxxxxxx"
        :headers="xxxxxx"
        :before-upload="beforeUploadFile"
        :on-preview="handlePreview"
        :on-remove="handleRemove"
        :before-remove="beforeRemove"
        multiple
        :limit="1"
        :on-exceed="handleExceed"
        :on-success="uploadSuccess"
        :file-list="fileList"
        :data="uploadParams">
    <el-button size="small" type="primary">点击上传</el-button>
    <div slot="tip" class="el-upload__tip">请上传图片、表格或文档,大小不得超过5M</div>
</el-upload>
- action中填写文件上传的接口地址,如果上传需要携带header信息,在:headers="xxxxxx"中填写。
- :file-list是已上传的文件列表。
- uploadParams是我自己定义的参数,因为我的文件上传接口action="xxx"需要一个额外的参数,如果你的文件接口不需要参数, :data里就不用写了,空引号就行。
- :limit 限制文件个数。
参数定义:
fileList: [],
confirmForm: {
     fileUrl:'',  // 记录文件上传成功后的下载连接
     fileName:'', // 记录文件的名字
 },
uploadParams:{
     fileName:'' // 我的上传接口需要一个fileName的入参,如果还需要其他入参,可以一并加到uploadParams对象里
 },
- 注意:this.confirmForm、this.uploadParams是我自己额外定义的参数,因为我的功能只需要上传一个文件就够了,并且我的文件上传接口会返回给我两个参数“fileUrl”和“fileName”,所以我直接用自定义的参数记录下文件的信息。这一块需要各位根据自己业务需要修改。
- 如果需要多个文件,要么直接用已经定义好的:file-list=“fileList”,从fileList中去取文件列表。
相关方法:
			//文件上传之前
             beforeUploadFile(file) {
                const size = file.size / 1024/ 1024
                if (size > 5) {
                    this.$message({
                    message: '文件大小不得大于5M',
                    duration: 2000,
                    showClose: true,
                    type: 'warning'
                  });
                  return false;
                }

               var FileExt = file.name.replace(/.+\./, "");
               if (["xls", "xlsx","pdf","jpg","jpeg","png","doc","docx","txt"].indexOf(FileExt.toLowerCase()) === -1) {
                  this.$message({
                    message: '上传文件只能是图片、表格或文档',
                    duration: 2000,
                    showClose: true,
                    type: 'warning'
                  });
                  return false;
               }
                this.uploadParams.fileName = file.name
             },
            // 文件移除之后
            handleRemove(file, fileList) {
                this.confirmForm.fileName = null
                this.confirmForm.fileUrl = null
            },

            // 文件超过限制
            handleExceed(files, fileList) {
                this.$message.warning(`当前限制选择 1 个文件`);
            },
            // 文件移除之前
            beforeRemove(file, fileList) {
                if(file && file.status === 'success'){
                    return this.$confirm(`确定移除 ${ file.name }?`);
                }
            },
            // 文件上传成功
            uploadSuccess(response, file, fileList) {
                if(response.code != 0) {
                    return this.$message.error(response);
                }else {
                    //上传成功之后 文件名和地址存入参数
                    this.confirmForm.fileName = response.data.name;
                    this.confirmForm.fileUrl = response.data.path;
					file.url = response.data.path; // 上传接口返回的文件下载地址回写到file里去
                    return this.$message.success(response);
                }
            },
			// 预览下载文件
            handlePreview(file) {
                var a = document.createElement('a');
                var event = new MouseEvent('click');
                a.download = file.name;
                a.href = file.url;
                a.dispatchEvent(event);
            },
以上的方法是用来控制文件上传前和上传后的行为。
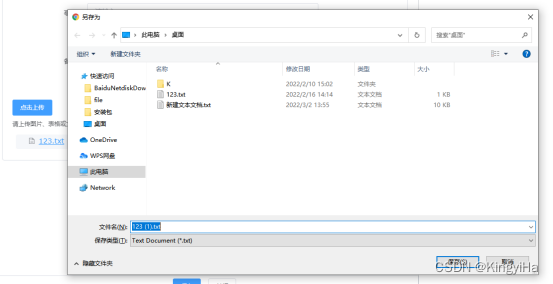
截图:


2.下载
2.1 通过el-upload组件下载
- 下载主要是利用a标签。
上面所写的handlePreview(file)是其中一种下载方式,document.createElement(‘a’);,先定义一个a标签,然后用啊标签的下载功能。
至于file参数中的name和url属性来源于fileList。uploadSuccess方法中,文件成功上传后我会得到这个文件的下载路径,并填写到file里面去。
uploadSuccess方法中的response具体会返回什么参数,请根据自己的业务需要修改。
文件上传后,fileList就会变成 [{name: ‘文件1’, url: ‘下载路径1’}] 这种数据格式,name是自动填写的,url我是在uploadSuccess方法中赋值的,否则无法获取下载地址。
如果有多个文件就是这种格式:
[{name: 文件名1’, url: ‘文件路径1’}, {name: 文件名2’, url: ‘文件路径2’}]
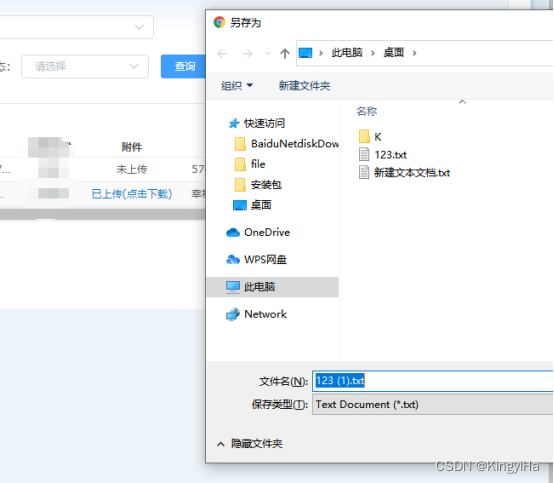
截图:
点击已经上传的文件“123.txt”,跳出下载框
2.2 在页面展示的列表中下载
如果你的文件下载地址已经写入数据库,并且在页面上通过< el-table >展示出来
如下图:所有数据从后端获取,已经展示到列表中了,再点击下载,同样利用a标签下载

<el-table-column label="附件" prop="fileUrl" width="120">
    <template slot-scope="scope">
        <span v-if="scope.row.fileUrl === null || scope.row.fileUrl === ''">未上传</span>
        <span v-if="scope.row.fileUrl != null && scope.row.fileUrl !== ''">
            <a :href="scope.row.fileUrl" :download="scope.row.fileName">已上传(点击下载)</a>
        </span>
    </template>
</el-table-column>
scope.row.fileUrl和scope.row.fileNam中存放着从后台获取到文件名字和路径。
点击“已上传(点击下载)”,就能下载了。
如图:
3.参考代码
<!DOCTYPE html PUBliC "-//W3C//Dtd html 4.01 transitional//EN" "http://www.w3c.org/tr/1999/REC-html401-19991224/loose.dtd">
<html lang=zh-hans dir=ltr xml:lang="zh-hans" xmlns="http://www.w3.org/1999/xhtml">
<head>
    <meta charset="utf-8">
    <meta name="hello">
    <title>hello</title>
    <script src="D:\vue.js"></script>
</head>
<body>

<div id=wrapper>
<el-upload
        class="upload-file"
        action="xxxxxx/xxxxxxx/xxxxxxxx"
        :headers="xxxxxx"
        :before-upload="beforeUploadFile"
        :on-preview="handlePreview"
        :on-remove="handleRemove"
        :before-remove="beforeRemove"
        multiple
        :limit="1"
        :on-exceed="handleExceed"
        :on-success="uploadSuccess"
        :file-list="fileList"
        :data="uploadParams">
    <el-button size="small" type="primary">点击上传</el-button>
    <div slot="tip" class="el-upload__tip">请上传图片、表格或文档,大小不得超过5M</div>
</el-upload>
</div>
<!-- 引入样式 -->
<link rel="stylesheet" href="https://unpkg.com/element-ui/lib/theme-chalk/index.css">
<!-- 引入组件库 -->
<script src="https://unpkg.com/element-ui/lib/index.js"></script>
<script>
    const vue = new Vue({
        el: '#wrapper',
        data() {
            return {
                fileList: [],
				// confirmForm 如果你的上传功能用不着这个对象  可以删了
				confirmForm: {
                    fileUrl:'',  // 记录文件上传成功后的下载地址
                    fileName:'', // 记录文件的名字

                },
				uploadParams:{
                    fileName:'' // 我的文件上传接口需要一个fileName的入参
                },
            }
        },
        created() {
        },
        methods: {
            //文件上传之前
             beforeUploadFile(file) {
                const size = file.size / 1024/ 1024
                if (size > 5) {
                    this.$message({
                    message: '文件大小不得大于5M',
                    duration: 2000,
                    showClose: true,
                    type: 'warning'
                  });
                  return false;
                }

               var FileExt = file.name.replace(/.+\./, "");
               if (["xls", "xlsx","pdf","jpg","jpeg","png","doc","docx","txt"].indexOf(FileExt.toLowerCase()) === -1) {
                  this.$message({
                    message: '上传文件只能是图片、表格或文档',
                    duration: 2000,
                    showClose: true,
                    type: 'warning'
                  });
                  return false;
               }
                this.uploadParams.fileName = file.name
             },
            // 文件移除之后
            handleRemove(file, fileList) {
                this.confirmForm.fileName = null
                this.confirmForm.fileUrl = null
            },

            // 文件超过限制
            handleExceed(files, fileList) {
                this.$message.warning(`当前限制选择 1 个文件`);
            },
            // 文件移除之前
            beforeRemove(file, fileList) {
                if(file && file.status === 'success'){
                    return this.$confirm(`确定移除 ${ file.name }?`);
                }
            },
            // 文件上传成功
            uploadSuccess(response, file, fileList) {
                if(response.code != 0) {
                    return this.$message.error(response);
                }else {
                    //上传成功之后 文件名和地址存入参数
                    this.confirmForm.fileName = response.data.name;
                    this.confirmForm.fileUrl = response.data.path;
					file.url = response.data.path; // 我的上传接口会返回文件的下载地址,回写到file里去
                    return this.$message.success(response);
                }
            },
			// 预览下载文件
            handlePreview(file) {
                var a = document.createElement('a');
                var event = new MouseEvent('click');
                a.download = file.name;
                a.href = file.url;
                a.dispatchEvent(event);
            },
        }
    });

</script>
<style>
.wrapper {
            display: grid;
            grid-template-columns: repeat(5, 1fr);
        }
.form-header{
    text-align: center;
}
/**
 * 抽屉表单居中
 */
.form-center {
    display: flex;
    display: -webkit-flex;
    justify-content: center;
    align-items: center;
}
/**
 * 抽屉表单页脚
 */
.form-foot {
    z-index: 100;
    border: 1px solid #DCDFE6;
    background-color: white;
    width: 100%;
    height: 40px;
    position: absolute;
    bottom: 0;
    padding: 5px;
    text-align: center;
}

</style>
</body>
</html>


 2048
2048

 被折叠的 条评论
为什么被折叠?
被折叠的 条评论
为什么被折叠?
 到【灌水乐园】发言


