


部署Openstack-train版
环境准备
192.168.201.136 controller
192.168.201.137 compute
所有节点关闭Selinux及firewalld
sed -i 's/SELINUX=enforcing/SELINUX=disabled/g' /etc/selinux/config; systemctl stop firewalld; systemctl disable firewalld
配置主机名及hosts文件
hostnamectl set-hostname controller   #控制节点
hostnamectl set-hostname compute      #计算节点
[root@controller ~]# cat /etc/hosts
127.0.0.1   localhost localhost.localdomain localhost4 localhost4.localdomain4
::1         localhost localhost.localdomain localhost6 localhost6.localdomain6
192.168.201.137 compute
192.168.201.136 controller
配置时间服务器(所有节点执行以下操作)
yum -y install chrony
控制节点:vim /etc/chrony.conf
server ntp3.aliyun.com iburst
allow all
local stratum 10

计算节点 vim /etc/chrony.conf
server controller iburs
设置时区:timedatectl set-timezone Asia/Shanghai
重新启动chronyd服务并设为开机自启

[root@compute ~]# systemctl restart chronyd.service;systemctl enable chronyd.service
[root@compute ~]chronyc sources -v
所有节点安装openstack安装包
yum install -y centos-release-openstack-train
yum install python-openstackclient openstack-selinux -y
控制节点环境配置
配置安装数据库
[root@controller ~]# yum install -y mariadb mariadb-server python2-PyMySQL
配置数据库在/etc/my.cnf.d/文件夹下创建openstack.cnf文件,配置完成后启动数据库并设为开机自启
[root@controller ~]# vim /etc/my.cnf.d/openstack.cnf
[mysqld]
bind-address = 192.168.201.136

default-storage-engine = innodb
innodb_file_per_table = on
max_connections = 4096
collation-server = utf8_general_ci
character-set-server = utf8
[root@controller ~]# systemctl start mariadb.service;systemctl enable mariadb.service
初始化数据库 (root密码为openstack)
[root@controller ~]# mysql_secure_installation
NOTE: RUNNING ALL PARTS OF THIS SCRIPT IS RECOMMENDED FOR ALL MariaDB
      SERVERS IN PRODUCTION USE!  PLEASE READ EACH STEP CAREFULLY!

In order to log into MariaDB to secure it, we'll need the current
password for the root user.  If you've just installed MariaDB, and
you haven't set the root password yet, the password will be blank,
so you should just press enter here.

Enter current password for root (enter for none):      #回车
OK, successfully used password, moving on...

Setting the root password ensures that nobody can log into the MariaDB
root user without the proper authorisation.

Set root password? [Y/n] y                    #设置root密码
New password:
Re-enter new password:
Password updated successfully!
Reloading privilege tables..
 ... Success!


By default, a MariaDB installation has an anonymous user, allowing anyone
to log into MariaDB without having to have a user account created for
them.  This is intended only for testing, and to make the installation
go a bit smoother.  You should remove them before moving into a
production environment.

Remove anonymous users? [Y/n] y                         #删除匿名用户
 ... Success!

Normally, root should only be allowed to connect from 'localhost'.  This
ensures that someone cannot guess at the root password from the network.

Disallow root login remotely? [Y/n] y                 #禁止root用户远程登录
 ... Success!

By default, MariaDB comes with a database named 'test' that anyone can
access.  This is also intended only for testing, and should be removed
before moving into a production environment.

Remove test database and access to it? [Y/n] y             #删除test数据库
 - Dropping test database...
 ... Success!
 - Removing privileges on test database...
 ... Success!

Reloading the privilege tables will ensure that all changes made so far
will take effect immediately.

Reload privilege tables now? [Y/n] y                #刷新权限表
 ... Success!

Cleaning up...

All done!  If you've completed all of the above steps, your MariaDB
installation should now be secure.

Thanks for using MariaDB!
安装 RabbitMQ消息队列
[root@controller ~]# yum install -y rabbitmq-server
启动消息队列服务并将其配置为开机系统启动
[root@controller ~]# systemctl start rabbitmq-server.service
[root@controller ~]# systemctl enable rabbitmq-server.service
添加openstack用户
[root@controller ~]# rabbitmqctl add_user openstack openstack
赋予openstack用户读写权限
[root@controller ~]# rabbitmqctl set_permissions openstack ".*" ".*" ".*"
配置RabbitMQ
[root@controller ~]# rabbitmq-plugins list
[root@controller ~]# rabbitmq-plugins enable rabbitmq_management
[root@controller ~]# netstat -tlnp |grep 15672
tcp        0      0 0.0.0.0:15672           0.0.0.0:*               LISTEN      17098/beam.smp
安装配置Memcached,启动并设为开机自启动
[root@controller ~]# yum install -y memcached python-memcached
[root@controller ~]# vim /etc/sysconfig/memcached
[root@controller ~]# cat /etc/sysconfig/memcached
PORT="11211"
USER="memcached"
MAXCONN="1024"
CACHESIZE="1024"
OPTIONS="-l 127.0.0.1,::1,controller"
[root@controller ~]# systemctl restart memcached
[root@controller ~]# systemctl enable memcached
部署Keystone认证服务
创建keystone数据库并授权
[root@controller ~]# mysql -u root -p
Enter password:
Welcome to the MariaDB monitor.  Commands end with ; or \g.
Your MariaDB connection id is 10
Server version: 10.1.20-MariaDB MariaDB Server

Copyright (c) 2000, 2016, Oracle, MariaDB Corporation Ab and others.

Type 'help;' or '\h' for help. Type '\c' to clear the current input statement.

MariaDB [(none)]> create database keystone;
Query OK, 1 row affected (0.00 sec)

MariaDB [(none)]> grant all privileges on keystone.* to 'keystone'@'localhost' identified by 'keystone';
Query OK, 0 rows affected (0.00 sec)

MariaDB [(none)]> grant all privileges on keystone.* to 'keystone'@'%' identified by 'keystone';
Query OK, 0 rows affected (0.00 sec)

MariaDB [(none)]> \q
Bye
安装Keystone
[root@controller ~]# yum install -y openstack-keystone httpd mod_wsgi
编辑文件/etc/keystone/keystone.conf,进行以下配置
[root@controller ~]# vim /etc/keystone/keystone.conf
[database]
connection = mysql+pymysql://keystone:keystone@192.168.201.136/keystone
[token]
改:#provider = fernet
为:provider = fernet
初始化身份认证服务的数据库
[root@controller ~]# su -s /bin/sh -c "keystone-manage db_sync" keystone
查看是否初始化成功 (查询到创建了相关的表即为成功)
[root@controller ~]# mysql -h 192.168.201.136 -ukeystone -pkeystone -e "use keystone;show tables;"
初始化Fernet keys,创建证书
[root@controller ~]# keystone-manage fernet_setup --keystone-user keystone --keystone-group keystone
[root@controller ~]# keystone-manage credential_setup --keystone-user keystone --keystone-group keystone
配置引导身份服务
[root@controller ~]# keystone-manage bootstrap --bootstrap-password admin \
    --bootstrap-admin-url http://192.168.201.136:5000/v3/ \
    --bootstrap-internal-url http://192.168.201.136:5000/v3/ \
    --bootstrap-public-url http://192.168.201.136:5000/v3/ \
    --bootstrap-region-id RegionOne
配置Apache服务器
[root@controller ~]# vim /etc/httpd/conf/httpd.conf
ServerName 192.168.201.136:80
[root@controller ~]# ln -s /usr/share/keystone/wsgi-keystone.conf /etc/httpd/conf.d/
启动Apache并设为开机自启
[root@controller ~]# systemctl start httpd.service
[root@controller ~]# systemctl enable httpd.service
通过设置适当的环境变量来配置管理帐户
export OS_USERNAME=admin
export OS_PASSWORD=admin
export OS_PROJECT_NAME=admin
export OS_USER_DOMAIN_NAME=Default
export OS_PROJECT_DOMAIN_NAME=Default
export OS_AUTH_URL=http://192.168.201.136:5000/v3
export OS_IDENTITY_API_VERSION=3
创建域 (密码myuser)
[root@controller ~]# openstack project create --domain default \
     --description "Service Project" service
+-------------+----------------------------------+
| Field       | Value                            |
+-------------+----------------------------------+
| description | Service Project                  |
| domain_id   | default                          |
| enabled     | True                             |
| id          | 0627fc5727cc43be973d342952dd9e42 |
| is_domain   | False                            |
| name        | service                          |
| options     | {}                               |
| parent_id   | default                          |
| tags        | []                               |
+-------------+----------------------------------+
[root@controller ~]# openstack project create --domain default \
     --description "Demo Project" myproject
+-------------+----------------------------------+
| Field       | Value                            |
+-------------+----------------------------------+
| description | Demo Project                     |
| domain_id   | default                          |
| enabled     | True                             |
| id          | af79ebc538ed473687434bb0e49dbcca |
| is_domain   | False                            |
| name        | myproject                        |
| options     | {}                               |
| parent_id   | default                          |
| tags        | []                               |
+-------------+----------------------------------+
[root@controller ~]# openstack user create --domain default \
     --password-prompt myuser
User Password:
Repeat User Password:
+---------------------+----------------------------------+
| Field               | Value                            |
+---------------------+----------------------------------+
| domain_id           | default                          |
| enabled             | True                             |
| id                  | 1ae5705340b64b4ba355c3b27834df32 |
| name                | myuser                           |
| options             | {}                               |
| password_expires_at | None                             |
+---------------------+----------------------------------+
创建 myrole 角色
[root@controller ~]# openstack role create myrole
+-------------+----------------------------------+
| Field       | Value                            |
+-------------+----------------------------------+
| description | None                             |
| domain_id   | None                             |
| id          | a70774137bd940339f8f735700d826b9 |
| name        | myrole                           |
| options     | {}                               |
+-------------+----------------------------------+
将myuser用户添加到myproject项目
[root@controller ~]# openstack role add --project myproject --user myuser myrole
验证操作
[root@controller ~]# unset OS_AUTH_URL OS_PASSWORD
作为 admin 用户,请求认证令牌 ,密码输入admin
openstack --os-auth-url http://192.168.201.136:5000/v3 \
   --os-project-domain-name Default --os-user-domain-name Default \
   --os-project-name admin --os-username admin token issue
作为myuser用户,请求认证令牌(密码myuser)
openstack --os-auth-url http://192.168.201.136:5000/v3 \
   --os-project-domain-name Default --os-user-domain-name Default \
   --os-project-name myproject --os-username myuser token issue
创建 OpenStack 客户端环境脚本
创建admin用户的脚本
[root@controller ~]# vim admin-openstack.sh
export OS_PROJECT_DOMAIN_NAME=default
export OS_USER_DOMAIN_NAME=default
export OS_PROJECT_NAME=admin
export OS_USERNAME=admin
export OS_PASSWORD=admin
export OS_AUTH_URL=http://192.168.201.136:5000/v3
export OS_IDENTITY_API_VERSION=3
export OS_IMAGE_API_VERSION=2
测试使用脚本获取token
[root@controller ~]# source admin-openstack.sh
[root@controller ~]# openstack token issue
+------------+-----------------------------------------------------------------------------------------------------------------------------------------------------------------------------------------+
| Field      | Value                                                                                                                                                                                   |
+------------+-----------------------------------------------------------------------------------------------------------------------------------------------------------------------------------------+
| expires    | 2021-11-10T06:57:39+0000                                                                                                                                                                |
| id         | gAAAAABhi19TzJuCFXkHwiOhuUXq3FP1cFcyTXzuHxQwk6P33kQziq6kGEbGEZMO43MQUALSEKNfWeqcRAfTyq3oVMsJhV0EOyT6nt1pmmYuSeSmMngQioexkQzBWZSBJdLTXEqkQxHfupaJ6-9_cFuIivYML4jW7-D9Im-PFQcYRmNZUhD2Q2Q |
| project_id | 8095c8f209c442839b79cdcd1434f0be                                                                                                                                                        |
| user_id    | 124e0938bfa94766ae8b9da0ea03fa95                                                                                                                                                        |
+------------+-----------------------------------------------------------------------------------------------------------------------------------------------------------------------------------------+
创建myuser用户脚本
[root@controller ~]# vim myuser-openstack.sh
export OS_PROJECT_DOMAIN_NAME=default
export OS_USER_DOMAIN_NAME=default
export OS_PROJECT_NAME=myproject
export OS_USERNAME=myuser
export OS_PASSWORD=myuser
export OS_AUTH_URL=http://192.168.201.136:5000/v3
export OS_IDENTITY_API_VERSION=3
export OS_IMAGE_API_VERSION=2
测试使用脚本获取token
[root@controller ~]# source myuser-openstack.sh
[root@controller ~]# openstack token issue
+------------+-----------------------------------------------------------------------------------------------------------------------------------------------------------------------------------------+
| Field      | Value                                                                                                                                                                                   |
+------------+-----------------------------------------------------------------------------------------------------------------------------------------------------------------------------------------+
| expires    | 2021-11-10T06:58:33+0000                                                                                                                                                                |
| id         | gAAAAABhi1-JO9wc3ExIaGioOa2Hoq1H4rI3UgpKuZ0npfNIntKN2UB3DNN63MDdwOacKz54VQcBp9-KehNkukd-LLJI1Qv1akWkXqUHWfev9yzY9isvrXTG4sy5Y82vQwbvoD3HAdXQXzzJL2VAhHGfiPQxiVCVueijBqM-AYus5f6u_kkgBbg |
| project_id | af79ebc538ed473687434bb0e49dbcca                                                                                                                                                        |
| user_id    | 1ae5705340b64b4ba355c3b27834df32                                                                                                                                                        |
+------------+-----------------------------------------------------------------------------------------------------------------------------------------------------------------------------------------+
部署glance镜像服务
创建数据库
[root@controller ~]# mysql -uroot -p
Enter password:
Welcome to the MariaDB monitor.  Commands end with ; or \g.
Your MariaDB connection id is 19
Server version: 10.1.20-MariaDB MariaDB Server

Copyright (c) 2000, 2016, Oracle, MariaDB Corporation Ab and others.

Type 'help;' or '\h' for help. Type '\c' to clear the current input statement.

MariaDB [(none)]> create database glance;
Query OK, 1 row affected (0.01 sec)

MariaDB [(none)]> grant all privileges on glance.* to 'glance'@'localhost' identified by 'glance';
Query OK, 0 rows affected (0.00 sec)

MariaDB [(none)]> grant all privileges on glance.* to 'glance'@'%' identified by 'glance';
Query OK, 0 rows affected (0.00 sec)

MariaDB [(none)]> \q
Bye
创建glance用户,密码glance
[root@controller ~]# source admin-openstack.sh
[root@controller ~]# openstack user create --domain default --password-prompt glance
User Password:
Repeat User Password:
+---------------------+----------------------------------+
| Field               | Value                            |
+---------------------+----------------------------------+
| domain_id           | default                          |
| enabled             | True                             |
| id                  | 224964f0ff384063a99c5585ed6b06a5 |
| name                | glance                           |
| options             | {}                               |
| password_expires_at | None                             |
+---------------------+----------------------------------+
将admin用户添加到glance项目
[root@controller ~]# openstack role add --project service --user glance admin
创建服务实体
[root@controller ~]# openstack service create --name glance \
     --description "OpenStack Image" image
+-------------+----------------------------------+
| Field       | Value                            |
+-------------+----------------------------------+
| description | OpenStack Image                  |
| enabled     | True                             |
| id          | aa12699e8fd348e78aa43b37a3804ef6 |
| name        | glance                           |
| type        | image                            |
+-------------+----------------------------------+
创建镜像服务的 API 端点
[root@controller ~]# openstack endpoint create --region RegionOne image public http://192.168.201.136:9292
+--------------+----------------------------------+
| Field        | Value                            |
+--------------+----------------------------------+
| enabled      | True                             |
| id           | af809c477dff4835b79b8e3d33e35c85 |
| interface    | public                           |
| region       | RegionOne                        |
| region_id    | RegionOne                        |
| service_id   | aa12699e8fd348e78aa43b37a3804ef6 |
| service_name | glance                           |
| service_type | image                            |
| url          | http://192.168.201.136:9292      |
+--------------+----------------------------------+
[root@controller ~]# openstack endpoint create --region RegionOne image internal http://192.168.201.136:9292
+--------------+----------------------------------+
| Field        | Value                            |
+--------------+----------------------------------+
| enabled      | True                             |
| id           | 4c206587e61c4a3286d1363fcb07eb15 |
| interface    | internal                         |
| region       | RegionOne                        |
| region_id    | RegionOne                        |
| service_id   | aa12699e8fd348e78aa43b37a3804ef6 |
| service_name | glance                           |
| service_type | image                            |
| url          | http://192.168.201.136:9292      |
+--------------+----------------------------------+
[root@controller ~]# openstack endpoint create --region RegionOne image admin http://192.168.201.136:9292
+--------------+----------------------------------+
| Field        | Value                            |
+--------------+----------------------------------+
| enabled      | True                             |
| id           | 2515e3341558432b858af2780fed7a3a |
| interface    | admin                            |
| region       | RegionOne                        |
| region_id    | RegionOne                        |
| service_id   | aa12699e8fd348e78aa43b37a3804ef6 |
| service_name | glance                           |
| service_type | image                            |
| url          | http://192.168.201.136:9292      |
+--------------+----------------------------------+
安装并配置组件
[root@controller ~]# yum install -y openstack-glance
编辑文件 /etc/glance/glance-api.conf 进行以下配置
[root@controller ~]# vim /etc/glance/glance-api.conf
[database]
connection =  mysql+pymysql://glance:glance@192.168.201.136/glance

[keystone_authtoken]
www_authenticate_uri = http://192.168.201.136:5000
auth_url = http://192.168.201.136:5000
memcached_servers = 192.168.201.136:11211
auth_type = password
project_domain_name = Default
user_domain_name = Default
project_name = service
username = glance
password = glance

[paste_deploy]
flavor = keystone

[glance_store]
stores = file,http
default_store = file
filesystem_store_datadir = /var/lib/glance/images/
写入镜像服务数据库
[root@controller ~]# su -s /bin/sh -c "glance-manage db_sync" glance
启动镜像服务,并配置开机自启
[root@controller ~]# systemctl start openstack-glance-api.service
[root@controller ~]# systemctl enable openstack-glance-api.service
检测如以下结果则为正常
[root@controller ~]# glance image-list
+----+------+
| ID | Name |
+----+------+
+----+------+
[root@controller ~]# openstack image list #为空则正常
验证,下载一个小型镜像进行验证
[root@controller ~]# wget http://download.cirros-cloud.net/0.4.0/cirros-0.4.0-x86_64-disk.img
[root@controller ~]# source admin-openstack.sh
[root@controller ~]# glance image-create --name "cirros" \
    --file cirros-0.4.0-x86_64-disk.img \
    --disk-format qcow2 --container-format bare \
    --visibility public
+------------------+----------------------------------------------------------------------------------+
| Property         | Value                                                                            |
+------------------+----------------------------------------------------------------------------------+
| checksum         | 443b7623e27ecf03dc9e01ee93f67afe                                                 |
| container_format | bare                                                                             |
| created_at       | 2021-11-10T06:26:38Z                                                             |
| disk_format      | qcow2                                                                            |
| id               | bcfee4e3-d705-4a9b-bd98-812ed9d88cf2                                             |
| min_disk         | 0                                                                                |
| min_ram          | 0                                                                                |
| name             | cirros                                                                           |
| os_hash_algo     | sha512                                                                           |
| os_hash_value    | 6513f21e44aa3da349f248188a44bc304a3653a04122d8fb4535423c8e1d14cd6a153f735bb0982e |
|                  | 2161b5b5186106570c17a9e58b64dd39390617cd5a350f78                                 |
| os_hidden        | False                                                                            |
| owner            | 8095c8f209c442839b79cdcd1434f0be                                                 |
| protected        | False                                                                            |
| size             | 12716032                                                                         |
| status           | active                                                                           |
| tags             | []                                                                               |
| updated_at       | 2021-11-10T06:26:38Z                                                             |
| virtual_size     | Not available                                                                    |
| visibility       | public                                                                           |
+------------------+----------------------------------------------------------------------------------+
查看镜像是否上次成功

部署placement服务
创建数据库(密码placement)
[root@controller ~]# mysql -uroot -p
Enter password:
Welcome to the MariaDB monitor.  Commands end with ; or \g.
Your MariaDB connection id is 37
Server version: 10.3.20-MariaDB MariaDB Server

Copyright (c) 2000, 2018, Oracle, MariaDB Corporation Ab and others.

Type 'help;' or '\h' for help. Type '\c' to clear the current input statement.

MariaDB [(none)]> create database placement;
Query OK, 1 row affected (0.001 sec)

MariaDB [(none)]> grant all privileges on placement.* to 'placement'@'localhost' identified by 'placement';
Query OK, 0 rows affected (0.001 sec)

MariaDB [(none)]> grant all privileges on placement.* to 'placement'@'%' identified by 'placement';
Query OK, 0 rows affected (0.000 sec)

MariaDB [(none)]> \q
Bye
配置用户和端点(密码placement)
[root@controller ~]# openstack user create --domain default --password-prompt placement
User Password:
Repeat User Password:
+---------------------+----------------------------------+
| Field               | Value                            |
+---------------------+----------------------------------+
| domain_id           | default                          |
| enabled             | True                             |
| id                  | d72342f5ce1547d0ad9bd0171da54ace |
| name                | placement                        |
| options             | {}                               |
| password_expires_at | None                             |
+---------------------+----------------------------------+
将放置用户添加到具有管理员角色的服务项目中
[root@controller ~]# openstack role add --project service --user placement admin
在服务目录中创建放置 API 条目
[root@controller ~]# openstack service create --name placement \
    --description "Placement API" placement
+-------------+----------------------------------+
| Field       | Value                            |
+-------------+----------------------------------+
| description | Placement API                    |
| enabled     | True                             |
| id          | df0fc8d34cc8482682c99e3af8ea38dc |
| name        | placement                        |
| type        | placement                        |
+-------------+----------------------------------+
创建API端点
[root@controller ~]# openstack endpoint create --region RegionOne \
    placement public http://192.168.201.136:8778
+--------------+----------------------------------+
| Field        | Value                            |
+--------------+----------------------------------+
| enabled      | True                             |
| id           | 4b544d0db3404ef9a6c5c2c69e81ead7 |
| interface    | public                           |
| region       | RegionOne                        |
| region_id    | RegionOne                        |
| service_id   | df0fc8d34cc8482682c99e3af8ea38dc |
| service_name | placement                        |
| service_type | placement                        |
| url          | http://192.168.201.136:8778      |
+--------------+----------------------------------+
[root@controller ~]# openstack endpoint create --region RegionOne \
    placement internal http://192.168.201.136:8778
+--------------+----------------------------------+
| Field        | Value                            |
+--------------+----------------------------------+
| enabled      | True                             |
| id           | 13131c3a298140009d6327288c83f2ee |
| interface    | internal                         |
| region       | RegionOne                        |
| region_id    | RegionOne                        |
| service_id   | df0fc8d34cc8482682c99e3af8ea38dc |
| service_name | placement                        |
| service_type | placement                        |
| url          | http://192.168.201.136:8778      |
+--------------+----------------------------------+
[root@controller ~]# openstack endpoint create --region RegionOne \
    placement admin http://192.168.201.136:8778
+--------------+----------------------------------+
| Field        | Value                            |
+--------------+----------------------------------+
| enabled      | True                             |
| id           | a7fe77dcd722465dae944c82b49cbb7d |
| interface    | admin                            |
| region       | RegionOne                        |
| region_id    | RegionOne                        |
| service_id   | df0fc8d34cc8482682c99e3af8ea38dc |
| service_name | placement                        |
| service_type | placement                        |
| url          | http://192.168.201.136:8778      |
+--------------+----------------------------------+
安装和配置组件
[root@controller ~]# yum install -y openstack-placement-api
编辑文件并完成以下操作:/etc/placement/placement.conf
[root@controller ~]# vim /etc/placement/placement.conf
[placement_database]
connection = mysql+pymysql://placement:placement@192.168.201.136/placement
[api]
auth_strategy = keystone
[keystone_authtoken]
auth_url = http://192.168.201.136:5000/v3
memcached_servers = 192.168.201.136:11211
auth_type = password
project_domain_name = Default
user_domain_name = Default
project_name = service
username = placement
password = placement
同步数据库
[root@controller ~]# su -s /bin/sh -c "placement-manage db sync" placement
编辑配置文件,文件末尾加入以下内容
[root@controller ~]# vim /etc/httpd/conf.d/00-placement-api.conf
<Directory /usr/bin>
<IfVersion >= 2.4>
 Require all granted
</IfVersion>
<IfVersion < 2.4>
   Order allow,deny
   Allow from all
</IfVersion>
</Directory>
重启httpd服务
[root@controller ~]# systemctl restart httpd
验证
[root@controller ~]# source admin-openstack.sh
[root@controller ~]# placement-status upgrade check
+----------------------------------+
| Upgrade Check Results            |
+----------------------------------+
| Check: Missing Root Provider IDs |
| Result: Success                  |
| Details: None                    |
+----------------------------------+
| Check: Incomplete Consumers      |
| Result: Success                  |
| Details: None                    |
+----------------------------------+
配置部署nova服务
[root@controller ~]# mysql -uroot -p
Enter password:
Welcome to the MariaDB monitor.  Commands end with ; or \g.
Your MariaDB connection id is 41
Server version: 10.3.20-MariaDB MariaDB Server

Copyright (c) 2000, 2018, Oracle, MariaDB Corporation Ab and others.

Type 'help;' or '\h' for help. Type '\c' to clear the current input statement.

MariaDB [(none)]> create database nova_api;
Query OK, 1 row affected (0.001 sec)

MariaDB [(none)]> create database nova;
Query OK, 1 row affected (0.000 sec)

MariaDB [(none)]> create database nova_cell0;
Query OK, 1 row affected (0.000 sec)

MariaDB [(none)]> grant all privileges on nova_api.* to 'nova'@'localhost' identified by 'nova';
Query OK, 0 rows affected (0.000 sec)

MariaDB [(none)]> grant all privileges on nova_api.* to 'nova'@'%' identified by 'nova';
Query OK, 0 rows affected (0.000 sec)

MariaDB [(none)]> grant all privileges on nova.* to 'nova'@'localhost' identified by 'nova';
Query OK, 0 rows affected (0.000 sec)

MariaDB [(none)]> grant all privileges on nova.* to 'nova'@'%' identified by 'nova';
Query OK, 0 rows affected (0.000 sec)

MariaDB [(none)]> grant all privileges on nova_cell0.* to 'nova'@'localhost' identified by 'nova';
Query OK, 0 rows affected (0.000 sec)

MariaDB [(none)]> grant all privileges on nova_cell0.* to 'nova'@'%' identified by 'nova';
Query OK, 0 rows affected (0.000 sec)

MariaDB [(none)]> \q
Bye
创建计算服务凭据
创建nova用户(密码nova)
[root@controller ~]# source admin-openstack.sh
[root@controller ~]# openstack user create --domain default --password-prompt nova
User Password:
Repeat User Password:
+---------------------+----------------------------------+
| Field               | Value                            |
+---------------------+----------------------------------+
| domain_id           | default                          |
| enabled             | True                             |
| id                  | ea7984dbd3234232af7ad78a9817c248 |
| name                | nova                             |
| options             | {}                               |
| password_expires_at | None                             |
+---------------------+----------------------------------+
将角色添加到用户admin
[root@controller ~]# openstack role add --project service --user nova admin
创建服务实体nova
[root@controller ~]# openstack service create --name nova \
    --description "OpenStack Compute" compute
+-------------+----------------------------------+
| Field       | Value                            |
+-------------+----------------------------------+
| description | OpenStack Compute                |
| enabled     | True                             |
| id          | 0cdf3ecf608c4fbf87fde770998f7caf |
| name        | nova                             |
| type        | compute                          |
+-------------+----------------------------------+
创建计算API服务端点
[root@controller ~]# openstack endpoint create --region RegionOne \
    compute public http://192.168.201.136:8774/v2.1
+--------------+----------------------------------+
| Field        | Value                            |
+--------------+----------------------------------+
| enabled      | True                             |
| id           | 072ec04a511c4d03991012443bf21597 |
| interface    | public                           |
| region       | RegionOne                        |
| region_id    | RegionOne                        |
| service_id   | 0cdf3ecf608c4fbf87fde770998f7caf |
| service_name | nova                             |
| service_type | compute                          |
| url          | http://192.168.201.136:8774/v2.1 |
+--------------+----------------------------------+
[root@controller ~]# openstack endpoint create --region RegionOne \
    compute internal http://192.168.201.136:8774/v2.1
+--------------+----------------------------------+
| Field        | Value                            |
+--------------+----------------------------------+
| enabled      | True                             |
| id           | ac1adcb2c93749289bc29914b7a14e22 |
| interface    | internal                         |
| region       | RegionOne                        |
| region_id    | RegionOne                        |
| service_id   | 0cdf3ecf608c4fbf87fde770998f7caf |
| service_name | nova                             |
| service_type | compute                          |
| url          | http://192.168.201.136:8774/v2.1 |
+--------------+----------------------------------+
[root@controller ~]# openstack endpoint create --region RegionOne \
    compute admin http://192.168.201.136:8774/v2.1
+--------------+----------------------------------+
| Field        | Value                            |
+--------------+----------------------------------+
| enabled      | True                             |
| id           | 1d30a13227374510a4219edacf836fb5 |
| interface    | admin                            |
| region       | RegionOne                        |
| region_id    | RegionOne                        |
| service_id   | 0cdf3ecf608c4fbf87fde770998f7caf |
| service_name | nova                             |
| service_type | compute                          |
| url          | http://192.168.201.136:8774/v2.1 |
+--------------+----------------------------------+
安装并配置组件
[root@controller ~]# yum install openstack-nova-api openstack-nova-conductor openstack-nova-novncproxy openstack-nova-scheduler -y
编辑配置文件/etc/nova/nova.conf
[root@controller ~]# vim /etc/nova/nova.conf
[DEFAULT]
enabled_apis = osapi_compute,metadata
my_ip = 192.168.201.136
use_neutron = true
firewall_driver = nova.virt.firewall.NoopFirewallDriver
transport_url = rabbit://openstack:openstack@192.168.201.136:15672/

[api_database]
connection = mysql+pymysql://nova:nova@192.168.201.136/nova_api

[database]
connection = mysql+pymysql://nova:nova@192.168.201.136/nova

[api]
auth_strategy = keystone

[keystone_authtoken]
www_authenticate_uri = http://192.168.201.136:5000/
auth_url = http://192.168.201.136:5000/
memcached_servers = 192.168.201.136:11211
auth_type = password
project_domain_name = Default
user_domain_name = Default
project_name = service
username = nova
password = nova

[vnc]
enabled = true
server_listen = $my_ip
server_proxyclient_address = $my_ip

[glance]
api_servers = http://192.168.201.136:9292

[oslo_concurrency]
lock_path = /var/lib/nova/tmp

[placement]
region_name = RegionOne
project_domain_name = Default
project_name = service
auth_type = password
user_domain_name = Default
auth_url = http://192.168.201.136:5000/v3
username = placement
password = placement
同步数据库
[root@controller ~]# su -s /bin/sh -c "nova-manage api_db sync" nova
[root@controller ~]# su -s /bin/sh -c "nova-manage cell_v2 map_cell0" nova
[root@controller ~]# su -s /bin/sh -c "nova-manage cell_v2 create_cell --name=cell1 --verbose" nova
[root@controller ~]# su -s /bin/sh -c "nova-manage db sync" nova
[root@controller ~]# su -s /bin/sh -c "nova-manage cell_v2 list_cells" nova
+-------+--------------------------------------+-----------------------------------------------+------------------------------------------------------+----------+
|  Name |                 UUID                 |                 Transport URL                 |                 Database Connection                  | Disabled |
+-------+--------------------------------------+-----------------------------------------------+------------------------------------------------------+----------+
| cell0 | 00000000-0000-0000-0000-000000000000 |                     none:/                    | mysql+pymysql://nova:****@192.168.201.136/nova_cell0 |  False   |
| cell1 | 2e0afa3e-df13-419b-8ed8-6c1cce002f57 | rabbit://openstack:****@192.168.201.136:5672/ |    mysql+pymysql://nova:****@192.168.201.136/nova    |  False   |
+-------+--------------------------------------+-----------------------------------------------+------------------------------------------------------+----------+
启动服务并设为开机自启
[root@controller ~]# systemctl enable openstack-nova-api.service openstack-nova-scheduler.service openstack-nova-conductor.service openstack-nova-novncproxy.service;systemctl start openstack-nova-api.service openstack-nova-scheduler.service openstack-nova-conductor.service openstack-nova-novncproxy.service
计算节点安装配置
compute安装配置
[root@compute ~]# yum install -y openstack-nova-compute
配置/etc/nova/nova.conf文件
[root@compute ~]# vim /etc/nova/nova.conf
[DEFAULT]
enabled_apis = osapi_compute,metadata
use_neutron = true
firewall_driver = nova.virt.firewall.NoopFirewallDriver
transport_url = rabbit://openstack:openstack@192.168.201.136
my_ip = 192.168.201.137

[api]
auth_strategy = keystone

[keystone_authtoken]
www_authenticate_uri = http://192.168.201.136:5000/
auth_url = http://192.168.201.136:5000/
memcached_servers = 192.168.201.136:11211
auth_type = password
project_domain_name = Default
user_domain_name = Default
project_name = service
username = nova
password = nova

[vnc]
enabled = true
server_listen = 0.0.0.0
server_proxyclient_address = $my_ip
novncproxy_base_url = http://192.168.201.136:6080/vnc_auto.html

[glance]
api_servers = http://192.168.201.136:9292

[oslo_concurrency]
lock_path = /var/lib/nova/tmp

[placement]
region_name = RegionOne
project_domain_name = Default
project_name = service
auth_type = password
user_domain_name = Default
auth_url = http://192.168.201.136:5000/v3
username = placement
password = placement
确定计算节点是否支持cpu虚拟化
[root@compute ~]# egrep -c '(vmx|svm)' /proc/cpuinfo
4
如为0则需配置文件/etc/nova/nova.conf
[libvirt]
virt_type = qemu
启动并设为开机自启服务
[root@compute ~]# systemctl enable libvirtd.service openstack-nova-compute.service;systemctl start libvirtd.service openstack-nova-compute.service
验证(控制节点验证)
[root@controller ~]# source admin-openstack.sh
[root@controller ~]# openstack compute service list --service nova-compute
+----+--------------+---------+------+---------+-------+----------------------------+
| ID | Binary       | Host    | Zone | Status  | State | Updated At                 |
+----+--------------+---------+------+---------+-------+----------------------------+
|  9 | nova-compute | compute | nova | enabled | up    | 2021-11-10T07:13:51.000000 |
+----+--------------+---------+------+---------+-------+----------------------------+
配置发现计算主机(控制节点配置)
[root@controller ~]# su -s /bin/sh -c "nova-manage cell_v2 discover_hosts --verbose" nova
Found 2 cell mappings.
Skipping cell0 since it does not contain hosts.
Getting computes from cell 'cell1': 2e0afa3e-df13-419b-8ed8-6c1cce002f57
Checking host mapping for compute host 'compute': bad01d3a-bbb1-42af-9354-33fbb0e78b4d
Creating host mapping for compute host 'compute': bad01d3a-bbb1-42af-9354-33fbb0e78b4d
Found 1 unmapped computes in cell: 2e0afa3e-df13-419b-8ed8-6c1cce002f57
通过修改配置文件方式配置自动发现计算主机策略
[root@controller ~]# vim /etc/nova/nova.conf
[scheduler]
discover_hosts_in_cells_interval = 300
验证计算服务的运行情况
列出服务组件,以验证每个流程的成功启动和注册
[root@controller ~]# source admin-openstack.sh
[root@controller ~]# openstack compute service list
+----+----------------+------------+----------+---------+-------+----------------------------+
| ID | Binary         | Host       | Zone     | Status  | State | Updated At                 |
+----+----------------+------------+----------+---------+-------+----------------------------+
|  5 | nova-conductor | controller | internal | enabled | up    | 2021-11-10T07:15:51.000000 |
|  7 | nova-scheduler | controller | internal | enabled | up    | 2021-11-10T07:15:55.000000 |
|  9 | nova-compute   | compute    | nova     | enabled | up    | 2021-11-10T07:15:51.000000 |
+----+----------------+------------+----------+---------+-------+----------------------------+
在身份服务中列出 API 端点,以验证与身份服务的连接性
[root@controller ~]# openstack catalog list
+-----------+-----------+----------------------------------------------+
| Name      | Type      | Endpoints                                    |
+-----------+-----------+----------------------------------------------+
| nova      | compute   | RegionOne                                    |
|           |           |   public: http://192.168.201.136:8774/v2.1   |
|           |           | RegionOne                                    |
|           |           |   admin: http://192.168.201.136:8774/v2.1    |
|           |           | RegionOne                                    |
|           |           |   internal: http://192.168.201.136:8774/v2.1 |
|           |           |                                              |
| glance    | image     | RegionOne                                    |
|           |           |   admin: http://192.168.201.136:9292         |
|           |           | RegionOne                                    |
|           |           |   internal: http://192.168.201.136:9292      |
|           |           | RegionOne                                    |
|           |           |   public: http://192.168.201.136:9292        |
|           |           |                                              |
| keystone  | identity  | RegionOne                                    |
|           |           |   admin: http://192.168.201.136:5000/v3/     |
|           |           | RegionOne                                    |
|           |           |   public: http://192.168.201.136:5000/v3/    |
|           |           | RegionOne                                    |
|           |           |   internal: http://192.168.201.136:5000/v3/  |
|           |           |                                              |
| placement | placement | RegionOne                                    |
|           |           |   internal: http://192.168.201.136:8778      |
|           |           | RegionOne                                    |
|           |           |   public: http://192.168.201.136:8778        |
|           |           | RegionOne                                    |
|           |           |   admin: http://192.168.201.136:8778         |
|           |           |                                              |
+-----------+-----------+----------------------------------------------+
在图像服务中列出图像,以验证与图像服务的连接性
[root@controller ~]# openstack image list
+--------------------------------------+--------+--------+
| ID                                   | Name   | Status |
+--------------------------------------+--------+--------+
| bcfee4e3-d705-4a9b-bd98-812ed9d88cf2 | cirros | active |
+--------------------------------------+--------+--------+
检查单元格和位置 API 是否成功工作,并制定其他必要的先决条件
[root@controller ~]# nova-status upgrade check
+--------------------------------+
| Upgrade Check Results          |
+--------------------------------+
| Check: Cells v2                |
| Result: Success                |
| Details: None                  |
+--------------------------------+
| Check: Placement API           |
| Result: Success                |
| Details: None                  |
+--------------------------------+
| Check: Ironic Flavor Migration |
| Result: Success                |
| Details: None                  |
+--------------------------------+
| Check: Cinder API              |
| Result: Success                |
| Details: None                  |
+--------------------------------+
配置neutron
配置控制节点
创建数据库并授权
[root@controller ~]# mysql -uroot -p
Enter password:
Welcome to the MariaDB monitor.  Commands end with ; or \g.
Your MariaDB connection id is 80
Server version: 10.3.20-MariaDB MariaDB Server

Copyright (c) 2000, 2018, Oracle, MariaDB Corporation Ab and others.

Type 'help;' or '\h' for help. Type '\c' to clear the current input statement.

MariaDB [(none)]> create database neutron;
Query OK, 1 row affected (0.000 sec)

MariaDB [(none)]> grant all privileges on neutron.* to 'neutron'@'localhost' identified by 'neutron';
Query OK, 0 rows affected (0.003 sec)

MariaDB [(none)]> grant all privileges on neutron.* to 'neutron'@'%' identified by 'neutron';
Query OK, 0 rows affected (0.000 sec)

MariaDB [(none)]> \q
Bye
创建neutron用户(密码neutron)
[root@controller ~]# openstack user create --domain default --password-prompt neutron
User Password:
Repeat User Password:
+---------------------+----------------------------------+
| Field               | Value                            |
+---------------------+----------------------------------+
| domain_id           | default                          |
| enabled             | True                             |
| id                  | 7ce20a43fdcc4971af65318baf83cd77 |
| name                | neutron                          |
| options             | {}                               |
| password_expires_at | None                             |
+---------------------+----------------------------------+
将角色添加到用户admin
[root@controller ~]# openstack role add --project service --user neutron admin
创建服务实体及api端点
[root@controller ~]# openstack service create --name neutron \
     --description "OpenStack Networking" network
+-------------+----------------------------------+
| Field       | Value                            |
+-------------+----------------------------------+
| description | OpenStack Networking             |
| enabled     | True                             |
| id          | 230d6f3da28646cb910dbdfeec5788c4 |
| name        | neutron                          |
| type        | network                          |
+-------------+----------------------------------+
[root@controller ~]# openstack endpoint create --region RegionOne \
     network public http://192.168.201.136:9696
+--------------+----------------------------------+
| Field        | Value                            |
+--------------+----------------------------------+
| enabled      | True                             |
| id           | 8215b5d02ce942e786aadd3f2bd9926e |
| interface    | public                           |
| region       | RegionOne                        |
| region_id    | RegionOne                        |
| service_id   | 230d6f3da28646cb910dbdfeec5788c4 |
| service_name | neutron                          |
| service_type | network                          |
| url          | http://192.168.201.136:9696      |
+--------------+----------------------------------+
[root@controller ~]# openstack endpoint create --region RegionOne \
     network internal http://192.168.201.136:9696
+--------------+----------------------------------+
| Field        | Value                            |
+--------------+----------------------------------+
| enabled      | True                             |
| id           | f7f85b331cb94e6db2033059d4542f30 |
| interface    | internal                         |
| region       | RegionOne                        |
| region_id    | RegionOne                        |
| service_id   | 230d6f3da28646cb910dbdfeec5788c4 |
| service_name | neutron                          |
| service_type | network                          |
| url          | http://192.168.201.136:9696      |
+--------------+----------------------------------+
[root@controller ~]# openstack endpoint create --region RegionOne \
     network admin http://192.168.201.136:9696
+--------------+----------------------------------+
| Field        | Value                            |
+--------------+----------------------------------+
| enabled      | True                             |
| id           | 608072882baf4ac781771618d0b3477d |
| interface    | admin                            |
| region       | RegionOne                        |
| region_id    | RegionOne                        |
| service_id   | 230d6f3da28646cb910dbdfeec5788c4 |
| service_name | neutron                          |
| service_type | network                          |
| url          | http://192.168.201.136:9696      |
+--------------+----------------------------------+
安装组件
[root@controller ~]# yum install -y openstack-neutron openstack-neutron-ml2 openstack-neutron-linuxbridge ebtables
编辑配置文件/etc/neutron/neutron.conf,缺省文件使用以下链接文件的内容进行替换
https://docs.openstack.org/ocata/config-reference/networking/samples/neutron.conf.html
[root@controller ~]# vim /etc/neutron/neutron.conf
[database]
connection = mysql+pymysql://neutron:neutron@192.168.201.136/neutron
[DEFAULT]
core_plugin = ml2
service_plugins =
transport_url = rabbit://openstack:openstack@192.168.201.136
auth_strategy = keystone
notify_nova_on_port_status_changes = true
notify_nova_on_port_data_changes = true
[keystone_authtoken]
www_authenticate_uri = http://192.168.201.136:5000
auth_url = http://192.168.201.136:5000
memcached_servers = 192.168.201.136:11211
auth_type = password
project_domain_name = default
user_domain_name = default
project_name = service
username = neutron
password = neutron


[nova]
auth_url = http://192.168.201.136:5000
auth_type = password
project_domain_name = default
user_domain_name = default
region_name = RegionOne
project_name = service
username = nova
password = nova

[oslo_concurrency]
lock_path = /var/lib/neutron/tmp
vim /etc/neutron/plugins/ml2/ml2_conf.ini,缺省文件使用以下链接文件的内容进行替换
https://docs.openstack.org/ocata/config-reference/networking/samples/ml2_conf.ini
[root@controller ~]# vim /etc/neutron/plugins/ml2/ml2_conf.ini
[ml2]
type_drivers = flat,vlan
tenant_network_types =
mechanism_drivers = linuxbridge
extension_drivers = port_security
[ml2_type_flat]
flat_networks = provider
[securitygroup]
enable_ipset = true
vim /etc/neutron/plugins/ml2/linuxbridge_agent.ini,缺省文件使用以下链接文件的内容进行替换
https://docs.openstack.org/ocata/config-reference/networking/samples/linuxbridge_agent.ini
[root@controller ~]# vim /etc/neutron/plugins/ml2/linuxbridge_agent.ini
[linux_bridge]
physical_interface_mappings = provider:eth0
[vxlan]
enable_vxlan = false
[securitygroup]
enable_security_group = true
firewall_driver = neutron.agent.linux.iptables_firewall.IptablesFirewallDriver
配置内核
[root@controller ~]# echo "net.bridge.bridge-nf-call-iptables = 1" >> /etc/sysctl.conf
[root@controller ~]# echo "net.bridge.bridge-nf-call-ip6tables = 1" >> /etc/sysctl.conf
[root@controller ~]# modprobe br_netfilter
[root@controller ~]# sysctl -p
net.bridge.bridge-nf-call-iptables = 1
net.bridge.bridge-nf-call-ip6tables = 1
配置dhcp代理/etc/neutron/dhcp_agent.ini
[root@controller ~]# vim /etc/neutron/dhcp_agent.ini
[DEFAULT]
interface_driver = linuxbridge
dhcp_driver = neutron.agent.linux.dhcp.Dnsmasq
enable_isolated_metadata = true
配置元数据代理/etc/neutron/metadata_agent.ini
[root@controller ~]# vim /etc/neutron/metadata_agent.ini
[DEFAULT]
nova_metadata_host = 192.168.201.136
metadata_proxy_shared_secret = neutron123
配置计算服务使用网络/etc/nova/nova.conf
[root@controller ~]# vim /etc/nova/nova.conf
[neutron]
auth_url = http://192.168.201.136:5000
auth_type = password
project_domain_name = default
user_domain_name = default
region_name = RegionOne
project_name = service
username = neutron
password = neutron
service_metadata_proxy = true
metadata_proxy_shared_secret = neutron123
配置软链接
[root@controller ~]# ln -s /etc/neutron/plugins/ml2/ml2_conf.ini /etc/neutron/plugin.ini
同步数据库
[root@controller ~]# su -s /bin/sh -c "neutron-db-manage --config-file /etc/neutron/neutron.conf --config-file /etc/neutron/plugins/ml2/ml2_conf.ini upgrade head" neutron
重启api服务
[root@controller ~]# systemctl restart openstack-nova-api.service
启动neutron服务并配置开机自启
[root@controller ~]# systemctl enable neutron-server.service neutron-linuxbridge-agent.service neutron-dhcp-agent.service neutron-metadata-agent.service; systemctl start neutron-server.service neutron-linuxbridge-agent.service neutron-dhcp-agent.service neutron-metadata-agent.service
neutron计算节点配置
compute配置
[root@compute ~]# yum install openstack-neutron-linuxbridge ebtables ipset -y
编辑配置文件/etc/neutron/neutron.conf
[root@compute ~]# vim /etc/neutron/neutron.conf
[DEFAULT]
transport_url = rabbit://openstack:openstack@192.168.201.136
auth_strategy = keystone

[keystone_authtoken]
www_authenticate_uri = http://192.168.201.136:5000
auth_url = http://192.168.201.136:5000
memcached_servers = 192.168.201.136:11211
auth_type = password
project_domain_name = default
user_domain_name = default
project_name = service
username = neutron
password = neutron

[oslo_concurrency]
lock_path = /var/lib/neutron/tmp
编辑配置文件/etc/neutron/plugins/ml2/linuxbridge_agent.ini,缺省文件使用以下链接内容进行替换
https://docs.openstack.org/ocata/config-reference/networking/samples/linuxbridge_agent.ini
[root@compute ~]# vim /etc/neutron/plugins/ml2/linuxbridge_agent.ini
[linux_bridge]
physical_interface_mappings = provider:eth0
[vxlan]
enable_vxlan = false

[securitygroup]
enable_security_group = true
firewall_driver = neutron.agent.linux.iptables_firewall.IptablesFirewallDriver
编辑配置文件/etc/nova/nova.conf
[root@compute ~]# vim /etc/nova/nova.conf
[neutron]
auth_url = http://192.168.201.136:5000
auth_type = password
project_domain_name = default
user_domain_name = default
region_name = RegionOne
project_name = service
username = neutron
password = neutron
重启计算服务
[root@compute ~]# systemctl restart openstack-nova-compute.service
启动neutron服务并设为开机自启
[root@compute ~]# systemctl enable neutron-linuxbridge-agent.service;systemctl start neutron-linuxbridge-agent.service
到controller验证
[root@controller ~]# openstack network agent list
+--------------------------------------+--------------------+------------+-------------------+-------+-------+---------------------------+
| ID                                   | Agent Type         | Host       | Availability Zone | Alive | State | Binary                    |
+--------------------------------------+--------------------+------------+-------------------+-------+-------+---------------------------+
| 54984022-0884-43bb-995b-7bff10ca4d26 | Linux bridge agent | compute    | None              | :-)   | UP    | neutron-linuxbridge-agent |
| 5e499f59-f0af-411c-ae33-3c8385738e9c | DHCP agent         | controller | nova              | :-)   | UP    | neutron-dhcp-agent        |
| 7df43717-b6c7-412e-93d2-7495baa79fa6 | Metadata agent     | controller | None              | :-)   | UP    | neutron-metadata-agent    |
| cedaa315-25cf-4679-90b3-863bb60708bf | Linux bridge agent | controller | None              | :-)   | UP    | neutron-linuxbridge-agent |
+--------------------------------------+--------------------+------------+-------------------+-------+-------+---------------------------+
创建一个主机
创建一个实例规格
[root@controller ~]# openstack flavor create --id 0 --vcpus 1 --ram 64 --disk 1 m1.nano
+----------------------------+---------+
| Field                      | Value   |
+----------------------------+---------+
| OS-FLV-DISABLED:disabled   | False   |
| OS-FLV-EXT-DATA:ephemeral  | 0       |
| disk                       | 1       |
| id                         | 0       |
| name                       | m1.nano |
| os-flavor-access:is_public | True    |
| properties                 |         |
| ram                        | 64      |
| rxtx_factor                | 1.0     |
| swap                       |         |
| vcpus                      | 1       |
+----------------------------+---------+
生成密钥对
[root@controller ~]# source admin-openstack.sh
[root@controller ~]# ssh-keygen -q -N ""
Enter file in which to save the key (/root/.ssh/id_rsa):
[root@controller ~]# openstack keypair create --public-key ~/.ssh/id_rsa.pub mykey
+-------------+-------------------------------------------------+
| Field       | Value                                           |
+-------------+-------------------------------------------------+
| fingerprint | 24:78:45:09:cb:1a:88:cb:59:26:b6:4c:5c:fb:32:3b |
| name        | mykey                                           |
| user_id     | 124e0938bfa94766ae8b9da0ea03fa95                |
+-------------+-------------------------------------------------+
验证密钥对是否添加
[root@controller ~]# openstack keypair create --public-key ~/.ssh/id_rsa.pub mykey
+-------------+-------------------------------------------------+
| Field       | Value                                           |
+-------------+-------------------------------------------------+
| fingerprint | 37:1f:32:97:5f:df:96:fd:10:dc:ae:de:9d:48:84:7e |
| name        | mykey                                           |
| user_id     | 124e0938bfa94766ae8b9da0ea03fa95                |
+-------------+-------------------------------------------------+
配置安全组规则放通icmp及ssh
[root@controller ~]# openstack security group rule create --proto icmp default
[root@controller ~]# openstack security group rule create --proto tcp --dst-port 22 default
创建一个网络
[root@controller ~]# source admin-openstack.sh
[root@controller ~]# openstack network create  --share --external --provider-physical-network provider --provider-network-type flat provider
[root@controller ~]# openstack subnet create --network provider --allocation-pool start=192.168.201.100,end=192.168.201.150 --dns-nameserver 114.114.114.114 --gateway 192.168.201.1 --subnet-range 192.168.201.0/24 provider
查看镜像以及创建的网络
[root@controller ~]# openstack network list
+--------------------------------------+----------+--------------------------------------+
| ID                                   | Name     | Subnets                              |
+--------------------------------------+----------+--------------------------------------+
| 6120c001-1df9-44a4-869b-9314b8ec5e26 | provider | 402cbc84-d84b-487d-8929-4f3a9f55a478 |
+--------------------------------------+----------+--------------------------------------+
[root@controller ~]# openstack image list
+--------------------------------------+--------+--------+
| ID                                   | Name   | Status |
+--------------------------------------+--------+--------+
| bcfee4e3-d705-4a9b-bd98-812ed9d88cf2 | cirros | active |
+--------------------------------------+--------+--------+
计算节点运行命令
[root@compute ~]# virsh capabilities
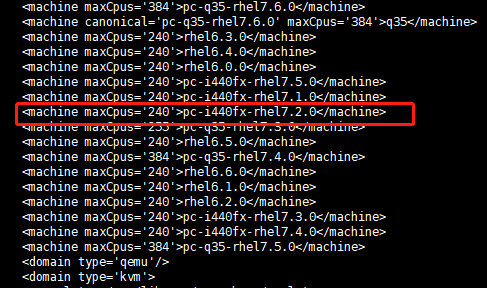
编辑配置文件
[root@compute ~]# vim /etc/nova/nova.conf
[libvirt]
hw_machine_type = x86_64=pc-i440fx-rhel7.2.0
cpu_mode = host-passthrough
重启计算节点服务
[root@compute ~]# systemctl restart openstack-nova-compute.service
创建启动实例
[root@controller ~]# source admin-openstack.sh
[root@controller ~]# openstack server create --flavor m1.nano --image cirros --nic net-id=6120c001-1df9-44a4-869b-9314b8ec5e26 --security-group default --key-name mykey kvm1
+-------------------------------------+-----------------------------------------------+
| Field                               | Value                                         |
+-------------------------------------+-----------------------------------------------+
| OS-DCF:diskConfig                   | MANUAL                                        |
| OS-EXT-AZ:availability_zone         |                                               |
| OS-EXT-SRV-ATTR:host                | None                                          |
| OS-EXT-SRV-ATTR:hypervisor_hostname | None                                          |
| OS-EXT-SRV-ATTR:instance_name       |                                               |
| OS-EXT-STS:power_state              | NOSTATE                                       |
| OS-EXT-STS:task_state               | scheduling                                    |
| OS-EXT-STS:vm_state                 | building                                      |
| OS-SRV-USG:launched_at              | None                                          |
| OS-SRV-USG:terminated_at            | None                                          |
| accessIPv4                          |                                               |
| accessIPv6                          |                                               |
| addresses                           |                                               |
| adminPass                           | f4voewJYGNxq                                  |
| config_drive                        |                                               |
| created                             | 2021-11-11T06:07:11Z                          |
| flavor                              | m1.nano (0)                                   |
| hostId                              |                                               |
| id                                  | 34fd6768-061b-4a96-a9fc-9857c08d86a0          |
| image                               | cirros (bcfee4e3-d705-4a9b-bd98-812ed9d88cf2) |
| key_name                            | mykey                                         |
| name                                | kvm1                                          |
| progress                            | 0                                             |
| project_id                          | 8095c8f209c442839b79cdcd1434f0be              |
| properties                          |                                               |
| security_groups                     | name='70740638-c94e-4baf-b344-0fe9eff9cac2'   |
| status                              | BUILD                                         |
| updated                             | 2021-11-11T06:07:11Z                          |
| user_id                             | 124e0938bfa94766ae8b9da0ea03fa95              |
| volumes_attached                    |                                               |
+-------------------------------------+-----------------------------------------------+
检查实例状态
[root@controller ~]# openstack server list
+--------------------------------------+------+--------+--------------------------+--------+---------+
| ID                                   | Name | Status | Networks                 | Image  | Flavor  |
+--------------------------------------+------+--------+--------------------------+--------+---------+
| 34fd6768-061b-4a96-a9fc-9857c08d86a0 | kvm1 | ACTIVE | provider=192.168.201.109 | cirros | m1.nano |
+--------------------------------------+------+--------+--------------------------+--------+---------+
获取访问控制台链接
[root@controller ~]# openstack console url show kvm1
+-------+------------------------------------------------------------------------------------------------+
| Field | Value                                                                                          |
+-------+------------------------------------------------------------------------------------------------+
| type  | novnc                                                                                          |
| url   | http://192.168.201.136:6080/vnc_auto.html?path=%3Ftoken%3D097ed045-1267-4453-932c-ceacbde001a7 |
+-------+------------------------------------------------------------------------------------------------+
通过浏览器访问http://192.168.201.136:6080/vnc_auto.html?path=%3Ftoken%3D097ed045-1267-4453-932c-ceacbde001a7
可以正常使用
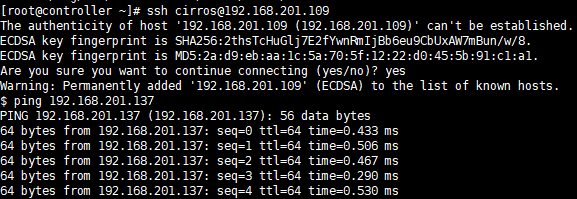
使用远程连接
安装dashboard组件
安装包
[root@controller ~]# yum install openstack-dashboard -y
编辑配置文件/etc/openstack-dashboard/local_settings
OPENSTACK_HOST = "192.168.201.136"
ALLOWED_HOSTS = ['*']
SESSION_ENGINE = 'django.contrib.sessions.backends.cache'

CACHES = {
    'default': {
         'BACKEND': 'django.core.cache.backends.memcached.MemcachedCache',
         'LOCATION': '192.168.201.136:11211',
    },
}
OPENSTACK_KEYSTONE_URL = "http://%s:5000/v3" % OPENSTACK_HOST
OPENSTACK_KEYSTONE_MULTIDOMAIN_SUPPORT = True
OPENSTACK_API_VERSIONS = {
    "identity": 3,
    "image": 2,
    "volume": 3,
}
OPENSTACK_KEYSTONE_DEFAULT_DOMAIN = "Default"
OPENSTACK_KEYSTONE_DEFAULT_ROLE = "user"
WEBROOT = '/dashboard'
OPENSTACK_NEUTRON_NETWORK = {
    'enable_router': False,
    'enable_quotas': False,
    'enable_distributed_router': False,
    'enable_ha_router': False,
    'enable_lb': False,
    'enable_firewall': False,
    'enable_vpn': False,
    'enable_fip_topology_check': False,
}
TIME_ZONE = "Asia/Shanghai"
编辑配置文件
[root@controller ~]# vim /etc/httpd/conf.d/openstack-dashboard.conf
WSGIApplicationGroup %{GLOBAL}
重新启动服务
[root@controller ~]# systemctl restart httpd.service memcached.service
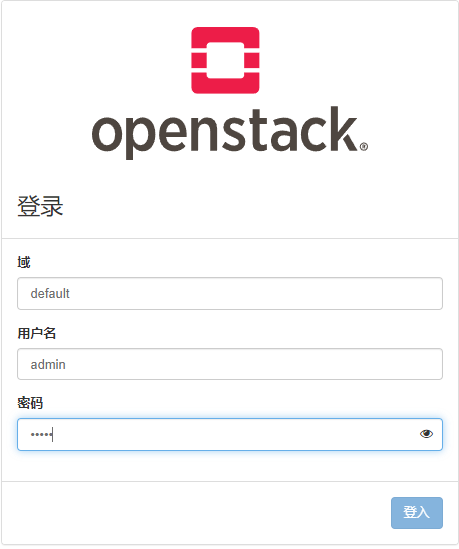
浏览器访问http://192.168.201.136/dashboard
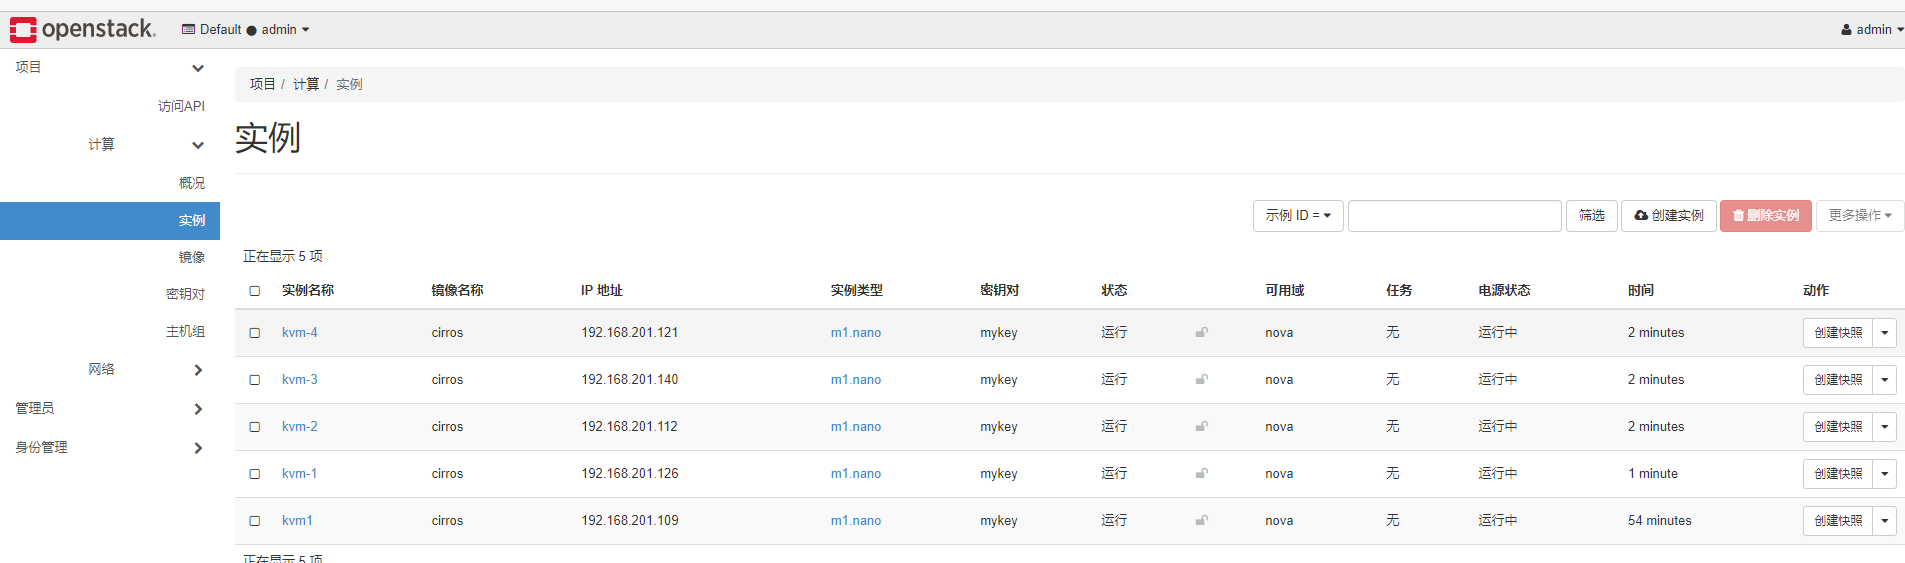
尝试创建实例


 2649
2649

 被折叠的 条评论
为什么被折叠?
被折叠的 条评论
为什么被折叠?
 到【灌水乐园】发言


