


demo:
实体:Position
@TableName("tb_position")
public class Position {
	private static final long serialVersionUID = 1L;

	@TableId(value = "id", type = IdType.AUTO)
	@ApiModelProperty(value = "主键id")
	private int id;

	@ApiModelProperty(value = "名称")
	private String tPosName;

	@ApiModelProperty(value = "名称")
	private List<Teacher> teachers;

	@Override
	public String toString() {
		return "Position{" +
			"id='" + id + '\'' +
			", tPosName='" + tPosName + '\'' +
//			", teachers=" + teachers +
			'}';
	}
}
实体:Teacher
@TableName("tb_teacher")
public class Teacher {
	private static final long serialVersionUID = 1L;

	@TableId(value = "id", type = IdType.AUTO)
	private String id;
	private String tNo;
	private String tName;
	private String positionId;

}
mapper: 一个职位可以有多个老师
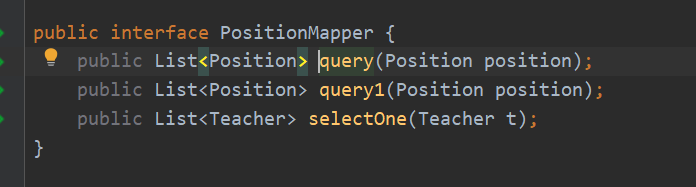
第一种写法
<!-- 通用查询映射结果 -->
<resultMap id="productResultMap" type="org.springblade.product.entity.Position">
<result column="id" property="id"/>
<result column="tPosName" property="tPosName"/>
<collection property="teachers" javaType="java.util.ArrayList" ofType="org.springblade.product.entity.Teacher">
<result column="id" property="id"/>
<result column="tNo" property="tNo"/>
<result column="tName" property="tName"/>
</collection>
</resultMap>
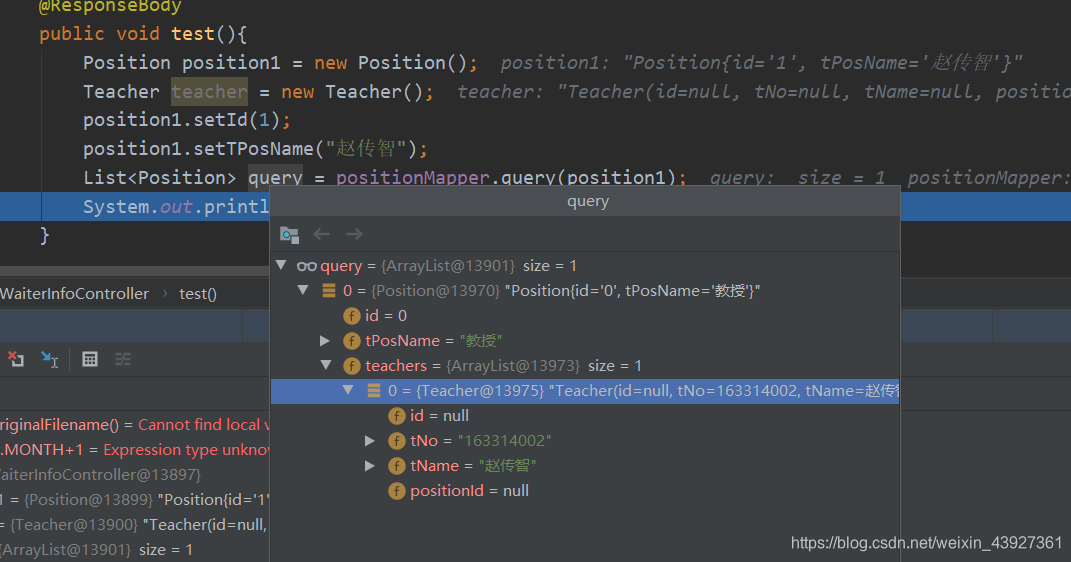
<select id="query" resultMap="productResultMap" resultType="org.springblade.product.entity.Position">
select t_pos_name as tPosName,t.t_name as tName,t.t_no as tNo from tb_position p
left join tb_teacher t on p.id=t.position_id where p.id=#{id}
and t.t_name = #{tPosName}
</select>
controller:
第二种写法
    <resultMap id="resultMap" type="org.springblade.product.entity.Position">
    <result column="id" property="id"/>
    <result column="tPosName" property="tPosName"/>
    <collection property="teachers" javaType="java.util.List" ofType="org.springblade.product.entity.Teacher"
                select="selectOne"
                column="{sonId=id,tPosName=tPosName}">
    </collection>
    </resultMap>
需查询出子查询的id。column传递参数,sonId表示子查询的参数,id父查询的值
 <select id="query1" resultMap="resultMap"  resultType="org.springblade.product.entity.Position">
        select id as id, t_pos_name as tPosName from  tb_position where id=#{id}
    </select>

    <select id="selectOne"  resultType="org.springblade.product.entity.Teacher" >
        select t_name as tName from tb_teacher where position_id=#{sonId}
    </select>
特别注意:子查询的条件,在夫查询一定要查询出来,不然子查询一直不会执行
数据库
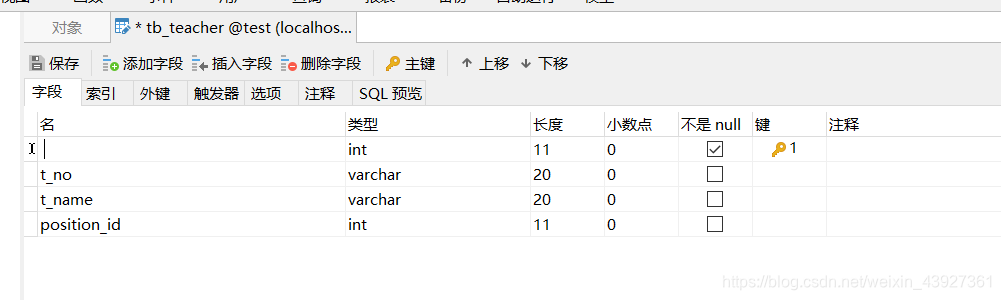
tb_teacher
CREATE TABLE `tb_teacher`  (
  `id` int(11) NOT NULL AUTO_INCREMENT,
  `t_no` varchar(20) CHARACTER SET utf8 COLLATE utf8_general_ci NULL DEFAULT NULL,
  `t_name` varchar(20) CHARACTER SET utf8 COLLATE utf8_general_ci NULL DEFAULT NULL,
  `position_id` int(11) NULL DEFAULT NULL,
  PRIMARY KEY (`id`) USING BTREE
) ENGINE = InnoDB AUTO_INCREMENT = 6 CHARACTER SET = utf8 COLLATE = utf8_general_ci ROW_FORMAT = Compact;
INSERT INTO `tb_teacher` VALUES (1, '163314001', '张文远', 1);
INSERT INTO `tb_teacher` VALUES (2, '163314002', '赵传智', 1);
INSERT INTO `tb_teacher` VALUES (3, '163314003', '风清扬', 2);
INSERT INTO `tb_teacher` VALUES (4, '163314004', '王汇智', 2);
INSERT INTO `tb_teacher` VALUES (5, '163314005', '汪思远', 3);
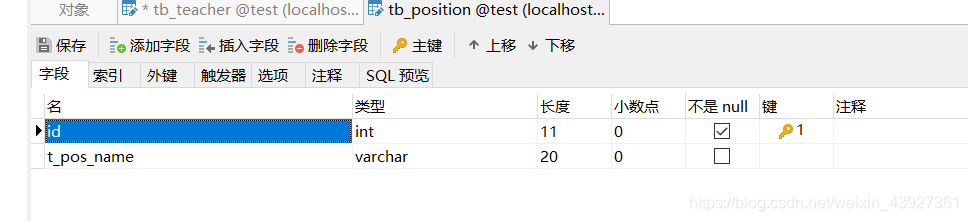
tb_position
CREATE TABLE `tb_position`  (
  `id` int(11) NOT NULL AUTO_INCREMENT,
  `t_pos_name` varchar(20) CHARACTER SET utf8 COLLATE utf8_general_ci NULL DEFAULT NULL,
  PRIMARY KEY (`id`) USING BTREE
) ENGINE = InnoDB AUTO_INCREMENT = 4 CHARACTER SET = utf8 COLLATE = utf8_general_ci ROW_FORMAT = Compact;
INSERT INTO `tb_position` VALUES (1, '教授');
INSERT INTO `tb_position` VALUES (2, '副教授');
INSERT INTO `tb_position` VALUES (3, '讲师');
两种方式的比较
方式一:只需要执行一次sql查询, 主表分页查询不正确。
方式二:代码复用性高, 主表分页查询正确。
方式一比方式二的效率要高,但是在使用的时候,方案一的代码可重用性要高


 1242
1242

 被折叠的 条评论
为什么被折叠?
被折叠的 条评论
为什么被折叠?
 到【灌水乐园】发言


