


 本文详细介绍SpringMVC框架的安装配置过程,包括通过不同方式安装Spring,配置web.xml及dispatcher-servlet.xml文件,创建Controller类及视图解析器,实现简单的SpringMVC应用。
1.Spring的安装
- 方式1:参考网址:https://maven.springframework.org/release/org/springframework/spring/ 下载后手动导入jar包
- 方式2:在myeclipse自动安装,新建一个web项目,右击项目,在弹出的页面中点击如下操作
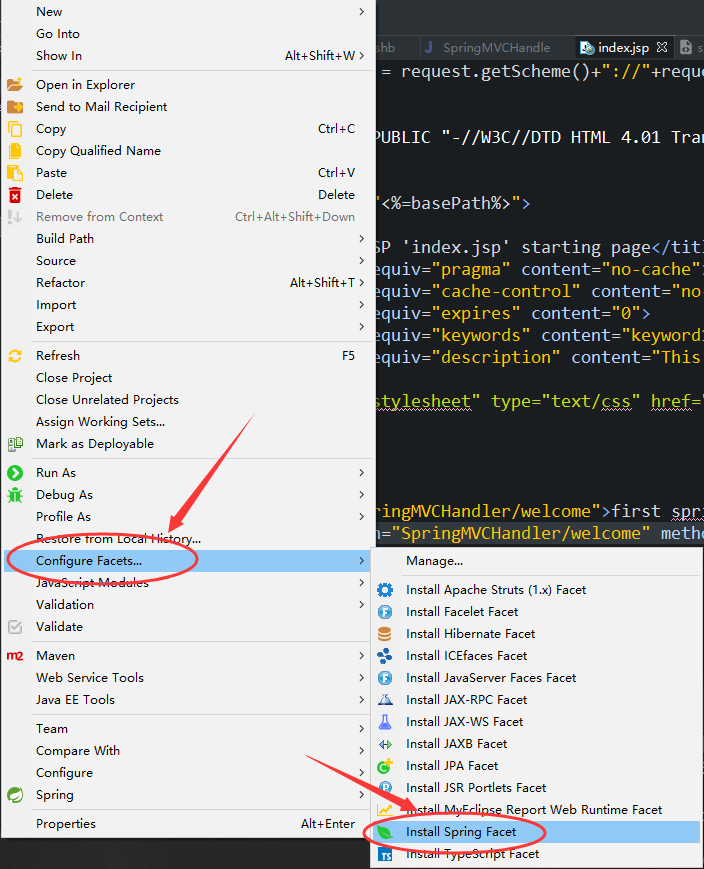
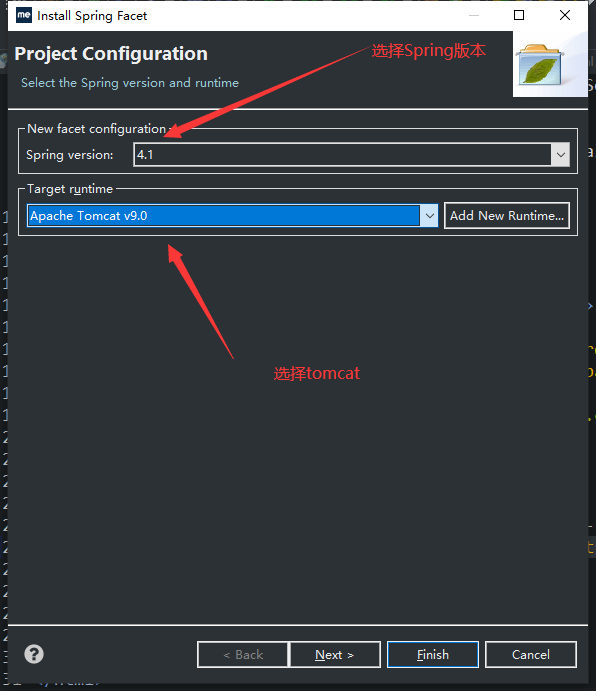
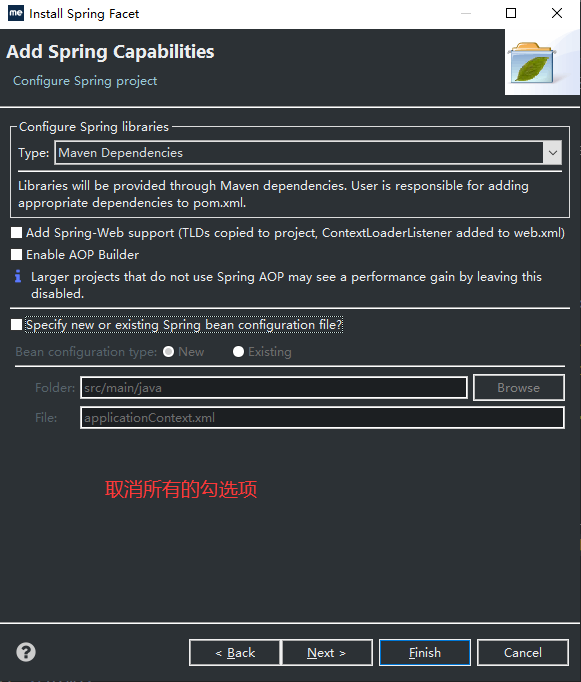
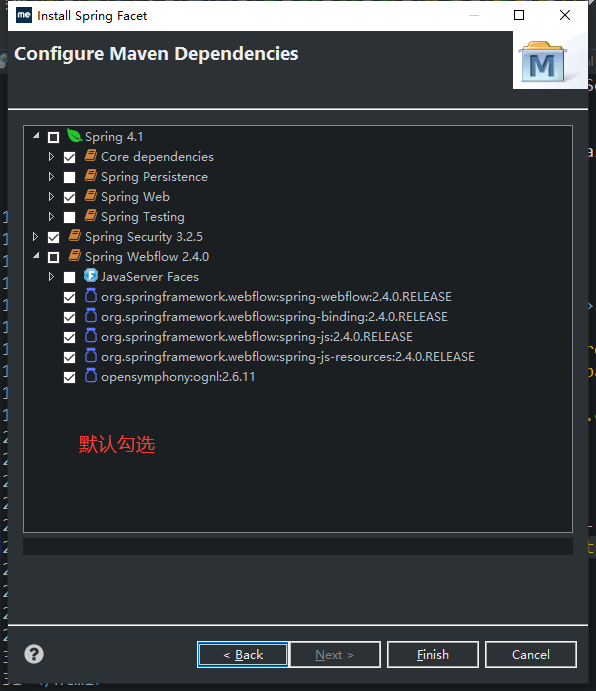
等待安装完成。其中myeclipse会自动导入所需的jar包
2.SpringMVC的配置
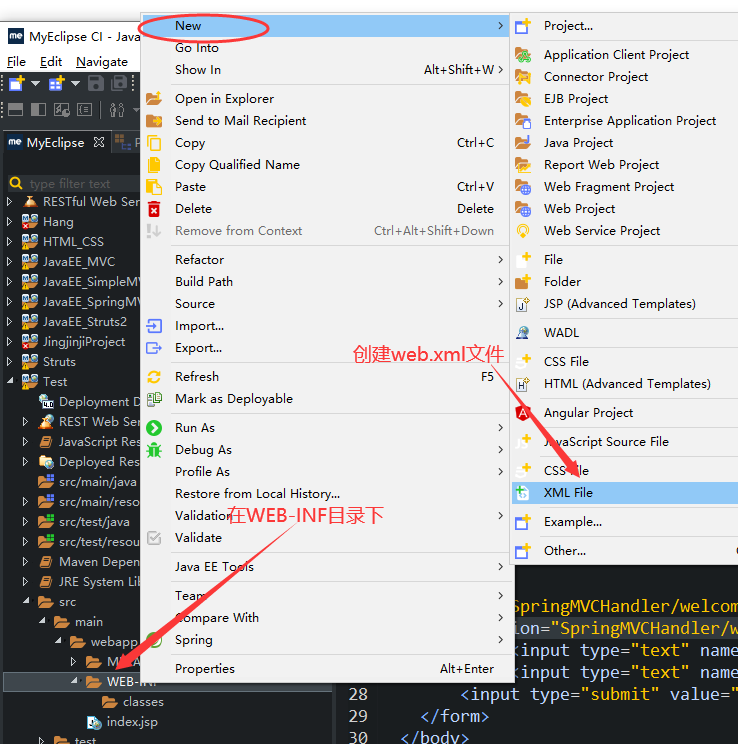
在WEB-INF目录下创建web.xml文件
web.xml内容如下:
<?xml version="1.0" encoding="UTF-8"?>
<web-app version="3.0"
    xmlns="http://java.sun.com/xml/ns/javaee"
    xmlns:xsi="http://www.w3.org/2001/XMLSchema-instance"
    xsi:schemaLocation="http://java.sun.com/xml/ns/javaee
    http://java.sun.com/xml/ns/javaee/web-app_3_0.xsd">
    <!-- 配置SpringMVC -->
    <servlet>
        <servlet-name>dispatcher</servlet-name>
        <servlet-class>org.springframework.web.servlet.DispatcherServlet</servlet-class>
        <init-param>
            <param-name>contextConfigLocation</param-name>
            <param-value>classpath:dispatcher-servlet.xml</param-value>
        </init-param>
    </servlet>

    <servlet-mapping>
        <servlet-name>dispatcher</servlet-name>
        <!-- 监听所有请求 -->
        <url-pattern>hello</url-pattern>
    </servlet-mapping>
</web-app>
注:其中
<servlet-mapping>
        <servlet-name>dispatcher</servlet-name>
        <!-- 监听所有请求 -->
        <url-pattern>hello</url-pattern>
</servlet-mapping><url-pattern>/</url-pattern> 相当于一个小区的门卫大爷,会拦截所有hello的请求
继而门卫大爷会直接给请求进入的人根据 <servlet-name>dispatcher</servlet-name> 中的dispatcher找 <servlet> 中的 <servlet-name>dispatcher</servlet-name>
找到如下部分代码:
    <servlet>
        <servlet-name>dispatcher</servlet-name>
        <servlet-class>org.springframework.web.servlet.DispatcherServlet</servlet-class>
        <init-param>
            <param-name>contextConfigLocation</param-name>
            <param-value>classpath:dispatcher-servlet.xml</param-value>
        </init-param>
    </servlet>
dispatcher中指明 <param-value>classpath:dispatcher-servlet.xml</param-value> 所以接下来创建dispatcher-servlet.xml
如下:

内容如下:
<?xml version="1.0" encoding="UTF-8"?>
<beans xmlns="http://www.springframework.org/schema/beans"
    xmlns:xsi="http://www.w3.org/2001/XMLSchema-instance"
    xmlns:context="http://www.springframework.org/schema/context"
    xmlns:mvc="http://www.springframework.org/schema/mvc"
    xsi:schemaLocation="http://www.springframework.org/schema/beans http://www.springframework.org/schema/beans/spring-beans.xsd
        http://www.springframework.org/schema/context http://www.springframework.org/schema/context/spring-context-4.1.xsd
        http://www.springframework.org/schema/mvc http://www.springframework.org/schema/mvc/spring-mvc-4.1.xsd">
       <!-- 定义要扫描 controller的包 -->
       <context:component-scan base-package="com.frank.springmvc.controller" />

       <mvc:default-servlet-handler />
       <!-- 启动注解驱动 SpringMVC 功能 -->
       <mvc:annotation-driven />

       <!-- 配置视图解析器解析路径 -->
       <bean class="org.springframework.web.servlet.view.InternalResourceViewResolver" id="internalResourceViewResolver">
              <!-- 定义视图存放路径 -->
              <property name="prefix" value="/WEB-INF/" />
              <!-- 定义视图后缀 -->
              <property name="suffix" value=".jsp" />
       </bean>
</beans><context:component-scan base-package="com.frank.springmvc.controller" /> 是你要创建的controller的包名,可自行更改但必须保持一致。
<!-- 配置视图解析器解析路径 -->中的
 <property name="prefix" value="/WEB-INF/" /> 为前缀

 <property name="suffix" value=".jsp" /> 为后缀

在下面会详细解释
3.SpringMVC的简单应用
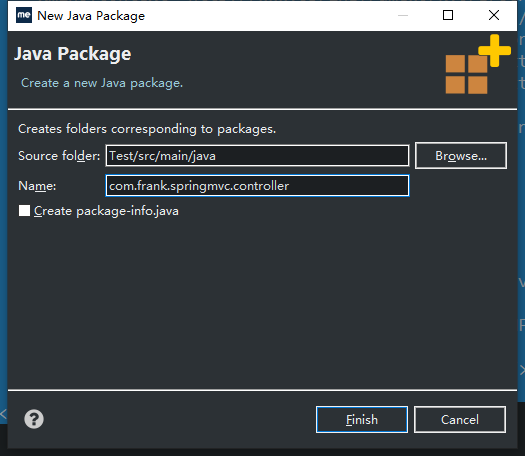
接下来创建package
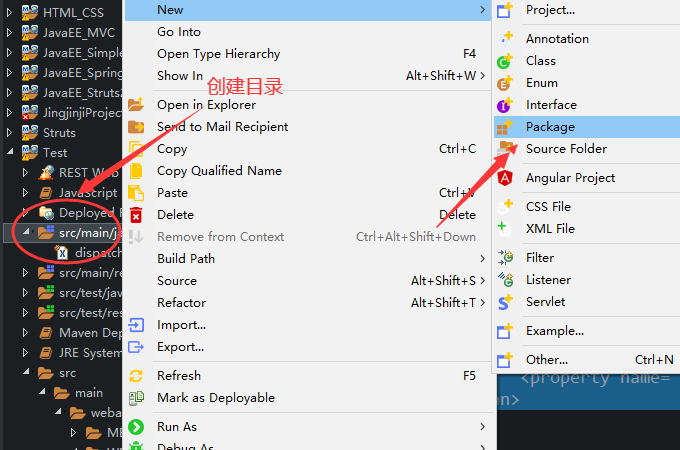
包名如上
com.frank.springmvc.controller
在该包中创建HellpSpringMVC类代码如下:
package com.frank.springmvc.controller;

import org.springframework.stereotype.Controller;
import org.springframework.web.bind.annotation.RequestMapping;

@Controller
public class HellpSpringMVC {

    @RequestMapping("hello")
    public String hello() {
        return "hello";
    }
}
@RequestMapping("hello") 这就是请求的hello,
在WEB-INF中创建hello.jsp
代码如下:
<%@ page language="java" import="java.util.*" pageEncoding="UTF-8"%>
<%
String path = request.getContextPath();
String basePath = request.getScheme()+"://"+request.getServerName()+":"+request.getServerPort()+path+"/";
%>

<!DOCTYPE HTML PUBLIC "-//W3C//DTD HTML 4.01 Transitional//EN">
<html>
  <head>
    <base href="<%=basePath%>">

    <title>My JSP 'hello.jsp' starting page</title>

    <meta http-equiv="pragma" content="no-cache">
    <meta http-equiv="cache-control" content="no-cache">
    <meta http-equiv="expires" content="0">
    <meta http-equiv="keywords" content="keyword1,keyword2,keyword3">
    <meta http-equiv="description" content="This is my page">
    <!--
    <link rel="stylesheet" type="text/css" href="styles.css">
    -->

  </head>

  <body>
    Spring Hello - Welcome<br>
  </body>
</html>
更改index.jsp的代码:
<%@ page language="java" import="java.util.*" pageEncoding="UTF-8"%>
<%
String path = request.getContextPath();
String basePath = request.getScheme()+"://"+request.getServerName()+":"+request.getServerPort()+path+"/";
%>

<!DOCTYPE HTML PUBLIC "-//W3C//DTD HTML 4.01 Transitional//EN">
<html>
  <head>
    <base href="<%=basePath%>">

    <title>My JSP 'index.jsp' starting page</title>
    <meta http-equiv="pragma" content="no-cache">
    <meta http-equiv="cache-control" content="no-cache">
    <meta http-equiv="expires" content="0">
    <meta http-equiv="keywords" content="keyword1,keyword2,keyword3">
    <meta http-equiv="description" content="This is my page">
    <!--
    <link rel="stylesheet" type="text/css" href="styles.css">
    -->
  </head>

  <body>
    <a href="hello">Hello</a>
  </body>
</html>
其中 <a href="hello">Spring Hello</a> 请求为hello会被web.xml的setvlet-mapping拦截
根据Controller类 HellpSpringMVC 的 @RequestMapping("hello") 执行 public String hello() 返回hello字符串
根据dispatcher-servlet.xml视图解析器(详见:上面的前缀以及后缀)
拼接成 /WEB-INF/ hello .jsp 这就是返回路径
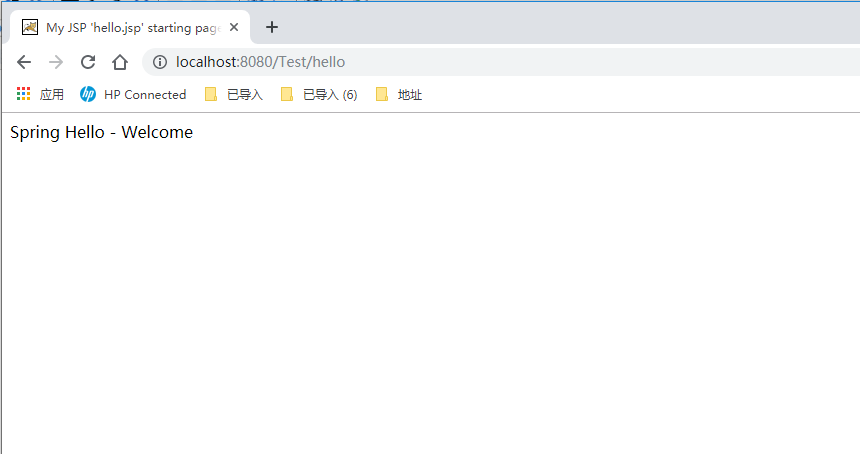
结果如下:
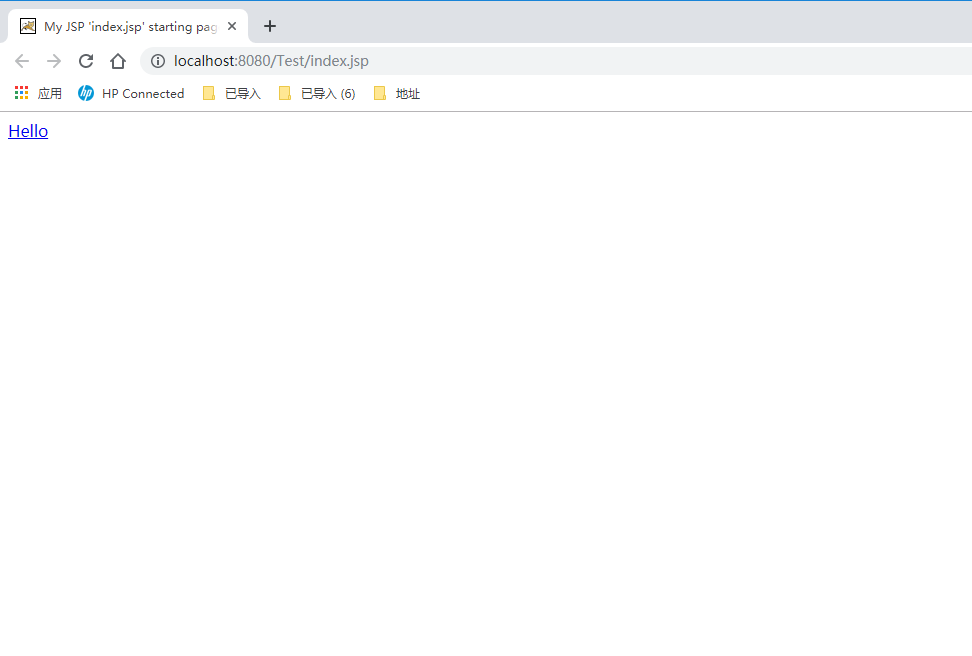
点击hello进入


 被折叠的 条评论
为什么被折叠?
被折叠的 条评论
为什么被折叠?
 到【灌水乐园】发言


