


 本文介绍了使用POM(PageObjectModel)和Selenium进行网页自动化测试的方法,包括页面元素定义、页面对象封装、Pytest测试用例、数据驱动和allure报告的集成。重点讲解了如何划分核心代码、元素定位、操作封装和测试数据管理。
pom是一种页面自动化设计模式。一般将核心代码分成四个部分:页面元素部分(pageLocators),页面对象部分(pageObjects),测试用例(test_case),测试数据(test_data)。
框架本身是基于Selenium,结合POM设计模式和分层思想,并配套日志、配置等常用模块的封装;用例部分基于Pytest单元测试框架,结合yml用例组织实现数据驱动;报告部分基于allure插件
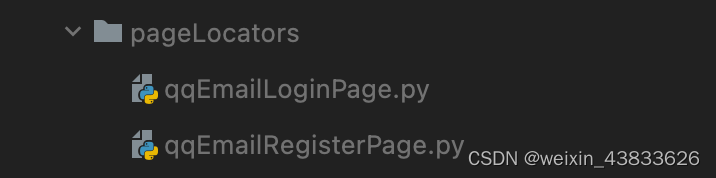
1.页面元素部分(pageLocators)
该部分主要按照测试用例场景的不同,新建对应的py文件。每个py文件里添加需要用到的元素以及定位方法。以下面截图为类,pageLocators里新增qq邮箱登录和注册的页面元素。
下面代码是邮箱登录相关的定位方法和元素,不需要将页面全部可以操作的元素写出来,只写该条测试用例相关的元素即可。
class QqEmailLoginPage:
	def __init__(self):
		self.username_class = (By.ID, "u")
		self.password_class = (By.ID, "p")
		self.click_class = (By.ID, "login_button")
		self.swith_user = (By.ID, "switcher_plogin")
		self.top_swith_frame = (By.CLASS_NAME,"QQMailSdkTool_login_loginBox_qq_iframe")
		self.swith_frame = (By.ID, "ptlogin_iframe")
		self.login_suc = (By.ID, "TodayWelcome")
		self.login_fail = (By.CLASS_NAME, "err_m")
2.页面对象部分(pageObjects)
该部分是封装了测试用例里需要用到的操作,比如输入,点击,截图,切换窗口等操作。
下面代码是邮箱登录相关的操作:
# 页面自动化pom设计模式
# 封装元素相关的操作

from selenium import webdriver
from selenium.webdriver import ActionChains
from selenium.webdriver.support.wait import WebDriverWait
from selenium.webdriver.support import expected_conditions as EC
from test_qqemail.common.get_config import Get_config

urls = Get_config().get_url("qq")


class ActionPage:
	def __init__(self):
		self.driver = webdriver.Chrome()

	def get_url(self, url=urls):
		self.driver.get(url)
		# 网页最大化
		# driver.maximize_window()
		# 隐式等待,最大等待时间为10秒,10秒未加载完页面元素,则进行下一步操作。如果10内加载完,则不需要等待直接进行下一步
		self.driver.implicitly_wait(10)

	def find_ele(self, element):
		return self.driver.find_element(*element)

	# 输入账号密码
	def send_keys(self, element, content):
		result = WebDriverWait(self.driver, 5, 0.5).until(EC.presence_of_element_located(element))
		return result.send_keys(content)

	# 点击操作
	def click_op(self, element):
		result = WebDriverWait(self.driver, 5, 0.5).until(EC.element_to_be_clickable(element))
		return result.click()

	# 切换到frame嵌套页面
	def switch_iframe(self, element):
		result = WebDriverWait(self.driver, 5, 0.5).until(EC.element_to_be_clickable(element))
		return self.driver.switch_to.frame(result)

	# 退出嵌套页面
	def switch_quit(self):
		return self.driver.switch_to.default_content()

	# 获取截图
	def get_screenshot(self, file):
		return self.driver.get_screenshot_as_file(file)

	# 退出浏览器
	def quit_window(self):
		return self.driver.quit()
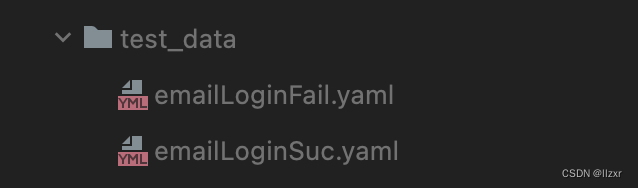
3.测试数据(test_data)
测试数据我是用yaml文件来储存的,按照测试用例不同的场景新建不同的yaml文件。
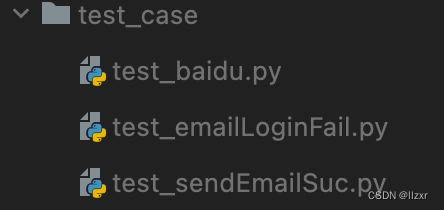
4.测试用例(test_case)
testcases层存放各模块下的测试用例,test_xxx.py文件操作页面对象,实现正向和反向业务场景的测试,加上断言,判断用例执行结果。
下面是发送邮件的测试用例:
import time
import pytest
import allure
from test_qqemail.pageLocators.qqSendEmail import QqSendEmail
from test_qqemail.common.get_yaml import Make_yaml
qq = QqSendEmail()


@allure.feature("邮件发送成功")
class Test_sendemailSuc:
	@pytest.mark.parametrize("test_case", Make_yaml("emailSendSuc.yaml").get_yaml())
	def test_login(self, Login_main, test_case):
		print(test_case, test_case["addressee"])
		# 隐式等待
		Login_main.driver.implicitly_wait(10)

		with allure.step("进入写信页面"):
			Login_main.click_op(qq.writeEmail)

		with allure.step("输入收件人和内容"):
			# 输入框在frame嵌套里面
			Login_main.switch_iframe(qq.switchMainFrame)
			time.sleep(5)
			# 收件人输入框隐藏元素,需要js去操作
			js = f"document.querySelector('#toAreaCtrl > div.addr_text > input').value={test_case['addressee']}"
			Login_main.driver.execute_script(js)
			# 输入主题
			Login_main.send_keys(qq.theme, test_case["theme"])
5.配置文件
config.ini(配置文件),建议不同环境请求地址,数据库地址账号密码等信息放在配置文件里。将所有的代码和配置都变成模块化可配置化,可以提高代码的复用性;这样有数据或代码变动时,不用每次都去修改代码内部。
例如:如果要换其他环境或者地址,只要修改配置文件里的url
[url]
baidu=https://www.baidu.com/
6.common工具部分
common是一个存放常用工具类的文件夹,封装了一些常用方法,比如:配置文件的读取、接口请求、yml文件解析、文件上传、日志收集等。
7.conftest.py
比如我们需要测试一个登录后查询订单的测试用例。不需要每次都写登录模块,可以把登录模块用fixture修饰,存放在conftest.py文件中。将登录方法当作形参传入需要测试的方法中。
import pytest
import allure
from test_qqemail.pageObjects.actionPage import ActionPage
from test_qqemail.pageLocators.qqEmailLoginPage import QqEmailLoginPage
from test_qqemail.pageObjects.webDriverWait import to_be_title

driver = ActionPage()
qq = QqEmailLoginPage()


@pytest.fixture(scope="class")
def Login_main():
	with allure.step("访问网站"):
		driver.get_url()

	with allure.step("切换到iframe内部"):
		driver.switch_iframe(qq.top_swith_frame)
		driver.switch_iframe(qq.swith_frame)

	# 输入账号密码
	with allure.step("输入账号密码"):
		# 切换到输入密码页面
		# driver.click_op(qq.swith_user)
		# 输入账号
		# driver.send_keys(qq.username_class, content=testcase["username"])
		# 输入密码
		# driver.send_keys(qq.password_class, content=testcase["password"])
		driver.click_op(qq.click_login)
		# 截图当前页面
		driver.get_screenshot("./a.png")
		allure.attach.file("./a.png", attachment_type=allure.attachment_type.PNG)

	with allure.step("退出嵌套页面"):
		driver.switch_quit()

	with allure.step("判断是否登录成功"):
		# 该元素在iframe内
		# assert to_be_located(driver.driver, qq.login_suc) is True
		# 校验登录成功后的title
		assert to_be_title(driver.driver, "QQ邮箱") is True
		driver.get_screenshot("./a.png")
		allure.attach.file("./a.png", attachment_type=allure.attachment_type.PNG)

	yield driver
	driver.quit_window()
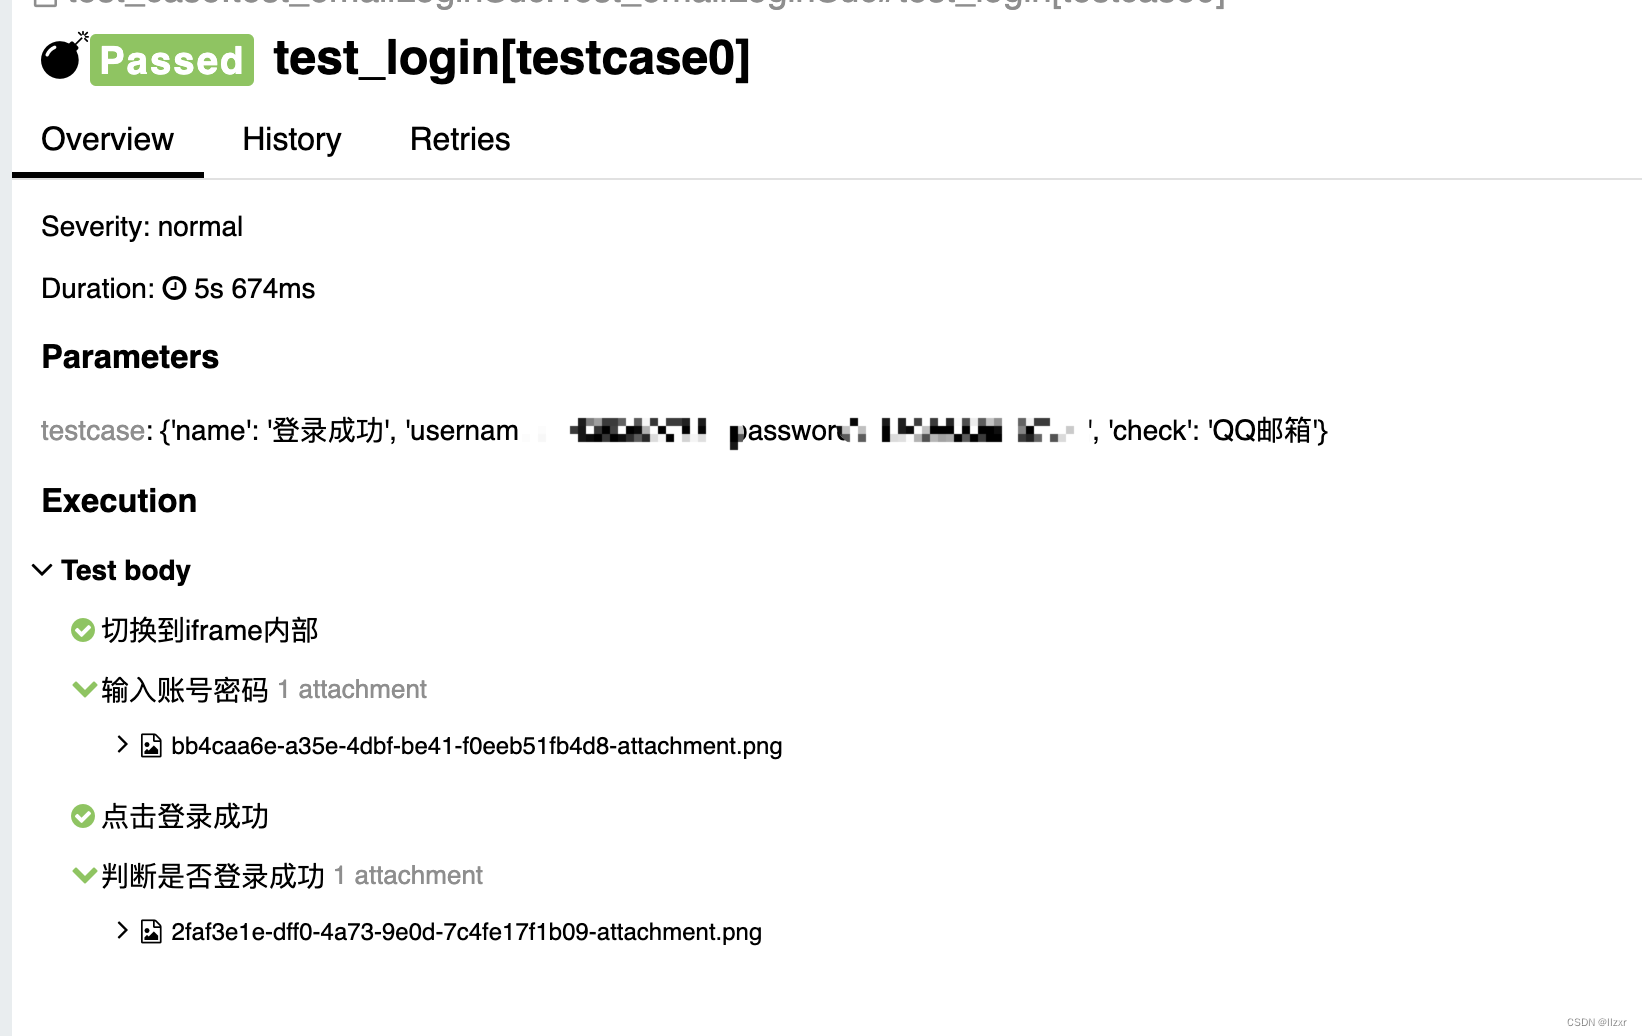
8.allure报告
用于储存allure报告和页面的截图。在terminal中输入allure serve ./report/xml启动allure报告
总结:
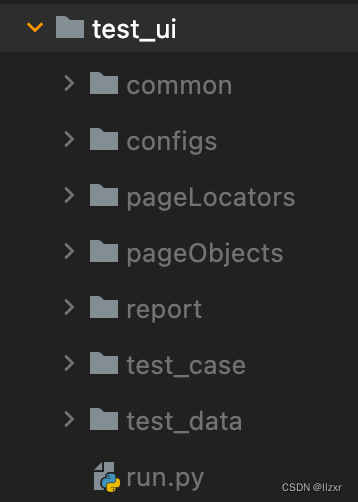
common:常用的工具类
configs:配置文件
pageLocators:页面元素
pageObjects:页面对象
report:测试报告
test_case:测试用例
test_data:测试数据
conftest.py:存放fixture修饰的前置步骤,比如登录模块
run.py:运行全部测试用例或者指定的测试用例,并且生成报告


 1085
1085

 被折叠的 条评论
为什么被折叠?
被折叠的 条评论
为什么被折叠?
 到【灌水乐园】发言


