


 本文详细介绍了如何使用MyBatis在IDEA中生成代码,并结合HTML页面(如index.html, single-product.html, registration.html, login.html, cart.html, checkout.html)实现电商网站的基本功能。步骤包括数据库表创建、代码生成、Controller和Service编写,以及Mapper接口和XML配置。此外,还涵盖了购物车功能的实现,包括添加商品、删除商品和提交订单。整个流程涉及前端页面与后端服务的交互,以及数据库操作。
一、Index.html 以及 single-product.html首页、商品展示两个网页
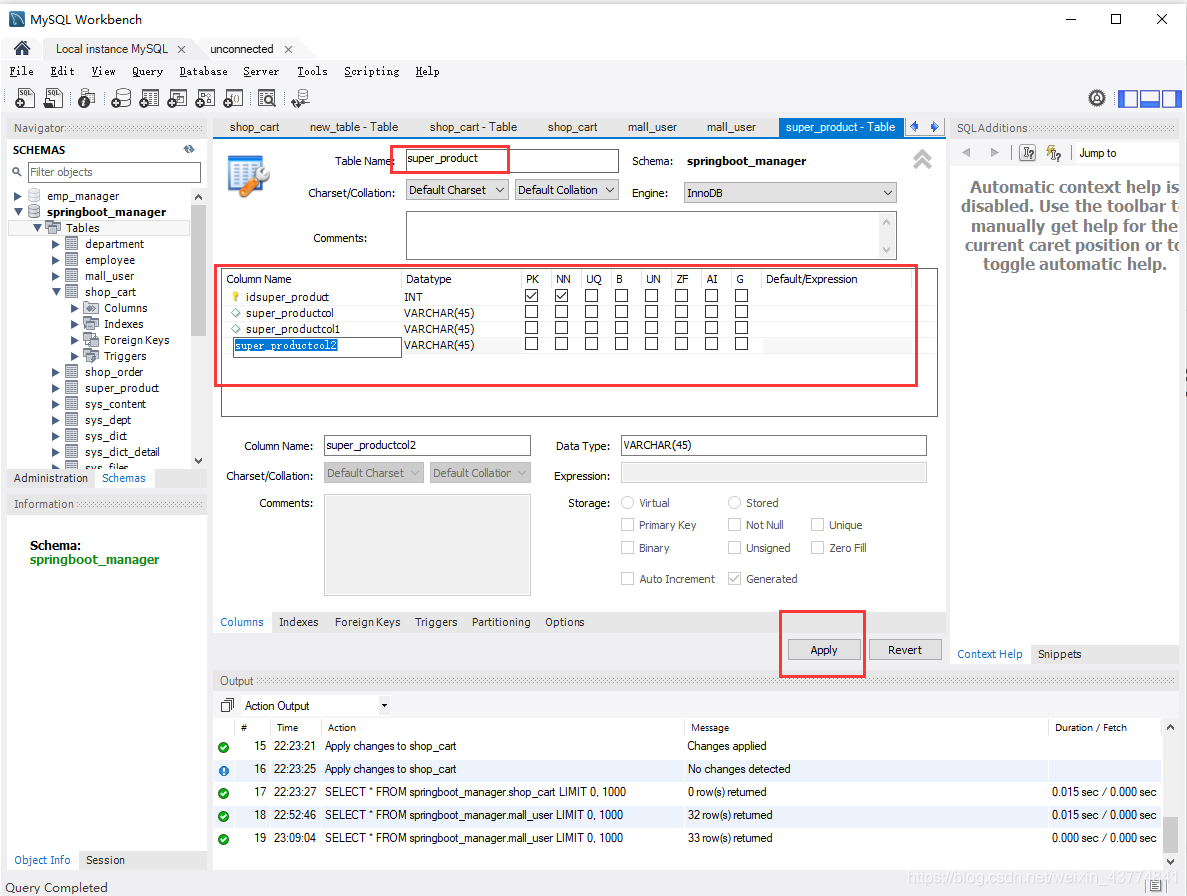
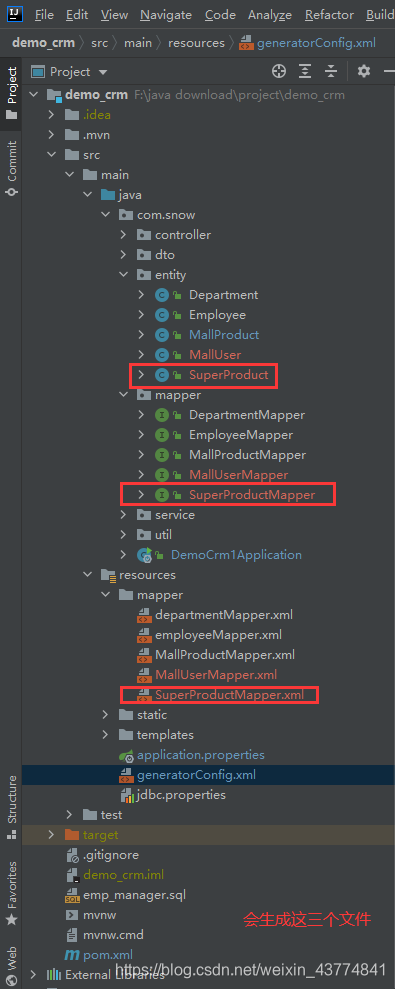
第一步、首先在MySQL数据生成一张表
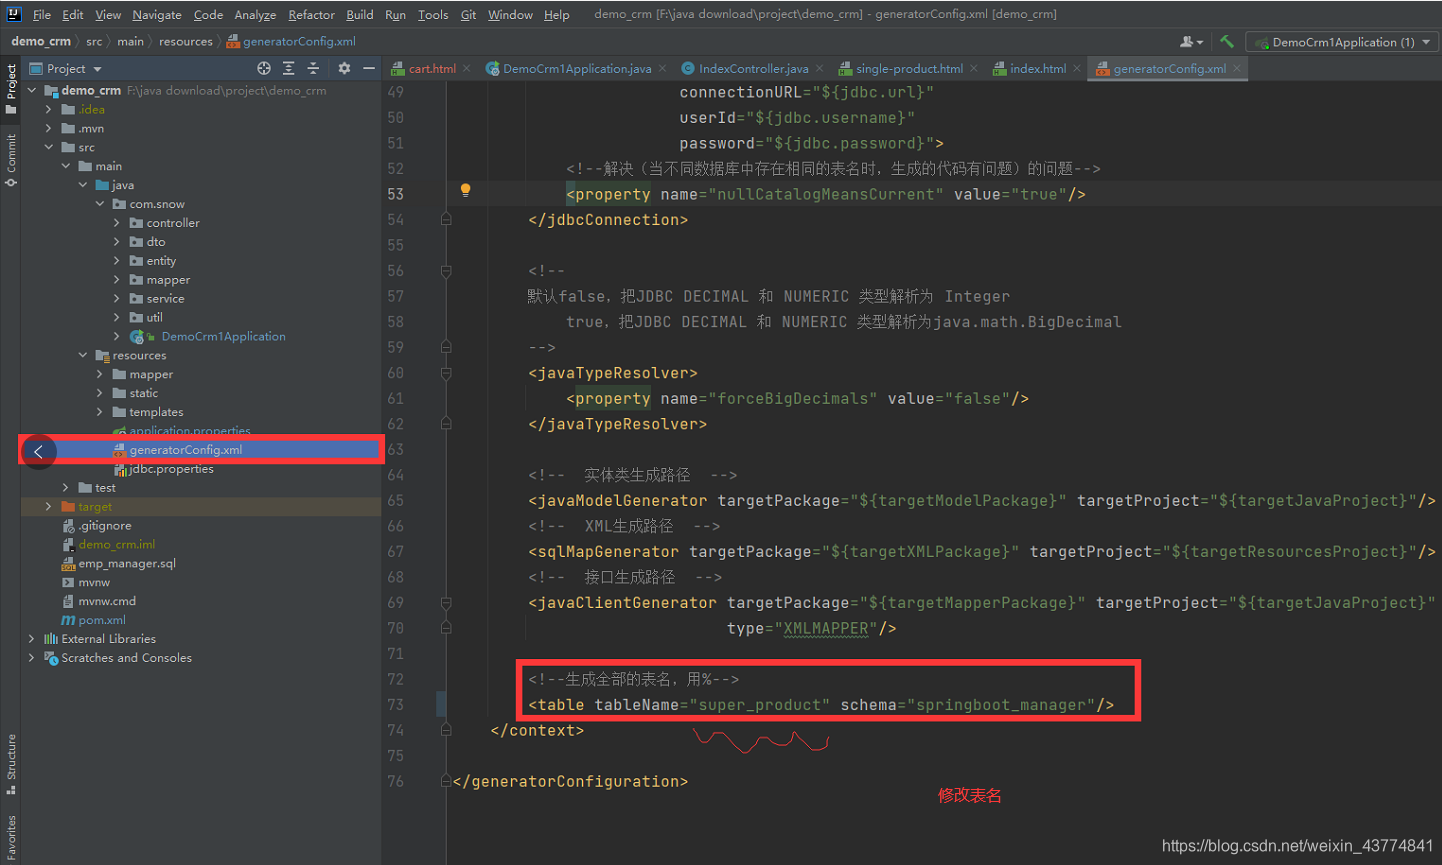
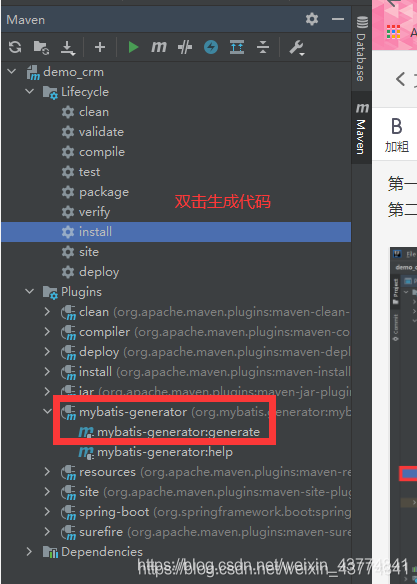
第二步、在IDEA中的generatorConfig.xml文件中,输入表的名字,然后点击Maven——plugins——mybatis-generator-mybatis-generator-generate生成代码
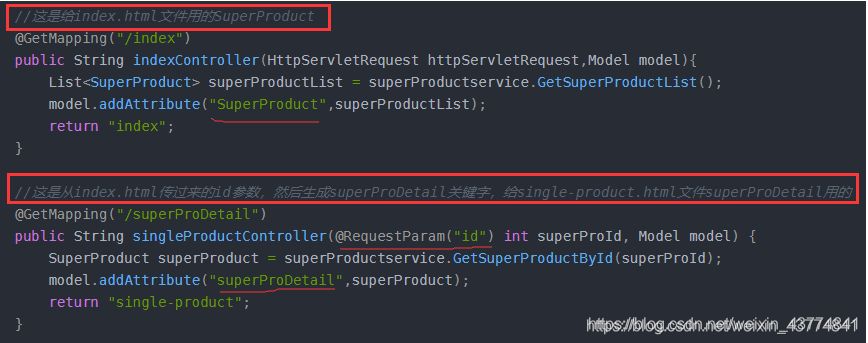
第三步、在HTML文件index.html中添加数据

第四步、在HTML文件single-product.html中添加数据

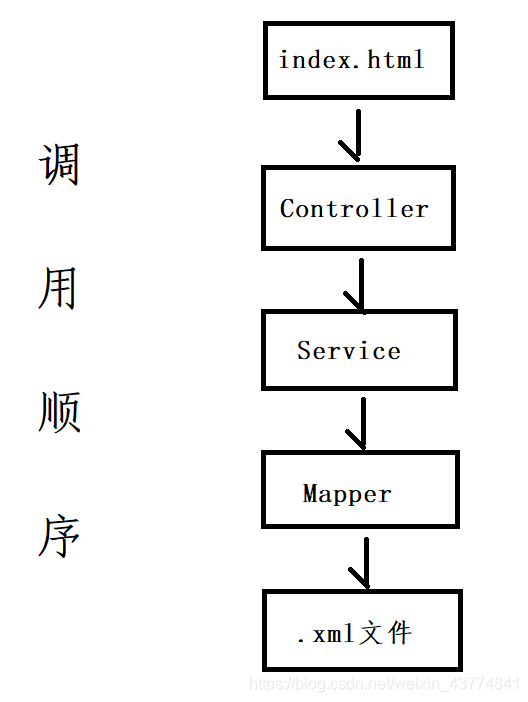
第五步、自己写Controller和Service,也就是下面三个文件要自己写
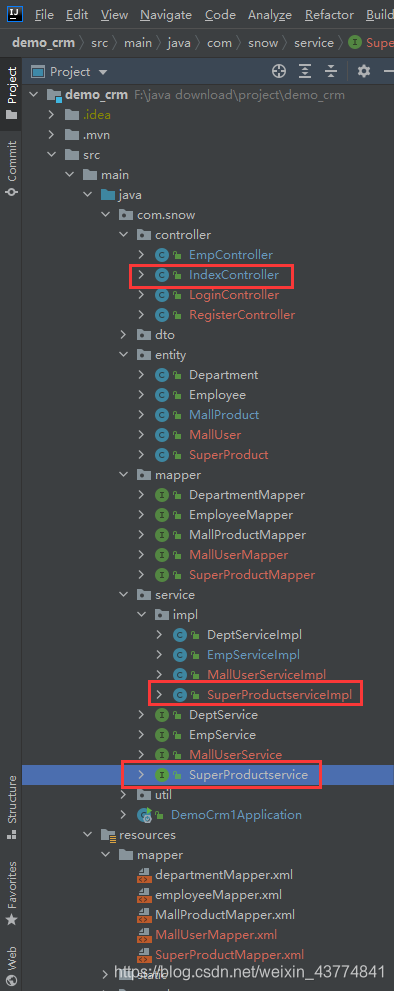
Controller:
SuperProductservice:
@Service
public interface SuperProductservice {

    List<SuperProduct> GetSuperProductList();

    SuperProduct GetSuperProductById(int SuperProId);

    List<SuperProduct> GetSuperProductByIdList(int[] SuperProIdList);
}
SuperProductserviceImpl:(这是SuperProductservice的实现类,工业标准)
@Service
public class SuperProductserviceImpl implements SuperProductservice {
    @Autowired
    SuperProductMapper superProductMapper;

    @Override
    public List<SuperProduct> GetSuperProductList() {
        return superProductMapper.selectAll();
    }

    @Override
    public SuperProduct GetSuperProductById(int SuperProId) {
        return superProductMapper.selectByPrimaryKey(SuperProId);
    }

    @Override
    public List<SuperProduct> GetSuperProductByIdList(int[] SuperProIdList) {
        List<SuperProduct> superProductList = new ArrayList<>();
        for (int j : SuperProIdList) {
            superProductList.add(superProductMapper.selectByPrimaryKey(j));
        }
        return superProductList;
    }
}
Mapper
@Mapper
public interface SuperProductMapper {
    int deleteByPrimaryKey(Integer id);

    int insert(SuperProduct record);

    SuperProduct selectByPrimaryKey(Integer id);

    List<SuperProduct> selectAll();

    int updateByPrimaryKey(SuperProduct record);
}
.XML文件

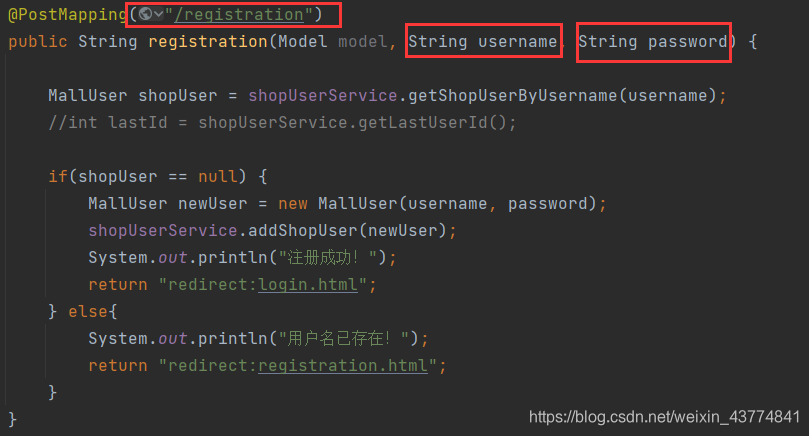
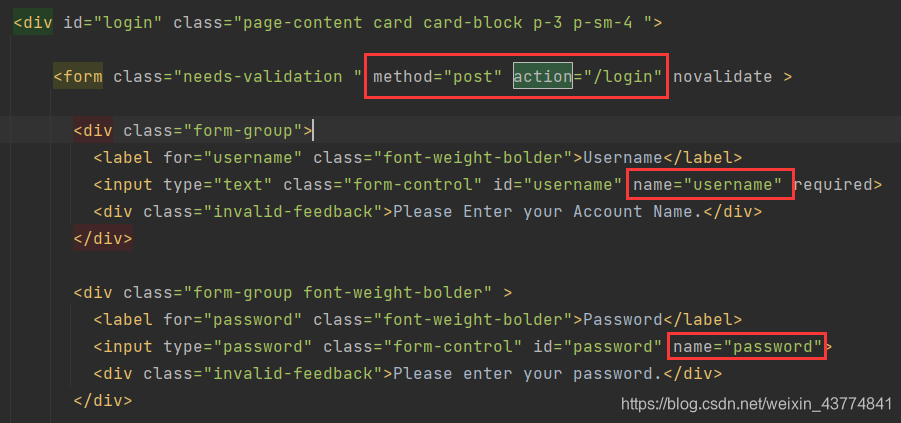
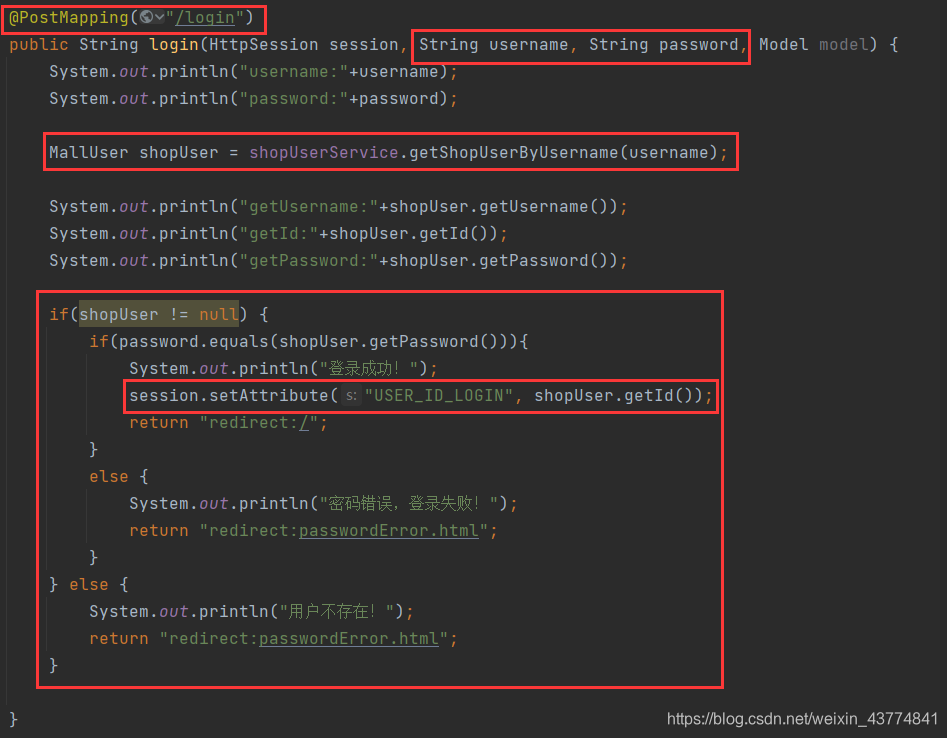
二、registration.html 以及 login.html注册和登录页面
registration.html

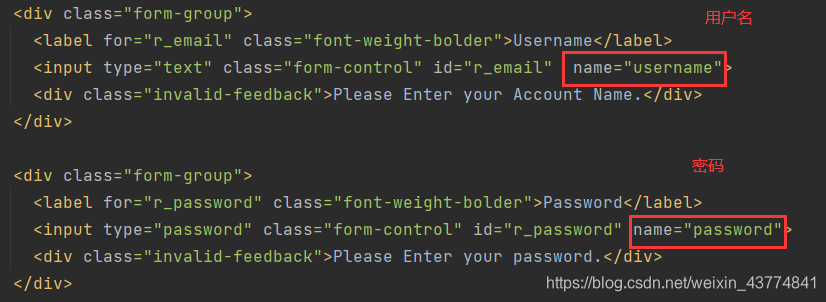
RegisterController
login.html
LoginController
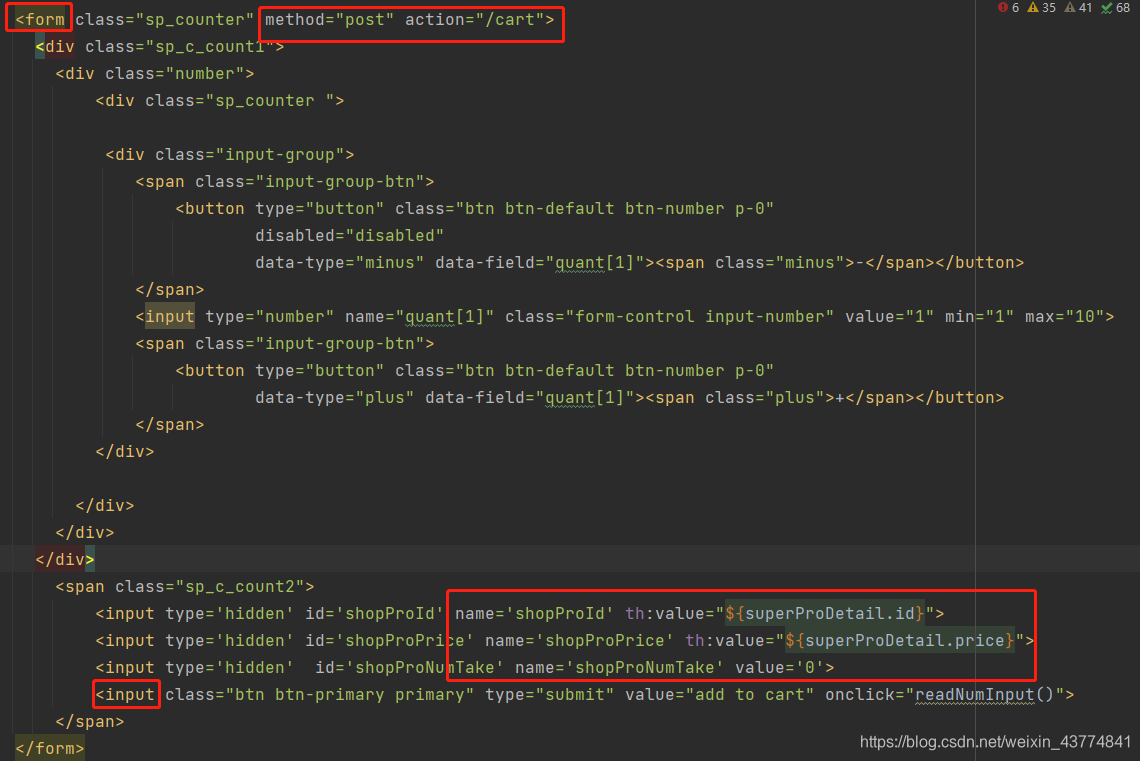
三、cart.html 购物车页面
购物车主要是两个功能,分别是
①single-product.html商品页面添加宝贝到购物车,并展示出来的功能
②购物车删除宝贝的功能
③提交订单的功能
①single-product.html添加商品到购物车
single-product.html商品页面,实现,我一点击商品添加到购物车功能,就可以获得响应
CartController通过PostMappering来获取用户提交的宝贝信息,写入数据库,然后返回关联字让cart.html页面可以显示出来
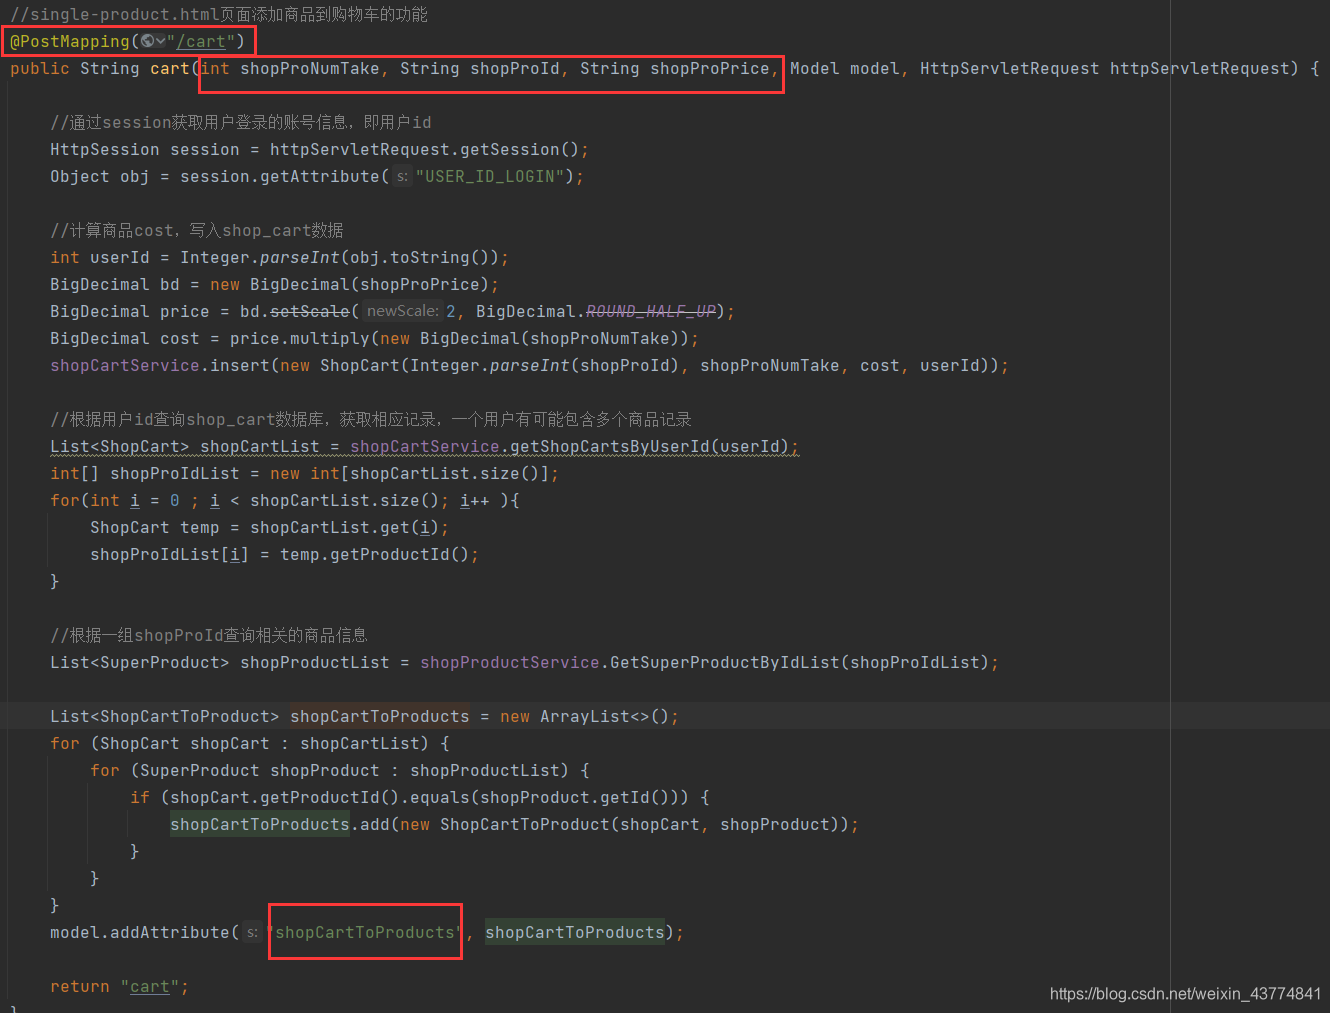
cart.html
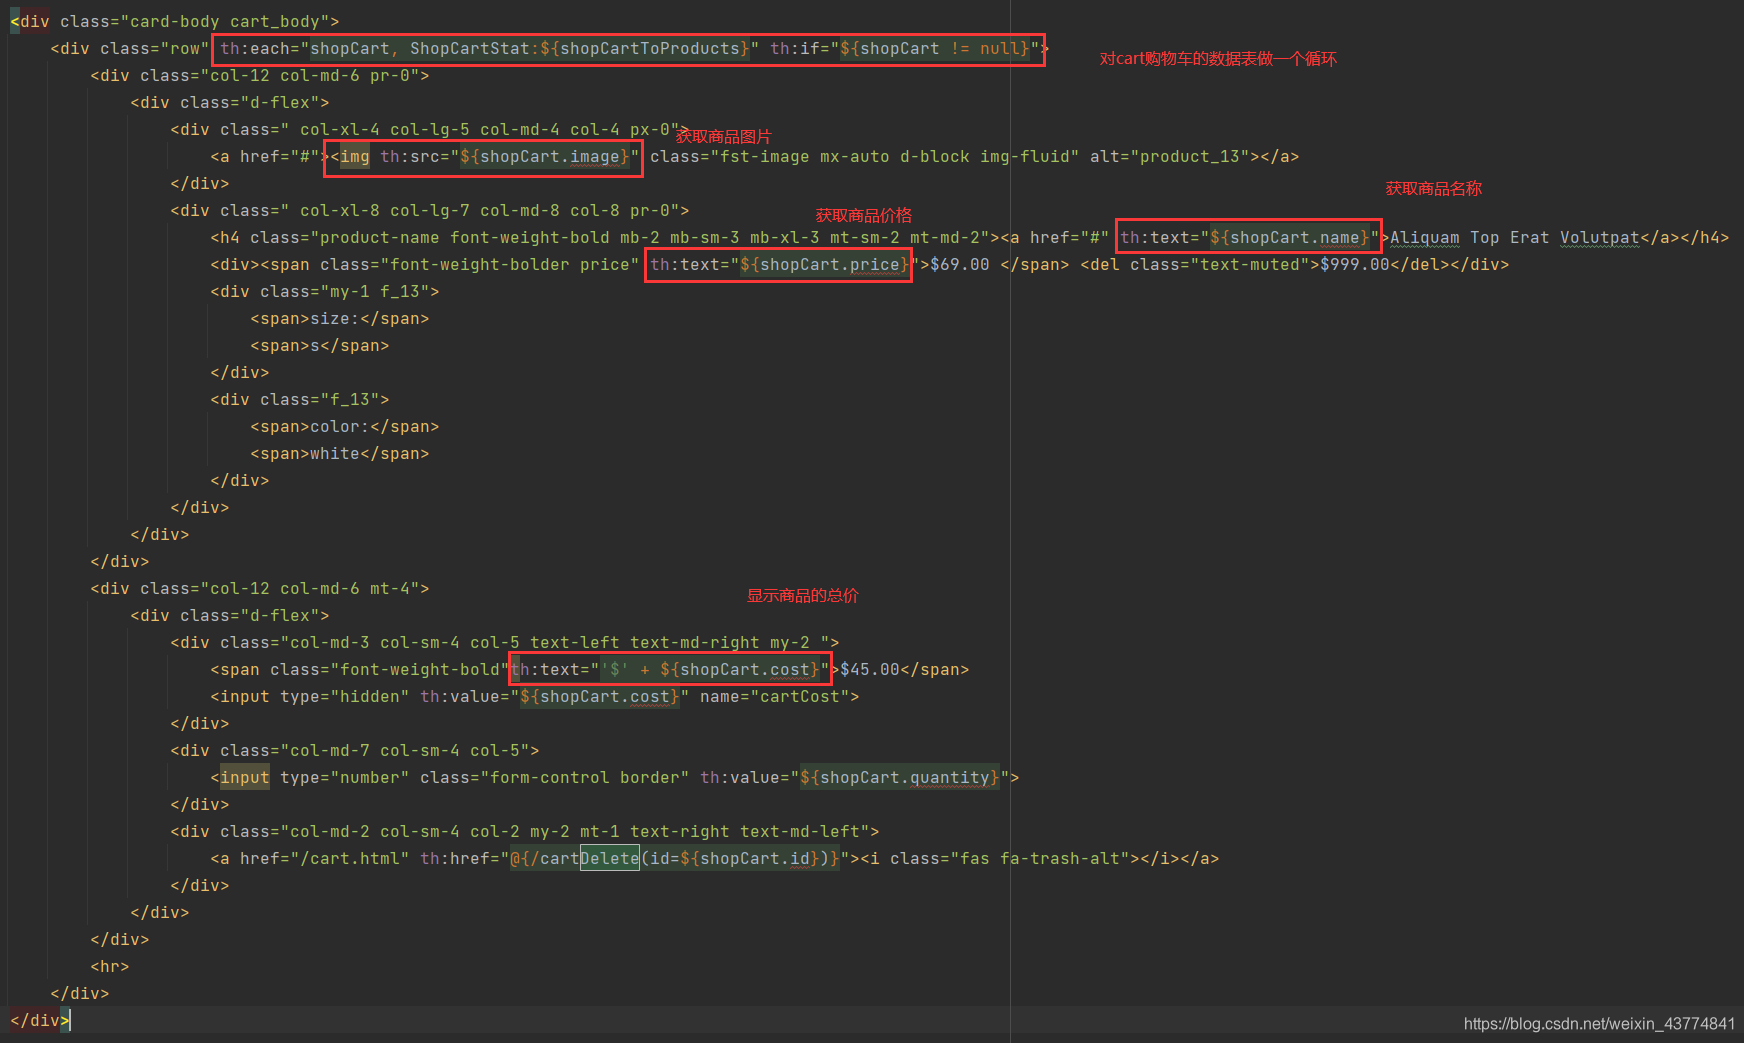
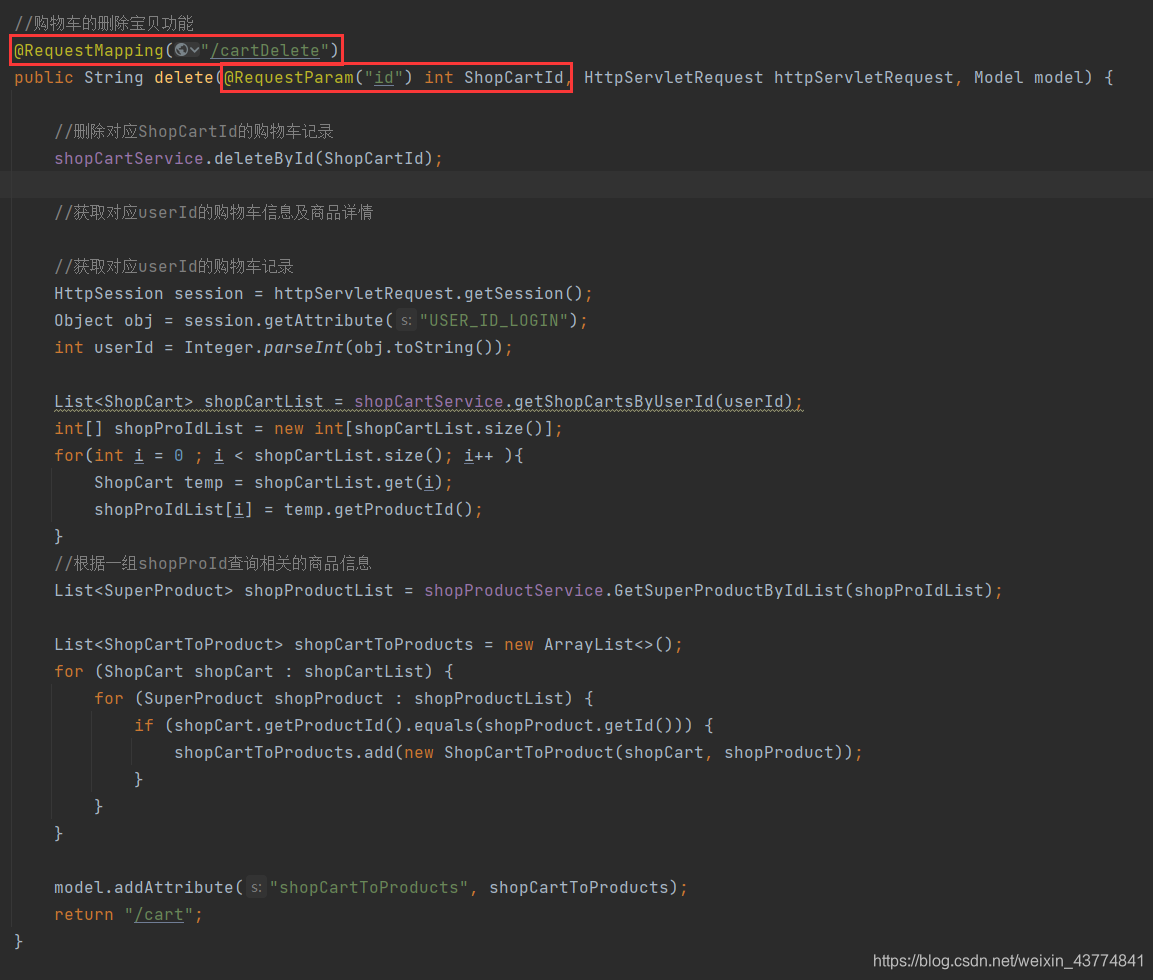
②购物车删除宝贝的功能
点击删除的时候把商品的id传回去Controller就可以了
cart.html

CartController
③提交订单的功能
这个功能不用写什么,直接用一个跳转到checkout.html订单页面就可以了,然后Controller通过session接收用户id,再通过用户id在cart数据库表中搜索显示出来就行
cart.html

Controller
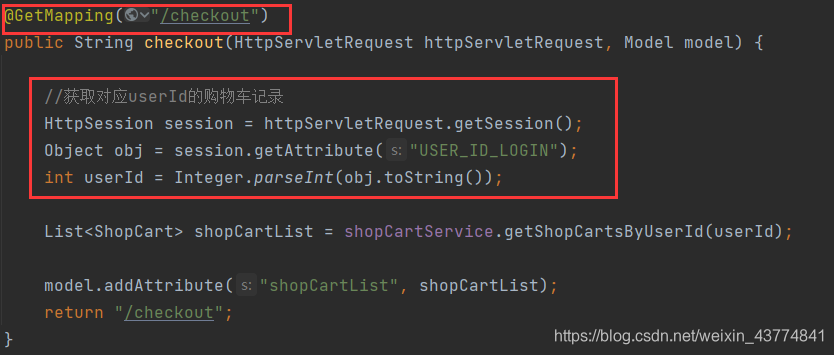
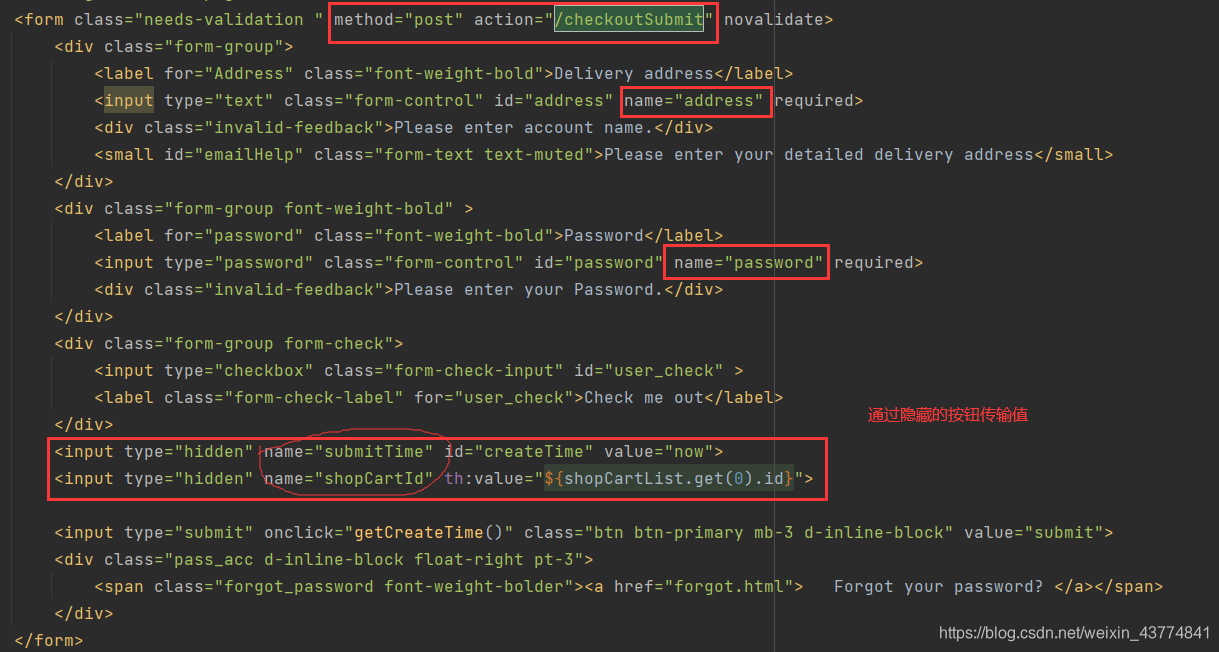
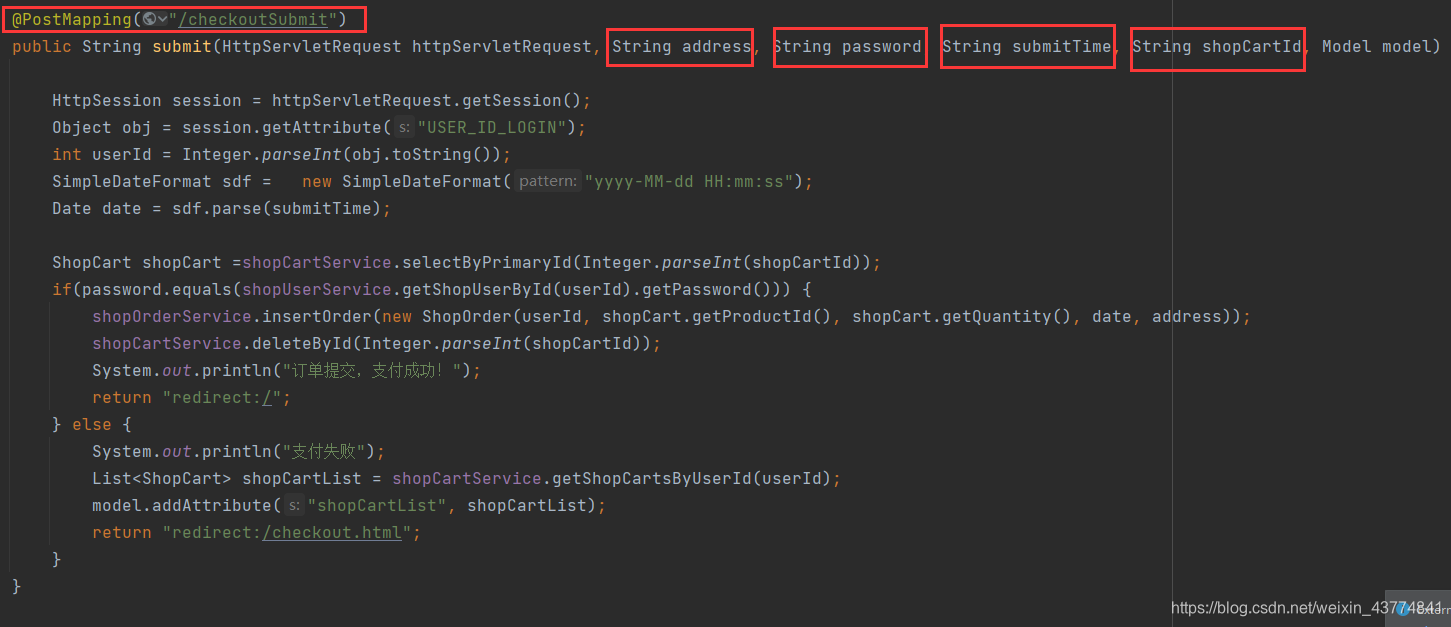
四、checkout.html 订单页面
订单页面要实现两个功能
用户提交订单后,相应的数据库要做一些删除的操作
checkout.html
CartController


 3571
3571

 被折叠的 条评论
为什么被折叠?
被折叠的 条评论
为什么被折叠?
 到【灌水乐园】发言


