


Spring Cloud Eureka服务治理
目录
- Eureka服务治理
- 搭建Eureka-Server服务注册中心
- 搭建Eureka-Client服务提供者
- Eureka-Server添加认证
- 搭建Server-Consumer服务消费者
- Eureka-Server集群
- Eureka配置
Eureka服务治理
Eureka是由Netflix开发的一款服务治理开源框架,Spring-cloud对其进行了集成。Eureka既包含了服务端也包含了客户端,Eureka服务端是一个服务注册中心(Eureka Server),提供服务的注册和发现,即当前有哪些服务注册进来可供使用;Eureka客户端为服务提供者(Server Provider),它将自己提供的服务注册到Eureka服务端,并周期性地发送心跳来更新它的服务租约,同时也能从服务端查询当前注册的服务信息并把它们缓存到本地并周期性地刷新服务状态。这样服务消费者(Server Consumer)便可以从服务注册中心获取服务名称,并消费服务。
搭建Eureka-Server服务注册中心
工具IDEA
新建一个Spring Boot项目
引入相应的jar包
<version填Edgware.SR3
    <groupId>com.zlx</groupId>
    <artifactId>spring-cloud</artifactId>
    <version>0.0.1-SNAPSHOT</version>
    <name>spring-cloud</name>
    <description>Demo project for Spring Boot</description>

    <properties>
        <java.version>1.8</java.version>
        <spring-cloud.version>Edgware.SR3</spring-cloud.version>
    </properties>

    <dependencies>
        <dependency>
            <groupId>org.springframework.cloud</groupId>
            <artifactId>spring-cloud-starter-netflix-eureka-server</artifactId>
        </dependency>

        <dependency>
            <groupId>org.springframework.boot</groupId>
            <artifactId>spring-boot-starter-test</artifactId>
            <scope>test</scope>
        </dependency>
    </dependencies>

    <dependencyManagement>
        <dependencies>
            <dependency>
                <groupId>org.springframework.cloud</groupId>
                <artifactId>spring-cloud-dependencies</artifactId>
                <version>Edgware.SR3</version>
                <type>pom</type>
                <scope>import</scope>
            </dependency>
        </dependencies>
    </dependencyManagement>
在启动类上添加@EnableEurekaServer注解,表明这是一个Eureka服务端:
@EnableEurekaServer
@SpringBootApplication
public class SpringCloudApplication {

    public static void main(String[] args) {
        SpringApplication.run(SpringCloudApplication.class, args);
    }
}
接着在application.yml中添加一些配置:
server:
  port: 80

eureka:
  instance:
    hostname: localhost
  client:
    register-with-eureka: false
    fetch-registry: false
    serviceUrl:
      defaultZone: http://root:root@localhost:80/eureka/
上面配置了服务的端口为80,剩下几个为Eureka配置:
- eureka.instance.hostname指定了Eureka服务端的IP;
- eureka.client.register-with-eureka表示是否将服务注册到Eureka服务端,由于自身就是Eureka服务端,所以设置为false;
- eureka.client.fetch-registry表示是否从Eureka服务端获取服务信息,因为这里只搭建了一个Eureka服务端,并不需要从别的Eureka服务端同步服务信息,所以这里设置为false;
- eureka.client.serviceUrl.defaultZone指定Eureka服务端的地址,默认值为http://localhost:8761/eureka。
配置完毕后启动服务,访问http://localhost:80/,可看到:

由于还没有Eureka客户端将服务注册进来,所以Instances currently registered with Eureka列表是空的。
下面我们接着搭建一个Eureka客户端来提供服务。
搭建Eureka-Client服务提供者
新建一个Spring Boot项目,version填Edgware.SR3,然后引入以下依赖:
<groupId>com.zlx</groupId>
    <artifactId>eureka-client</artifactId>
    <version>0.0.1-SNAPSHOT</version>
    <name>eureka-client</name>
    <description>Demo project for Spring Boot</description>

    <properties>
        <java.version>1.8</java.version>
        <spring-cloud.version>Edgware.SR3</spring-cloud.version>
    </properties>

    <dependencies>
        <dependency>
            <groupId>org.springframework.cloud</groupId>
            <artifactId>spring-cloud-starter-eureka</artifactId>
        </dependency>

        <dependency>
            <groupId>org.springframework.boot</groupId>
            <artifactId>spring-boot-starter</artifactId>
        </dependency>

        <dependency>
            <groupId>org.springframework.cloud</groupId>
            <artifactId>spring-cloud-starter-config</artifactId>
        </dependency>

        <dependency>
            <groupId>org.springframework.boot</groupId>
            <artifactId>spring-boot-starter-test</artifactId>
            <scope>test</scope>
        </dependency>
    </dependencies>

    <dependencyManagement>
        <dependencies>
            <dependency>
                <groupId>org.springframework.cloud</groupId>
                <artifactId>spring-cloud-dependencies</artifactId>
                <version>Edgware.SR3</version>
                <type>pom</type>
                <scope>import</scope>
            </dependency>
        </dependencies>
    </dependencyManagement>
接着编写一个TestController
@RestController
public class TestController {
    @RequestMapping(value = "/info",method = RequestMethod.GET)
    public String info() {
        return "登录成功";
    }

}
编写启动类,在启动类上加@EnableDiscoveryClient注解,表明这是一个Eureka客户端:
@EnableDiscoveryClient
@SpringBootApplication
public class EurekaClientApplication {
    public static void main(String[] args) {
        SpringApplication.run(EurekaClientApplication.class, args);
    }
}
最后配置application.yml:
server:
  port: 83

spring:
  application:
    name: Server-Provider

eureka:
  client:
    register-with-eureka: true
    fetch-registry: true
    serviceUrl:
      defaultZone: http://root:root@localhost:80/eureka/
配置的意思:
- server.port指定了服务的端口为83;
- spring.application.name指定服务名称为Server-Provider,后续服务消费者要获取上面TestController中接口的时候会用到这个服务名;
- eureka.client.serviceUrl.defaultZone指定Eureka服务端的地址,这里为上面定义的Eureka服务端地址;
- eureka.client.register-with-eureka和eureka.client.fetch-registry上面已经解释了其意思,虽然这两个配置的默认值就是true,但这里还是显式配置下,使Eureka客户端的功能更为直观(即向服务端注册服务并定时从服务端获取服务缓存到本地)。
配置好后,启动Eureka-Client,可以从控制台中看到注册成功的消息:
: Registered Applications size is zero : true
: Application version is -1: true
: Getting all instance registry info from the eureka server
: The response status is 200
: Starting heartbeat executor: renew interval is: 30
: InstanceInfoReplicator onDemand update allowed rate per min is 4
: Discovery Client initialized at timestamp 1548072419735 with initial instances count: 0
: Registering application Server-Provider with eureka with status UP
: Saw local status change event StatusChangeEvent [timestamp=1548072419744, current=UP, previous=STARTING]
: DiscoveryClient_SERVER-PROVIDER/DESKTOP-FT5TDM5:Server-Provider:8889: registering service...
: Tomcat started on port(s): 83 (http)
: Updating port to 83
第3,4行输出表示已经成功从Eureka服务端获取到了服务;
第5行表示发送心跳给Eureka服务端,续约(renew)服务;
第8到11行表示已经成功将服务注册到了Eureka服务端。
再次访问http://localhost:80/,可看到服务列表里已经出现了名字为Server-providerde服务了:

可看到虽然Eureka客户端已经关闭了,但是Eureka服务端页面的服务服务列表中依然还有该服务,并且页面红色文字提示:
EMERGENCY! EUREKA MAY BE INCORRECTLY CLAIMING INSTANCES ARE UP WHEN THEY’RE NOT. RENEWALS ARE LESSER THAN THRESHOLD AND HENCE THE INSTANCES ARE NOT BEING EXPIRED JUST TO BE SAFE.
大致意思是Eureka已经进入了保护模式。微服务在部署之后可能由于网络问题造成Eureka客户端无法成功的发送心跳给Eureka服务端,这时候Eureka服务端认定Eureka客户端已经挂掉了,虽然实际上Eureka客户端还在正常的运行着。而保护模式就是为了解决这个问题,即当Eureka服务端在短时间内同时丢失了过多的Eureka客户端时,Eureka服务端会进入保护模式,不去剔除这些客户端。因为我们这里只部署了一个Eureka客户端服务,所以关闭客户端后满足“短时间内丢失过多Eureka客户端”的条件。
在开发中可以先将保护模式给关了,我们在Eureka服务端加上一条配置:
eureka:
  server:
    enable-self-preservation: false
Eureka-Server添加认证
出于安全的考虑,我们可能会对Eureka服务端添加用户认证的功能。我们在Eureka-Server引入Spring-Security依赖:
<!--安全jar包-->
        <dependency>
            <groupId>org.springframework.boot</groupId>
            <artifactId>spring-boot-starter-security</artifactId>
        </dependency>
然后在application.yml中配置用户名和密码:
security:
  user:
    name: root
    password: root
  basic:
    enabled: true
Eureka服务端配置了密码之后,所有eureka.client.serviceUrl.defaultZone的配置也必须配置上用户名和密码,格式为:eureka.client.serviceUrl.defaultZone=http:// u s e r N a m e : {userName}: userName:{password}@ h o s e t n a m e : {hosetname}: hosetname:{port}/eureka/,如:
eureka:
  client:
    register-with-eureka: true
    fetch-registry: true
    serviceUrl:
      defaultZone: http://root:root@localhost:80/eureka/
重新打包并部署后,访问http://localhost:80/,页面将弹出验证窗口,输入用户名和密码后即可访问。
搭建Server-Consumer服务消费者
在实际项目中,Eureka客户端即是服务提供者,也是服务消费者,即自身的接口可能被别的服务访问,同时也可能调用别的服务接口。这里为了更好的演示,我们把服务消费者单独的分开来演示。
新建一个Spring Boot项目,artifactId填Server-Consumer,其主要的任务就是将自身的服务注册到Eureka服务端,并且获取Eureka服务端提供的服务并进行消费。这里服务的消费我们用Ribbon来完成,Ribbon是一款实现服务负载均衡的开源软件,这里不做详细介绍。
引入Eureka客户端和Ribbon依赖:
<properties>
        <java.version>1.8</java.version>
        <spring-cloud.version>Edgware.SR3</spring-cloud.version>
    </properties>

    <dependencies>
        <dependency>
            <groupId>org.springframework.cloud</groupId>
            <artifactId>spring-cloud-starter-eureka</artifactId>
        </dependency>

        <dependency>
            <groupId>org.springframework.boot</groupId>
            <artifactId>spring-boot-starter</artifactId>
        </dependency>
        <dependency>
            <groupId>org.springframework.cloud</groupId>
            <artifactId>spring-cloud-starter-feign</artifactId>
        </dependency>

    </dependencies>

    <dependencyManagement>
        <dependencies>
            <dependency>
                <groupId>org.springframework.cloud</groupId>
                <artifactId>spring-cloud-dependencies</artifactId>
                <version>Edgware.SR3</version>
                <type>pom</type>
                <scope>import</scope>
            </dependency>
        </dependencies>
    </dependencyManagement>
同样的,在入口类中加入@EnableDiscoveryClient注解和@EnableFeignClients用于发现服务和注册服务
@EnableDiscoveryClient
@EnableFeignClients
@SpringBootApplication
public class ServerConsumerApplication {
    public static void main(String[] args) {
        SpringApplication.run(ServerConsumerApplication.class, args);
    }
}
接着编写UserClientFeign接口和一个TestController,用于消费服务:
@FeignClient(name = "Server-Provider")
public interface UserClientFeign {
        @RequestMapping(value = "/info",method = RequestMethod.GET)
     public String login();
}
@RestController
public class TestController {
    @Resource
    private UserClientFeign userClientFeign;

    @RequestMapping("/userLogin")
    public String getInfo() {
        return "消费者调用了"+userClientFeign.login();
    }
}
最后编写下配置文件application.yml:
server:
  port: 84
spring:
  application:
    name: Service-Consumer
eureka:
  client:
    service-url:
      defaultZone: http://root:root@localhost:80/eureka/
端口为84,服务名称为Server-Consumer并指定了Eureka服务端的地址。
启动该项目,访问http://localhost:84/userLogin:

可以看到它们的后台都打印出了信息
Eureka-Server集群
Eureka服务端充当了重要的角色,所有Eureka客户端都将自己提供的服务注册到Eureka服务端,然后供所有服务消费者使用。如果单节点的Eureka服务端宕机了,那么所有服务都无法正常的访问,这必将是灾难性的。为了提高Eureka服务端的可用性,我们一般会对其集群部署,即同时部署多个Eureka服务端,并且可以相互间同步服务。
pom.xml
<?xml version="1.0" encoding="UTF-8"?>
<project xmlns="http://maven.apache.org/POM/4.0.0" xmlns:xsi="http://www.w3.org/2001/XMLSchema-instance"
         xsi:schemaLocation="http://maven.apache.org/POM/4.0.0 http://maven.apache.org/xsd/maven-4.0.0.xsd">
    <modelVersion>4.0.0</modelVersion>

    <groupId>com.zlx</groupId>
    <artifactId>Eureka-Service</artifactId>
    <version>0.0.1-SNAPSHOT</version>
    <packaging>jar</packaging>

    <name>Eureka-Service</name>
    <description>Demo project for Spring Boot</description>

    <parent>
        <groupId>org.springframework.boot</groupId>
        <artifactId>spring-boot-starter-parent</artifactId>
        <version>1.5.13.RELEASE</version>
        <relativePath/> <!-- lookup parent from repository -->
    </parent>

    <properties>
        <project.build.sourceEncoding>UTF-8</project.build.sourceEncoding>
        <project.reporting.outputEncoding>UTF-8</project.reporting.outputEncoding>
        <java.version>1.8</java.version>
    </properties>

    <dependencyManagement>
        <dependencies>
            <dependency>
                <groupId>org.springframework.cloud</groupId>
                <artifactId>spring-cloud-dependencies</artifactId>
                <version>Edgware.SR3</version>
                <type>pom</type>
                <scope>import</scope>
            </dependency>
        </dependencies>
    </dependencyManagement>

    <dependencies>
        <dependency>
            <groupId>org.springframework.cloud</groupId>
            <artifactId>spring-cloud-starter-eureka-server</artifactId>
        </dependency>
        <dependency>
            <groupId>org.springframework.boot</groupId>
            <artifactId>spring-boot-starter-security</artifactId>
        </dependency>

    </dependencies>

    <repositories>
        <repository>
            <id>nexus-aliyun</id>
            <name>Nexus aliyun</name>
            <url>http://maven.aliyun.com/nexus/content/groups/public</url>
        </repository>
    </repositories>

    <build>
        <plugins>
            <plugin>
                <groupId>org.springframework.boot</groupId>
                <artifactId>spring-boot-maven-plugin</artifactId>
            </plugin>
        </plugins>
    </build>
</project>
在搭建Eureka服务端的时候我们曾把下面两个配置给关闭了:
eureka:
  client:
    register-with-eureka: false
    fetch-registry: false
实际上在Eureka集群模式中,开启这两个参数可以让当前Eureka服务端将自己也作为服务注册到别的Eureka服务端,并且从别的Eureka服务端获取服务进行同步。所以这里我们将这两个参数置为true(默认就是true),下面开始搭建Eureka服务端集群,为了简单起见这里只搭建两个节点的Eureka服务端集群。
application.yml配置如下:
spring:
  profiles:
    active: peer1
security:
  basic:
    enabled: true
  user:
    name: root
    password: root
在Eureka-Server项目的src/main/resource目录下新建application-peer1.yml,配置如下:
server:
  port: 80

spring:
  application:
    name: Eureka-Server

eureka:
  instance:
    hostname: peer1
  client:
    serviceUrl:
      defaultZone: http://root:root@peer1:80/eureka/
    register-with-eureka: false
  server:
    enable-self-preservation: false
- server.port=80指定端口为80;
- spring.application.name=Eureka-Server指定了服务名称为Eureka-Server;
- eureka.instance.hostname=peer1指定地址为peer1;
- eureka.client.serviceUrl.defaultZone=http://peer2:8081/eureka/指定Eureka服务端的地址为另外一个Eureka服务端的地址peer2。
下面我们创建另外一个Eureka服务端peer2的yml配置application-peer2.yml:
server:
  port: 81

spring:
  application:
    name: Eureka-Server

eureka:
  instance:
    hostname: peer2
  client:
    serviceUrl:
      defaultZone: http://root:root@peer1:80/eureka/
    register-with-eureka: false
  server:
    enable-self-preservation: false
peer2中的serviceUrl我们指向Eureka服务端peer1。
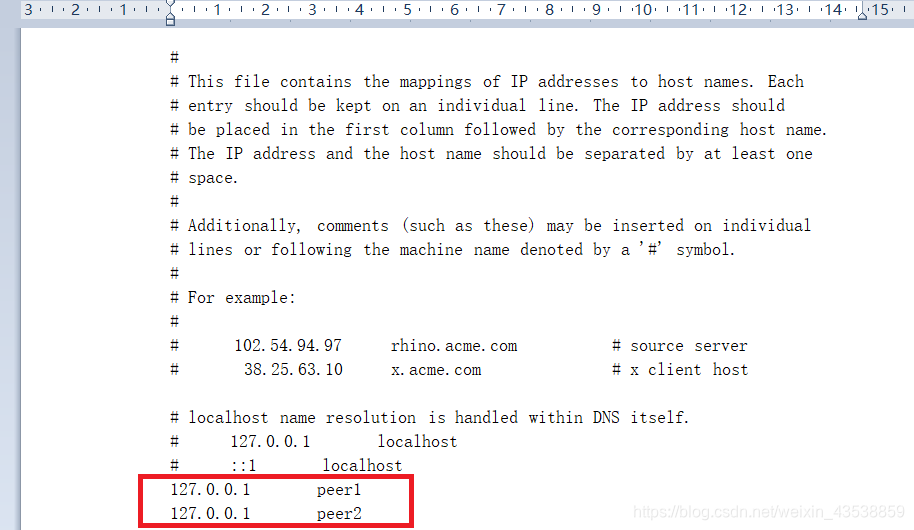
为了让这种在一台机器上配置两个hostname的方式生效,我们需要修改下hosts文件(位置C:\Windows\System32\drivers\etc):
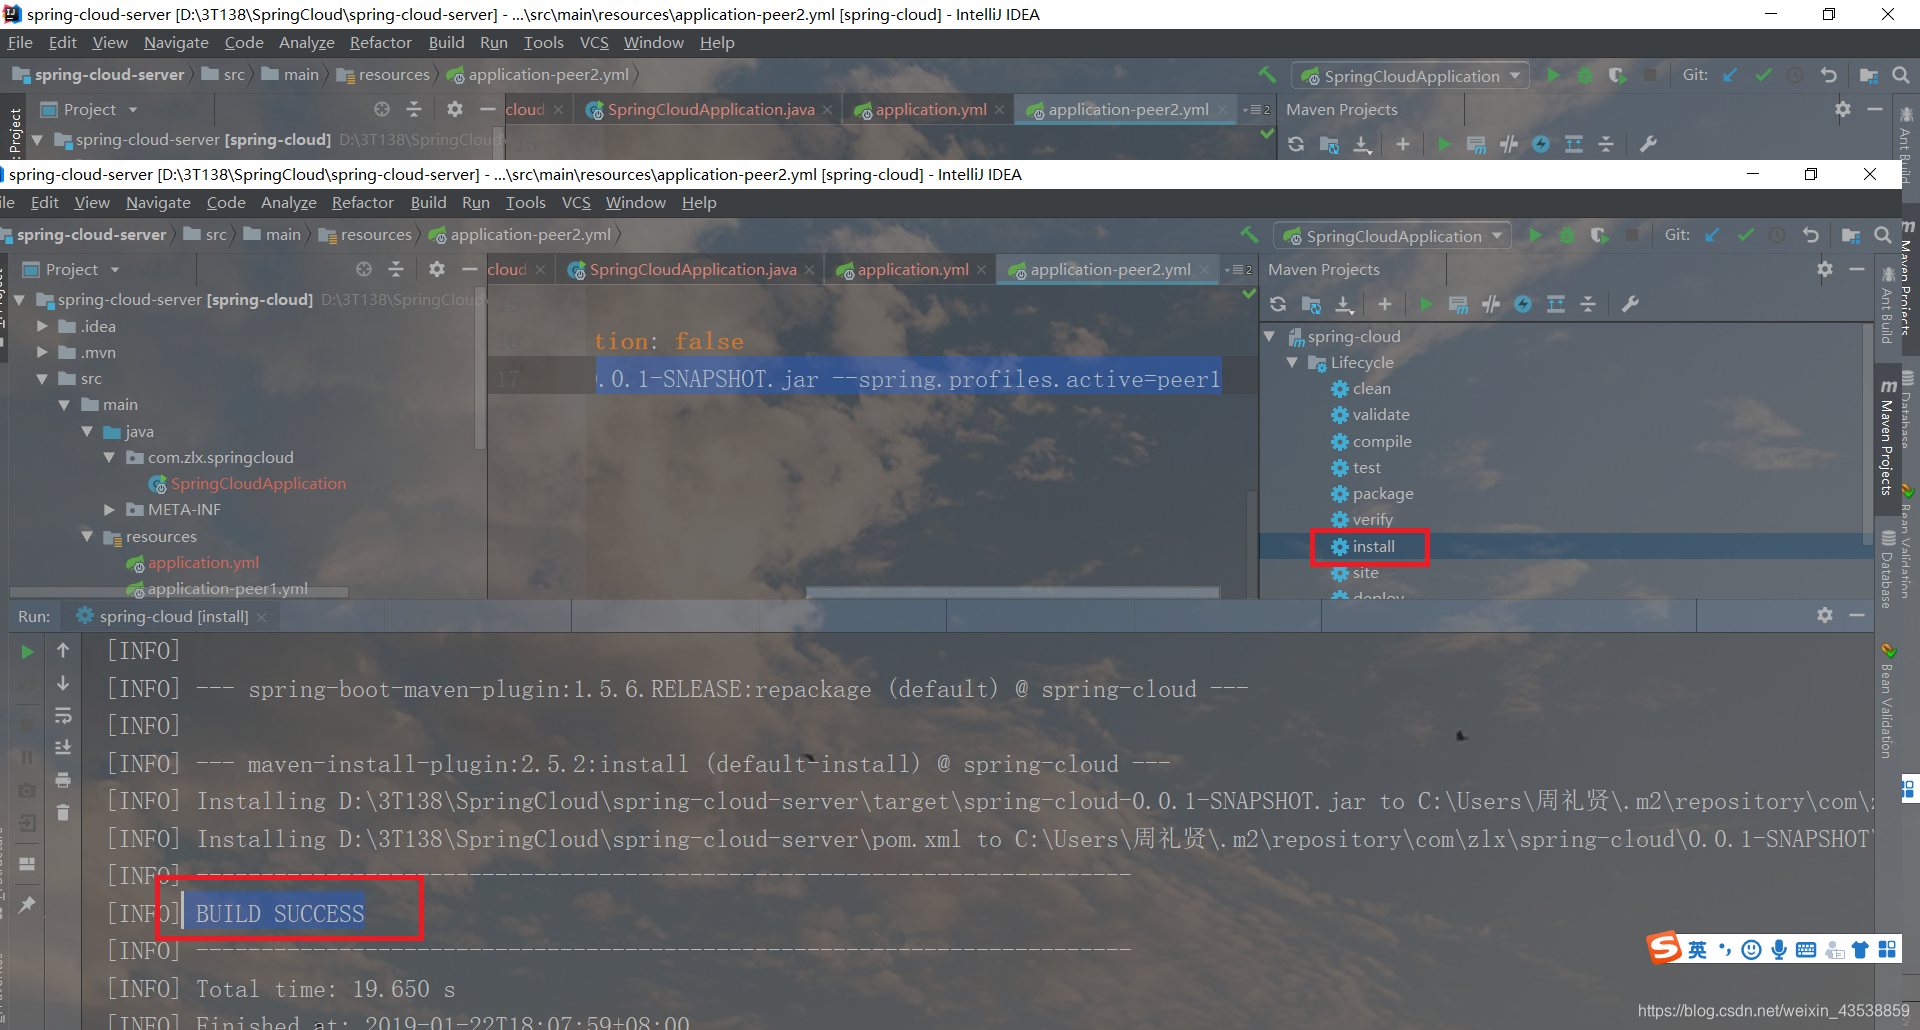
我们将Eureka-Server项目打包成jar,然后分别运行以下两条命令来部署peer1和peer2:
spring-cloud-0.0.1-SNAPSHOT.jar这个是我自己打包好的jar包

java -jar spring-cloud-0.0.1-SNAPSHOT.jar --spring.profiles.active=peer1
java -jar spring-cloud-0.0.1-SNAPSHOT.jar --spring.profiles.active=peer2
打包jar包:
用命令运行jar包:
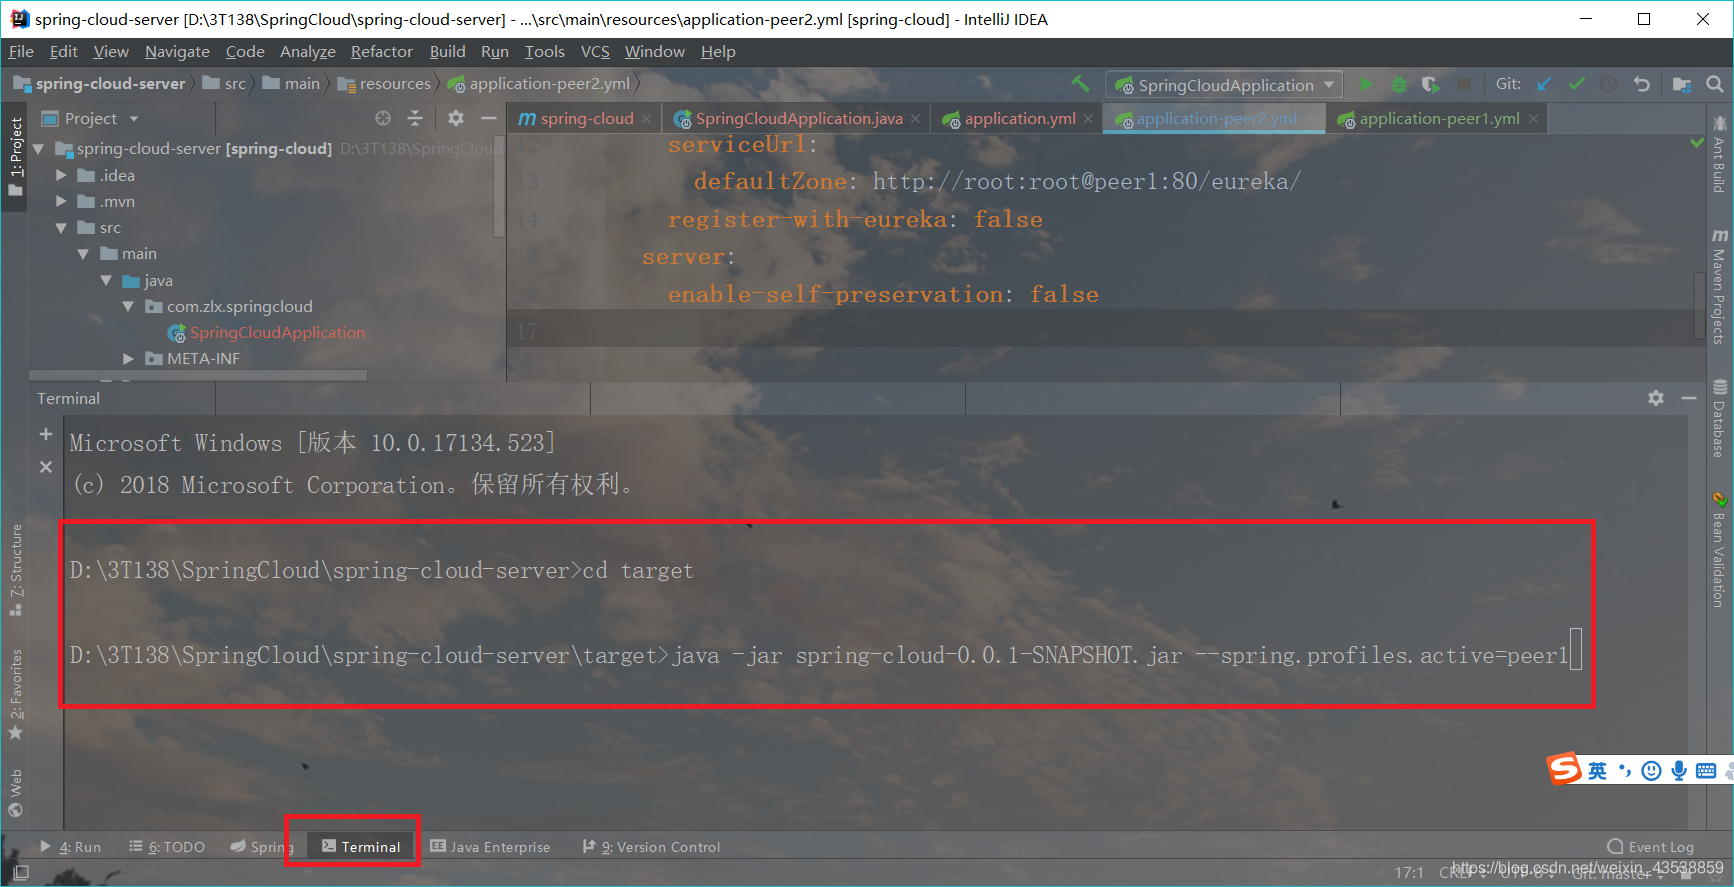
启动后,我们来访问peer1http://localhost:80/:

Eureka配置
| 配置 | 含义 | 默认值 |
|---|---|---|
| eureka.client.enabled | 是否启用Eureka Client | true |
| eureka.client.register-with-eureka | 表示是否将自己注册到Eureka Server | true |
| eureka.client.fetch-registry | 表示是否从Eureka Server获取注册的服务信息 | true |
| eureka.client.serviceUrl.defaultZone | 配置Eureka Server地址,用于注册服务和获取服务 | http://localhost:8761/eureka |
| eureka.client.registry-fetch-interval-seconds | 默认值为30秒,即每30秒去Eureka Server上获取服务并缓存 | 30 |
| eureka.instance.lease-renewal-interval-in-seconds | 向Eureka Server发送心跳的间隔时间,单位为秒,用于服务续约 | 30 |
| eureka.instance.lease-expiration-duration-in-seconds | 定义服务失效时间,即Eureka Server检测到Eureka Client木有心跳后(客户端意外下线)多少秒将其剔除 | 90 |
| eureka.server.enable-self-preservation | 用于开启Eureka Server自我保护功能 | true |
| eureka.client.instance-info-replication-interval-seconds | 更新实例信息的变化到Eureka服务端的间隔时间,单位为秒 | 30 |
| eureka.client.eureka-service-url-poll-interval-seconds | 轮询Eureka服务端地址更改的间隔时间,单位为秒。 | 300 |
| eureka.instance.prefer-ip-address | 表示使用IP进行配置为不是域名 | false |
| eureka.client.healthcheck.enabled | 默认Erueka Server是通过心跳来检测Eureka Client的健康状况的,通过置为true改变Eeureka Server对客户端健康检测的方式,改用Actuator的/health端点来检测。 | false |


 被折叠的 条评论
为什么被折叠?
被折叠的 条评论
为什么被折叠?
 到【灌水乐园】发言


