


写在前面:我刚入行的时候,带头大哥就告诉我,Android中Binder很重要,但是Binder是什么?我问他,他也说不清楚,我去网上看文章,我发现往上也都写得很笼统、很模糊、不清晰、不形象、太概括,从哪个时候起,“Binder是什么?谷歌为什么要单独搞一个Binder出来做IPC通信?”这个问题就一直困扰着我。我尝试着去看过很多人的博客,但是说到系统层和内核时我就看不懂,太抽象了。“纸上得来终觉浅,绝知此事要躬行。”,我写Binder系列的文章,尝试从我自己的角度去理解Binder,由浅入深从应用层AIDL使用开始。这个系列可能会跨越很长的时间。
文末会给出示例APP的GitHub 链接。
Android应用层有多种跨应用通信的方式,它们底层都是依赖Binder,比如给其它应用发广播附带数据、ContentProvider共享数据给其它应用、Intent启动其它APP附带数据等等。有人就问了,都有这些方式了,还搞个AIDL出来干嘛?目前我觉得最靠谱的解释是:上述说的方式虽然也能实现跨APP(跨进程)通信,但是都只能传送简单的键值对,不能传送对象和复杂的数据结构,只有AIDL可以,从反应速度上来说,aidl也是最快的,适用于应用场景复杂,要求高时效性的业务。
万丈高楼从打地基开始,刨根问底从实操一下开始。下面介绍一下,如何使用AIDL让两个APP完成一个最基本的通信。
注:下文创建两个APP,Server表示服务端,Client表示调用端。
1、创建AIDL服务端应用Server
1.1 build.gradle 打开aidl使能开关
不打开这个开关无法创建aidl文件。
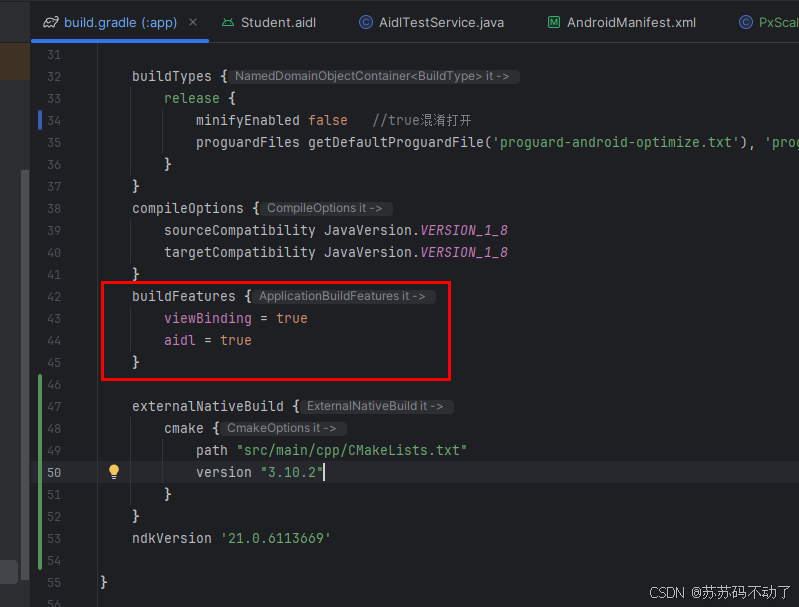
buildFeatures {
        viewBinding = true //viewbinding开关
        aidl = true //aidl开关
    }
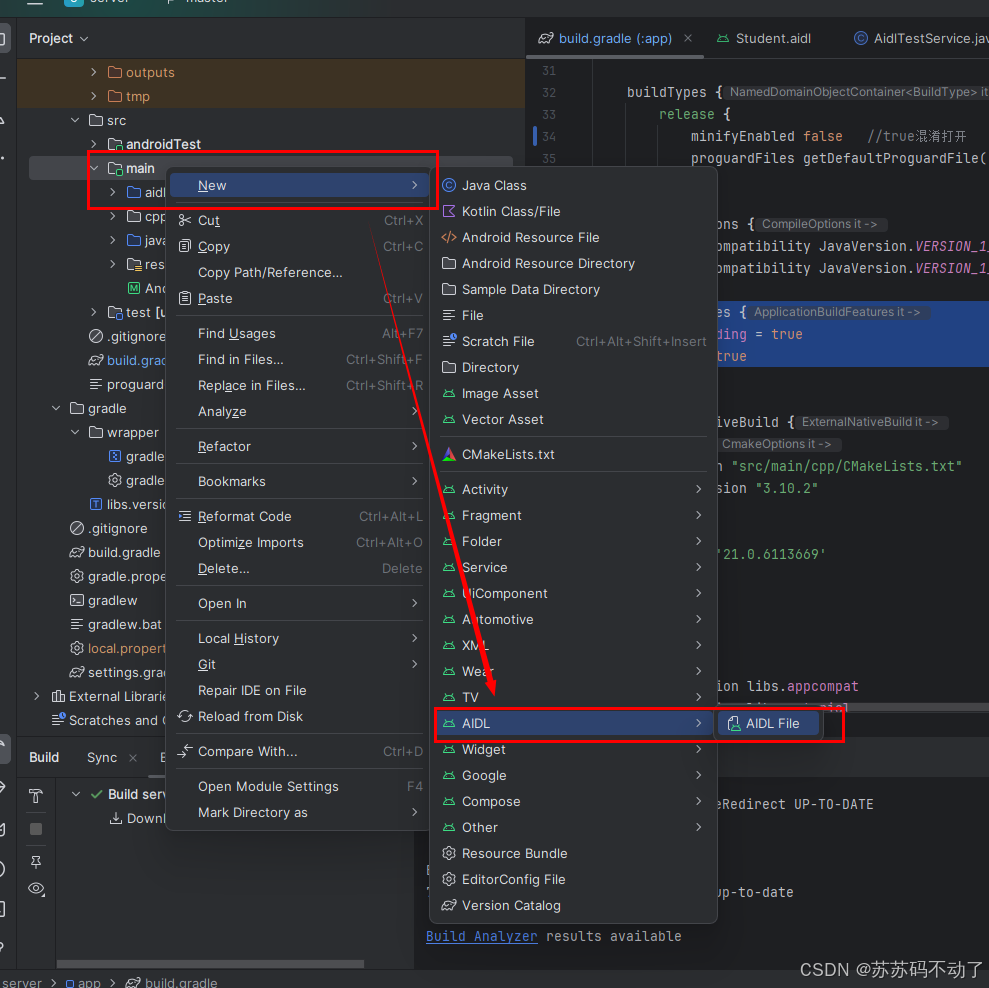
1.2 在java的同级目录创建aidl目录和文件
点击main目录右键展开选项创建。
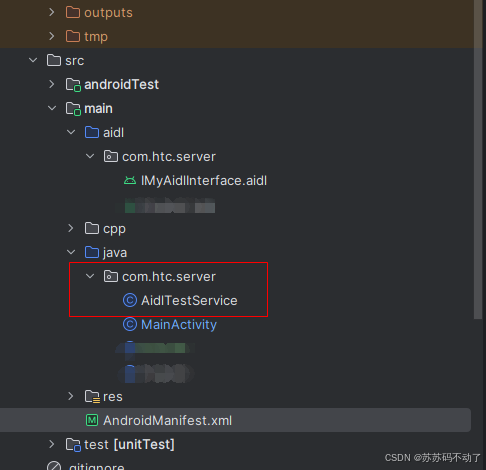
创建出来的aidl文件如下:我们主要是声明了两个接口,getString用于提供给客户端获取字符串,setString用于客户端主动设置字符串。
// IMyAidlInterface.aidl
package com.htc.server;

interface IMyAidlInterface {
    /**
     * Demonstrates some basic types that you can use as parameters
     * and return values in AIDL.
     */
    void basicTypes(int anInt, long aLong, boolean aBoolean, float aFloat,
            double aDouble, String aString);

    //上面这个是新建的时候自己生成的,可以去掉。
    String getString();

    void setString(String string);
}
1.3 创建一个aidl服务
一定记得要在AndroidManifest.xml中注册。
内容如下:就是实现了aidl中声明的两个方法。返回MyBinder、MyBinder extends IMyAidlInterface.Stub这些都是固定写法,不要问为什么,这些都是谷歌定下来的游戏规则,想要自己定规则,除非鸿蒙了。
package com.htc.server;

import android.app.Service;
import android.content.Intent;
import android.os.IBinder;
import android.os.RemoteException;
import android.util.Log;

import androidx.annotation.Nullable;

public class AidlTestService extends Service {

    private String hello;
    private static String TAG = "AidlTestService";

    @Override
    public void onCreate() {
        super.onCreate();
        hello = "hello xu";
    }

    @Nullable
    @Override
    public IBinder onBind(Intent intent) {
        return new MyBinder();
    }

    public class MyBinder extends IMyAidlInterface.Stub {

        @Override
        public void basicTypes(int anInt, long aLong, boolean aBoolean, float aFloat, double aDouble, String aString) throws RemoteException {
            Log.d(TAG, "basicTypes: \nanInt = "+anInt
                    +"\naLong = "+aLong
                    +"\naBoolean = "+aBoolean
                    +"\naFloat = "+aFloat
                    +"\naDouble = "+aDouble
                    +"\naString = "+aString
            );
        }

        @Override
        public String getString() throws RemoteException {
            return hello;
        }

        @Override
        public void setString(String string) throws RemoteException {
            hello = string;
        }
    }
}
到这里Server端的工作就结束了,没错,就是这么简单,后面就是等着客户端调用了。
2、创建AIDL客户端应用Client
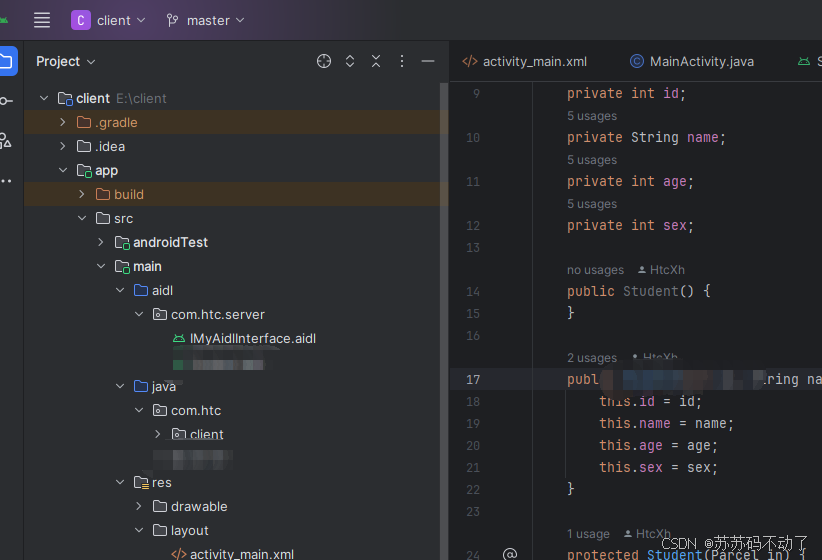
2.1 将Server端的aidl文件及其文件夹原封不动的移动过来
记住,是原封不动的Copy过来,包名这些得一摸一样,不要问为什么,这是别人定的规则。
2.2 在client端的MainActivity中注册服务并调用方法
代码如下:
package com.htc.client;

import android.annotation.SuppressLint;
import android.content.ComponentName;
import android.content.Context;
import android.content.Intent;
import android.content.ServiceConnection;
import android.os.Bundle;
import android.os.IBinder;
import android.os.RemoteException;
import android.util.Log;
import android.widget.Toast;

import androidx.activity.EdgeToEdge;
import androidx.appcompat.app.AppCompatActivity;
import androidx.core.graphics.Insets;
import androidx.core.view.ViewCompat;
import androidx.core.view.WindowInsetsCompat;

import com.htc.server.IMyAidlInterface;

public class MainActivity extends AppCompatActivity {
    private IMyAidlInterface myAidlInterface;
    private static String TAG = "MainActivity";
    private final ServiceConnection connection = new ServiceConnection() {
        @Override
        public void onServiceConnected(ComponentName name, IBinder service) {
            myAidlInterface = IMyAidlInterface.Stub.asInterface(service);
        }

        @Override
        public void onServiceDisconnected(ComponentName name) {
            myAidlInterface = null;
        }
    };

    @SuppressLint("MissingInflatedId")
    @Override
    protected void onCreate(Bundle savedInstanceState) {
        super.onCreate(savedInstanceState);
        setContentView(R.layout.activity_main);

        //点击按钮一去绑定服务
        findViewById(R.id.btn1).setOnClickListener(v -> {
            Intent intent = new Intent();
            intent.setComponent(new ComponentName("com.htc.server", "com.htc.server.AidlTestService"));
            boolean re = bindService(intent, connection, Context.BIND_AUTO_CREATE);
            Log.d(TAG, "bindService: " + re);
        });

        //点击按钮2调用set方法
        findViewById(R.id.btn2).setOnClickListener(v -> {
            if (myAidlInterface != null) {
                try {
                    myAidlInterface.setString("你好啊,aidl ");
                } catch (RemoteException e) {
                    e.printStackTrace();
                }
            } else {
                Log.d(TAG, "btn2 onclick: myAidlInterface == null");
            }
        });

        //点击按钮3调用get方法
        findViewById(R.id.btn3).setOnClickListener(v -> {
            if (myAidlInterface != null) {
                try {
                    Toast.makeText(this, myAidlInterface.getString(), Toast.LENGTH_SHORT).show();
                } catch (RemoteException e) {
                    e.printStackTrace();
                }
            } else {
                Log.d(TAG, "btn3 onclick: myAidlInterface == null");
            }
        });
    }

    @Override
    protected void onDestroy() {
        super.onDestroy();
        unbindService(connection);
    }
}
bindService就是去绑定并启动服务的函数,退出Activity的时候使用unbindService解绑服务防止内存泄漏。到这里就完成了一个aidl的简单通信。
3、aidl进阶:使用aidl传输对象
所有要通过Binder传送的数据对象,必须实现Parcelable接口,这是规矩。
官方的说法是:实现Parcelable 达到序列化传输数据、反序列化还原对象的功能。至于什么是“序列化、反序列化”?我也不知道,感觉没有一个形象的理解,网上的说法都很抽象。
3.1 Server端创建传输对象的aidl
假设我们要传输一个People对象。
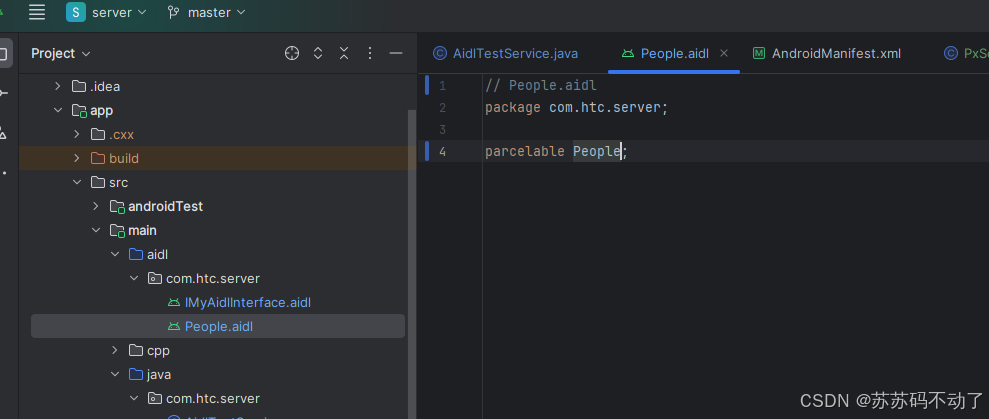
// People.aidl
package com.htc.server;

parcelable People;
注意:这里parcelable 开头是小写的p,这也是规矩,必须照办。
下一步将People.aidl导入之前写的IMyAidlInterface:
// IMyAidlInterface.aidl
package com.htc.server;

// Declare any non-default types here with import statements

import com.htc.server.People;

interface IMyAidlInterface {
    /**
     * Demonstrates some basic types that you can use as parameters
     * and return values in AIDL.
     */
    void basicTypes(int anInt, long aLong, boolean aBoolean, float aFloat,
            double aDouble, String aString);

    //上面这个是新建的时候自己生成的,可以去掉,我们自己新建以下方法,一个get(从服务端取值),一个set(传值给服务端)
    String getString();

    void setString(String string);

    void addPeople(in People people);

    People getPeople(int id);
}
这里我们声明两个和People有关的方法:addPeople、getPeople供Client调用。
3.2 创建People类,实现Parcelable接口
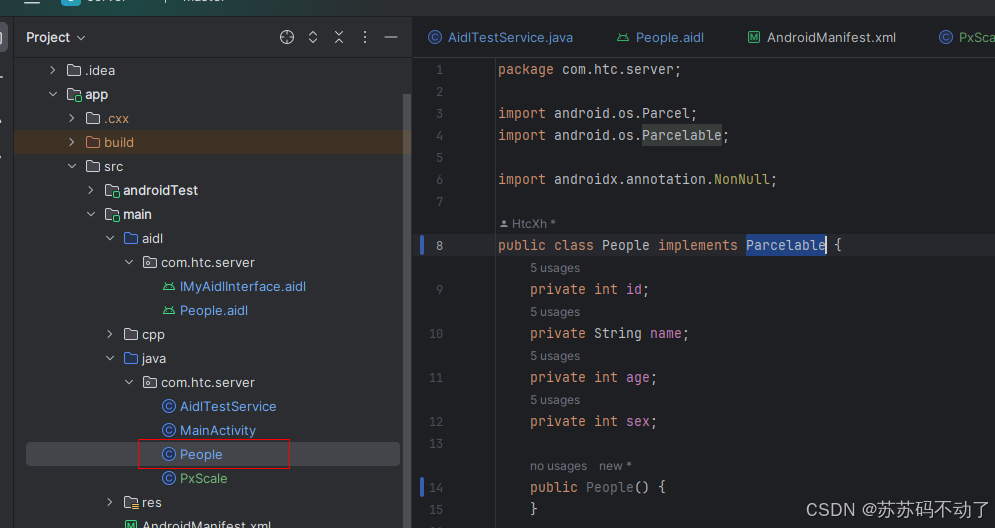
package com.htc.server;

import android.os.Parcel;
import android.os.Parcelable;

import androidx.annotation.NonNull;

public class People implements Parcelable {
    private int id;
    private String name;
    private int age;
    private int sex;

    public People() {
    }

    public People(int id, String name, int age, int sex) {
        this.id = id;
        this.name = name;
        this.age = age;
        this.sex = sex;
    }

    protected People(Parcel in) {
        id = in.readInt();
        name = in.readString();
        age = in.readInt();
        sex = in.readInt();
    }

    public static final Creator<People> CREATOR = new Creator<People>() {
        @Override
        public People createFromParcel(Parcel in) {
            return new People(in);
        }

        @Override
        public People[] newArray(int size) {
            return new People[size];
        }
    };

    public String getName() {
        return name;
    }

    public int getAge() {
        return age;
    }

    public int getSex() {
        return sex;
    }

    public int getId() {
        return id;
    }

    @Override
    public int describeContents() {
        return 0;
    }

    @Override
    public void writeToParcel(@NonNull Parcel dest, int flags) {
        dest.writeInt(id);
        dest.writeString(name);
        dest.writeInt(age);
        dest.writeInt(sex);
    }

    @Override
    public String toString() {
        return "People{" +
                "id=" + id +
                ", name='" + name + '\'' +
                ", age=" + age +
                ", sex=" + sex +
                '}';
    }
}
3.3 在AidlTestService中实现 addPeople 、getPeople方法
@Override
        public void addPeople(People people) throws RemoteException {
            Log.d(TAG, "addPeople: "+people);
            if(peopleMap == null){
                peopleMap = new HashMap<>();
            }
            peopleMap.put(people.getId(), people);
        }

        @Override
        public People getPeople(int id) throws RemoteException {
            if(peopleMap != null){
                People people = peopleMap.get(id);
                Log.d(TAG, id + " -> getPeople: "+people);
                return people;
            }
            Log.d(TAG, id + " -> getPeople: null");
            return null;
        }
3.4 把People.aidl和People类原封不动拷贝到Client端
包名必须和Server端保持一致。
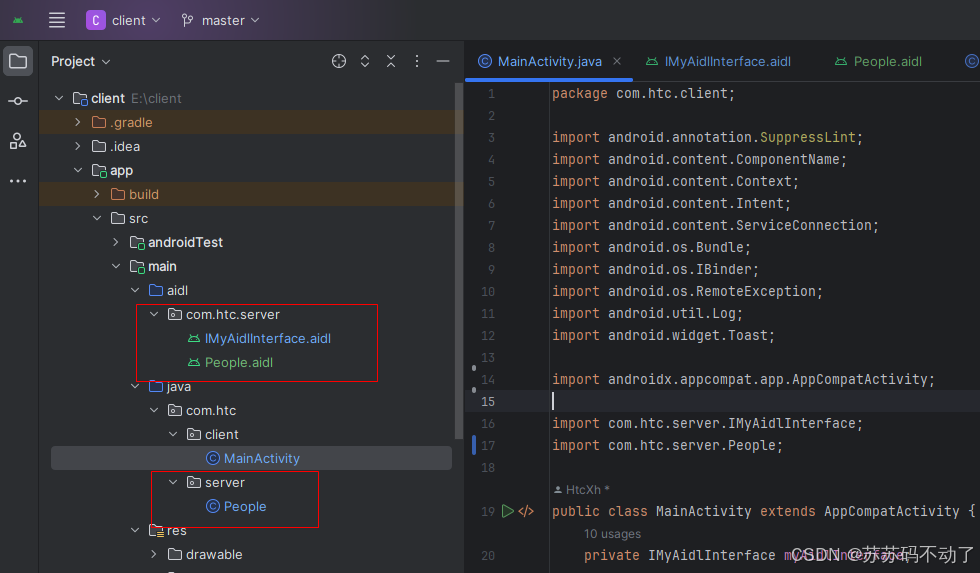
3.5 Client端APP对People对象进行操作
 //点击按钮3调用get方法
        findViewById(R.id.btn3).setOnClickListener(v -> {
            if (myAidlInterface != null) {
                try {
                    Toast.makeText(this, myAidlInterface.getString(), Toast.LENGTH_SHORT).show();
                    myAidlInterface.addPeople(new People(1,"people 1",15,1));
                    myAidlInterface.addPeople(new People(2,"people 2",33,0));

                    Log.d(TAG, "getPeople 1: "+myAidlInterface.getPeople(1));
                    Log.d(TAG, "getPenple 2: "+myAidlInterface.getPeople(2));
                } catch (RemoteException e) {
                    e.printStackTrace();
                }
            } else {
                Log.d(TAG, "btn3 onclick: myAidlInterface == null");
            }
        });
写在末尾:到这里AIDL的背景介绍和简单使用就结束了,不难,主要是对谷歌定下来的规则进行学习,其余的具体通信过程都被隐藏了。
点击下载 Server 端Demo APP:https://github.com/xuhao120833/Server
点击下载 Client 端Demo APP:https://github.com/xuhao120833/Client


 1万+
1万+

 被折叠的 条评论
为什么被折叠?
被折叠的 条评论
为什么被折叠?
 到【灌水乐园】发言


