


Flask是一个轻量级的可定制框架,使用Python语言编写,较其他同类型框架更为灵活、轻便、安全且容易上手。
目录
一、项目环境搭配以及安装运行
1.下载安装
创建项目及虚拟环境
$ mkdir myproject
$ cd myproject
$ python3 -m venv venv
激活虚拟环境
venv\Scripts\activatepip install Flask
(venv) D:\CODE\VSCODE\python\myproject>pip install Flask
2.最小的应用
from flask import Flask #导入flask类 该类的实例将会成为我们的 WSGI 应用
app = Flask(__name__) #创建一个该类的实例 第一个参数是应用模块或者包的名称
@app.route('/') #然后我们使用 route() 装饰器来告诉 Flask 触发函数的 URL
def hello_world(): #函数名称被用于生成相关联的 URL
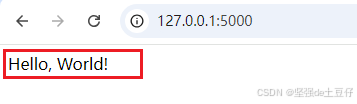
return 'Hello, World!' #返回需要在用户浏览器中显示的信息3.运行应用
该应用运行在windows系统中。
1.set FLASK_APP=hello.py
2. flask run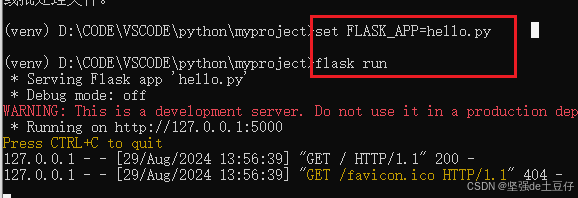
4.运行结果
根据提示运行结果可以在 http://127.0.0.1:5000 访问
这样就启动了一个非常简单的内建的服务器。
4.1 外部可见的服务器
运行服务器后,会发现只有你自己的电脑可以使用服务,而网络中的其他电脑却 不行。缺省设置就是这样的,因为在调试模式下该应用的用户可以执行你电脑中 的任意 Python 代码。
如果你关闭了调试器或信任你网络中的用户,那么可以让服务器被公开访问。只要在命令行上简单的加上 --host=0.0.0.0 即可:
$ flask run --host=0.0.0.0这行代码告诉你的操作系统监听所有公开的 IP 。
二、路由
使用 route() 装饰器来把函数绑定到 URL:
@app.route('/')
def index():
    return 'Index Page'

@app.route('/hello')
def hello():
    return 'Hello, World'
还可以动态变化 URL 的某些部分, 还可以为一个函数指定多个规则。
@app.route('/user/<username>')
def show_user_profile(username):
    # show the user profile for that user
    return 'User %s' % escape(username)

@app.route('/post/<int:post_id>')
def show_post(post_id):
    # show the post with the given id, the id is an integer
    return 'Post %d' % post_id

@app.route('/path/<path:subpath>')
def show_subpath(subpath):
    # show the subpath after /path/
    return 'Subpath %s' % escape(subpath)
转换器类型:

三、http请求
一个路由默认回应 GET 请求。 可以使用 route()装饰器的 methods 参数来处理不同的 HTTP 方法:
from flask import Flask,request
app = Flask(__name__)

@app.route('/login', methods=['GET', 'POST'])
def login():
    if request.method == 'POST':
        return do_the_login()
    else:
        return show_the_login_form()
3.1静态文件
静态文件位于应用的
/static中。使用特定的'static'端点就可以生成相应的 URL
url_for('static', filename='style.css') 这个静态文件在文件系统中的位置应该是 static/style.css 。
3.2渲染模板
使用
 最低0.47元/天 解锁文章


 3174
3174

 被折叠的 条评论
为什么被折叠?
被折叠的 条评论
为什么被折叠?
 到【灌水乐园】发言


