


在熟悉了 Wi-Fi 打开流程后,我们知道其中会去启动wpa_supplicant(接下来文中出现的wpa就是指wpa_supplicant),这里我们就仔细的看下整个wpa启动做了哪些事情,代码还是使用Android T 的代码:http://aospxref.com/android-13.0.0_r3/
接着这篇文章里面最后的 Android S Wi-Fi 打开流程(二) switchClientInterfaceToConnectivityMode 方法,仔细看下wpa相关流程。
//首先看这个方法:startSupplicant()
private boolean startSupplicant() {
    synchronized (mLock) {
        if (!mIfaceMgr.hasAnyStaIfaceForConnectivity()) { ---> 检查是否有type为IFACE_TYPE_STA_FOR_CONNECTIVITY类型的活跃
            if (!startAndWaitForSupplicantConnection()) { ---> 这个就是建立连接
                Log.e(TAG, "Failed to connect to supplicant");
                return false;
            }
            if (!mSupplicantStaIfaceHal.registerDeathHandler(
                    new SupplicantDeathHandlerInternal())) {
                Log.e(TAG, "Failed to register supplicant death handler");
                return false;
            }
        }
        return true;
    }
}
// 继续看下建立连接的方法
private boolean startAndWaitForSupplicantConnection() {
    // Start initialization if not already started.
    if (!mSupplicantStaIfaceHal.isInitializationStarted() && !mSupplicantStaIfaceHal.initialize()) {
        return false;
    }
    if (!mSupplicantStaIfaceHal.startDaemon()) {
        Log.e(TAG, "Failed to startup supplicant");
        return false;
    }
    boolean connected = false;
    int connectTries = 0;
    while (!connected && connectTries++ < CONNECT_TO_SUPPLICANT_RETRY_TIMES) {
        // Check if the initialization is complete.
        connected = mSupplicantStaIfaceHal.isInitializationComplete();
        if (connected) {
            break;
        }
        try {
            Thread.sleep(CONNECT_TO_SUPPLICANT_RETRY_INTERVAL_MS);
        } catch (InterruptedException ignore) {
        }
    }
    return connected;
}
上面的代码我们一个个的看下,首先看 mSupplicantStaIfaceHal.isInitializationStarted(),
SupplicantStaIfaceHal mSupplicantStaIfaceHal,所以代码位置是:http://aospxref.com/android-13.0.0_r3/xref/packages/modules/Wifi/service/java/com/android/server/wifi/SupplicantStaIfaceHal.java#isInitializationStarted
public boolean isInitializationStarted() {
    synchronized (mLock) {
        String methodStr = "isInitializationStarted";
        if (mStaIfaceHal == null) {
            return handleNullHal(methodStr);
        }
        return mStaIfaceHal.isInitializationStarted();  --->mStaIfaceHal两种实现(AIDL和HIDL),具体的看下面这段代码
    }
}

// 初始化 mStaIfaceHal的地方
mStaIfaceHal = createStaIfaceHalMockable();

protected ISupplicantStaIfaceHal createStaIfaceHalMockable() {
   synchronized (mLock) {
       // Prefer AIDL implementation if service is declared.
       if (SupplicantStaIfaceHalAidlImpl.serviceDeclared()) {
           Log.i(TAG, "Initializing SupplicantStaIfaceHal using AIDL implementation.");
           return new SupplicantStaIfaceHalAidlImpl(mContext, mWifiMonitor, mEventHandler, mClock, mWifiMetrics, mWifiGlobals);
       } else if (SupplicantStaIfaceHalHidlImpl.serviceDeclared()) {
           Log.i(TAG, "Initializing SupplicantStaIfaceHal using HIDL implementation.");
           return new SupplicantStaIfaceHalHidlImpl(mContext, mWifiMonitor, mFrameworkFacade,
                   mEventHandler, mClock, mWifiMetrics, mWifiGlobals);
       }
       Log.e(TAG, "No HIDL or AIDL service available for SupplicantStaIfaceHal.");
       return null;
   }
}
mStaIfaceHal.isInitializationStarted() 具体是哪一个,看下实际项目代码,目前我见过的大多数都是HIDL的,这里我们就以SupplicantStaIfaceHalHidlImpl 为例

http://aospxref.com/android-13.0.0_r3/xref/packages/modules/Wifi/service/java/com/android/server/wifi/SupplicantStaIfaceHalHidlImpl.java#isInitializationStarted
// 主要是看是否初始化完成
public boolean isInitializationStarted() {
    synchronized (mLock) {
        return mIServiceManager != null;
    }
}
比如这里初次打开,没有初始化,那返回的就是false,再回到上面的startAndWaitForSupplicantConnection方法中:
if (!mSupplicantStaIfaceHal.isInitializationStarted() && !mSupplicantStaIfaceHal.initialize()),第一个条件满足(!false)没有初始化,所以就调用mSupplicantStaIfaceHal.initialize()进行初始化操作:
http://aospxref.com/android-13.0.0_r3/xref/packages/modules/Wifi/service/java/com/android/server/wifi/
SupplicantStaIfaceHal.java#initialize
public boolean initialize() {
    synchronized (mLock) {
        if (mStaIfaceHal == null) {
            Log.wtf(TAG, "Internal ISupplicantStaIfaceHal instance does not exist.");
            return false;
        }
        if (!mStaIfaceHal.initialize()) {
            Log.e(TAG, "Failed to init ISupplicantStaIfaceHal, stopping startup.");
            return false;
        }
        return true;
    }
}
然后还是:http://aospxref.com/android-13.0.0_r3/xref/packages/modules/Wifi/service/java/com/android/server/wifi/
SupplicantStaIfaceHalHidlImpl.java#initialize
public boolean initialize() {
   synchronized (mLock) {
       if (mVerboseLoggingEnabled) {
           Log.i(TAG, "Registering ISupplicant service ready callback.");
       }
       mISupplicant = null;
       mISupplicantStaIfaces.clear();
       if (mIServiceManager != null) {
           // Already have an IServiceManager and serviceNotification registered, don't
           // don't register another.
           return true;
       }
       try {
           mIServiceManager = getServiceManagerMockable();   ---> 是不是很熟悉,这个不就是刚刚的地方么?初始化
           if (mIServiceManager == null) {
               Log.e(TAG, "Failed to get HIDL Service Manager");
               return false;
           }
           if (!linkToServiceManagerDeath()) {
               return false;
           }
           /* TODO(b/33639391) : Use the new ISupplicant.registerForNotifications() once it exists */
           if (!mIServiceManager.registerForNotifications(ISupplicant.kInterfaceName, "", mServiceNotificationCallback)) {
               Log.e(TAG, "Failed to register for notifications to "+ ISupplicant.kInterfaceName);
               mIServiceManager = null; // Will need to register a new ServiceNotification
               return false;
           }
       } catch (RemoteException e) {
           Log.e(TAG, "Exception while trying to register a listener for "
                   + "ISupplicant service: " + e);
           supplicantServiceDiedHandler(mDeathRecipientCookie);
       }
       return true;
   }
}

// mIServiceManager = getServiceManagerMockable(),就是拿到一个IServiceManager,用于管理整个HIDL层面的Service的服务端口
protected IServiceManager getServiceManagerMockable() throws RemoteException {
   synchronized (mLock) {
       return IServiceManager.getService();
   }
}

// 主要看下这个mIServiceManager.registerForNotifications(ISupplicant.kInterfaceName, "", mServiceNotificationCallback)
// 注册成功后回调下面这个方法:
private final IServiceNotification mServiceNotificationCallback = new IServiceNotification.Stub() {
    public void onRegistration(String fqName, String name, boolean preexisting) {
        synchronized (mLock) {
            if (mVerboseLoggingEnabled) {
       //IServiceNotification.onRegistration for: android.hardware.wifi.supplicant@1.0::ISupplicant, default preexisting=false
                Log.i(TAG, "IServiceNotification.onRegistration for: " + fqName + ", " + name + " preexisting=" + preexisting);
            }
            if (!initSupplicantService()) {   ---> 初始化,看下面贴的
                Log.e(TAG, "initalizing ISupplicant failed.");
                supplicantServiceDiedHandler(mDeathRecipientCookie);
            } else {
                Log.i(TAG, "Completed initialization of ISupplicant.");
            }
        }
    }
};

private boolean initSupplicantService() {
    synchronized (mLock) {
        try {
            mISupplicant = getSupplicantMockable();   ---> 拿到ISupplicant
        } catch (RemoteException e) {
            Log.e(TAG, "ISupplicant.getService exception: " + e);
            return false;
        } catch (NoSuchElementException e) {
            Log.e(TAG, "ISupplicant.getService exception: " + e);
            return false;
        }
        if (mISupplicant == null) {
            Log.e(TAG, "Got null ISupplicant service. Stopping supplicant HIDL startup");
            return false;
        }
        if (!linkToSupplicantDeath(mSupplicantDeathRecipient, ++mDeathRecipientCookie)) {
            return false;
        }
    }
    return true;
}
到此,IServiceManager 和 ISupplicant 初始化完毕,再接着看startAndWaitForSupplicantConnection后面的步骤:
mSupplicantStaIfaceHal.startDaemon()
http://aospxref.com/android-13.0.0_r3/xref/packages/modules/Wifi/service/java/com/android/server/wifi/
SupplicantStaIfaceHalHidlImpl.java#startDaemon
//启动 supplicant的守护进程,这是两种不同的启动方式
public boolean startDaemon() {
    synchronized (mLock) {
        if (isV1_1()) {    ---> 支持
            Log.i(TAG, "Starting supplicant using HIDL");
            return startDaemon_V1_1();
        } else {
            Log.i(TAG, "Starting supplicant using init");
            return mFrameworkFacade.startSupplicant();
        }
    }
}

private boolean startDaemon_V1_1() {
   synchronized (mLock) {
       try {
           // This should startup supplicant daemon using the lazy start HAL mechanism.
           getSupplicantMockableV1_1();    ---> 拿到supplicant对象,在下面
       } catch (RemoteException e) {
           Log.e(TAG, "Exception while trying to start supplicant: " + e);
           supplicantServiceDiedHandler(mDeathRecipientCookie);
           return false;
       } catch (NoSuchElementException e) {
           // We're starting the daemon, so expect |NoSuchElementException|.
           Log.d(TAG, "Successfully triggered start of supplicant using HIDL");
       }
       return true;
   }
}

protected android.hardware.wifi.supplicant.V1_1.ISupplicant getSupplicantMockableV1_1()
        throws RemoteException, NoSuchElementException {
    synchronized (mLock) {
    	// getSupplicantMockable() 拿到 ISupplicant 通过castFrom转换成接口对象 supplicant,
        android.hardware.wifi.supplicant.V1_1.ISupplicant iSupplicantDerived =
                android.hardware.wifi.supplicant.V1_1.ISupplicant.castFrom(getSupplicantMockable());
        if (iSupplicantDerived == null) {
            throw new NoSuchElementException("Cannot cast to V1.1 service.");
        }
        return iSupplicantDerived;
    }
}
总结下到此做了啥;
1. 初始化 IServiceManager(管理HIDL层的服务)
2. 初始化 ISupplicant,然后转换成supplicant对象
那wpa_supplicant是在哪里启动的呢?刚startDaemon的时候我们有说:这是两种不同的启动方式
- startDaemon_V1_1(); —> 这种就是现在HIDL启动方式
- mFrameworkFacade.startSupplicant() —> 这种还是之前那种老方式
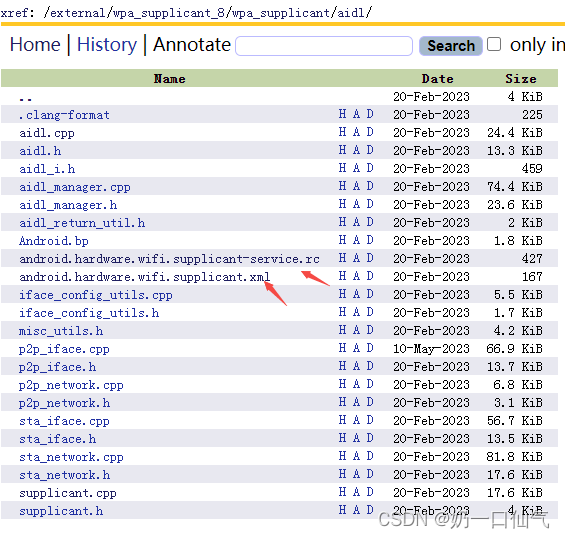
第一种方式代码目录:external/wpa_supplicant_8/wpa_supplicant/aidl/
再回到初始代码里 switchClientInterfaceToConnectivityMode 地方在看下:
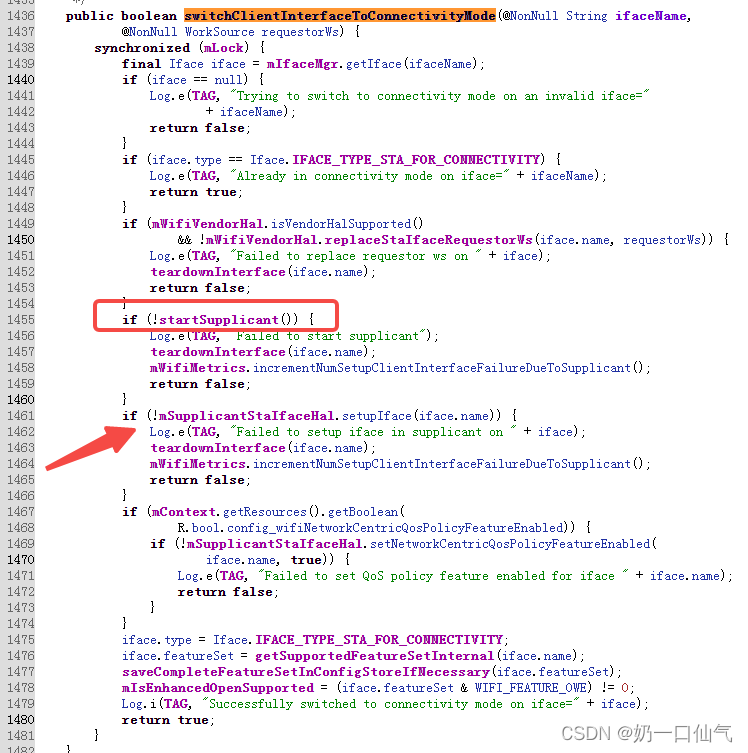
下面将执行这个代码:mSupplicantStaIfaceHal.setupIface(iface.name),还是一样的最终调到:SupplicantStaIfaceHalHidlImpl.java里面
public boolean setupIface(@NonNull String ifaceName) {
    final String methodStr = "setupIface";
    if (checkSupplicantStaIfaceAndLogFailure(ifaceName, methodStr) != null) return false;
    ISupplicantIface ifaceHwBinder;

    if (isV1_1()) {
        ifaceHwBinder = addIfaceV1_1(ifaceName);   ---> 看这个
    } else {
        ifaceHwBinder = getIfaceV1_0(ifaceName);
    }
    if (ifaceHwBinder == null) {
        Log.e(TAG, "setupIface got null iface");
        return false;
    }

    try {
        ISupplicantStaIface iface = setupStaIface(ifaceName, ifaceHwBinder);
        mISupplicantStaIfaces.put(ifaceName, iface);
    } catch (RemoteException e) {
        loge("setup StaIface failed: " + e.toString());
        return false;
    }

    return true;
}

private ISupplicantIface addIfaceV1_1(@NonNull String ifaceName) {
   synchronized (mLock) {
       ISupplicant.IfaceInfo ifaceInfo = new ISupplicant.IfaceInfo();
       ifaceInfo.name = ifaceName;
       ifaceInfo.type = IfaceType.STA;
       Mutable<ISupplicantIface> supplicantIface = new Mutable<>();
       try {
       	   // 这个是不是很熟悉了,就是拿到的 supplicant,然后调用 addInterface 方法
           getSupplicantMockableV1_1().addInterface(ifaceInfo, (SupplicantStatus status, ISupplicantIface iface) -> {
                       if (status.code != SupplicantStatusCode.SUCCESS
                               && status.code != SupplicantStatusCode.FAILURE_IFACE_EXISTS) {
                           Log.e(TAG, "Failed to create ISupplicantIface " + status.code);
                           return;
                       }
                       supplicantIface.value = iface;
                   });
       } catch (RemoteException e) {
           Log.e(TAG, "ISupplicant.addInterface exception: " + e);
           handleRemoteException(e, "addInterface");
           return null;
       } catch (NoSuchElementException e) {
           Log.e(TAG, "ISupplicant.addInterface exception: " + e);
           handleNoSuchElementException(e, "addInterface");
           return null;
       } catch (IllegalArgumentException e) {
           handleIllegalArgumentException(e, "addInterface");
           Log.e(TAG, "ISupplicant.addInterface exception: " + e);
           return null;
       }
       return supplicantIface.value;
   }
}
看下调用 addInterface 方法:http://aospxref.com/android-13.0.0_r3/xref/external/wpa_supplicant_8/wpa_supplicant/aidl/
supplicant.cpp#addStaInterface
::ndk::ScopedAStatus Supplicant::addStaInterface(
	const std::string& in_name,
	std::shared_ptr<ISupplicantStaIface>* _aidl_return)
{
	return validateAndCall(
		this, SupplicantStatusCode::FAILURE_IFACE_INVALID, &Supplicant::addStaInterfaceInternal, _aidl_return, in_name);
}

std::pair<std::shared_ptr<ISupplicantStaIface>, ndk::ScopedAStatus>
Supplicant::addStaInterfaceInternal(const std::string& name)
{
	std::shared_ptr<ISupplicantStaIface> iface;

	// Check if required |ifname| argument is empty.
	if (name.empty()) {
		return {nullptr, createStatus(SupplicantStatusCode::FAILURE_ARGS_INVALID)};
	}
	// Try to get the wpa_supplicant record for this iface, return
	// the iface object with the appropriate status code if it exists.
	ndk::ScopedAStatus status;
	std::tie(iface, status) = getStaInterfaceInternal(name);
	if (status.isOk()) {
		wpa_printf(MSG_INFO, "Iface already exists, return existing");
		return {iface, ndk::ScopedAStatus::ok()};
	}

	struct wpa_interface iface_params = {};
	// kIfaceDriverName 就是指:nl80211
	iface_params.driver = kIfaceDriverName;
	if (ensureConfigFileExists(	kStaIfaceConfPath, kOldStaIfaceConfPath) != 0) {
		wpa_printf(MSG_ERROR, "Conf file does not exists: %s", kStaIfaceConfPath);
		return {nullptr, createStatusWithMsg(
			SupplicantStatusCode::FAILURE_UNKNOWN, "Conf file does not exist")};
	}
	// kStaIfaceConfPath: "/data/vendor/wifi/wpa/wpa_supplicant.conf"
	iface_params.confname = kStaIfaceConfPath;
	const char* path = resolvePath( kStaIfaceConfOverlayPaths,
		    sizeof(kStaIfaceConfOverlayPaths)/sizeof(kStaIfaceConfOverlayPaths[0]));
	if (path != nullptr) {
		iface_params.confanother = path;
	}

	iface_params.ifname = name.c_str();
	// 比对 是不是 p2p-dev-
	if (strncmp(iface_params.ifname, P2P_MGMT_DEVICE_PREFIX,
		strlen(P2P_MGMT_DEVICE_PREFIX)) == 0) {
		status = addP2pDevInterface(iface_params);
		if (!status.isOk()) {
			return {iface, createStatus(static_cast<SupplicantStatusCode>(
				status.getServiceSpecificError()))};
		}
	} else {
		struct wpa_supplicant* wpa_s = wpa_supplicant_add_iface(wpa_global_, &iface_params, NULL);
		if (!wpa_s) {
			return {nullptr, createStatus(SupplicantStatusCode::FAILURE_UNKNOWN)};
		}
		// Request the current scan results from the driver and update
		// the local BSS list wpa_s->bss. This is to avoid a full scan
		// while processing the connect request on newly created interface.
		wpa_supplicant_update_scan_results(wpa_s);
	}
	// The supplicant core creates a corresponding aidl object via
	// AidlManager when |wpa_supplicant_add_iface| is called.
	return getStaInterfaceInternal(name);
}
至此,差不多就记录完毕。


 521
521

 被折叠的 条评论
为什么被折叠?
被折叠的 条评论
为什么被折叠?
 到【灌水乐园】发言


