


前言
前面我们已经介绍了ElesticSearch6.6.2的入门以及安装部署,当然工作生产中对于ES是需要装很多插件的,其中有一个就是head插件,htlm5编写的一个可以浏览的页面
先了解一个配置文件
[hadoop@hadoop001 config]$ cat jvm.options
## JVM configuration

################################################################
## IMPORTANT: JVM heap size
################################################################
##
## You should always set the min and max JVM heap
## size to the same value. For example, to set
## the heap to 4 GB, set:
##
## -Xms4g
## -Xmx4g
##
## See https://www.elastic.co/guide/en/elasticsearch/reference/current/heap-size.html
## for more information
##
################################################################

# Xms represents the initial size of total heap space
# Xmx represents the maximum size of total heap space

-Xms1g
-Xmx1g

################################################################
## Expert settings
################################################################
##
## All settings below this section are considered
## expert settings. Don't tamper with them unless
## you understand what you are doing
##
################################################################

## GC configuration
-XX:+UseConcMarkSweepGC
-XX:CMSInitiatingOccupancyFraction=75
-XX:+UseCMSInitiatingOccupancyOnly

## G1GC Configuration
# NOTE: G1GC is only supported on JDK version 10 or later.
# To use G1GC uncomment the lines below.
# 10-:-XX:-UseConcMarkSweepGC
# 10-:-XX:-UseCMSInitiatingOccupancyOnly
# 10-:-XX:+UseG1GC
# 10-:-XX:InitiatingHeapOccupancyPercent=75

## DNS cache policy
# cache ttl in seconds for positive DNS lookups noting that this overrides the
# JDK security property networkaddress.cache.ttl; set to -1 to cache forever
-Des.networkaddress.cache.ttl=60
# cache ttl in seconds for negative DNS lookups noting that this overrides the
# JDK security property networkaddress.cache.negative ttl; set to -1 to cache
# forever
-Des.networkaddress.cache.negative.ttl=10

## optimizations

# pre-touch memory pages used by the JVM during initialization
-XX:+AlwaysPreTouch

## basic

# explicitly set the stack size
-Xss1m

# set to headless, just in case
-Djava.awt.headless=true

# ensure UTF-8 encoding by default (e.g. filenames)
-Dfile.encoding=UTF-8

# use our provided JNA always versus the system one
-Djna.nosys=true

# turn off a JDK optimization that throws away stack traces for common
# exceptions because stack traces are important for debugging
-XX:-OmitStackTraceInFastThrow

# flags to configure Netty
-Dio.netty.noUnsafe=true
-Dio.netty.noKeySetOptimization=true
-Dio.netty.recycler.maxCapacityPerThread=0

# log4j 2
-Dlog4j.shutdownHookEnabled=false
-Dlog4j2.disable.jmx=true

-Djava.io.tmpdir=${ES_TMPDIR}

## heap dumps

# generate a heap dump when an allocation from the Java heap fails
# heap dumps are created in the working directory of the JVM
-XX:+HeapDumpOnOutOfMemoryError

# specify an alternative path for heap dumps; ensure the directory exists and
# has sufficient space
-XX:HeapDumpPath=data

# specify an alternative path for JVM fatal error logs
-XX:ErrorFile=logs/hs_err_pid%p.log

## JDK 8 GC logging

8:-XX:+PrintGCDetails
8:-XX:+PrintGCDateStamps
8:-XX:+PrintTenuringDistribution
8:-XX:+PrintGCApplicationStoppedTime
8:-Xloggc:logs/gc.log
8:-XX:+UseGCLogFileRotation
8:-XX:NumberOfGCLogFiles=32
8:-XX:GCLogFileSize=64m

# JDK 9+ GC logging
9-:-Xlog:gc*,gc+age=trace,safepoint:file=logs/gc.log:utctime,pid,tags:filecount=32,filesize=64m
# due to internationalization enhancements in JDK 9 Elasticsearch need to set the provider to COMPAT otherwise
# time/date parsing will break in an incompatible way for some date patterns and locals
9-:-Djava.locale.providers=COMPAT

# temporary workaround for C2 bug with JDK 10 on hardware with AVX-512
10-:-XX:UseAVX=2
此配置文件主要用于JVM调优用的
head插件安装
https://github.com/mobz/elasticsearch-head
这个在github上面有介绍,我们这里就安装看下
首先需要安装git
#注意使用root
[root@hadoop001 ~]$ yum install -y git
[root@hadoop001 ~]# git --version
git version 1.7.1
Running with built in server
[hadoop@hadoop001 source]$ git clone https://github.com/mobz/elasticsearch-head.git
//当然也可以直接到release里下载
[hadoop@hadoop001 source]$ cd elasticsearch-head/
[hadoop@hadoop001 elasticsearch-head]$ sudo  yum install nodejs npm bzip2
[hadoop@hadoop001 elasticsearch-head]$ sudo  npm install
这时候报错
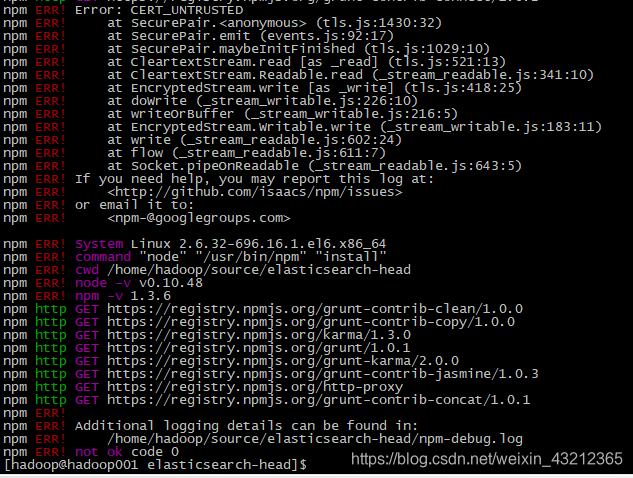
经过仔细排查和google,说是ssl 的问题:
https://blog.youkuaiyun.com/enweitech/article/details/88993022
npm config set strict-ssl false

或者npm config set registry=”http://registry.npmjs.org/”
.......
不过尝试后又报了错
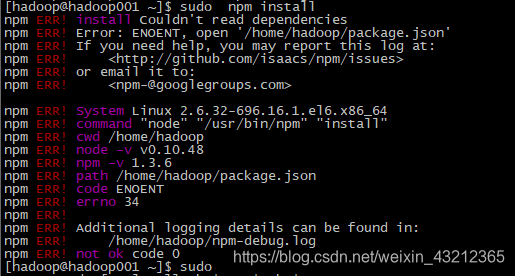
此问题在stackoverflow上面得到了解决
https://stackoverflow.com/questions/27637642/npm-throws-error-couldnt-read-dependencies
[hadoop@hadoop001 ~]$ sudo npm install -g npm
//此时就只有WARN警告了,这个可以忽略
npm run start前先改配置文件,否则后面还需要手工调整
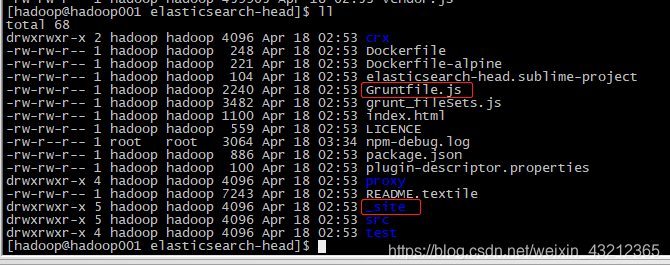
[hadoop@hadoop001 elasticsearch-head]$ vi Gruntfile.js
//主要修改以下内容,加上hostname: '*',当然0.0.0.0也可以,要不然外面访问不进去
                connect: {
                        server: {
                                options: {
                                        port: 9100,
                                        base: '.',
                                        keepalive: true,
                                        hostname: '*'
                                }
                        }
                }
 //保存,再到_site/文件夹下
[hadoop@hadoop001 elasticsearch-head]$ cd _site/
[hadoop@hadoop001 _site]$ ll app.js
-rw-rw-r-- 1 hadoop hadoop 145856 Apr 18 02:53 app.js
[hadoop@hadoop001 _site]$
[hadoop@hadoop001 _site]$ vi app.js
//主要修改以下内容
(function( app, i18n ) {

        var ui = app.ns("ui");
        var services = app.ns("services");

        app.App = ui.AbstractWidget.extend({
                defaults: {
                        base_uri: null
                },
                init: function(parent) {
                        this._super();
                        this.prefs = services.Preferences.instance();
                        this.base_uri = this.config.base_uri || this.prefs.get("app-base_uri") || "http://hadoop001:9200";         //修改主机名
                        if( this.base_uri.charAt( this.base_uri.length - 1 ) !== "/" ) {
                                // XHR request fails if the URL is not ending with a "/"
                                this.base_uri += "/";
                        }
                        if( this.config.auth_user ) {
                                var credentials = window.btoa( this.config.auth_user + ":" + this.config.auth_password );
                                $.ajaxSetup({
                                        headers: {
                                                "Authorization": "Basic " + credentials
                                        }
                                });
                        }
                        this.cluster = new services.Cluster({ base_uri: this.base_uri });
                        this._clusterState = new services.ClusterState({
这时候就可以启动了,可以使用github上面推荐的npm run start命令,也可以使用以下命令
[hadoop@hadoop001 elasticsearch-head]$ cd node_modules/grunt/bin
./grunt server &
这时候到UI界面上看发现连不上,原因是有一个跨域访问没配,配置之前先把ES停了
[hadoop@hadoop001 lib]$ cd ~/app/elasticsearch-6.6.2/config/
[hadoop@hadoop001 config]$ vi elasticsearch.yml
//随便在哪加上这两行,注意elasticsearch.yml是有格式要求的(true前有一个空格)
http.cors.enabled: true
http.cors.allow-origin: "*"
这时候网页上就可以看到了,具体使用我们到后面讲,不过这个界面有些丑
Kibana插件安装
当然也可以先搭建Kibana,不过上面的跨域访问肯定要配下
[hadoop@hadoop001 config]$ vi kibana.yml
//主要配置以下两个,Kibana默认端口是5601
server.host: "0.0.0.0"    //生产上控制一下,只能让指定机器访问,不过配0.0.0.0也没事,生产上一般都是需要通过跳板机等跳过去
server.name: "hadoop001"
启动kibana
[hadoop@hadoop001 bin]$ ./kibana
  log   [06:11:05.315] [warning][plugin] Skipping non-plugin directory at /home/hadoop/app/kibana-6.6.2-linux-x86_64/src/legacy/core_plugins/ems_util
  log   [06:11:06.321] [info][status][plugin:kibana@6.6.2] Status changed from uninitialized to green - Ready
  log   [06:11:06.345] [info][status][plugin:elasticsearch@6.6.2] Status changed from uninitialized to yellow - Waiting for Elasticsearch
  log   [06:11:06.347] [info][status][plugin:xpack_main@6.6.2] Status changed from uninitialized to yellow - Waiting for Elasticsearch
  log   [06:11:06.352] [info][status][plugin:graph@6.6.2] Status changed from uninitialized to yellow - Waiting for Elasticsearch
  log   [06:11:06.359] [info][status][plugin:monitoring@6.6.2] Status changed from uninitialized to green - Ready
  log   [06:11:06.362] [info][status][plugin:spaces@6.6.2] Status changed from uninitialized to yellow - Waiting for Elasticsearch
  log   [06:11:06.367] [warning][security] Generating a random key for xpack.security.encryptionKey. To prevent sessions from being invalidated on restart, please set xpack.security.encryptionKey in kibana.yml
  log   [06:11:06.371] [warning][security] Session cookies will be transmitted over insecure connections. This is not recommended.
  log   [06:11:06.376] [info][status][plugin:security@6.6.2] Status changed from uninitialized to yellow - Waiting for Elasticsearch
  log   [06:11:06.392] [info][status][plugin:searchprofiler@6.6.2] Status changed from uninitialized to yellow - Waiting for Elasticsearch
  log   [06:11:06.395] [info][status][plugin:ml@6.6.2] Status changed from uninitialized to yellow - Waiting for Elasticsearch
  log   [06:11:06.423] [info][status][plugin:tilemap@6.6.2] Status changed from uninitialized to yellow - Waiting for Elasticsearch
  log   [06:11:06.425] [info][status][plugin:watcher@6.6.2] Status changed from uninitialized to yellow - Waiting for Elasticsearch
  log   [06:11:06.434] [info][status][plugin:grokdebugger@6.6.2] Status changed from uninitialized to yellow - Waiting for Elasticsearch
  log   [06:11:06.442] [info][status][plugin:dashboard_mode@6.6.2] Status changed from uninitialized to green - Ready
  log   [06:11:06.443] [info][status][plugin:logstash@6.6.2] Status changed from uninitialized to yellow - Waiting for Elasticsearch
  log   [06:11:06.448] [info][status][plugin:beats_management@6.6.2] Status changed from uninitialized to yellow - Waiting for Elasticsearch
  log   [06:11:06.467] [info][status][plugin:apm@6.6.2] Status changed from uninitialized to green - Ready
  log   [06:11:06.562] [info][status][plugin:elasticsearch@6.6.2] Status changed from yellow to green - Ready
  log   [06:11:06.583] [info][status][plugin:interpreter@6.6.2] Status changed from uninitialized to green - Ready
  log   [06:11:06.590] [info][status][plugin:canvas@6.6.2] Status changed from uninitialized to green - Ready
  log   [06:11:06.596] [info][status][plugin:license_management@6.6.2] Status changed from uninitialized to green - Ready
  log   [06:11:06.599] [info][status][plugin:index_management@6.6.2] Status changed from uninitialized to yellow - Waiting for Elasticsearch
  log   [06:11:06.638] [info][status][plugin:console@6.6.2] Status changed from uninitialized to green - Ready
  log   [06:11:06.640] [info][status][plugin:console_extensions@6.6.2] Status changed from uninitialized to green - Ready
  log   [06:11:06.645] [info][status][plugin:notifications@6.6.2] Status changed from uninitialized to green - Ready
  log   [06:11:06.647] [info][status][plugin:index_lifecycle_management@6.6.2] Status changed from uninitialized to yellow - Waiting for Elasticsearch
  log   [06:11:06.694] [info][status][plugin:infra@6.6.2] Status changed from uninitialized to green - Ready
  log   [06:11:06.697] [info][status][plugin:rollup@6.6.2] Status changed from uninitialized to yellow - Waiting for Elasticsearch
  log   [06:11:06.707] [info][status][plugin:remote_clusters@6.6.2] Status changed from uninitialized to yellow - Waiting for Elasticsearch
  log   [06:11:06.712] [info][status][plugin:cross_cluster_replication@6.6.2] Status changed from uninitialized to yellow - Waiting for Elasticsearch
  log   [06:11:06.720] [info][status][plugin:upgrade_assistant@6.6.2] Status changed from uninitialized to green - Ready
  log   [06:11:06.734] [info][status][plugin:metrics@6.6.2] Status changed from uninitialized to green - Ready
  log   [06:11:06.879] [info][status][plugin:timelion@6.6.2] Status changed from uninitialized to green - Ready
  log   [06:11:07.605] [warning][reporting] Generating a random key for xpack.reporting.encryptionKey. To prevent pending reports from failing on restart, please set xpack.reporting.encryptionKey in kibana.yml
  log   [06:11:07.610] [info][status][plugin:reporting@6.6.2] Status changed from uninitialized to yellow - Waiting for Elasticsearch
  log   [06:11:07.628] [info][license][xpack] Imported license information from Elasticsearch for the [data] cluster: mode: basic | status: active
  log   [06:11:07.645] [info][status][plugin:xpack_main@6.6.2] Status changed from yellow to green - Ready
  log   [06:11:07.646] [info][status][plugin:graph@6.6.2] Status changed from yellow to green - Ready
  log   [06:11:07.647] [info][status][plugin:searchprofiler@6.6.2] Status changed from yellow to green - Ready
  log   [06:11:07.648] [info][status][plugin:ml@6.6.2] Status changed from yellow to green - Ready
  log   [06:11:07.649] [info][status][plugin:tilemap@6.6.2] Status changed from yellow to green - Ready
  log   [06:11:07.649] [info][status][plugin:watcher@6.6.2] Status changed from yellow to green - Ready
  log   [06:11:07.650] [info][status][plugin:grokdebugger@6.6.2] Status changed from yellow to green - Ready
  log   [06:11:07.650] [info][status][plugin:logstash@6.6.2] Status changed from yellow to green - Ready
  log   [06:11:07.651] [info][status][plugin:beats_management@6.6.2] Status changed from yellow to green - Ready
  log   [06:11:07.660] [info][status][plugin:index_management@6.6.2] Status changed from yellow to green - Ready
  log   [06:11:07.661] [info][status][plugin:index_lifecycle_management@6.6.2] Status changed from yellow to green - Ready
  log   [06:11:07.662] [info][status][plugin:rollup@6.6.2] Status changed from yellow to green - Ready
  log   [06:11:07.663] [info][status][plugin:remote_clusters@6.6.2] Status changed from yellow to green - Ready
  log   [06:11:07.665] [info][status][plugin:cross_cluster_replication@6.6.2] Status changed from yellow to green - Ready
  log   [06:11:07.665] [info][status][plugin:reporting@6.6.2] Status changed from yellow to green - Ready
  log   [06:11:07.666] [info][kibana-monitoring][monitoring-ui] Starting monitoring stats collection
  log   [06:11:07.687] [info][status][plugin:security@6.6.2] Status changed from yellow to green - Ready
  log   [06:11:07.763] [info][license][xpack] Imported license information from Elasticsearch for the [monitoring] cluster: mode: basic | status: active
  log   [06:11:18.592] [info][migrations] Creating index .kibana_1.
  log   [06:11:18.965] [info][migrations] Pointing alias .kibana to .kibana_1.
  log   [06:11:19.008] [info][migrations] Finished in 416ms.
  log   [06:11:19.010] [info][listening] Server running at http://0.0.0.0:5601
  log   [06:11:19.749] [info][status][plugin:spaces@6.6.2] Status changed from yellow to green - Ready
访问hadoop001:5601UI界面
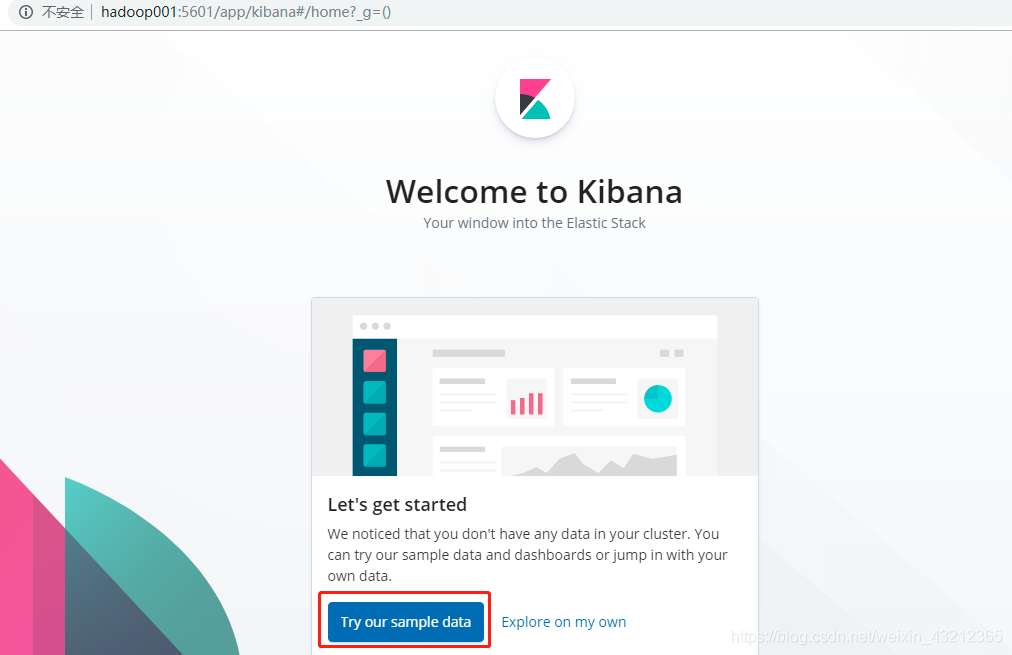
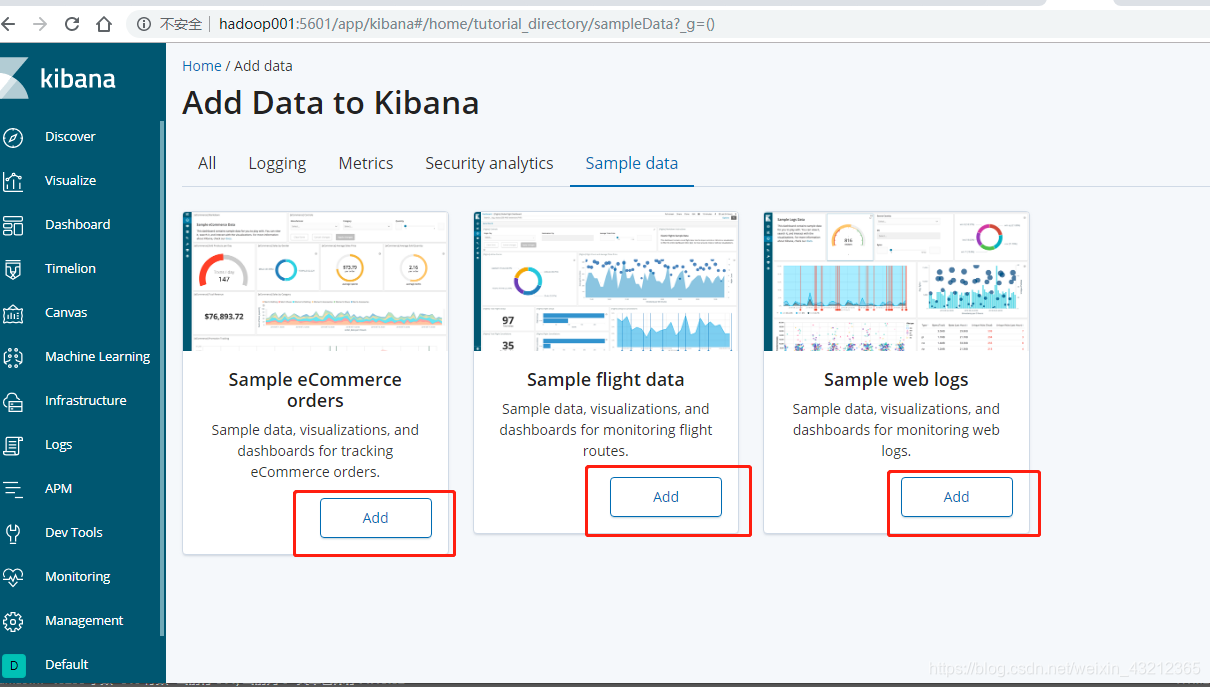
我们看一下Web的日志

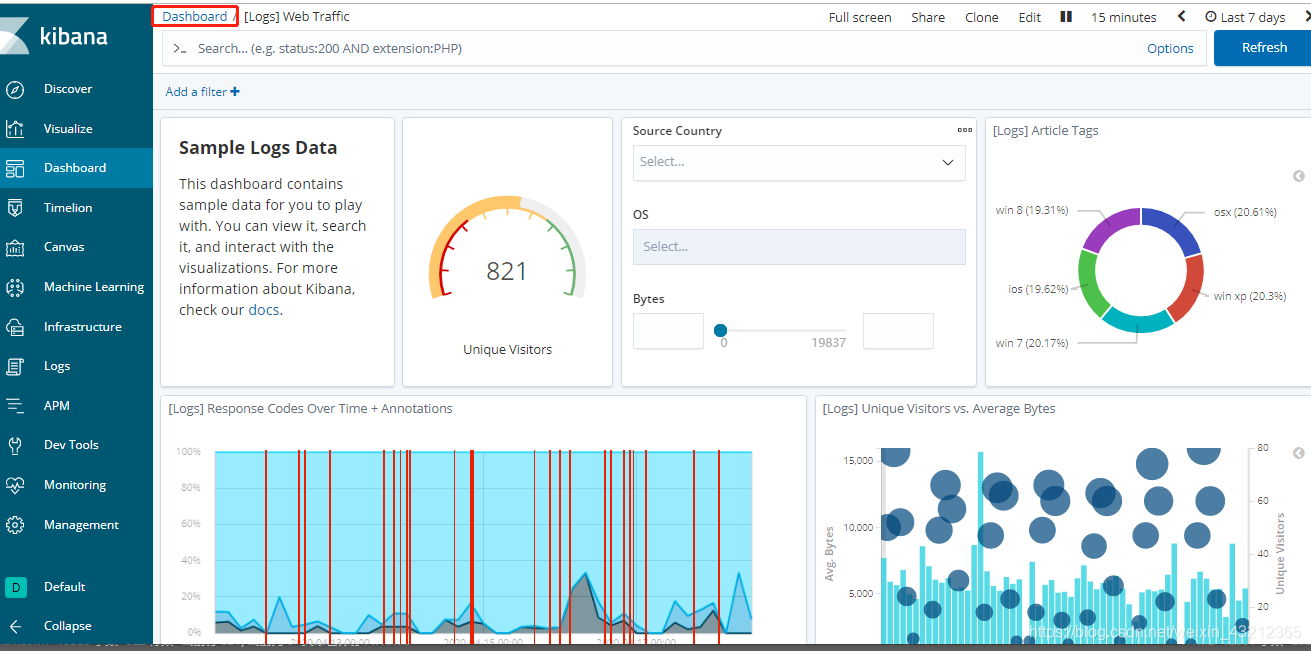

上述都是一些展示,我们重点关注以下几点
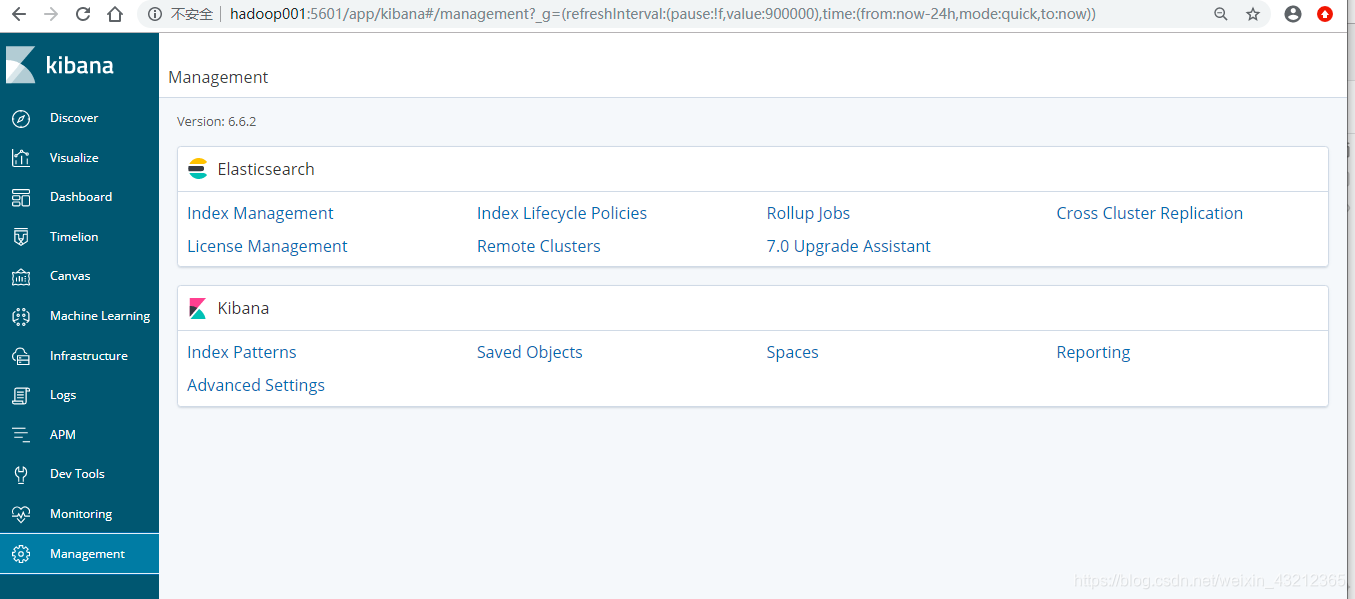
- Mangement

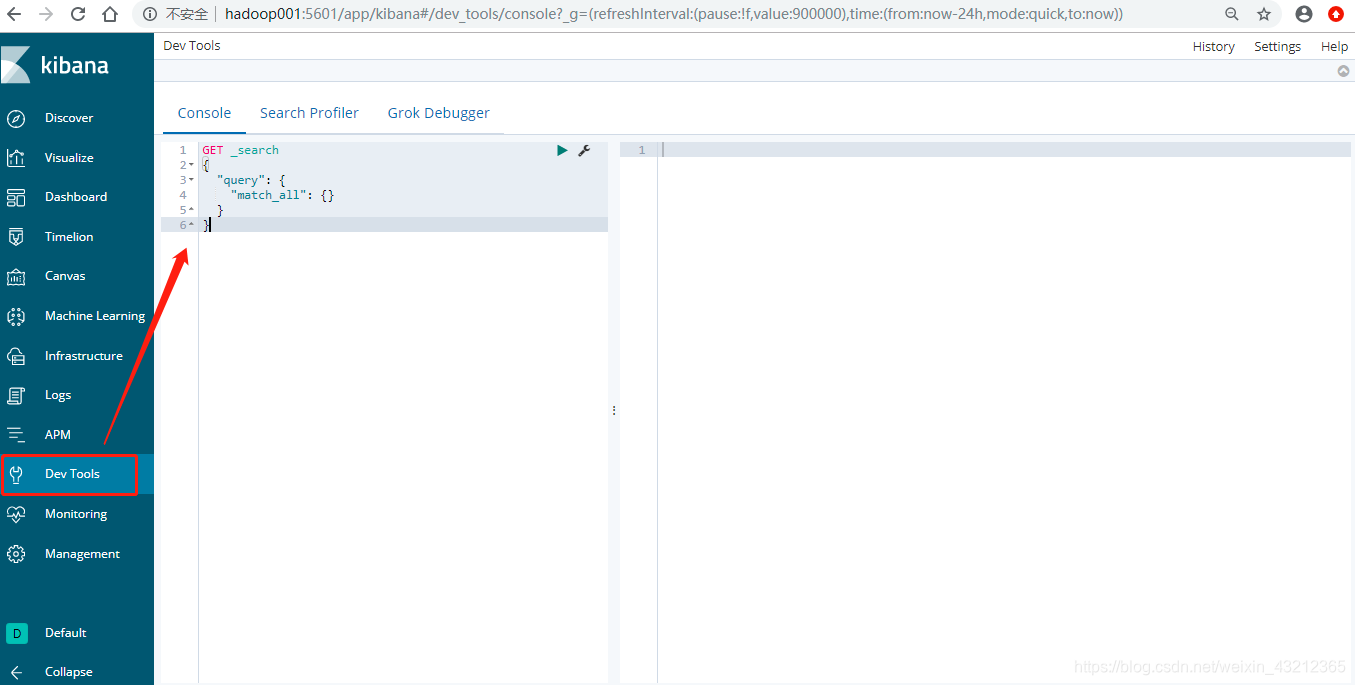
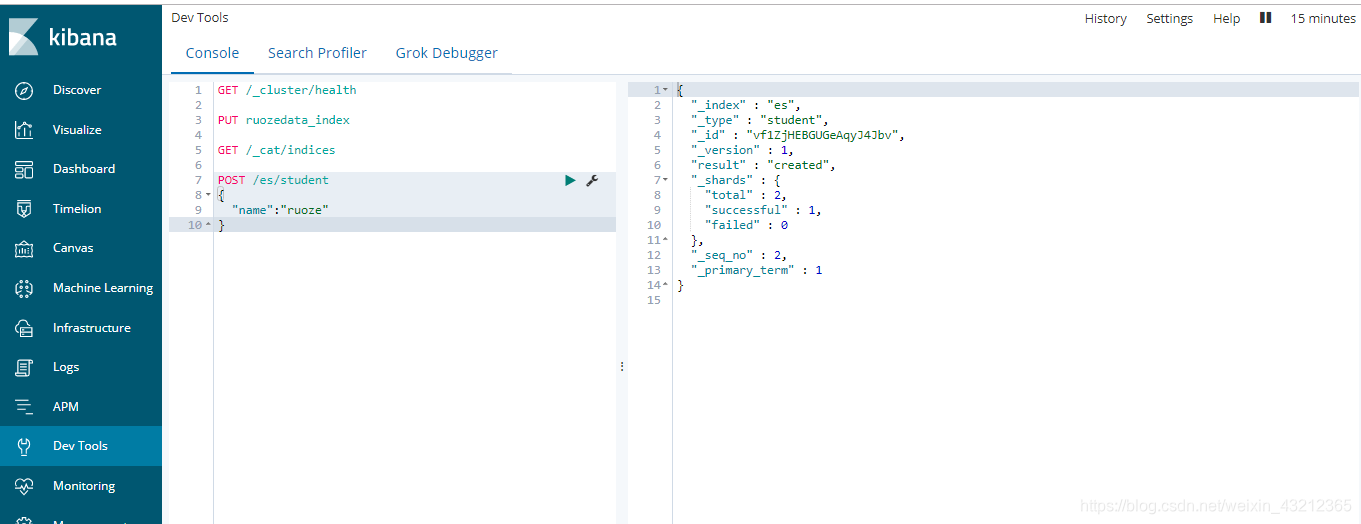
- Dev Tools


这时候再点击一次Dev Tools就可以看下以下界面
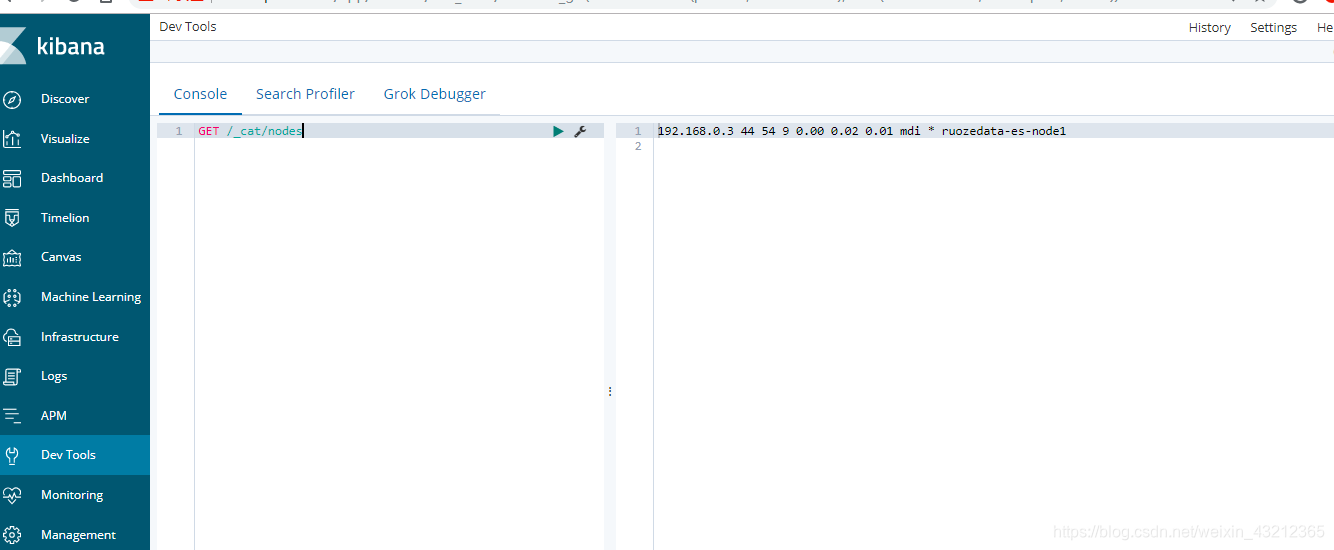
查看节点信息
查看集群的健康信息
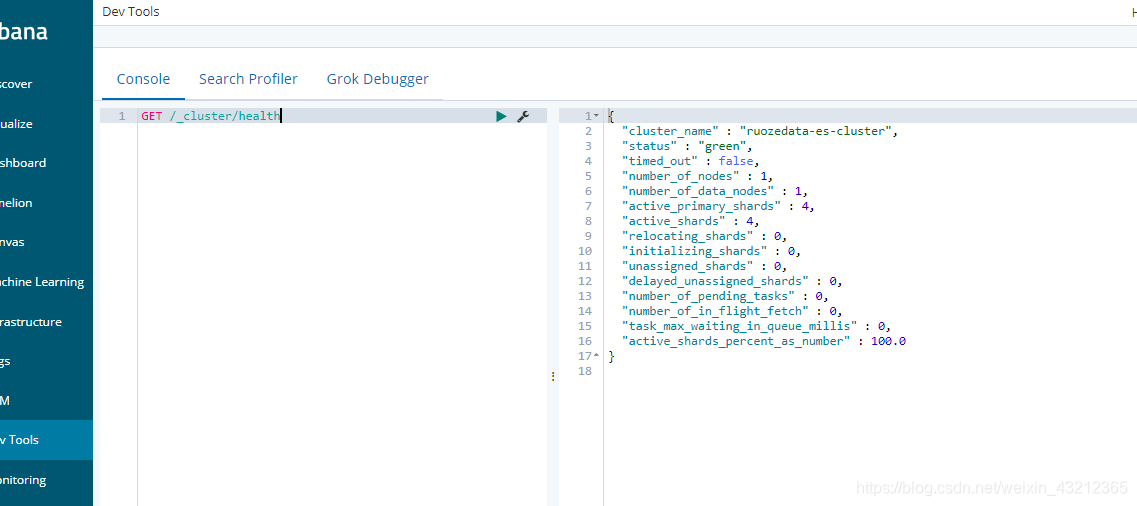
这些信息其实同ES访问出来的一样

加上pretty参数

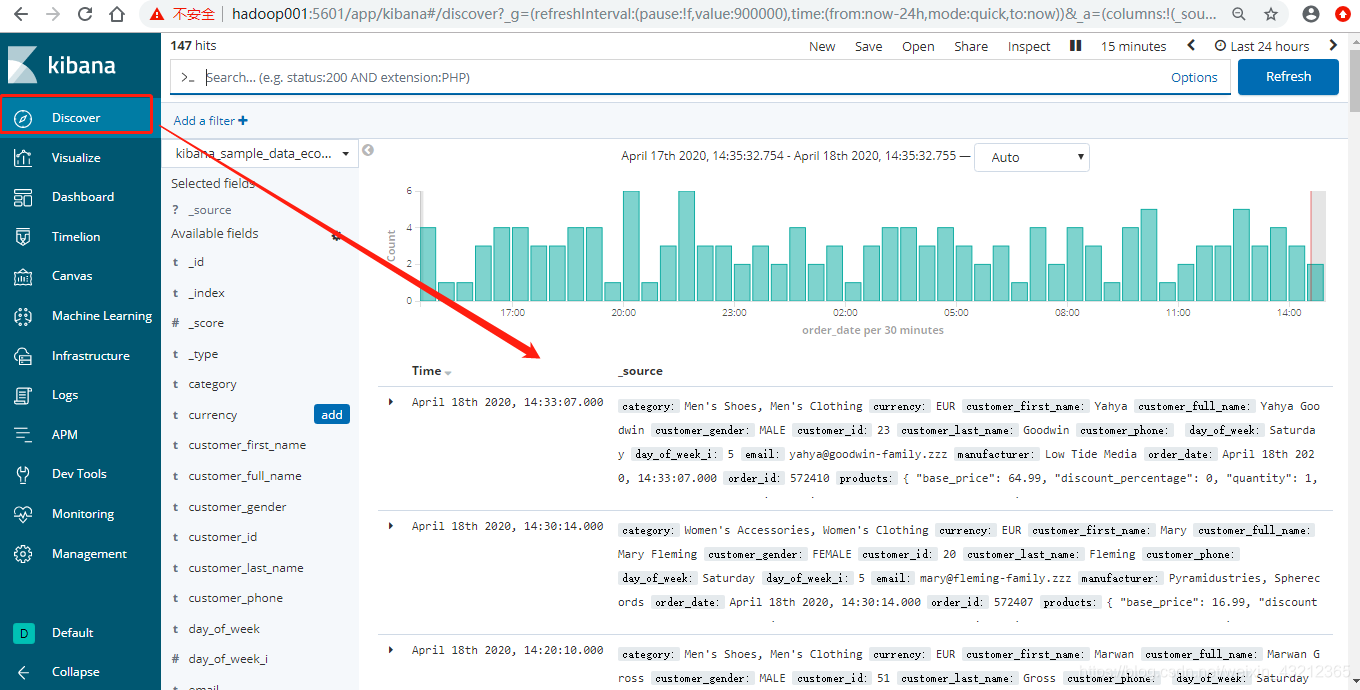
- Discover

这里面可以查询一些数据
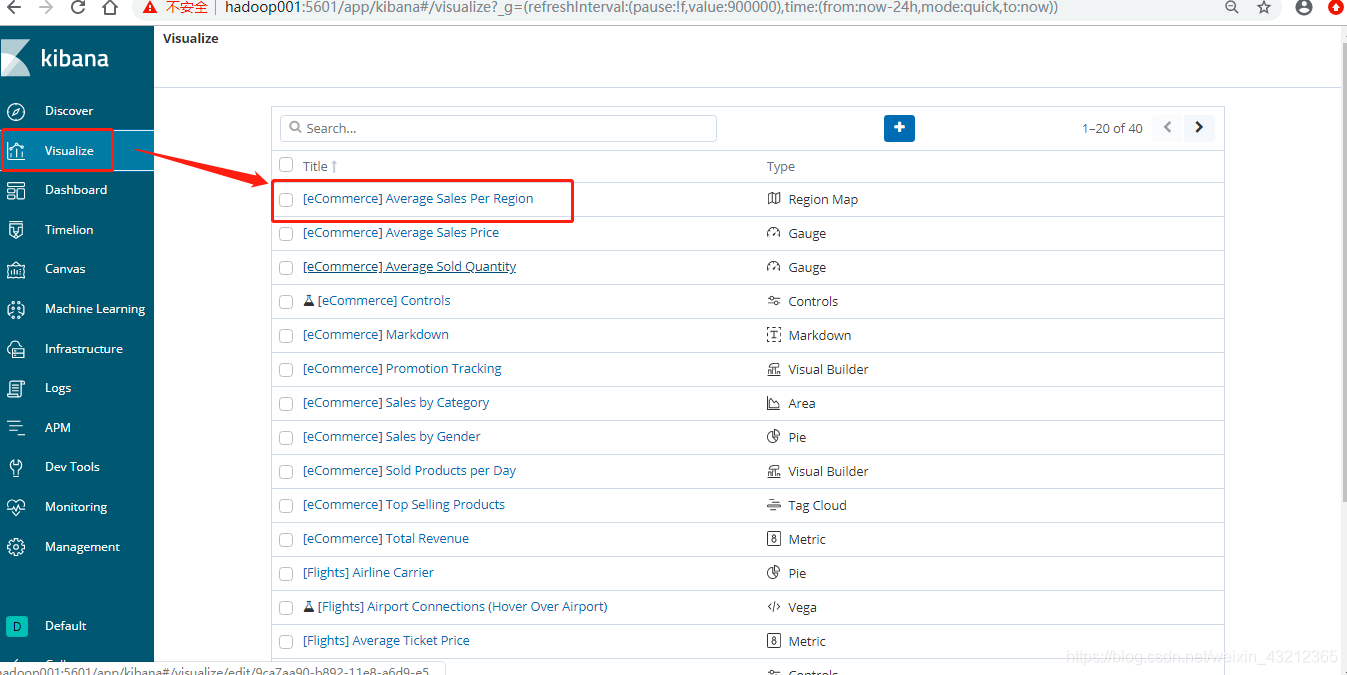
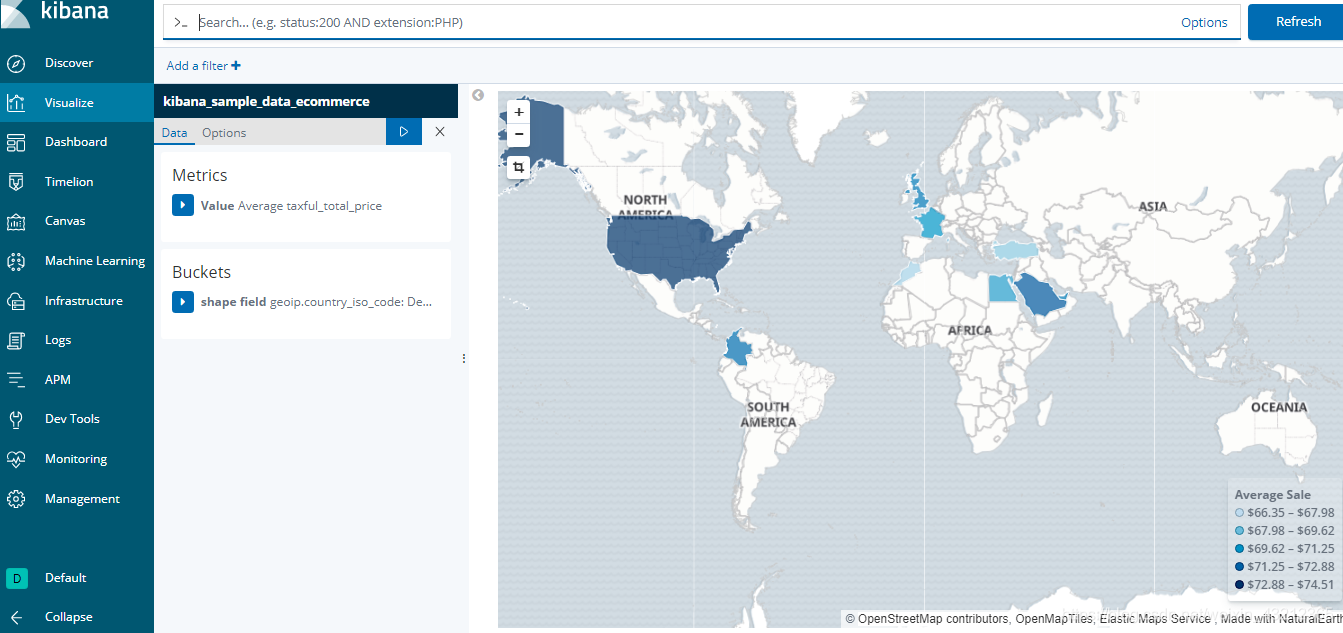
- Visualize可视化
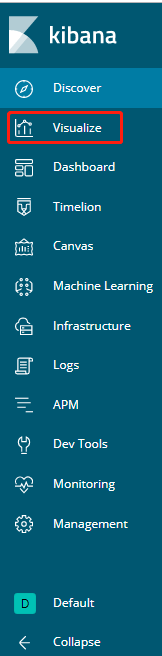
我们看下第一个销售的区域,地图分布情况
-
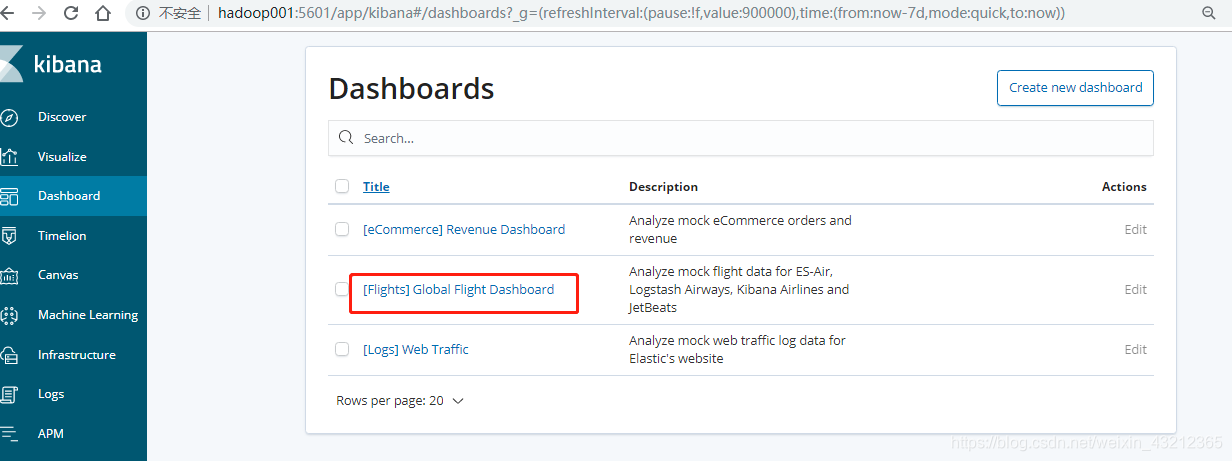
Dashboard可以将多个图在一张图中展示出来,这个在工作当中用的比较多,各种监控数据出来,然后通过大屏展示

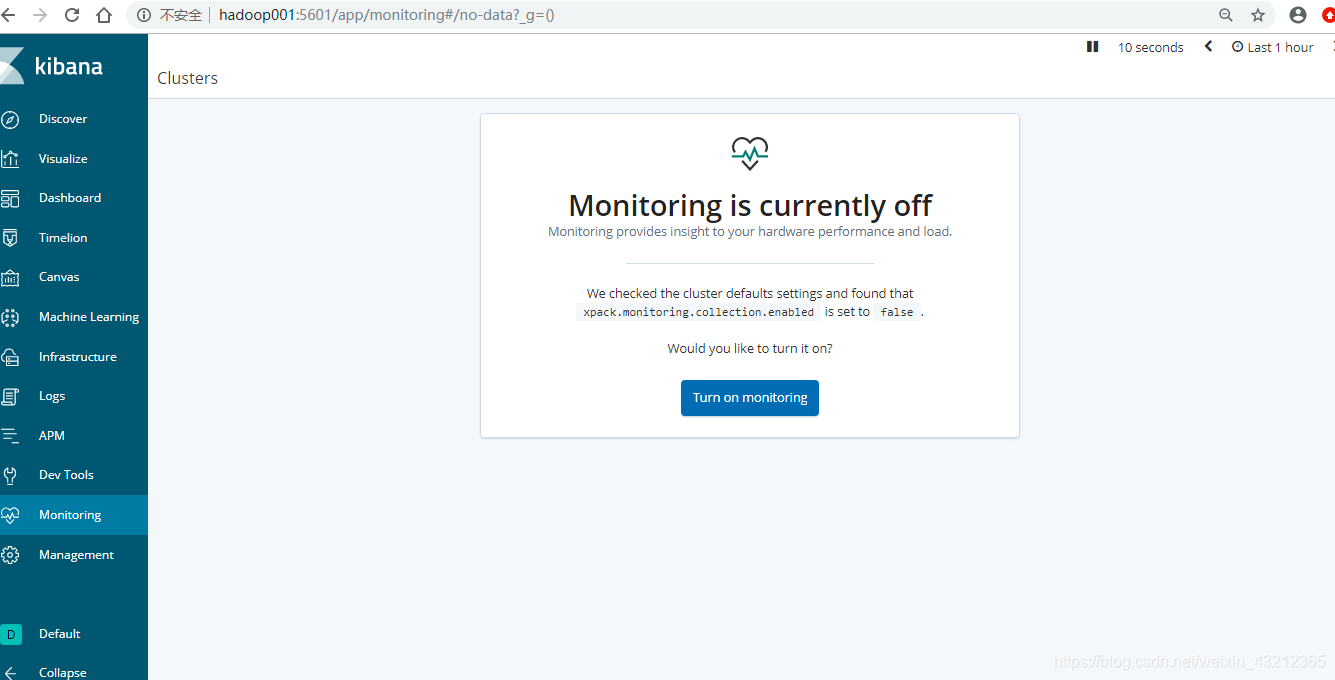
-
Monitoring监控

生产上场景

login到数据平台,把url信息指向link,所有的授权都是通过数据平台login地方的,这时候登上后有link的显示权限的话就打开展示,没有的话就不展示;生产上所有东西都是通过数据平台设置的,外面是访问不了的,所以的东西都是根据账号控制的
具体操作
分REST、Java两大部分
索引库
刚刚讲索引的时候有一个特点,名字必须是小写
[hadoop@hadoop001 ~]$ curl --help
Usage: curl [options...] <url>
Options: (H) means HTTP/HTTPS only, (F) means FTP only
    --anyauth       Pick "any" authentication method (H)
 -a/--append        Append to target file when uploading (F/SFTP)
    --basic         Use HTTP Basic Authentication (H)
    --cacert <file> CA certificate to verify peer against (SSL)
    --capath <directory> CA directory to verify peer against (SSL)
 -E/--cert <cert[:passwd]> Client certificate file and password (SSL)
    --cert-type <type> Certificate file type (DER/PEM/ENG) (SSL)
    --ciphers <list> SSL ciphers to use (SSL)
    --compressed    Request compressed response (using deflate or gzip)
 -K/--config <file> Specify which config file to read
    --connect-timeout <seconds> Maximum time allowed for connection
 -C/--continue-at <offset> Resumed transfer offset
 -b/--cookie <name=string/file> Cookie string or file to read cookies from (H)
 -c/--cookie-jar <file> Write cookies to this file after operation (H)
    --create-dirs   Create necessary local directory hierarchy
    --crlf          Convert LF to CRLF in upload
    --crlfile <file> Get a CRL list in PEM format from the given file
 -d/--data <data>   HTTP POST data (H)
    --data-ascii <data>  HTTP POST ASCII data (H)
    --data-binary <data> HTTP POST binary data (H)
    --data-urlencode <name=data/name@filename> HTTP POST data url encoded (H)
    --delegation STRING GSS-API delegation permission
    --digest        Use HTTP Digest Authentication (H)
    --disable-eprt  Inhibit using EPRT or LPRT (F)
    --disable-epsv  Inhibit using EPSV (F)
 -D/--dump-header <file> Write the headers to this file
    --egd-file <file> EGD socket path for random data (SSL)
    --engine <eng>  Crypto engine to use (SSL). "--engine list" for list
 -f/--fail          Fail silently (no output at all) on HTTP errors (H)
 -F/--form <name=content> Specify HTTP multipart POST data (H)
    --form-string <name=string> Specify HTTP multipart POST data (H)
    --ftp-account <data> Account data to send when requested by server (F)
    --ftp-alternative-to-user <cmd> String to replace "USER [name]" (F)
    --ftp-create-dirs Create the remote dirs if not present (F)
    --ftp-method [multicwd/nocwd/singlecwd] Control CWD usage (F)
    --ftp-pasv      Use PASV/EPSV instead of PORT (F)
 -P/--ftp-port <address> Use PORT with address instead of PASV (F)
    --ftp-skip-pasv-ip Skip the IP address for PASV (F)
    --ftp-ssl       Try SSL/TLS for ftp transfer (F)
    --ftp-ssl-ccc   Send CCC after authenticating (F)
    --ftp-ssl-ccc-mode [active/passive] Set CCC mode (F)
    --ftp-ssl-control Require SSL/TLS for ftp login, clear for transfer (F)
    --ftp-ssl-reqd  Require SSL/TLS for ftp transfer (F)
 -G/--get           Send the -d data with a HTTP GET (H)
 -g/--globoff       Disable URL sequences and ranges using {} and []
 -H/--header <line> Custom header to pass to server (H)
 -I/--head          Show document info only
 -h/--help          This help text
    --hostpubmd5 <md5> Hex encoded MD5 string of the host public key. (SSH)
 -0/--http1.0       Use HTTP 1.0 (H)
    --ignore-content-length  Ignore the HTTP Content-Length header
 -i/--include       Include protocol headers in the output (H/F)
 -k/--insecure      Allow connections to SSL sites without certs (H)
    --interface <interface> Specify network interface/address to use
 -4/--ipv4          Resolve name to IPv4 address
 -6/--ipv6          Resolve name to IPv6 address
 -j/--junk-session-cookies Ignore session cookies read from file (H)
    --keepalive-time <seconds> Interval between keepalive probes
    --key <key>     Private key file name (SSL/SSH)
    --key-type <type> Private key file type (DER/PEM/ENG) (SSL)
    --krb <level>   Enable Kerberos with specified security level (F)
    --libcurl <file> Dump libcurl equivalent code of this command line
    --limit-rate <rate> Limit transfer speed to this rate
 -l/--list-only     List only names of an FTP directory (F)
    --local-port <num>[-num] Force use of these local port numbers
 -L/--location      Follow Location: hints (H)
    --location-trusted Follow Location: and send auth to other hosts (H)
 -M/--manual        Display the full manual
    --max-filesize <bytes> Maximum file size to download (H/F)
    --max-redirs <num> Maximum number of redirects allowed (H)
 -m/--max-time <seconds> Maximum time allowed for the transfer
    --negotiate     Use HTTP Negotiate Authentication (H)
 -n/--netrc         Must read .netrc for user name and password
    --netrc-optional Use either .netrc or URL; overrides -n
 -N/--no-buffer     Disable buffering of the output stream
    --no-keepalive  Disable keepalive use on the connection
    --no-sessionid  Disable SSL session-ID reusing (SSL)
    --noproxy       Comma-separated list of hosts which do not use proxy
    --ntlm          Use HTTP NTLM authentication (H)
 -o/--output <file> Write output to <file> instead of stdout
    --pass  <pass>  Pass phrase for the private key (SSL/SSH)
    --post301       Do not switch to GET after following a 301 redirect (H)
    --post302       Do not switch to GET after following a 302 redirect (H)
 -#/--progress-bar  Display transfer progress as a progress bar
 -x/--proxy <host[:port]> Use HTTP proxy on given port
    --proxy-anyauth Pick "any" proxy authentication method (H)
    --proxy-basic   Use Basic authentication on the proxy (H)
    --proxy-digest  Use Digest authentication on the proxy (H)
    --proxy-negotiate Use Negotiate authentication on the proxy (H)
    --proxy-ntlm    Use NTLM authentication on the proxy (H)
 -U/--proxy-user <user[:password]> Set proxy user and password
    --proxy1.0 <host[:port]> Use HTTP/1.0 proxy on given port
 -p/--proxytunnel   Operate through a HTTP proxy tunnel (using CONNECT)
    --pubkey <key>  Public key file name (SSH)
 -Q/--quote <cmd>   Send command(s) to server before file transfer (F/SFTP)
    --random-file <file> File for reading random data from (SSL)
 -r/--range <range> Retrieve only the bytes within a range
    --raw           Pass HTTP "raw", without any transfer decoding (H)
 -e/--referer       Referer URL (H)
 -O/--remote-name   Write output to a file named as the remote file
    --remote-name-all Use the remote file name for all URLs
 -R/--remote-time   Set the remote file's time on the local output
 -X/--request <command> Specify request command to use
    --retry <num>   Retry request <num> times if transient problems occur
    --retry-delay <seconds> When retrying, wait this many seconds between each
    --retry-max-time <seconds> Retry only within this period
 -S/--show-error    Show error. With -s, make curl show errors when they occur
 -s/--silent        Silent mode. Don't output anything
    --socks4 <host[:port]> SOCKS4 proxy on given host + port
    --socks4a <host[:port]> SOCKS4a proxy on given host + port
    --socks5 <host[:port]> SOCKS5 proxy on given host + port
    --socks5-hostname <host[:port]> SOCKS5 proxy, pass host name to proxy
    --socks5-gssapi-service <name> SOCKS5 proxy service name for gssapi
    --socks5-gssapi-nec  Compatibility with NEC SOCKS5 server
 -Y/--speed-limit   Stop transfer if below speed-limit for 'speed-time' secs
 -y/--speed-time    Time needed to trig speed-limit abort. Defaults to 30
 -2/--sslv2         Use SSLv2 (SSL)
 -3/--sslv3         Use SSLv3 (SSL)
    --stderr <file> Where to redirect stderr. - means stdout
    --tcp-nodelay   Use the TCP_NODELAY option
 -t/--telnet-option <OPT=val> Set telnet option
 -z/--time-cond <time> Transfer based on a time condition
 -1/--tlsv1         Use => TLSv1 (SSL)
    --tlsv1.0       Use TLSv1.0 (SSL)
    --tlsv1.1       Use TLSv1.1 (SSL)
    --tlsv1.2       Use TLSv1.2 (SSL)
    --trace <file>  Write a debug trace to the given file
    --trace-ascii <file> Like --trace but without the hex output
    --trace-time    Add time stamps to trace/verbose output
 -T/--upload-file <file> Transfer <file> to remote site
    --url <URL>     Set URL to work with
 -B/--use-ascii     Use ASCII/text transfer
 -u/--user <user[:password]> Set server user and password
 -A/--user-agent <string> User-Agent to send to server (H)
 -v/--verbose       Make the operation more talkative
 -V/--version       Show version number and quit
 -w/--write-out <format> What to output after completion
 -q                 If used as the first parameter disables .curlrc
curl -X Linux常用的创建索引的方式
 -X/--request <command> Specify request command to use
   --retry <num>   Retry request <num> times if transient problems occur
   --retry-delay <seconds> When retrying, wait this many seconds between each
   --retry-max-time <seconds> Retry only within this period
有PUT、POST 、DELETE三种,我们先看PUT
[hadoop@hadoop001 ~]$ curl -XPUT  'http://hadoop001:9200/es'               //创建一个es的索引
{"acknowledged":true,"shards_acknowledged":true,"index":"es"}[hadoop@hadoop001 ~]$
这时候到hadoop001:9100UI界面上就可以看到刚刚创建的es的索引,默认一个索引是有五个分片,两个副本
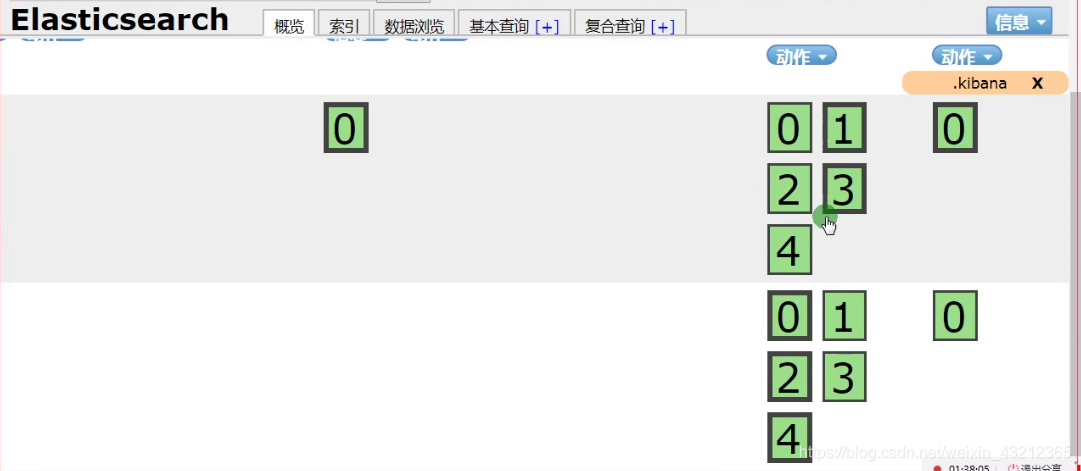
有黑框框的是主分片,这个同hadoop中非常类似
Index API https://www.elastic.co/guide/en/elasticsearch/reference/6.6/docs-index_.html
如果用大写的话就会报错,这就验证了官方文档上说的索引名必须小写
[hadoop@hadoop001 ~]$ curl -XPUT  'http://hadoop001:9200/eS'
{"error":{"root_cause":[{"type":"invalid_index_name_exception","reason":"Invalid index name [eS], must be lowercase","index_uuid":"_na_","index":"eS"}],"type":"invalid_index_name_exception","reason":"Invalid index name [eS], must be lowercase","index_uuid":"_na_","index":"eS"},"status":400}[hadoop@hadoop001 ~]$
当然也可以到kibana上面操作
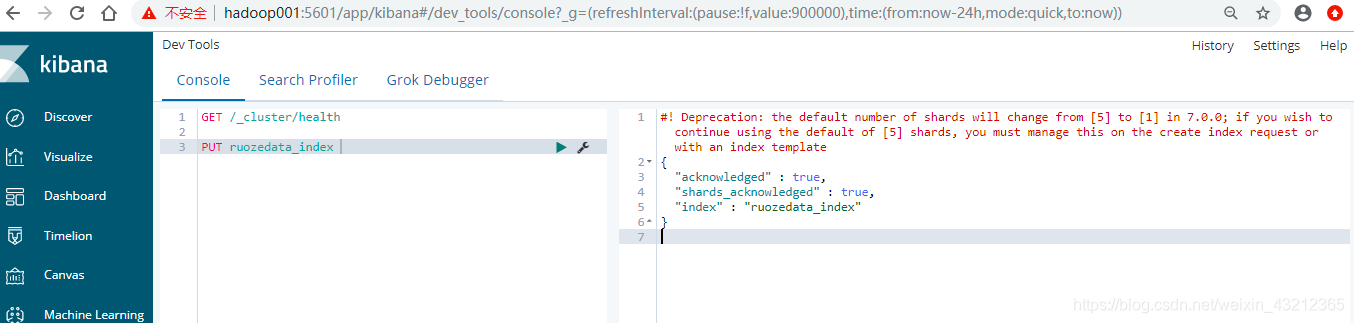
上面描述显示,默认从7.0开始分片就由5个变成了1个
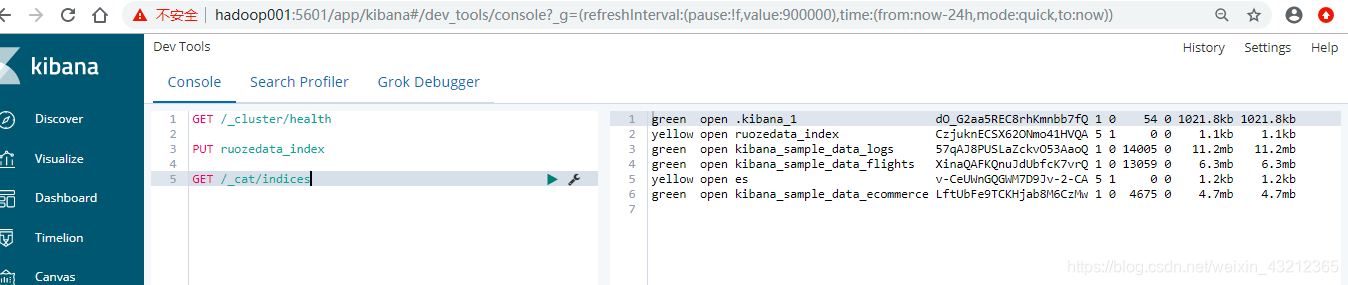
查询所有的索引

索引
上面讲的是索引库,索引创建要稍微复杂一些
[hadoop@hadoop001 ~]$ curl -XPOST  'http://hadoop001:9200/es/student/1' -d '{
> "name":"zhangsan",
> "age":"30",
> "interests":["spark","flink"]
> }'
{"error":"Content-Type header [application/x-www-form-urlencoded] is not supported","status":406}[hadoop@hadoop001 ~]$
发现报错,不过在2.X或者5.X中都是可以,到6.X就不行了
[hadoop@hadoop001 ~]$ curl -XPOST -H "Content-Type:application/json" 'http://hadoop001:9200/es/student/1' -d '{
> "name":"zhangsan",
> "age":"30",
> "interests":["spark","flink"]
> }'
{"_index":"es","_type":"student","_id":"1","_version":1,"result":"created","_shards":{"total":2,"successful":1,"failed":0},"_seq_no":0,"_primary_term":1}[hadoop@hadoop001 ~]$
加一个-H固定参数就OK了
再创建一个
[hadoop@hadoop001 ~]$ curl -XPOST -H "Content-Type:application/json" 'http://hadoop001:9200/es/student/2' -d '{
> "name":"lisi",
> "age":"18",
> "interests":["eat","sleep"]
> }'
{"_index":"es","_type":"student","_id":"2","_version":1,"result":"created","_shards":{"total":2,"successful":1,"failed":0},"_seq_no":0,"_primary_term":1}[hadoop@hadoop001 ~]$
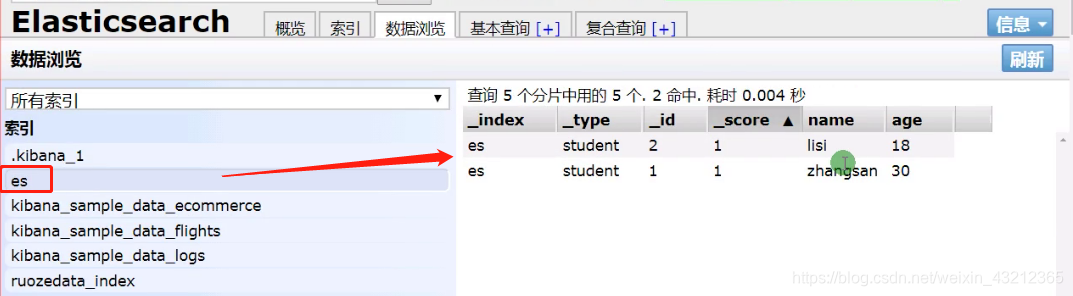
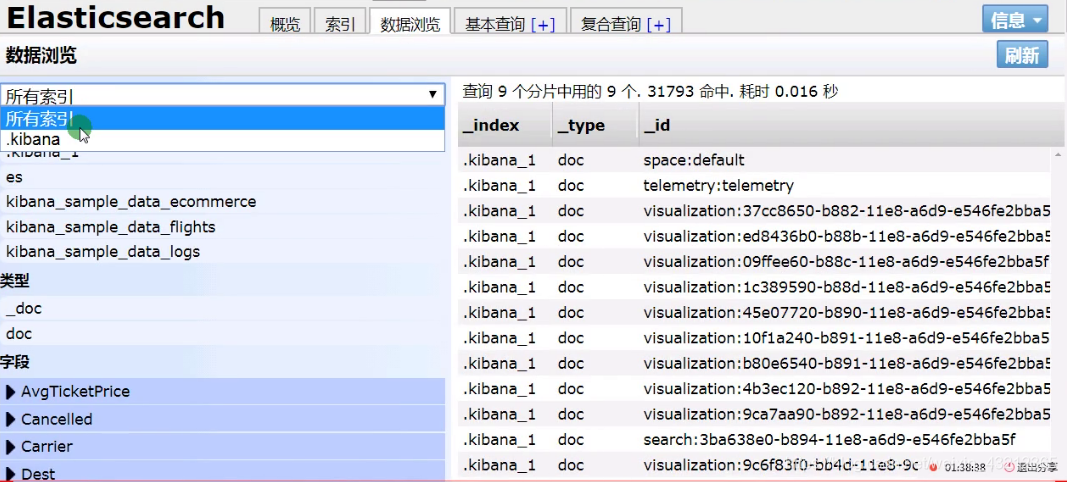
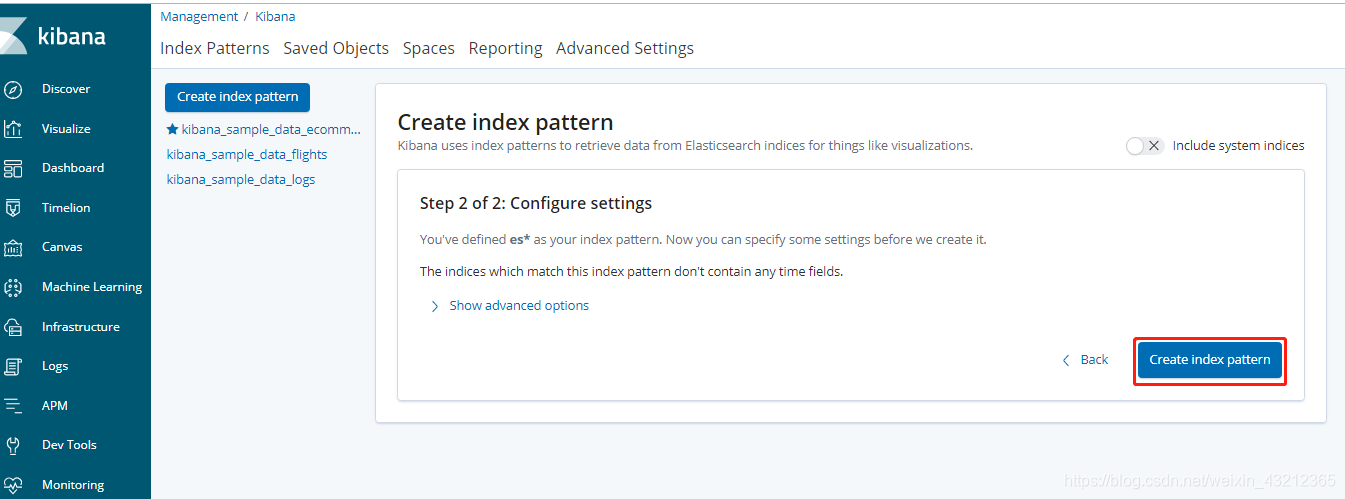
我们再到管理,刚刚是创建了一个es的索引库,不过默认是同kibana关联不上的,需要到Index Patterns
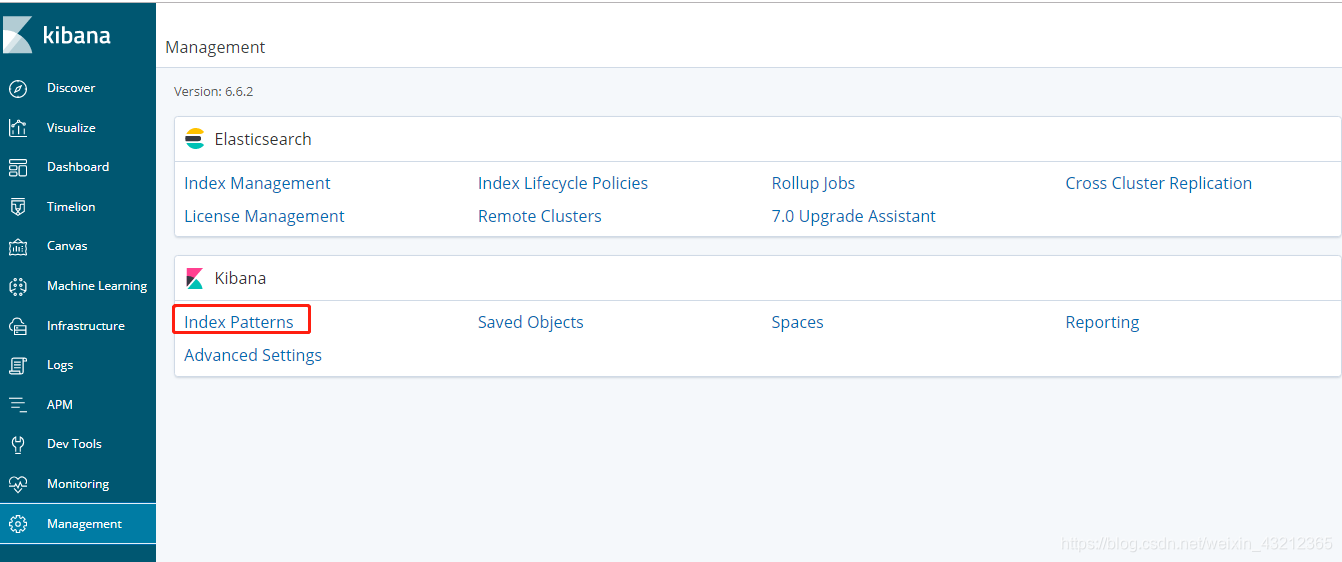
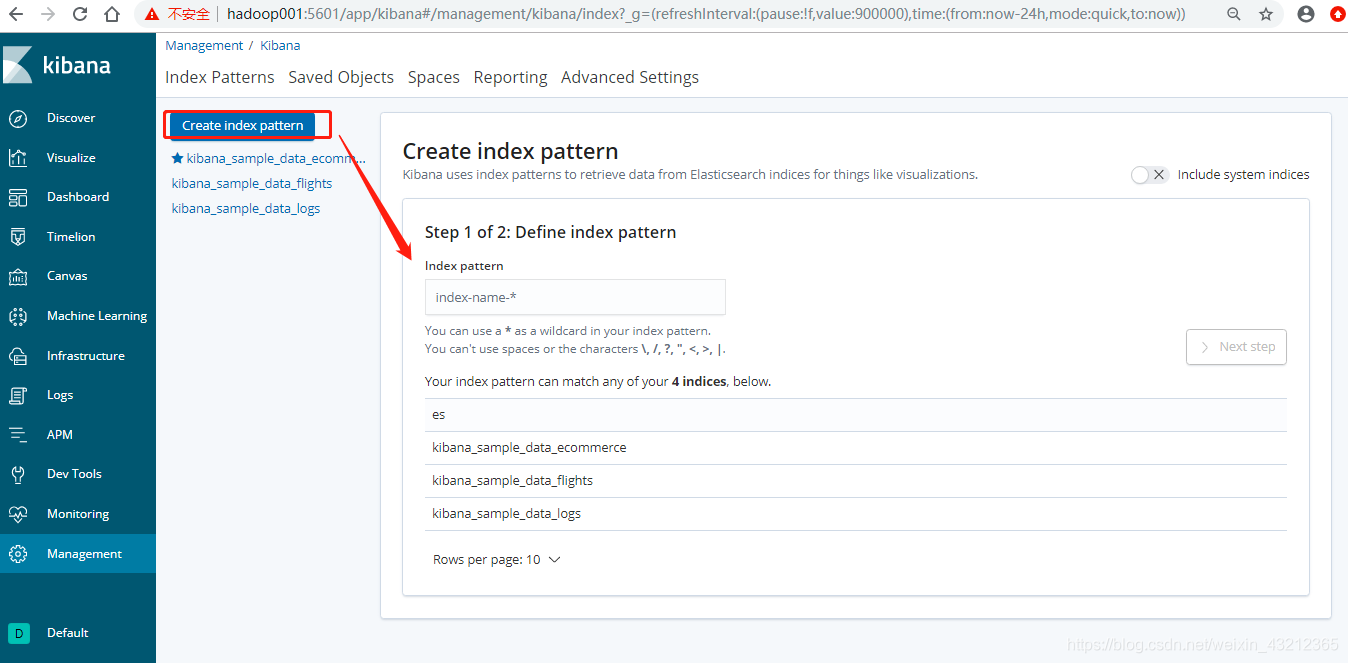
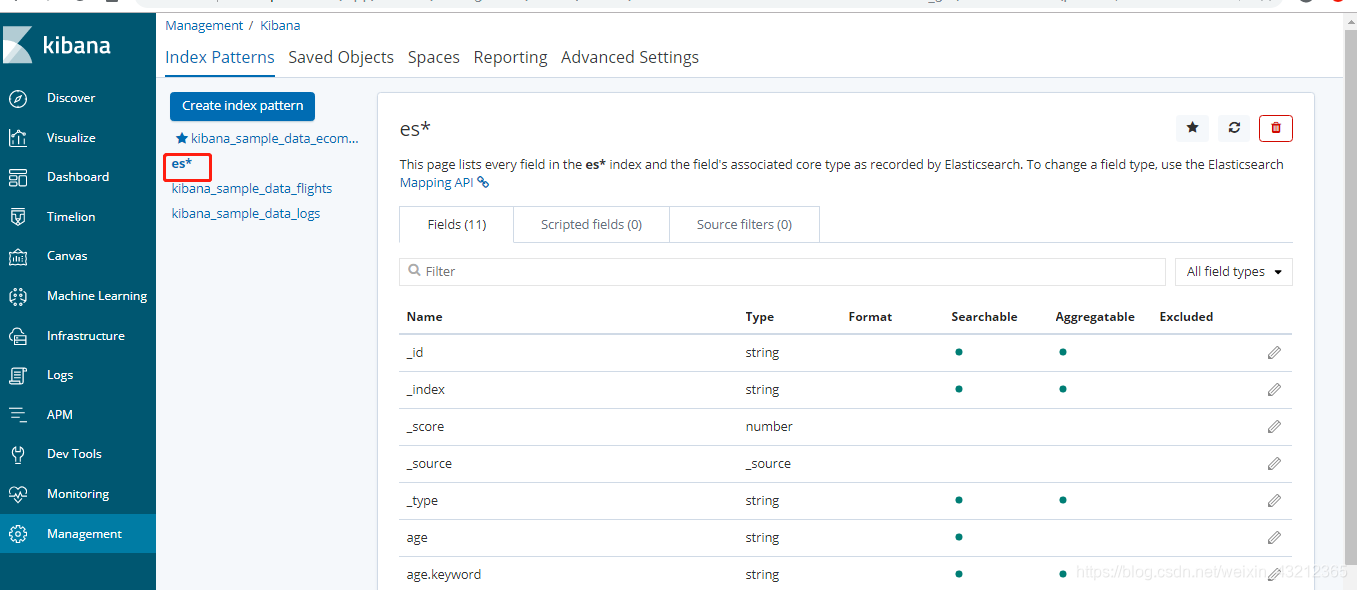
默认是只有三个,我们把刚刚创建的es添加进去
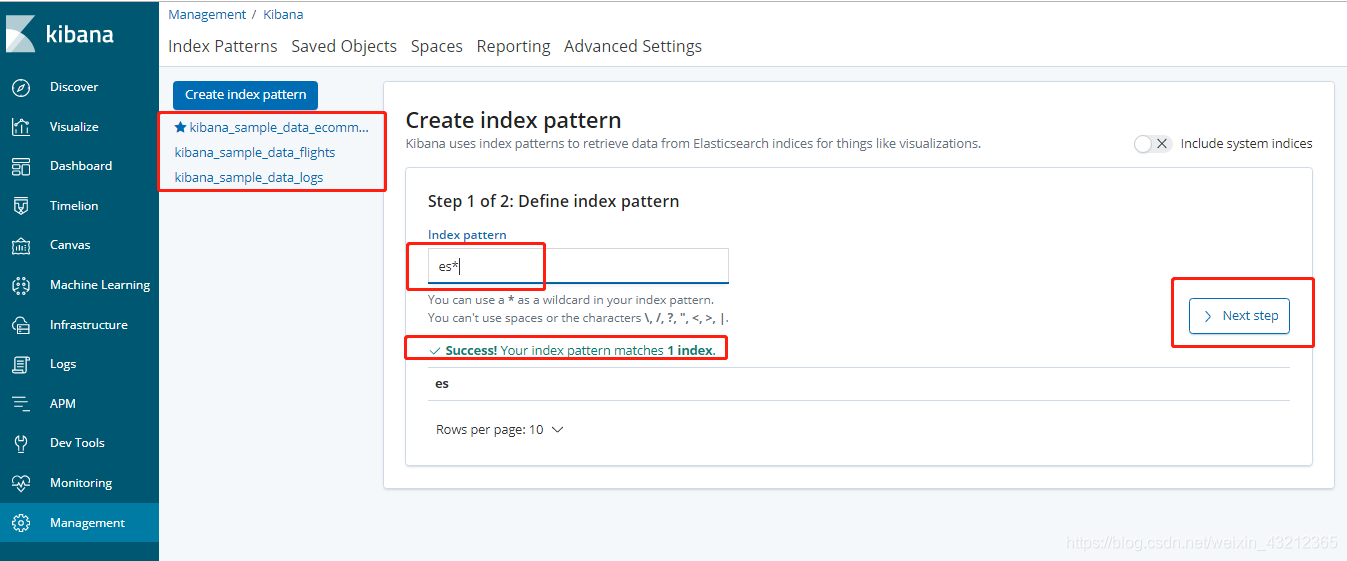
这时候就会发现我们的es索引库已经加进来了
再回到Discover
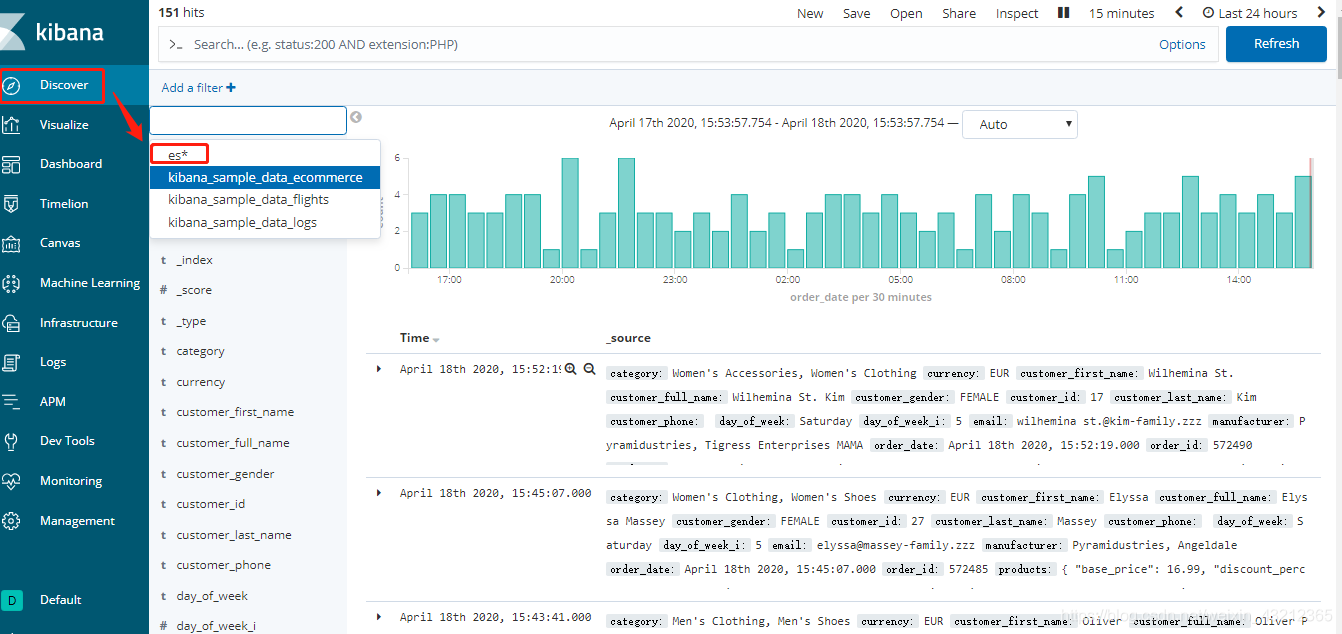
这时候数据就有了
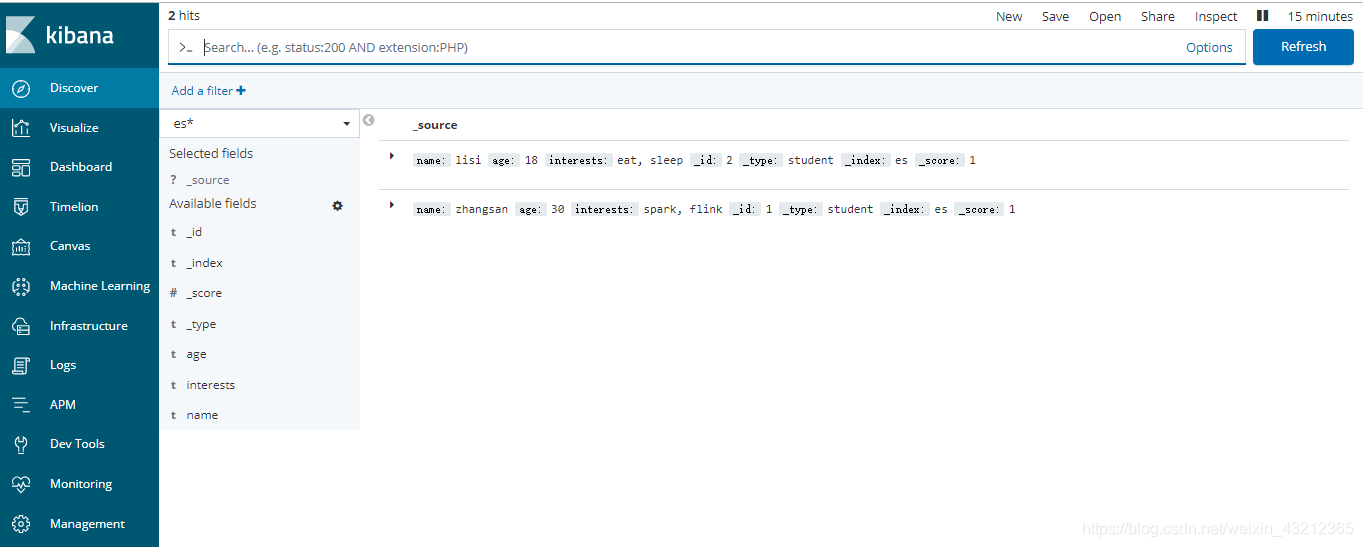
对于上面的,我们记住POST是新增,PUT是修改 ,由于是新增,当然不指定ID也是可以,不过PUT的话肯定要指定一个ID的
[hadoop@hadoop001 ~]$ curl -XPOST -H "Content-Type:application/json" 'http://hadoop001:9200/es/student/' -d '{
> "name":"laoer",
> "age":"3",
> "interests":["money"]
> }'
{"_index":"es","_type":"student","_id":"vP1OjHEBGUGeAqyJyJYx","_version":1,"result":"created","_shards":{"total":2,"successful":1,"failed":0},"_seq_no":0,"_primary_term":1}[hadoop@hadoop001 ~]$


 //修改索引
 curl -XPOST 'http://hadoop000:9200/es/student/999' -H 'Content-Type: application/json' -d '{
"name" : "999",
"age" : 30,
"interests": [ "football", "it" ]
}'


// 增量
curl -XPOST 'http://hadoop000:9200/es/student/1/_update' -H 'Content-Type: application/json'  -d '{"doc":{"age":"18", "work":"BigData R&D"}}'
再刷新以下就能看到我们刚刚创建的了
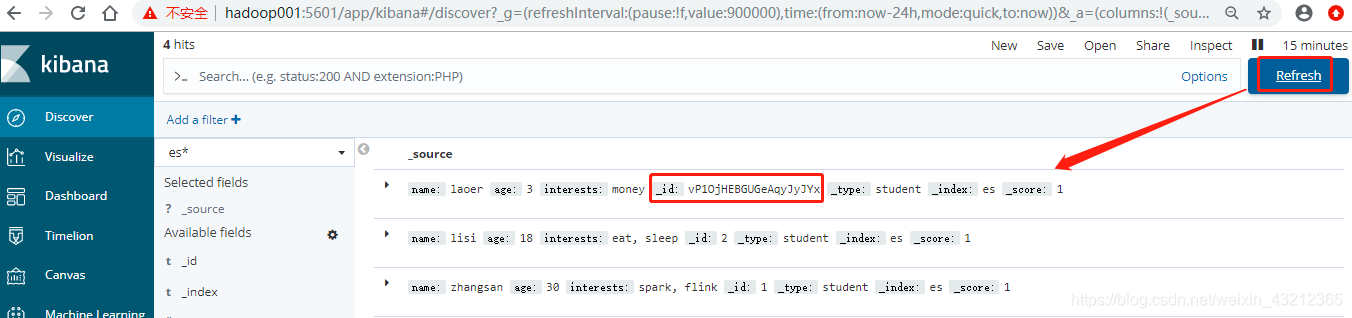
对于不指定ID的,他就是一长串,这串肯定不会重复,是用内部的一个算法实现的
我们用PUT方法,发现报错
[hadoop@hadoop001 ~]$ curl -XPUT -H "Content-Type:application/json" 'http://hadoop001:9200/es/student/' -d '{
> "name":"XX",
> "age":"3",
> "interests":["money"]
> }'
{"error":"Incorrect HTTP method for uri [/es/student/] and method [PUT], allowed: [POST]","status":405}[hadoop@hadoop001 ~]$
原因是PUT是修改需要指定一个ID,就像我们在MySQL中做修改也要指定ID一样
先尝试加一个不存在的编号
[hadoop@hadoop001 ~]$ curl -XPUT -H "Content-Type:application/json" 'http://hadoop001:9200/es/student/100' -d '{
> "name":"XX",
> "age":"3",
> "interests":["money"]
> }'
{"_index":"es","_type":"student","_id":"100","_version":1,"result":"created","_shards":{"total":2,"successful":1,"failed":0},"_seq_no":1,"_primary_term":1}[hadoop@hadoop001 ~]$

//替换
curl -XPUT 'http://hadoop000:9200/es/student/999' -H 'Content-Type: application/json'  -d '{
"name" : "999_UPDATE"
}'
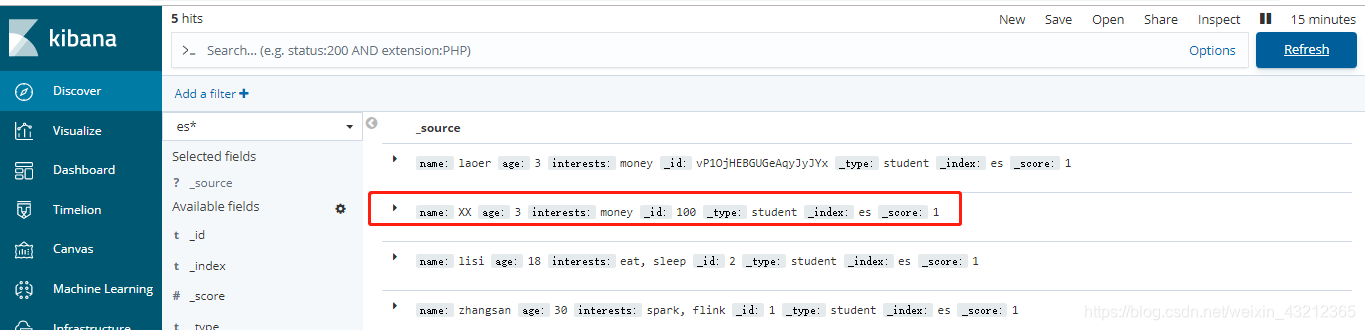
也能成功,这就说明你可以通过PUT加编号去加,也可以通过POST不加编号去加
RESTful博士论文有兴趣可以了解一下
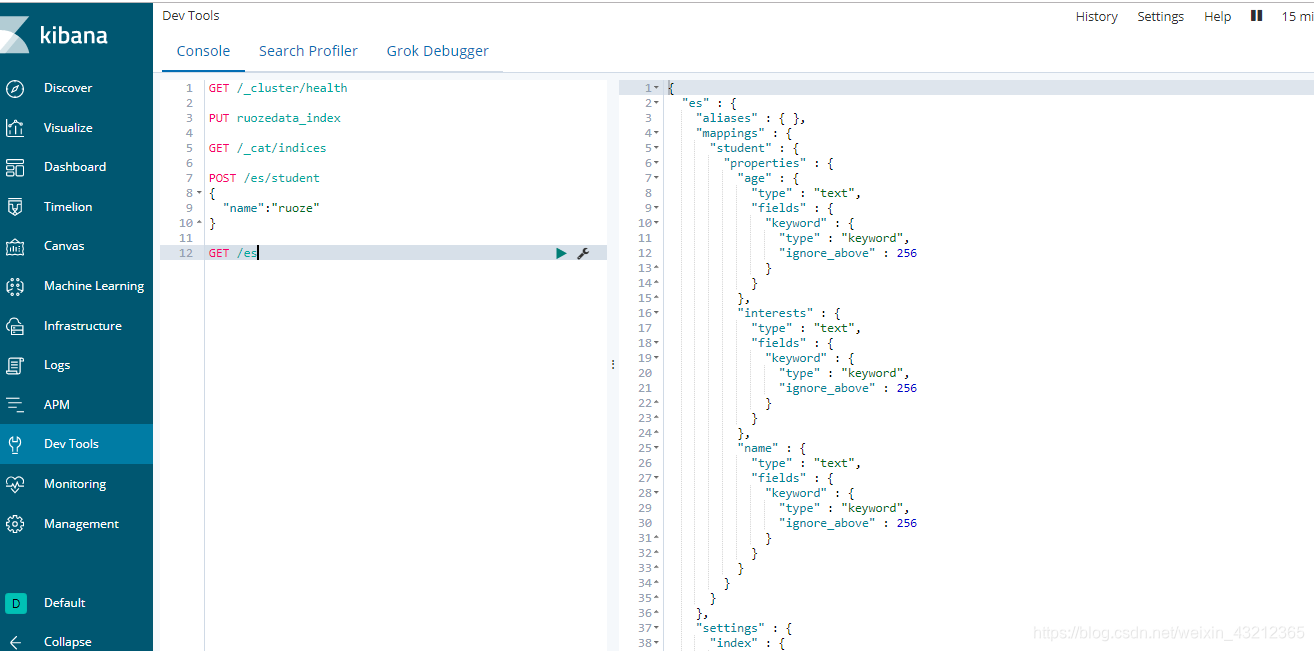
我们到kibana中再创建一个索引
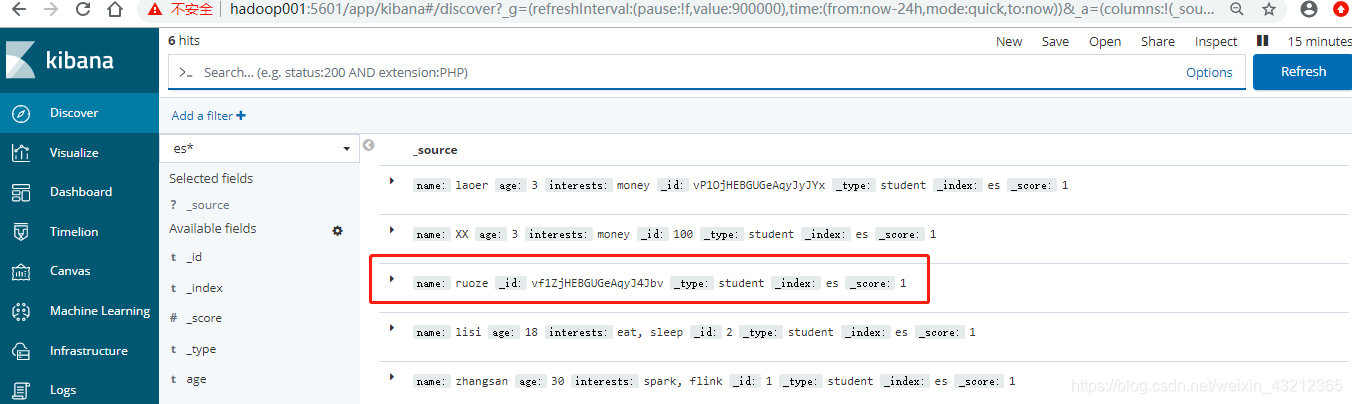
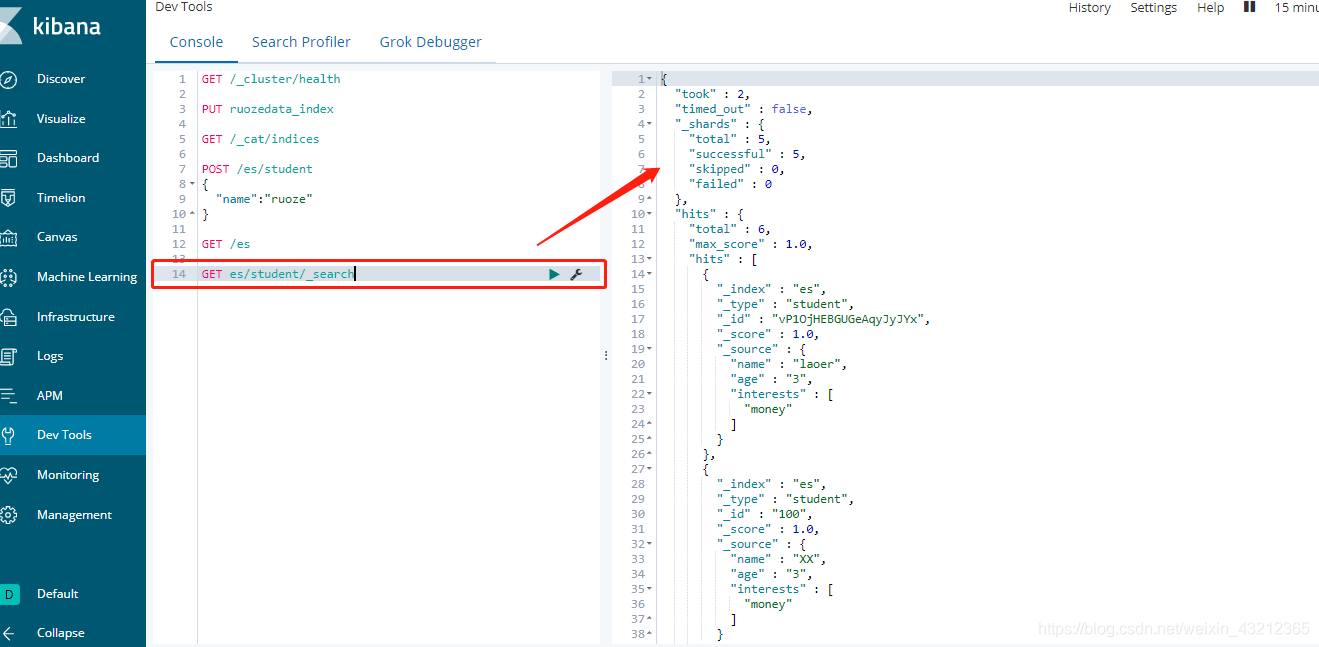
查询
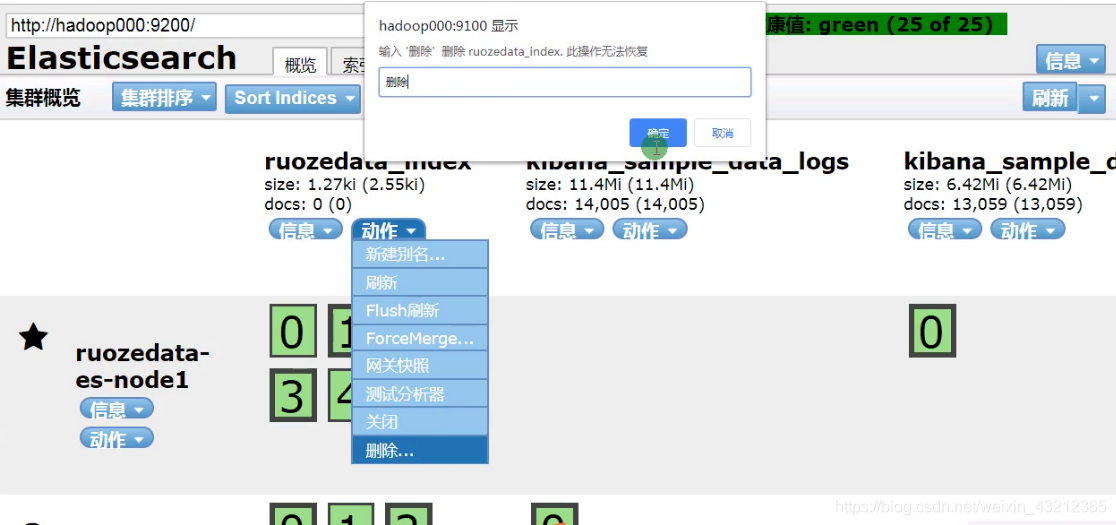
索引删除
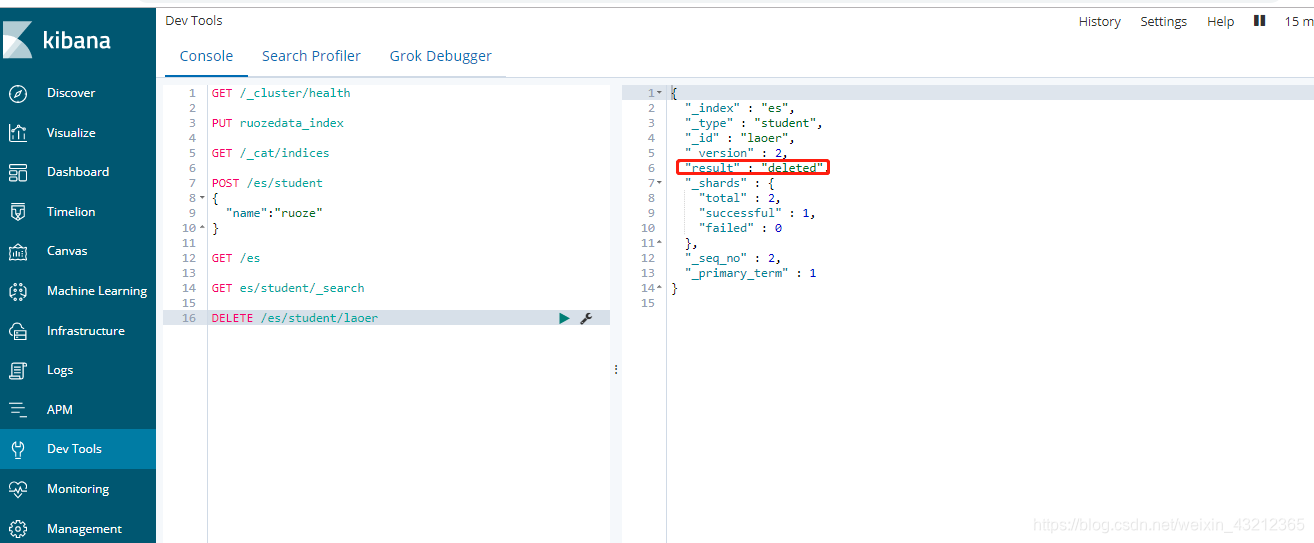
删除索引库也是一样的,不过这个在生产上慎用
命令行删除就是curl -XDELETE ‘…/es’


 503
503

 被折叠的 条评论
为什么被折叠?
被折叠的 条评论
为什么被折叠?
 到【灌水乐园】发言


