


一:配置XML,开启注解
<?xml version="1.0" encoding="UTF-8"?>
<beans xmlns="http://www.springframework.org/schema/beans"
	xmlns:context="http://www.springframework.org/schema/context" xmlns:p="http://www.springframework.org/schema/p"
	xmlns:aop="http://www.springframework.org/schema/aop" xmlns:tx="http://www.springframework.org/schema/tx"
	xmlns:xsi="http://www.w3.org/2001/XMLSchema-instance"
	xsi:schemaLocation="http://www.springframework.org/schema/beans http://www.springframework.org/schema/beans/spring-beans-4.0.xsd
	http://www.springframework.org/schema/context http://www.springframework.org/schema/context/spring-context-4.0.xsd
	http://www.springframework.org/schema/aop http://www.springframework.org/schema/aop/spring-aop-4.0.xsd http://www.springframework.org/schema/tx http://www.springframework.org/schema/tx/spring-tx-4.0.xsd
	http://www.springframework.org/schema/util http://www.springframework.org/schema/util/spring-util-4.0.xsd">

<!-- 扫描注解,扫描基本包 -->
      <context:component-scan base-package="cn.itcast"></context:component-scan>
  <!-- 开启AOP注解 -->
      <aop:aspectj-autoproxy></aop:aspectj-autoproxy>
</beans>
二:添加注解
package cn.itcast.AOP;

public interface IAccountService {
	//保存账户
	void saveAccount();
	//更新账户
	void updateAccount(int i);
	//删除账户
	int deleteAccount();
}
package cn.itcast.AOP;

import org.springframework.stereotype.Service;

@Service("accountService")
public class IAccountServiceImpl implements IAccountService{

	@Override
	public void saveAccount() {
		// TODO Auto-generated method stub
		System.out.println("执行了保存");
	}

	@Override
	public void updateAccount(int i) {
		// TODO Auto-generated method stub
		System.out.println("执行了更行"+i);
	}

	@Override
	public int deleteAccount() {
		// TODO Auto-generated method stub
		System.out.println("执行了删除");
		return 0;
	}

}
先对环绕通知进行注解
package cn.itcast.utils;

import org.aspectj.lang.ProceedingJoinPoint;
import org.aspectj.lang.annotation.After;
import org.aspectj.lang.annotation.AfterReturning;
import org.aspectj.lang.annotation.AfterThrowing;
import org.aspectj.lang.annotation.Aspect;
import org.aspectj.lang.annotation.Before;
import org.aspectj.lang.annotation.Pointcut;
import org.springframework.stereotype.Component;
@Component("logger")
@Aspect//表示当前类是一个切面类
public class Logger {
	@Pointcut("execution(* cn.itcast.AOP.*.*(..))")
	private void pt1(){

	}
	//前置通知
	@Before("pt1()")
	public void beforeprintLog(){
		System.out.println("前置通知Logger类中的beforeprintLog方法开始执行了");
	}
	//后置通知
	@AfterReturning("pt1()")
	public void afterReturningPringLog(){
		System.out.println("后置通知Logger类中的afterReturningPringLog方法开始执行了");
	}
	//异常通知
	@AfterThrowing("pt1()")
	public void afterThrowingPrintLog(){
		System.out.println("异常通知Logger类中的afterThrowingPrintLog方法开始执行了");
	}
	//最终通知
	@After("pt1()")
	public void afterPrintLog(){
		System.out.println("最终通知Logger类中的afterPrintLog方法开始执行了");
	}
	/*
	 * 环绕通知:
	 * spring环绕通知它是spring框架为我们提供的一种可以在代码中手动控制增强方法何时执行的方式
	 * Spring框架为我们提供了一个接口ProceedingJoinPoint.该接口有一个方法proceed(),此方法就相当于明确调用切入点方法
	 * 该接口可以作为环绕通知的方法参数,在程序执行时,spring框架会为我们提供该接口实现类供我们使用
	 *
	 */
	//@AfterReturning("pt1()")
	public Object arrounPringLog(ProceedingJoinPoint pjp){
		Object rtValue=null;
		try {
			Object[] args=pjp.getArgs();//得到方法执行所需的参数
			//System.out.println("前置通知Logger类开始执行了");
			rtValue=pjp.proceed(args);//明确调用业务层方法(切入点方法)
			//System.out.println("后置通知Logger类开始执行了");
			return rtValue;
		} catch (Throwable e) {
			//System.out.println("异常通知Logger类开始执行了");
			e.printStackTrace();
		}finally {
			//System.out.println("最终通知Logger类开始执行了");
		}
		return rtValue;
	}
}
三:测试结果
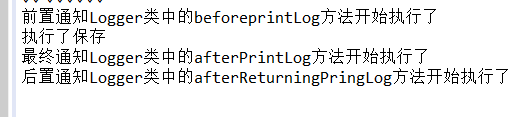
我们会发现这个结果实际顺序是有问题的,最终和后置顺序时反的,这个应该时改变不了的,确实有顺序调用的问题,所以选择何种方式需要慎重,现在测试环绕通知。
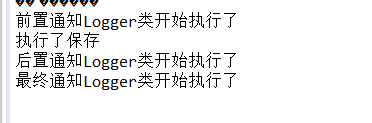
我们会发现环绕通知时没有问题的,如果用注解的话,还是使用环绕通知比较合适,如果需要XML配置AOP的话,请看我上一篇文章


 被折叠的 条评论
为什么被折叠?
被折叠的 条评论
为什么被折叠?
 到【灌水乐园】发言


