


 本文详细介绍在Windows和Ubuntu环境下,使用Boost库处理XML和JSON数据的步骤。从下载源码到配置编译,再到测试代码,一步步指导如何在不同操作系统上搭建Boost库环境,并提供示例代码展示Boost库的强大功能。
前言
由于工作需要,后面可能会处理xml和json相关的数据。因此在前期就需要确定采用哪种库来处理两种数据格式的文件。考虑到跨平台和库的流行程度,最终选择使用boost库来处理这两种文件,下面我就记录一下我在windows和linux两种环境下搭建boost库环境以及简单测试一下boost库如何处理这两种文件的。
搭建boost环境
1.到boost官网上下载boost源码: http://www.boost.org。
2.解压源码压缩包,以我下载的为例,解压得到:boost_1_66_0文件夹。
3.值得我们注意的是,boost库文件有两种类型,一种是无需编译就可以使用的文件,使用这类文件时,我们只需要在测试代码中包含所需要的头文件即可。另一种文件类型就是必须将他们编译成二进制文件然后安装到系统中才可以使用。恰好,在使用处理xml和json相关库的时候,我们只需要包含其头文件即可。这里我们只介绍第一种包含其头文件来使用boost库的方式。
windows上使用boost库
在这里,我以devc++为例,看看如何使用boost库。因为我们只需要包含boost库相关头文件,所以要确保devc++的编译器找的到boost中的头文件,可以如下配置:
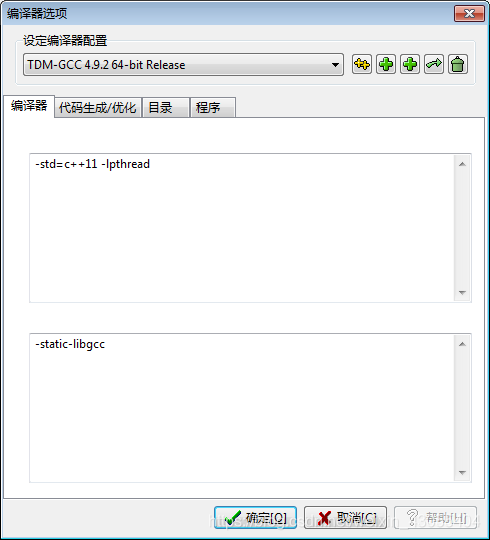
1.点击devc++的菜单栏,选择“工具”-》“编译选项”,弹出如下界面:
2.在弹出的窗口中选择“目录”-》“C++包含文件”:
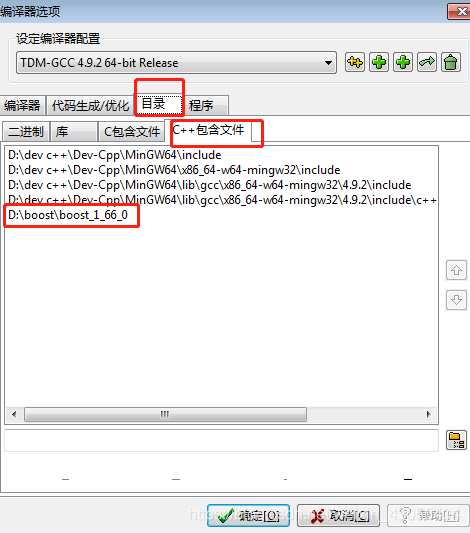
将boost库的所在路径添加到该目录中,如上我的目录是:D:\boost\boost_1_66_0\boost。
3.点击确定使改变生效。
测试程序:
#include <iostream>
#include <boost/property_tree/ptree.hpp>
#include <boost/property_tree/xml_parser.hpp>
#include <boost/typeof/typeof.hpp>
#include <boost/foreach.hpp>
#include <memory>
using namespace std;
using namespace boost::property_tree;
int  main()
{
    ptree pt;
    read_xml("conf.xml",pt,xml_parser::trim_whitespace, std::locale());     //读入一个xml文件

    xml_writer_settings<string> settings;
	settings = boost :: property_tree :: xml_writer_make_settings<string>('\t', 1,"utf-8");
    pt.put("con.name","Sword");    //更改name属性的值
    pt.add("con.urls.url","http://www.baidu.com"); //给urls属性增加值
    write_xml("conf.xml",pt,std::locale(), settings);    //写入XML
    getchar();
    return 0;
}
测试的XML文件:
<?xml version="1.0" encoding="utf-8"?>
<con>
  <id>1</id>
  <name>fansy</name>
  <urls>
    <url>http://blog.csdn.net//fansongy</url>
    <url>http://weibo.com//fansongy</url>
  </urls>
</con>
执行程序后xml文件如下:
<?xml version="1.0" encoding="utf-8"?>
<con>
	<id>1</id>
	<name>Sword</name>
	<urls>
		<url>http://blog.youkuaiyun.com//fansongy</url>
		<url>http://weibo.com//fansongy</url>
		<url>http://www.baidu.com</url>
	</urls>
</con>
ubuntu下使用boost库
接下来看一下再ubuntu下如何使用boost库。
1.把解压的boost_1_66_0复制到/usr/local/include下。
2.cd /usr/local/include
3.sudo ln -s boost_1_66_0/boost boost
第三步操作相当于创建了boost的软链接指向库文件所在目录,这样我们在写测试程序时只需要像#include “boost/property_tree/ptree.hpp” 就可以使用相应的库了。
测试程序:
#include <iostream>
#include "boost/property_tree/ptree.hpp"
#include "boost/property_tree/xml_parser.hpp"
#include "boost/typeof/typeof.hpp"
#include "boost/foreach.hpp"
#include <memory>
using namespace std;
using namespace boost::property_tree;
int  main()
{
    ptree pt;
    read_xml("conf.xml",pt,xml_parser::trim_whitespace, std::locale());     //¶ÁÈëÒ»žöxmlÎÄŒþ
    //boost::property_tree::xml_writer_settings<char> settings('\t', 1);
    xml_writer_settings<string> settings;
	settings = boost :: property_tree :: xml_writer_make_settings<string>('\t', 1,"utf-8");
    pt.put("con.name","Sword");    //žüžÄijžöŒüÖµ
    pt.add("con.urls.url","http://www.baidu.com"); //ÔöŒÓijžöŒüÖµ
    write_xml("conf.xml",pt,std::locale(), settings);    //ÐŽÈëXML
	write_xml("conf1.xml",pt,std::locale(), settings);
    getchar();
    return 0;
}
上面的测试程序和windows上的测试程序只是在包含头文件的方式不同而已。
4.编译测试代码:g++ xml.cpp -o xml
5.运行代码:./xml
如需要使用boost库处理json,如上配置即可。


 1632
1632

 被折叠的 条评论
为什么被折叠?
被折叠的 条评论
为什么被折叠?
 到【灌水乐园】发言


