


 本文介绍了SpringBoot项目多模块聚合结构搭建,适用于多功能模块管理与开发。项目架构分类包括用parent模块管理依赖版本,spi模块管理公共代码和依赖,还有多个业务模块。还给出了架构搭建的实际操作步骤,如创建maven项目、子模块,抽取公共代码等。
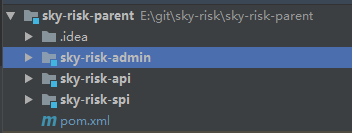
SprongBoot 项目多模块聚合结构搭建
此结构适用于项目中多个拥有功能模块进行管理与开发,
项目架构分类
使用一个模块作为parent父模块 管理所有模块共同的依赖版本
使用一个模块作为spi管理模块 管理所有模块公共的代码,依赖
以及多个自己分的业务模块,例如前后台,或者更加细分

ps:画的很丑,见谅
架构图
接下来放实际操作
架构方式
- 1 .创建一个新的maven项目删除所有的多余文件只留下pom文件
  //SpringBoot做父项目架构
    <parent>
        <groupId>org.springframework.boot</groupId>
        <artifactId>spring-boot-starter-parent</artifactId>
        <version>2.1.4.RELEASE</version>
        <relativePath/> <!-- lookup parent from repository -->
    </parent>
    //说明这个项目是父项目
    <groupId>com.test.test</groupId>
    <artifactId>test-test-parent</artifactId>
    <packaging>pom</packaging>
    <version>1.0-SNAPSHOT</version>
    <properties>
        <java.version>1.8</java.version>
        <project.build.sourceEncoding>UTF-8</project.build.sourceEncoding>
        <project.reporting.outputEncoding>UTF-								8
        </project.reporting.outputEncoding>
    </properties>
   //需要统一管理的依赖
    <dependencyManagement>
        <dependencies>
            <dependency>
                <groupId>org.projectlombok</groupId>
                <artifactId>lombok</artifactId>
                <version>1.18.6</version>
            </dependency>
        </dependencies>
    </dependencyManagement>
    //子模块
     <modules>
        <module>test-test-spi</module>
        <module>test-test-admin</module>
        <module>test-test-api</module>
    </modules>
- 2 .在创建parent模块上右键newModel创建多个子模块ps:new的子模块在pom文件中会自动生成管理
- 3 .选择一个模块作为spi模块用来抽取公用的代码,配置数据库连接等等,建立一个SpringBoot的启动类,但是不需要启动方法
@SpringBootApplication
//扫描DAO包
@MapperScan("你的dao层地址")
//扫描实体类包
@EntityScan("你的实体类地址")
//允许异步
@EnableAsync
public class TestSpiApplication {

}
- 4 .注意抽离公共代码模块的pom要打成jar包,子模块引入公共代码模块才能使用其中的依赖
	//指明父项目
   <parent>
        <artifactId>test-test-parent</artifactId>
        <groupId>com.test.test</groupId>
        <version>1.0-SNAPSHOT</version>
    </parent>
	//指明打包方式
    <modelVersion>4.0.0</modelVersion>
    <packaging>jar</packaging>
    <version>1.0-SNAPSHOT</version>
    <artifactId>sky-risk-spi</artifactId>
    //用到的依赖在父项目中管理了版本所以不需要表明版本
     <dependencies>
       <dependency>
            <groupId>org.projectlombok</groupId>
            <artifactId>lombok</artifactId>
        </dependency>
 	     </dependencies>
- 5 .在实际功能模块之中只需要引入公共代码模块,编写controller即可再也不需要做其他操作,接口实现主体都放在公共代码模块spi当中
    <parent>
        <artifactId>test-test-parent</artifactId>
        <groupId>test.test.risk</groupId>
        <version>1.0-SNAPSHOT</version>
    </parent>
    <groupId>test.test</groupId>
    <artifactId>test-test-admin</artifactId>
    <version>0.0.1-SNAPSHOT</version>
    <name>test-test-admin</name>
    <dependencies>
        <dependency>
            <groupId>com.test.test</groupId>
            <artifactId>test-test-spi</artifactId>
            <version>1.0-SNAPSHOT</version>
        </dependency>
    </dependencies>
- 6 .最后也是最重要的创建自己启动类的时候要引入公共类的启动类,否则会找不到dao层,以及接口
//spring的启动标签
@SpringBootApplication
//引入spi的配置类
@Import(TestSpiApplication.class)
//使用自己的配置
@PropertySource("classpath:application-admin.properties")
public class TestAdminApplication {

    public static void main(String[] args) {
        SpringApplication.run(SkyRiskAdminApplication.class, args);
    }

}


 5856
5856

 被折叠的 条评论
为什么被折叠?
被折叠的 条评论
为什么被折叠?
 到【灌水乐园】发言


