


 本文介绍了版本控制的重要性和核心功能,强调了追踪文件变更和并行开发的能力。详细阐述了如何使用GitLab进行版本控制,包括GitLab的部署步骤、配置YUM源、设置管理员密码、创建项目和组、用户管理以及添加密钥和转换语言的操作。
版本控制的介绍
版本控制是指对软件开发过程中各种程序代码、配置文件及说明文档等文件变更的管理,是软件配置管理的核心思想之一
版本控制最主要的功能就是追踪文件的变更,它将什么时候、什么人更改了文件的什么内容等信息记录下来,每一次文件的改变,文件的版本号都将增加,除了记录版本变更外,版本控制的另一个重要的功能是并行开发。根据变更的性质使配置项的版本树继续延伸或产生新的分支,形成性的目标版本,而对于不受变更影响的配置项则不应发产生变动。同时,应能够将变更所产生的对版本的影响进行记录和跟踪,必要时还可以退回到以前的版本
版本控制是软件配置管理的核心功能。所有置于配置库中的元素都应自动予以版本的标识,并保证版本命名的唯一性。版本在生成过程中,自动依照设定的使用模型自动分支、演进。除了系统自动记录的版本信息以外,为了配合软件开发流程,并为今后对软件过程的度量做好准备。当然如果选用的工具支持,这些辅助数据将能直接统计出过程数据,从而方便软件过程改进活动的进行
常用的版本控制工具
- gitlab
- subversion
gitlab 部署
配置yum源
[root@gitlab-server ~]# cd /etc/yum.repos.d/
[root@gitlab-server yum.repos.d]#curl -o CentOS7-Base-163.repo  http://mirrors.163.com/.help/CentOS7-Base-163.repo
[root@gitlab-server yum.repos.d]# sed -i 's/\$releasever/7/g' /etc/yum.repos.d/CentOS7-Base-163.repo
[root@gitlab-server yum.repos.d]# sed -i 's/^enabled=.*/enabled=1/g' /etc/yum.repos.d/CentOS7-Base-163.repo
[root@gitlab-server yum.repos.d]# yum clean all
[root@gitlab-server yum.repos.d]# yum -y install epel-release
关闭防火墙、关闭selinux,并设置开机不启动
[root@gitlab-server ~]# systemctl stop firewalld
[root@gitlab-server ~]# systemctl disable firewalld
Removed symlink /etc/systemd/system/multi-user.target.wants/firewalld.service.
Removed symlink /etc/systemd/system/dbus-org.fedoraproject.FirewallD1.service.
[root@gitlab-server ~]# setenforce 0
[root@gitlab-server ~]# sed -ri 's/(^SELINUX=).*/\1disabled/g' /etc/selinux/config
安装git
[root@gitlab-server ~]# yum -y install epel-release git
安装依赖包
[root@gitlab-server yum.repos.d]# yum -y install curl openssh-server openssh-clients post fix cronie policycoreutils-python
启动postfix 服务并设置开机自启
[root@gitlab-server ~]# systemctl restart postfix
[root@gitlab-server ~]# systemctl enable postfix
下载gitlab的rpm包
[root@gitlab-server ~]# cd /usr/src/
[root@gitlab-server src]#  wget https://mirrors.tuna.tsinghua.edu.cn/gitlab-ce/yum/el7/gitlab-ce-11.2.1-ce.0.el7.x86_64.rpm
[root@gitlab-server src]# ls
debug  gitlab-ce-11.2.1-ce.0.el7.x86_64.rpm  kernels
安装gitlab
[root@gitlab-server src]# rpm -ivh gitlab-ce-11.2.1-ce.0.el7.x86_64.rpm
warning: gitlab-ce-11.2.1-ce.0.el7.x86_64.rpm: Header V4 RSA/SHA1 Signature, key ID f27eab47: NOKEY
Preparing...                          ################################# [100%]
Updating / installing...
   1:gitlab-ce-11.2.1-ce.0.el7        ################################# [100%]
It looks like GitLab has not been configured yet; skipping the upgrade script.

       *.                  *.
      ***                 ***
     *****               *****
    .******             *******
    ********            ********
   ,,,,,,,,,***********,,,,,,,,,
  ,,,,,,,,,,,*********,,,,,,,,,,,
  .,,,,,,,,,,,*******,,,,,,,,,,,,
      ,,,,,,,,,*****,,,,,,,,,.
         ,,,,,,,****,,,,,,
            .,,,***,,,,
                ,*,.


     _______ __  __          __
    / ____(_) /_/ /   ____ _/ /_
   / / __/ / __/ /   / __ `/ __ \
  / /_/ / / /_/ /___/ /_/ / /_/ /
  \____/_/\__/_____/\__,_/_.___/


Thank you for installing GitLab!
GitLab was unable to detect a valid hostname for your instance.
Please configure a URL for your GitLab instance by setting `external_url`
configuration in /etc/gitlab/gitlab.rb file.
Then, you can start your GitLab instance by running the following command:
  sudo gitlab-ctl reconfigure

For a comprehensive list of configuration options please see the Omnibus GitLab readme
https://gitlab.com/gitlab-org/omnibus-gitlab/blob/master/README.md
修改配置文件
[root@gitlab-server src]# vim /etc/gitlab/gitlab.rb
##! https://docs.gitlab.com/omnibus/settings/configuration.html#configuring-the-external-url-for-gitlab
external_url 'http://192.168.169.10'     //此处修改为gitlab服务器地址
重载配置文件并启动gitlab
[root@gitlab-server src]# gitlab-ctl reconfigure
[root@gitlab-server src]# gitlab-ctl restart
查看当前的gitlab 版本
[root@gitlab-server src]# head -1 /opt/gitlab/version-manifest.txt
gitlab-ce 11.2.1
设置管理员密码
[root@gitlab-server src]# gitlab-rails console production
irb(main):001:0> user =User.where(id:1).first
=> #<User id:1 @root>
irb(main):002:0> user.password='chenshuo'
=> "chenshuo"
irb(main):003:0> exit
gitlab 管理
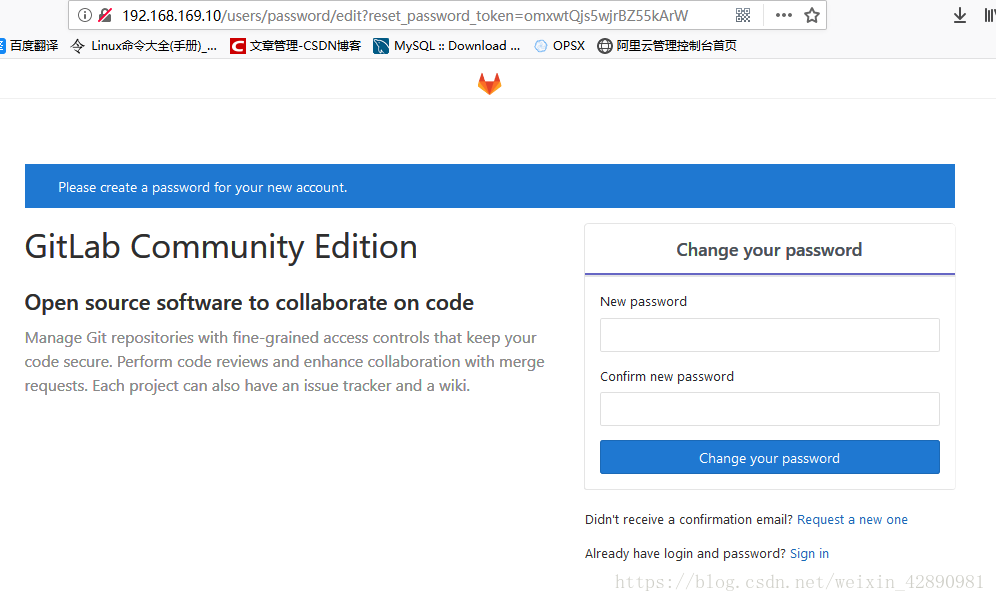
在浏览器中使用gitlab 服务器的IP访问,页面如下图
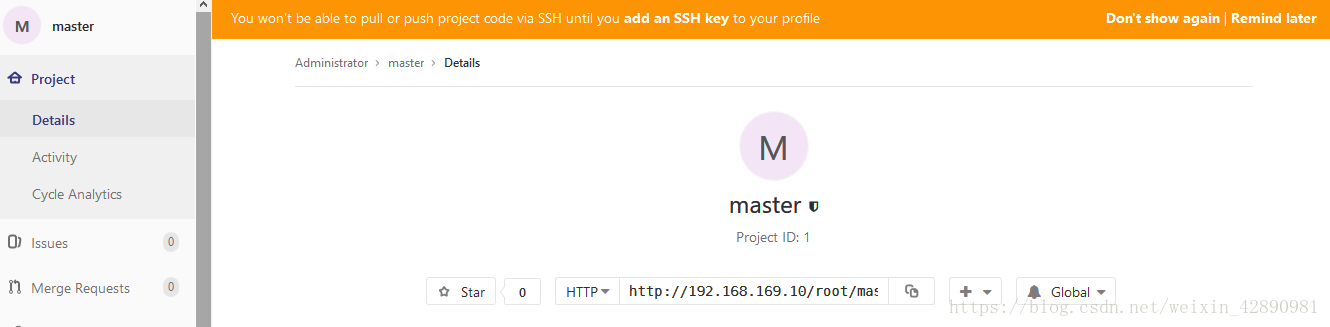
创建一个新项目 master
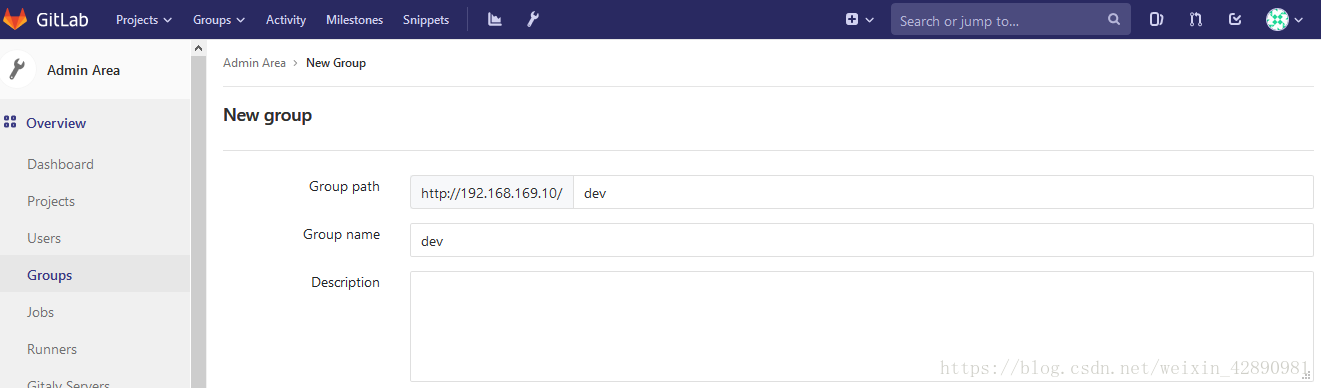
创建一个组 dev
创建一个普通用户

把用户加入到项目master

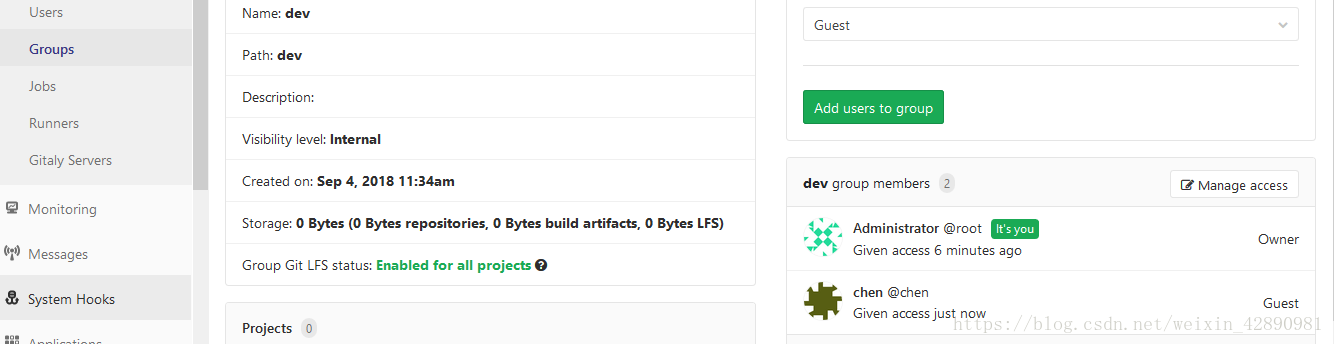
把普通用户加入到组中
删除这个用户

gitlab 添加密钥

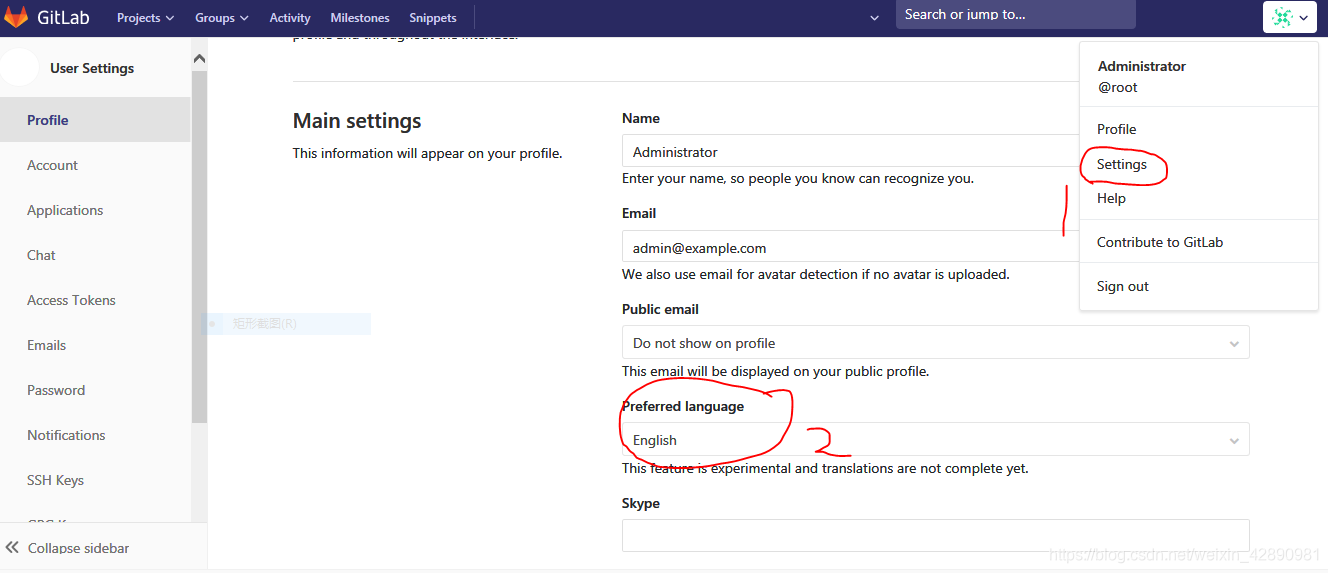
gitlab 转换语言


 551
551

 被折叠的 条评论
为什么被折叠?
被折叠的 条评论
为什么被折叠?
 到【灌水乐园】发言


