


 本文介绍了如何使用SpringBoot创建一个简单的HelloWorld项目,包括设置入口文件、控制器、Maven依赖以及配置文件的应用。通过运行Application.java,可以在默认端口8080访问到Hellofromcontroller!。
第一:创建工程的目录如下:
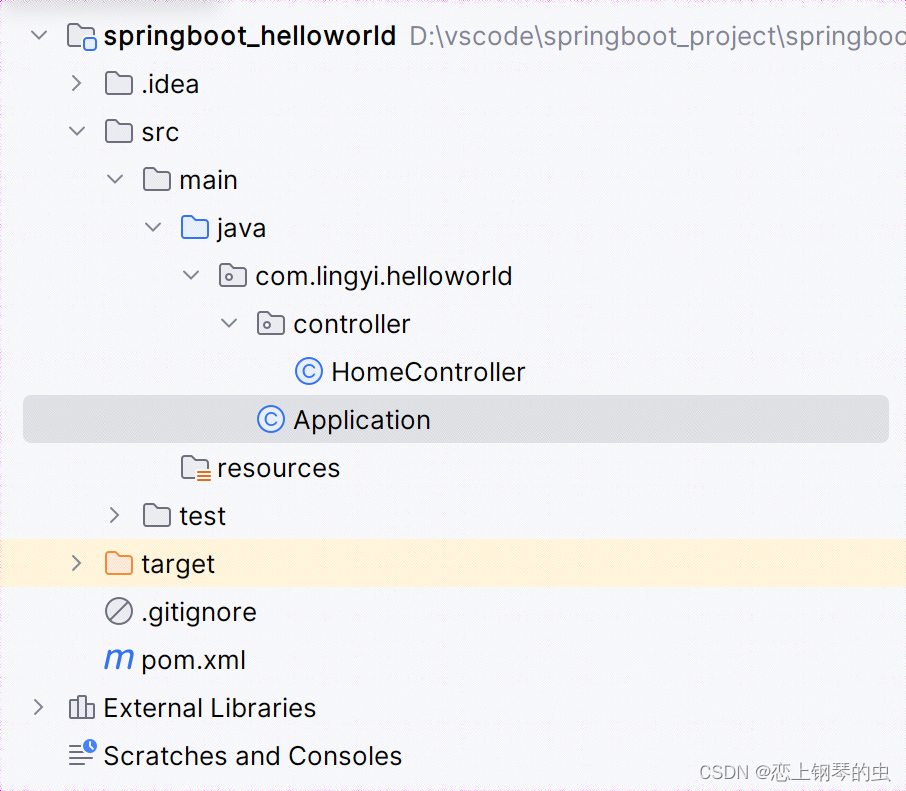
其中包com.lingyi.helloworld下有个Application.java的springboot入口文件:
package com.lingyi.helloworld;
import org.springframework.boot.SpringApplication;
import org.springframework.boot.autoconfigure.SpringBootApplication;

@SpringBootApplication
public class Application {
    public static void main(String[] args) throws  Exception{
        SpringApplication.run(Application.class,args);
    }
}
包com.lingyi.helloworld.controller下有一个路由文件HomeController.java
package com.lingyi.helloworld.controller;

import org.springframework.web.bind.annotation.RequestMapping;
import org.springframework.web.bind.annotation.RestController;

@RestController
public class HomeController {
    @RequestMapping("/")
    String home() {
        System.out.println("hello world");
        return "Hello from controller!";
    }
}
pom.xml中引入springboot的依赖包:
<?xml version="1.0" encoding="UTF-8"?>
<project xmlns="http://maven.apache.org/POM/4.0.0"
         xmlns:xsi="http://www.w3.org/2001/XMLSchema-instance"
         xsi:schemaLocation="http://maven.apache.org/POM/4.0.0 http://maven.apache.org/xsd/maven-4.0.0.xsd">
    <modelVersion>4.0.0</modelVersion>

    <groupId>org.example</groupId>
    <artifactId>springboot_helloworld</artifactId>
    <version>1.0-SNAPSHOT</version>

    <parent>
        <groupId>org.springframework.boot</groupId>
        <artifactId>spring-boot-starter-parent</artifactId>
        <version>1.2.2.RELEASE</version>
    </parent>

    <properties>
        <java.version>1.8</java.version>
    </properties>

    <dependencies>
        <dependency>
            <groupId>org.springframework.boot</groupId>
            <artifactId>spring-boot-starter-web</artifactId>
        </dependency>
        <dependency>
            <groupId>org.springframework.boot</groupId>
            <artifactId>spring-boot-starter-test</artifactId>
            <scope>test</scope>
        </dependency>
    </dependencies>

</project>
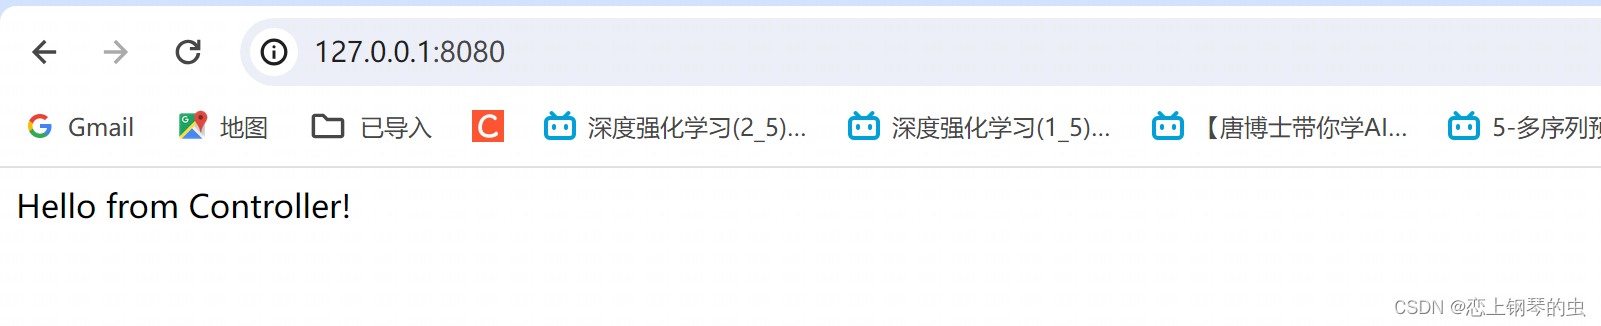
第二:运行Application.jav文件,默认端口为8080

浏览器访问:http://127.0.0.1:8080,内容如下,到此springboot的helloworld工程成功运行。
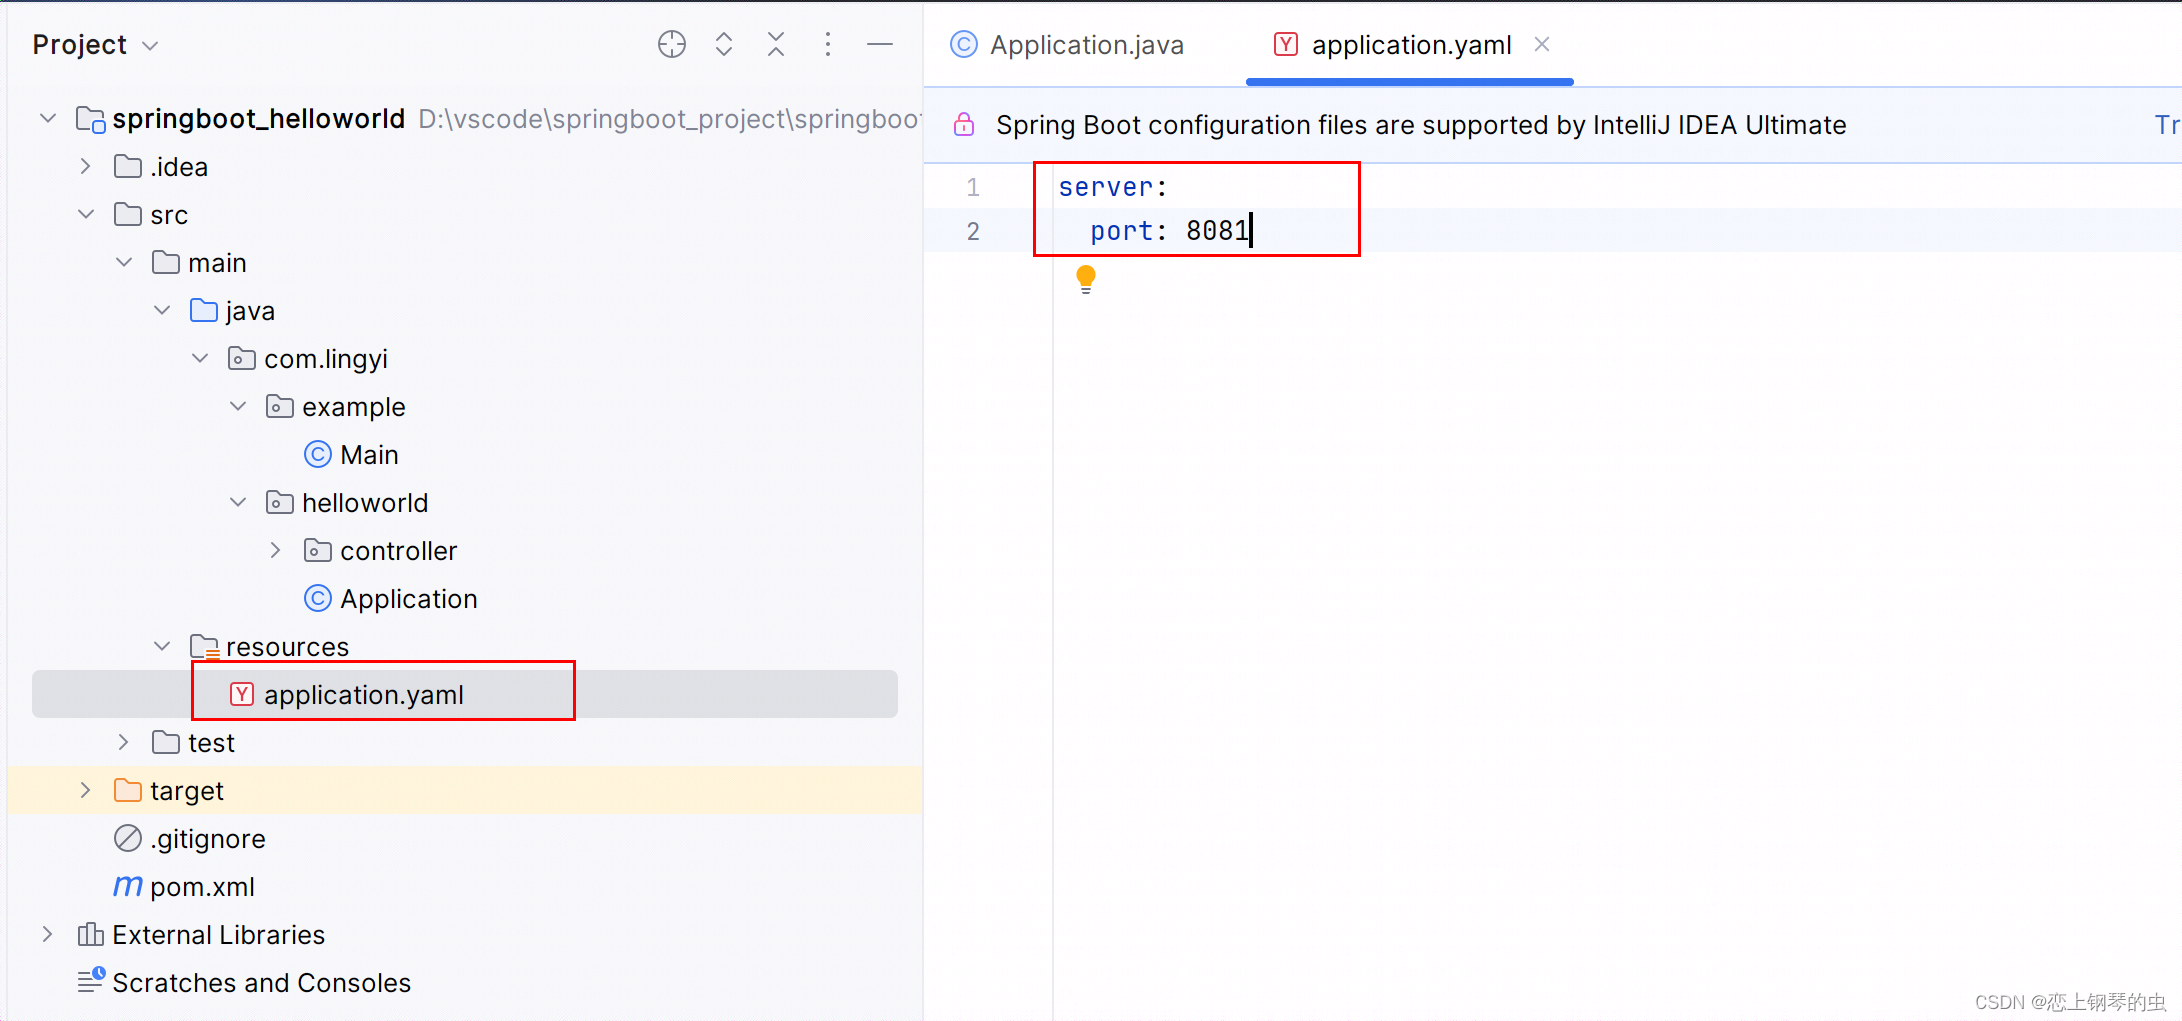
扩展:
springboot中引入配置文件,修改web工程的端口号为8081。
在resources文件夹下创建配置文件application.yaml文件:


 1651
1651

 被折叠的 条评论
为什么被折叠?
被折叠的 条评论
为什么被折叠?
 到【灌水乐园】发言


