


 本文详细介绍了Python中的多线程和多进程。线程是操作系统调度的最小单位,而进程是资源的最小分配单位。多线程允许在同一个进程中并发执行多个任务,而多进程则是在不同进程中并行执行任务。Python提供了_thread和threading模块来创建线程,其中threading是更高级的模块。文章讲解了如何创建线程、线程的join方法、守护线程、线程锁以及GIL锁的概念。对于多进程,介绍了使用os模块的fork和multiprocessing模块的Process类创建进程,还探讨了进程间通信的生产者-消费者模型。最后,文中通过实例比较了多线程和多进程在实际应用中的效率差异。
一 什么是多线程与多进程
- 什么是线程
线程是操作系统能够进行运算调度的最小单位。它被包含在进程之中,是进程中的实际运作单位。一条线程指的是进程中一个单一顺序的控制流,一个进程中可以并发多个线程,每条线程并行执行不同的任务,一个线程即cpu需要执行的一条指令 - 什么是进程
一个程序的执行实例就是一个进程。每一个进程提供执行程序所需的所有资源。(进程本质上是资源的集合)
一个进程有一个虚拟的地址空间、可执行的代码、操作系统的接口、安全的上下文(记录启动该进程的用户和权限等等)、唯一的进程ID、环境变量、优先级类、最小和最大的工作空间(内存空间),还要有至少一个线程。
每一个进程启动时都会最先产生一个线程,即主线程。然后主线程会再创建其他的子线程 - 进程与线程的区别
1) 同一个进程中的线程共享同一内存空间,但是进程之间是独立的。
2) 同一个进程中的所有线程的数据是共享的(进程通讯),进程之间的数据是独立的。
3) 对主线程的修改可能会影响其他线程的行为,但是父进程的修改(除了删除以外)不会影响其他子进程。
4) 线程是一个上下文的执行指令,而进程则是与运算相关的一簇资源。
5) 同一个进程的线程之间可以直接通信,但是进程之间的交流需要借助中间代理来实现。
6) 创建新的线程很容易,但是创建新的进程需要对父进程做一次复制。
7) 一个线程可以操作同一进程的其他线程,但是进程只能操作其子进程。
8) 线程启动速度快,进程启动速度慢(但是两者运行速度没有可比性)
二 多线程
- 创建线程
在python中有专门的模块来创建线程,有(_thread和threading)这两个模块,_thread是低级模块,threading是高级模块,对 _thread进行了封装,绝大多数情况下,我们只需要使用 threading 这个高级模块
现在来创建一个线程:其实质就是把一个函数传入并创建 Thread实例,然后调用 start()开始执行
1> 这是创建线程的第一种方法:
import threading
def job():
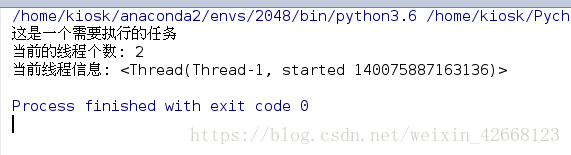
print('这是一个需要执行的任务')
#激活的线程个数
print('当前的线程个数:',threading.active_count())
#打印当前线程的详细信息
print('当前线程信息:',threading.current_thread())
if __name__=='__main__':
t1=threading.Thread(target=job)
t1.start()
通过实例化对象来创建一个线程
def __init__(self, group=None, target=None, name=None,
                 args=(), kwargs=None, *, daemon=None)
1)在创建线程的时候,需要传的参数,其中target为函数名,name为定义的名称,如果不传值的话,默认为Thread-1,args为需要传入的参数,当然函数本身不需要传的话,这里也就不需要
2)threading模块中 active_count()是用来统计正在活跃的线程数的,由于任何进程默认就会启动一个线程,我们把该线程称为主线程,主线程又可以启动新的线程,因此当前的线程数为2
3)而current_thread()是用来显示当前线程的详细信息的,里面包含名称和启动的时间
2> 这是创建线程的第二种方法:
通过继承threading.Thread来自定义线程类,其本质是:重构Thread类中的run方法
import threading
#类的继承
class IpThread(threading.Thread):
#重写构造方法
def __init__(self,jobname):
super(IpThread,self).__init__()
self.jobname=jobname
#将多线程需要执行的任务重写到run方法中
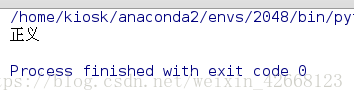
def run(self):
print('正义')
t1=IpThread(jobname='new_job')
t1.start()
如果你要在run方法中传递参数的话,那就将参数通过构造函数与self绑定在一起
- 多线程中的join方法
1) 不使用多线程
import time
#不使用线程
def music(name):
for i in range(2):
print('正在听音乐: %s' %(name))
time.sleep(2)
def code(name):
for i in range(2):
print('正在写代码: %s' %(name))
time.sleep(3)
if __name__=='__main__':
start_time=time.time()
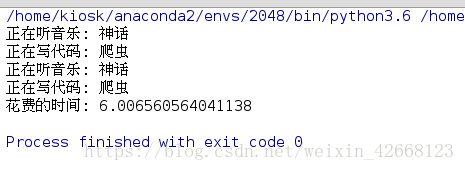
music('神话')
code('爬虫')
print('花费的时间: %s' %(time.time()-start_time))
事情是一个一个的做,没有同时进行,但是我敲代码的时候是会听歌的,
因此此处可以使用多线程来处理的
2) 使用多线程
import threading
import time
#使用线程
def music(name):
for i in range(2):
print('正在听音乐: %s' %(name))
time.sleep(2)
def code(name):
for i in range(2):
print('正在写代码: %s' %(name))
time.sleep(3)
if __name__=='__main__':
start_time=time.time()
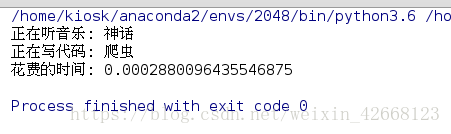
t1=threading.Thread(target=music,args=('神话',))
t2=threading.Thread(target=code,args=('爬虫',))
t1.start()
t2.start()
print('花费的时间: %s' %(time.time()-start_time))
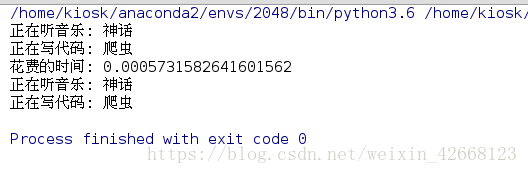
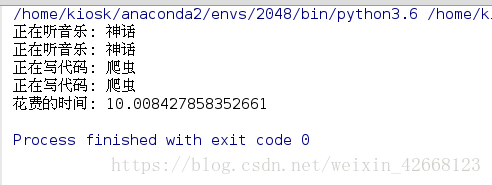
发现时间确实是变快了好多,但是感觉跟想象的不太一样,执行时间都结束了,而事情却没做完,这是因为主线程阻塞了子线程进行
这里就需要引入join方法了
3) 引入join方法
import threading
import time

#使用线程
def music(name):
    for i in range(2):
        print('正在听音乐: %s' %(name))
        time.sleep(2)
def code(name):
    for i in range(2):
        print('正在写代码: %s' %(name))
        time.sleep(3)
if __name__=='__main__':
    start_time=time.time()
    t1=threading.Thread(target=music,args=('神话',))
    t2=threading.Thread(target=code,args=('爬虫',))

    t1.start()
    t2.start()
    #等待所有的子线程执行结束之后,继续执行主线程的内容
    t1.join()
    t2.join()
    print('花费的时间: %s' %(time.time()-start_time))
现在的执行时间是正确的了
其实join的本质就是:等待所有的子线程执行结束之后,再去执行主线程的内容
- 守护线程setDaemon方法
守护线程的意义:为了让主线程在执行结束时,强制结束未执行完的子线程
import threading
import time

#使用线程,让其主线程执行结束后,强制结束所有的子线程
def music(name):
    for i in range(2):
        print('正在听音乐: %s' %(name))
        time.sleep(2)
def code(name):
    for i in range(2):
        print('正在写代码: %s' %(name))
        time.sleep(3)
if __name__=='__main__':
    start_time=time.time()
    t1=threading.Thread(target=music,args=('神话',))
    t2=threading.Thread(target=code,args=('爬虫',))
    #将子线程声明为守护线程,如果设置为True,子线程启动后,当主线程执行结束,子线程也结束
    #设置setDaemon必须在线程启动前
    t1.setDaemon(True)
    t2.setDaemon(True)
    t1.start()
    t2.start()

    print('花费的时间: %s' %(time.time()-start_time))
可以看到主线程在结束时,未完成的子线程也结束了
- 线程锁lock
多线程中,所有变量都由所有线程共享,所以,任何一个变量都可以被任何一个线程修改,因此,线程之间共享数据最大的危险在于多个线程同时改一个变量,把内容给改乱
下面来看一个实例:
import threading
def add():
global money
for i in range(1000000):
money+=1
def reduce():
global money
for i in range(1000000):
money-=1
if __name__ == '__main__':
money=0
t1=threading.Thread(target=add)
t2=threading.Thread(target=reduce)
t1.start()
t2.start()
t1.join()
t2.join()
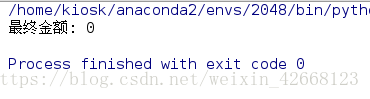
print('最终金额: %s'%(money))
理论上money的值应该为0,但是,由于线程的调度是由操作系统决定的,当t1、t2交替执行时,只要循环次数足够多,money的结果就不一定是0了
原因是因为:高级语言的一条语句在CPU执行时是若干条语句,即使一个简单的计算:money+=1 也是分为两步去完成的 先计算 money+1,将结果存入临时变量,再将临时变量赋值给money,而两个线程都拥有各自的临时变量,当t1与t2交替执行的时候,就会导致把同一个对象给改的混乱
这里我们为了避免这样的情况发生,从而引入了线程锁lock 这个概念
def add(lock):
# 操作变量之前进行加锁
lock.acquire()
global money
for i in range(1000000):
money+=1
# 操作变量之后进行解锁
lock.release()
def reduce(lock):
lock.acquire()
global money
for i in range(1000000):
money-=1
lock.release()
if __name__ == '__main__':
money=0
# 实例化一个锁对象
lock=threading.Lock()
t1=threading.Thread(target=add,args=(lock,))
t2=threading.Thread(target=reduce,args=(lock,))
t1.start()
t2.start()
t1.join()
t2.join()
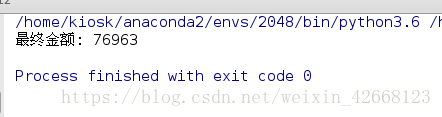
print('最终金额: %s'%(money))
可以看到结果是为0的
线程锁的本质是:对同一对象进行操作时,一个线程在进行前加把锁,让其他线程不能对其进行操作,执行完成后,再进行解锁释放
当然线程锁也存在缺点:首先,阻止了多线程并发执行,包含锁的某段代码实际上只能以单线程模式执行,效率就会降低;其次由于可以存在多个锁,不同的线程持有不同的锁,并试图获取对方持有的锁时,可能会造成死锁,导致多个线程全部挂起,既不能执行,也无法结束,只能靠操作系统强制终止
-
GIL锁
python中因为有GIL锁的存在,因此尽管你的计算机是4核的,但是多线程在执行时只是单核在运行,这是为什么呢
原因是python解释器在执行代码时,由于GIL锁的存在:任何Python线程执行前,必须先获得GIL锁,然后,每执行100条字节码,解释器就自动释放GIL锁,让别的线程有机会执行。这个GIL全局锁实际上把所有线程的执行代码都给上了锁,所以,多线程在Python中只能交替执行,即使100个线程跑在100核CPU上,也只能用到1个核
不过,也不用过于担心,Python虽然不能利用多线程实现多核任务,但可以通过多进程实现多核任务,多个Python进程有各自独立的GIL锁,互不影响 -
队列与多线程
理论上多线程在执行任务时,会产生一些数据,为其它程序执行作铺垫;而多线程本身是不能返回任务执行结果的,因此需要一个容器来存储多线程产生的数据
import threading
from mytime import timeit
from queue import Queue
def job(l, queue):
queue.put(sum(l))
@timeit
def use_thread():
q = Queue()
li = [[1, 3, 45, 6], [64, 33, 66, 35], [54, 55, 22, 65], [34, 25, 24, 76]]
threads = []
for i in li:
t = threading.Thread(target=job, args=(i, q))
threads.append(t)
t.start()
[thread.join() for thread in threads]
result = [q.get() for _ in li]
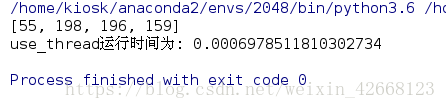
print(result)
if __name__ == '__main__':
use_thread()
这里面导入了自己定义的模块,其目的是使用其中的装饰器,其作用呢,就是用来计算时间的
你也可以把你常用的一些方法封装成一个模块,这样使得你的代码更为的简洁
mytime模块中的timeit装饰器:
import time


def timeit(f):
    def wrapper(*args, **kwargs):
        start_time = time.time()
        res = f(*args, **kwargs)
        end_time = time.time()
        print("%s运行时间为: %s" %(f.__name__, end_time-start_time))
        return  res
    return  wrapper
- 多线程与生产者、消费者模型
1)给定200个ip地址, 可能开放端口为80, 443, 7001, 7002, 8000, 8080, 9000(flask), 9001
2)以http://ip:port形式访问页面以判断是否正常访问
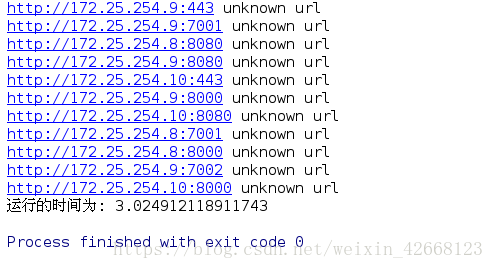
1> 没有使用模型
import threading
from urllib.request import urlopen

import time


def create_data():
    with open('ips.txt','w')as f:
        for i in range(200):
            f.write('172.25.254.%d\n'%(i+1))
def create_url():
    portlist=[80,443,7001,7002,8000,8080]
    with open('ips.txt')as f:
        ips=[ip.strip() for ip in f]
    urls=['http://%s:%s'%(ip,port) for ip in ips for port in portlist]
    return urls

def requst_url(url):

    try:
        urlopen(url)
    except Exception as e:
        print('%s unknown url'%(url))
    else:
        print('%s is ok'%(url))


if __name__ == '__main__':
    # create_data()
    urls=create_url()
    start_time = time.time()
    joins=[]
    for url in urls:
        t=threading.Thread(target=requst_url,args=(url,))
        joins.append(t)
        t.start()
    [i.join() for i in joins]
    print('运行的时间为: %s' % (time.time() - start_time))
2> 使用模型后
import  threading
from queue import Queue
from urllib.request import urlopen

import time


class Procuder(threading.Thread):
    def __init__(self, q):
        super(Procuder, self).__init__()
        self.q = q
    def run(self):
        portlist = [80, 443, 7001, 7002, 8000, 8080]
        with open('ips.txt') as f:
            ips = [ip.strip() for ip in f]
        # urls = ['http://%s:%s' % (ip, port) for ip in ips for port in portlist]
        # return urls
        for ip in ips:
            for port in portlist:
                url = 'http://%s:%s' % (ip, port)
                self.q.put(url)
class Consumer(threading.Thread):
    def __init__(self, q):
        super(Consumer, self).__init__()
        self.q = q

    def run(self):
        while True:
            url=self.q.get()
            try:
                urlopen(url)
            except Exception as e:
                print('%s unknown url'%(url))
            else:
                print('%s is ok'%(url))


if __name__ == '__main__':
    q = Queue(5)
    p1 = Procuder(q)
    p1.start()

    for i in range(10):
        c = Consumer(q)
        c.start()
    q.join()
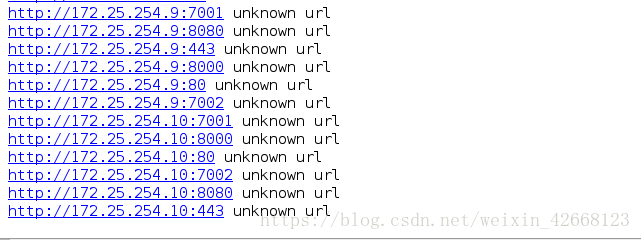
使用生产者、消费者模型的好处在于,一方可以只顾生产,一方可以只顾着消费,用中间的缓冲区来实现数据的连接,这样可以提高效率
- 使用多线程来处理地理位置的获取
比较使用多线程和没有使用多线程两者的效率差异
import json
import threading
from urllib.request import urlopen
import time
def job(ip):
url = "http://ip.taobao.com/service/getIpInfo.php?ip=%s" % (ip)
text = urlopen(url).read().decode('utf-8')
d = json.loads(text)['data']
country = d['country']
city = d['city']
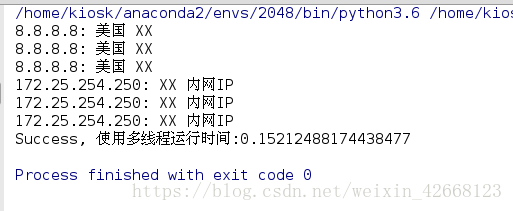
print("%s:" %(ip), country, city)
def has_many_thread():
start_time = time.time()
threads = []
ips = ['172.25.254.250', '8.8.8.8',
'172.25.254.250', '8.8.8.8',
'172.25.254.250', '8.8.8.8' ]
for ip in ips:
t = threading.Thread(target=job, args=(ip, ))
threads.append(t)
t.start()
[thread.join() for thread in threads]
print("Success, 使用多线程运行时间:%s" %(time.time()-start_time))
def has_no_thread():
start_time = time.time()
ips = ['172.25.254.250', '8.8.8.8',
'172.25.254.250', '8.8.8.8',
'172.25.254.250', '8.8.8.8']
for ip in ips:
job(ip)
print("Success, 未使用多线程运行时间:%s" % (time.time() - start_time))
if __name__ == '__main__':
has_many_thread()
has_no_thread()
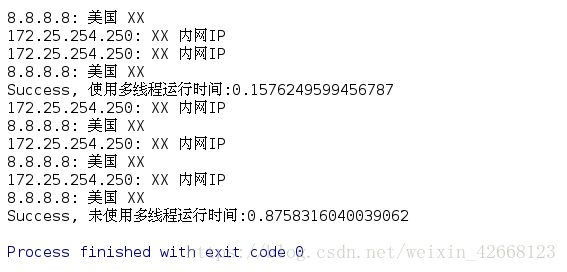
很明显,在使用了多线程之后,会节省不少的时间
同时,使用类的继承方法也可以
import json
import threading

#类的继承
from urllib.request import urlopen

import time


class IpThread(threading.Thread):
    #重写构造方法,如果执行的任务需要传递参数,那将参数通过构造函数与self绑定在一起
    def __init__(self,jobname,ip):
        super(IpThread,self).__init__()
        self.jobname=jobname
        self.ip=ip
    #将多线程需要执行的任务重写到run方法中
    def run(self):
        url = "http://ip.taobao.com/service/getIpInfo.php?ip=%s" % (self.ip)
        text = urlopen(url).read().decode('utf-8')
        d = json.loads(text)['data']
        country = d['country']
        city = d['city']
        print("%s:" % (self.ip), country, city)
def main():
    start_time = time.time()
    threads = []
    ips = ['172.25.254.250', '8.8.8.8',
           '172.25.254.250', '8.8.8.8',
           '172.25.254.250', '8.8.8.8']
    for ip in ips:
        t = IpThread('正义',ip)
        threads.append(t)
        t.start()
    [thread.join() for thread in threads]

    print("Success, 使用多线程运行时间:%s" % (time.time() - start_time))
if __name__ == '__main__':
    main()
- 利用多线程来批量管理主机
1> 第一种创建线程的方法
import threading
import paramiko
import time
from paramiko.ssh_exception import NoValidConnectionsError, AuthenticationException
def connect(cmd, hostname, port=22, user='root'):
# ssh root@172.25.254.250
# 创建一个ssh对象;
client = paramiko.SSHClient()
# 返回一个私钥对象
private_key = paramiko.RSAKey.from_private_key_file('id_rsa')
# 2. 解决问题:如果之前没有;连接过的ip, 会出现
# Are you sure you want to continue connecting (yes/no)? yes
# 自动选择yes
client.set_missing_host_key_policy(paramiko.AutoAddPolicy())
try:
# 3. 连接服务器
client.connect(hostname=hostname,
port=port,
username=user,
pkey=private_key
)
# 4. 执行操作
stdin, stdout, stderr = client.exec_command(cmd)
except NoValidConnectionsError as e:
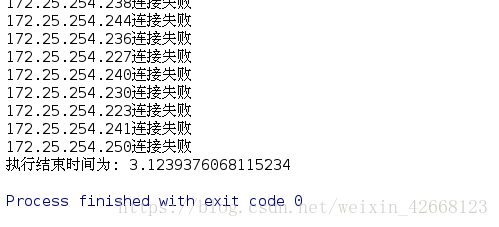
print("%s连接失败" %(hostname))
except AuthenticationException as e:
print("%s密码错误" %(hostname))
else:
# 5. 获取命令的执行结果;
result = stdout.read().decode('utf-8')
print("%s运行结果:" %(hostname), result)
finally:
# 6. 关闭连接
client.close()
start_time=time.time()
# 用来存储创建的所有线程对象;
threads = []
for count in range(254):
host = '172.25.254.%s' %(count+1)
# print(host.center(50, '*'))
t = threading.Thread(target=connect, args=('uname', host))
threads.append(t)
t.start()
# join方法, 等待所有的子线程执行结束;
_ = [thread.join() for thread in threads]
print("执行结束时间为: %s"%(time.time()-start_time))
2> 第二种创建线程的方法
import threading

import time


import  paramiko
from paramiko.ssh_exception import NoValidConnectionsError, AuthenticationException
class IPThread(threading.Thread):
    def __init__(self,cmd,hostname,port=22,user='root'):
        super(IPThread, self).__init__()
        self.cmd=cmd
        self.hostname=hostname
        self.port=port
        self.user=user
    def conn(self):
        # ssh root@172.25.254.250
        # 创建一个ssh对象;
        client = paramiko.SSHClient()

        # 返回一个私钥对象
        private_key = paramiko.RSAKey.from_private_key_file('id_rsa')


        # 2. 解决问题:如果之前没有;连接过的ip, 会出现
        # Are you sure you want to continue connecting (yes/no)? yes
        # 自动选择yes
        client.set_missing_host_key_policy(paramiko.AutoAddPolicy())
        try:
            # 3. 连接服务器
            client.connect(hostname=self.hostname,
                           port=self.port,
                           username=self.user,
                           pkey=private_key
                          )
            # 4. 执行操作
            stdin, stdout, stderr = client.exec_command(self.cmd)
        except NoValidConnectionsError as e:
            print("连接%s失败"%(self.hostname))
        except AuthenticationException as e:
            print("%s密码错误"%(self.hostname))
        else:
            # 5. 获取命令的执行结果;
            result = stdout.read().decode('utf-8')
            print(result)
        finally:
            # 6. 关闭连接
            client.close()
def main():
    #用来储存所有的线程对象
    start_time = time.time()
    threads=[]
    for count in range(254):
        host='172.25.254.%s' %(count+1)
        t=IPThread(cmd='hostname',hostname=host)
        threads.append(t)
        t.start()
    #join方法,等待所有的子线程结束后执行结束
    [thread.join() for thread in threads]

    print('任务执行结束,执行时间为%s'%(time.time()-start_time))
if __name__ == '__main__':
    main()

- 线程池
1)一个线程的时间可以分为3部分:线程的启动时间、线程体的运行时间和线程的销毁时间。而在在多线程处理的情景中,如果线程不能被重用,就意味着每次创建都需要经过启动、销毁和运行3个过程。这必然是会增加系统相应的时间,降低了整体的效率,基于此,线程池就有用了
线程池的作用:线程预先被创建并放入线程池中,同时处理完当前任务之后并不销毁而是被安排处理下一个任务,因此能够避免多次创建线程,从而节省线程创建和销毁的开销,能带来更好的性能和系统稳定性
在 concurrent.futures中就有 ThreadPoolExecutor类
可以用来创建线程池
from concurrent.futures import ThreadPoolExecutor
import time
# 需要执行的任务
def job():
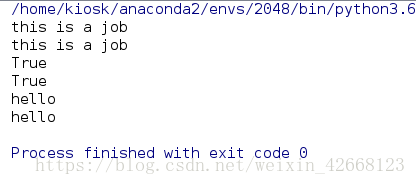
print("this is a job")
return "hello"
if __name__ == '__main__':
# 实例化对象, 线程池包含10个线程来处理任务;
pool = ThreadPoolExecutor(max_workers=10)
# 往线程池里面扔需要执行的任务, 返回一个对象,( _base.Future实例化出来的)
f1 = pool.submit(job)
f2 = pool.submit(job)
# 判断任务是否执行结束
print(f1.done())
time.sleep(1)
print(f2.done())
# 获取任务执行的结果
print(f1.result())
print(f2.result())
2) 用线程池去执行对主机的批量操作
from concurrent.futures import ThreadPoolExecutor
import  paramiko
from paramiko.ssh_exception import NoValidConnectionsError, AuthenticationException

def connect(cmd, hostname, port=22, user='root'):
    # ssh root@172.25.254.250
    # 创建一个ssh对象;
    client = paramiko.SSHClient()

    # 返回一个私钥对象
    private_key = paramiko.RSAKey.from_private_key_file('id_rsa')
    # 2. 解决问题:如果之前没有;连接过的ip, 会出现
    # Are you sure you want to continue connecting (yes/no)? yes
    # 自动选择yes
    client.set_missing_host_key_policy(paramiko.AutoAddPolicy())
    try:
        # 3. 连接服务器
        client.connect(hostname=hostname,
                       port=port,
                       username=user,
                       pkey=private_key
                      )
        # 4. 执行操作
        stdin, stdout, stderr = client.exec_command(cmd)
    except NoValidConnectionsError as e:
        print("%s连接失败" %(hostname))
    except AuthenticationException as e:
        print("%s密码错误" %(hostname))
    else:
        # 5. 获取命令的执行结果;
        result = stdout.read().decode('utf-8')
        print("%s运行结果:" %(hostname), result)
    finally:
        # 6. 关闭连接
        client.close()

# 创建线程池对象
pool = ThreadPoolExecutor(max_workers=50)
# 依次向线程池提交任务
for count in range(254):
    host = '172.25.254.%s' % (count + 1)
    pool.submit(connect, 'uname', host)
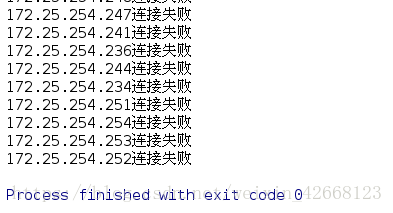
使用线程池批量管理主机可以比一个线程管理一台主机更加的有效率,避免了线程销毁的时间的浪费
3) 线程池与map函数
from urllib.error import HTTPError
from urllib.request import urlopen
from concurrent.futures import ThreadPoolExecutor
import time
URLS = ['http://httpbin.org', 'http://example.com/',
'https://api.github.com/'] * 10
def get_page(url, timeout=3):
try:
content = urlopen(url).read()
return {'url':url, 'len':len(content)}
except HTTPError as e:
return {'url':url, 'len':0}
# 方法1: submit提交任务
start_time = time.time()
pool = ThreadPoolExecutor(max_workers=20)
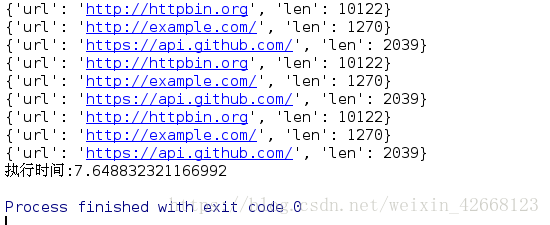
futuresObj = [pool.submit(get_page, url) for url in URLS]
for future in futuresObj:
print(future.result())
print("执行时间:%s" %(time.time()-start_time))
submit提交任务时可以完成的,不过用map函数可以更加快速的实现
from urllib.error import HTTPError
from urllib.request import urlopen
from concurrent.futures import ThreadPoolExecutor

import time
URLS = ['http://httpbin.org', 'http://example.com/',
        'https://api.github.com/'] * 10
def get_page(url, timeout=3):
    try:
        content = urlopen(url).read()
        return {'url':url, 'len':len(content)}
    except HTTPError as e:
        return {'url':url, 'len':0}

# 方法2:通过map方式执行
start_time = time.time()
pool = ThreadPoolExecutor(max_workers=20)
for res in pool.map(get_page, URLS):
    print(res)

print("执行时间:%s" %(time.time()-start_time))
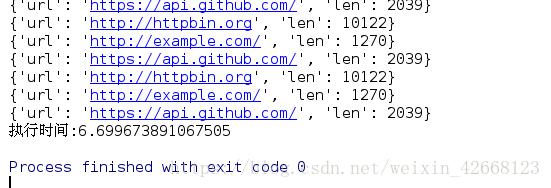
使用map函数可以使代码量更加的少一点,效率也差不多
三 多进程
- 多进程的创建
Unix和Linux操作系统提供了一个 fork()系统调用,它非常特殊。普通的函数调用一次,返回一次,但是 fork()调用一次,返回两次,因为操作系统自动把当前进程(称为父进程)复制了一份(称为子进程),然后,分别在父进程和子进程内返回
子进程永远返回 0,而父进程返回子进程的ID。这样做的理由是,一个父进程可以 fork出很多子进程,所以,父进程要记下每个子进程的ID,而子进程只需要调用 getppid()就可以拿到父进程的ID
Python的 os模块封装了常见的系统调用,其中就包括 fork,可以在Python程序中轻松创建子进程:
import  os

print('当前进程(pid=%d)正在运行...'%(os.getpid()))
print('当前进程的父进程(pid=%d)正在进行...'%(os.getppid()))
print('正在创建子进程...')
pid=os.fork()
if pid==0:
    print('这是创建的子进程,子进程的id为%s,父进程的id为%s'
          %(os.getpid(),os.getppid()))
else:
    print('当前是父进程[%s]的返回值%s'%(os.getpid(),pid))
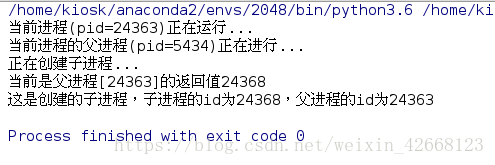
有了 fork()调用,一个进程在接到新任务时就可以复制出一个子进程来处理新任务
如果需要创建多进程,python中 multiprocessing模块提供了一个 Process 类来代表一个进程对象
1) 通过实例化 Process对象创建多进程
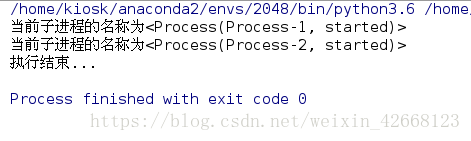
import multiprocessing
def job():
    print('当前子进程的名称为%s'%(multiprocessing.current_process()))
#创建一个进程对象
p1=multiprocessing.Process(target=job)
p2=multiprocessing.Process(target=job)
#开启进程
p1.start()
p2.start()
#等待所有的子进程结束后,再执行主进程
p1.join()
p2.join()
print('执行结束...')
2) 通过继承的方式来创建多进程
import multiprocessing
class JobProcess(multiprocessing.Process):
    def __init__(self,li):
        super(JobProcess, self).__init__()
        self.li=li
    def run(self):
        sum(self.li)
processes=[]
for i in range(10):
    p=JobProcess(li=[3,4])
    processes.append(p)
    p.start()
[process.join() for process in processes]
print('执行结束...')
- 多进程与多线程效率的比较
1)开启的进程数有瓶颈, 取决于CPU的个数
2)如果处理的数据比较小, 不建议使用多进程, 因为进程的创建和销毁需要时间
3)开启的进程数越多,不一定效率越高
4)如果处理的数据量足够大, 0<开启的进程数<cpu个数, 开启的进程数越多, 效率越高
import threading
import multiprocessing
from mytime import timeit
class JobProcess(multiprocessing.Process):
    def __init__(self,li):
        super(JobProcess, self).__init__()
        self.li=li
    def run(self):
        for item in self.li:
            sum(item)
class JobTread(threading.Thread):
    def __init__(self,li):
        super(JobTread, self).__init__()
        self.li=li
    def run(self):
            sum(self.li)

@timeit
def use_multi_process():
    lists=[[3,42,43],[54,25,242],[34,53,53,43],[243,242,53]]*1000
    processes=[]
    # for i in lists:
    #     p=JobProcess(i)
    #     processes.append(p)
    #     p.start()
    for i in range(0,len(lists),1000):
        p=JobProcess(lists[i:i+1000])
        processes.append(p)
        p.start()
    [process.join() for process in processes]
    print('多进程执行完毕...')
@timeit
def use_multi_thread():
    lists = [[3, 42, 43], [54, 25, 242], [34, 53, 53, 43], [243, 242, 53]] * 1000
    threads=[]
    for i in lists:
        p=JobTread(i)
        threads.append(p)
        p.start()
    [thread.join() for thread in threads]
    print('多线程执行完毕...')
if __name__ == '__main__':
    use_multi_process()
    use_multi_thread()
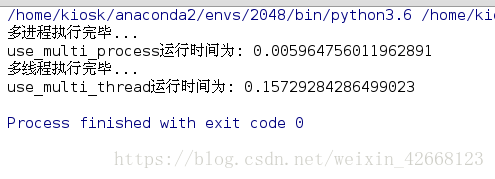
正是因为python中由于 GIL锁的存在,让多线程跑的不是很爽,但是如果电脑是多核的话,多进程是可以跑不同的cpu的,这样也就跑的快了
- 守护进程
import multiprocessing
import time
def demon():
    print('开始运行')
    time.sleep(3)  #这里需要等待3s,因此在主进程执行完后,不再打印下面的内容
    print('运行结束')
if __name__ == '__main__':
    p1=multiprocessing.Process(target=demon)
    p1.daemon=True
    p1.start()
    p1.join(1) #等待p1执行1s
    print('程序执行结束')
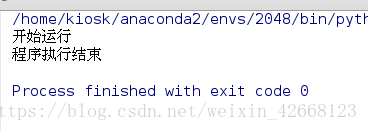
守护进程和守护线程是一样的,都是为了保证在主进程(主线程)完成时,强行结束未完成的子进程(子线程)
4. 终止进程
import time
import  multiprocessing

def job():
    print("start.....")
    time.sleep(1)
    print('end.......')
if __name__ == '__main__':
    p = multiprocessing.Process(target=job)
    print("Before:", p.is_alive())
    p.start()  # 启动子进程
    print("During:", p.is_alive())
    p.terminate()   # 终止子进程
    print('terminate:', p.is_alive())
    p.join()        #等待子进程彻底终止
    print("joined:", p.is_alive())
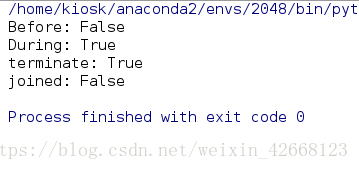
终止进程 terminate通常和 join一起使用的,当 terminate终止进程时,是会有一个销毁的过程,进程并没有完全结束,这里就需要 join来等待所有的子进程结束后,再去执行主进程
- 进程之间的生产者、消费者模型
进程与线程一样,中间的缓冲区都是队列(Queue)
import multiprocessing

from multiprocessing import Queue

import time


class Producer(multiprocessing.Process):
    def __init__(self, queue):
        super(Producer, self).__init__()
        self.queue = queue

    def run(self):
        for i in range(100):
            time.sleep(0.01)
            self.queue.put(i)
            print('传递消息,内容为%s' % (i))


class Consumer(multiprocessing.Process):
    def __init__(self, queue):
        super(Consumer, self).__init__()
        self.queue = queue

    def run(self):
        while True:
            time.sleep(0.01)
            print('get news is %s' % (self.queue.get()))


if __name__ == '__main__':
    q = Queue(maxsize=100)
    p1 = Producer(q)
    c1 = Consumer(q)
    p1.start()
    c1.start()
    p1.join()
    c1.terminate()
    c1.join()
    print('hello')
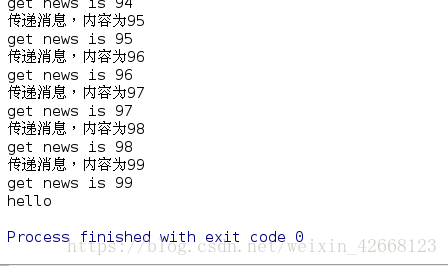
通过生产者、消费者模型可以提高代码的效率
- 分布式进程
Python的multiprocessing模块不但支持多进程,其中managers子模块还支持把多进程分布到多台机器上。一个服务进程可以作为调度者,将任务分布到其他多个进程中,依靠网络通信
当任务量很大时,就可以将任务分配到多台主机上,这样就需要本机作为管理端发放任务,而其它主机则作为被管理端,接收任务
1)管理端:
import random
from queue import Queue
from multiprocessing.managers import BaseManager
# 1.创建需要的队列
# task_queue存储的是任务需要传递的参数
task_queue = Queue()
# result_queue存储的是任务执行结果
result_queue = Queue()
# 2.将队列注册到网络上
# 需要将两个队列注册到网络上,callable参数关联了Queue对象使得其他主机可以访问
BaseManager.register('get_task_queue', callable=lambda: task_queue)
BaseManager.register('get_result_queue', callable=lambda: result_queue)
# 绑定端口为4000,暗号/密钥为westos
manager = BaseManager(address=('172.25.254.69', 4000), authkey=b'boy')
# 3.启动Queue
manager.start()
# 4.获得通过网络访问的Queue对象
# manager.register: 注册一个队列, 唯一标识'get_task_queue'
# manager.get_task_queue()调用注册, 调用过程中执行的内容为callable只想的函数
task = manager.get_task_queue()
result = manager.get_result_queue()
# 5.开始往队列里面放执行任务的数据
for i in range(100):
n = random.randint(1, 1000)
task.put(n)
print('任务列表加入任务: %d' % (n))
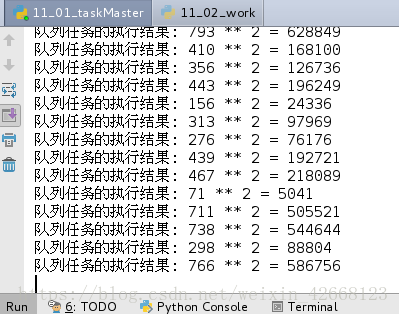
# 6.从result里面读取各个机器执行的结果
for j in range(100):
res = result.get()
print('队列任务的执行结果: %s' % (res))
# 7.关闭manager,取消共享队列
manager.shutdown()
print('任务执行结束!')
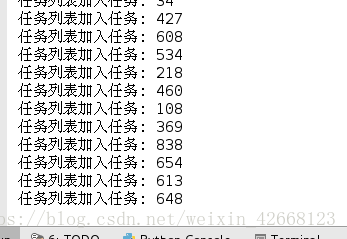
可以看到任务已经发放成功,就是通过队列(Queue)接受任务,将之暴露在网络中,让其它主机通过网络连接到上面,从队列中取出相应的任务
2)服务端
from multiprocessing.managers import BaseManager

# 1. 连接Master端, 获取共享的队列;
# address写的是master端的ip和共享的端口, authkey与master端保持一致;


worker = BaseManager(address=('172.25.254.69', 4000), authkey=b'boy')

# 2. 注册队列, 获取共享端的队列内容
BaseManager.register('get_task_queue')
BaseManager.register('get_result_queue')

# 3. 去连接
worker.connect()

# 4. 通过网络访问共享的Queue对象,
# manager.register: 注册一个队列, 唯一标识'get_task_queue'
# manager.get_task_queue()调用注册, 调用过程中执行的内容为callable只想的函数;
task = worker.get_task_queue()
result = worker.get_result_queue()

# 5. 读取管理端共享的任务, 依次执行;
for i in range(50):
    try:
        n = task.get()
        print("运行任务 %d ** 2:" % (n))
        res = "%d ** 2 = %d" % (n, n ** 2)
        # 将运行结果放入reesult队列
        result.put(res)
    except Exception as e:
        print("任务队列为空")
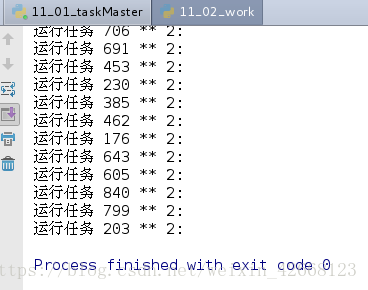
1号服务端已经完成一半的任务了,其中被管理端的代码是相同的
剩下的一半归2号主机去完成
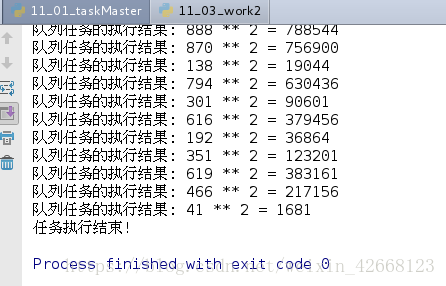
可以看到管理的任务已经被执行完毕了,就是通过这样来将繁重的任务分配到其它的各个主机上
这就是一个简单但真正的分布式计算,把代码稍加改造,启动多个worker,就可以把任务分布到几台甚至几十台机器上,比如把计算 n*n的代码换成发送邮件,就实现了邮件队列的异步发送
Queue对象存储在 task_master.py 进程中
而Queue之所以能通过网络访问,就是通过QueueManager实现的。由于QueueManager管理的不止一个Queue,所以,要给每个Queue的网络调用接口起个不一样的名字,比如get_task_queue
7. 进程池
进程池同线程池一样,都是为了传键与销毁过程中时间的浪费,创建与销毁进程更加的浪费时间
1) 进程池的创建
1> multiprocessing自带有进程池,pool
import  multiprocessing
import time
def job(id):
    print('start %d.....' %(id))
    print('end %d.....' %(id))
# 创建一个进程池对象
pool = multiprocessing.Pool(10)
# 给进程池的进程分配任务
for i in range(10):
    pool.apply_async(job,args=(i, ) )
pool.close()
# 等待所有的子进程执行结束
pool.join()
print('success')

2> 通过concurrent.futures 中的 ProcessPoolExecutor
from concurrent.futures import ProcessPoolExecutor
def job(id):
    print('start...%s'%(id))
    print('end...%s'%(id))
    return id

# #submit
pool=ProcessPoolExecutor(max_workers=4)
#非配任务给子进程,并且返回一个future对象
f1=pool.submit(job,69)
#判断进程是否执行结束
print(f1.done())
#获取子进程的执行结果
print(f1.result())
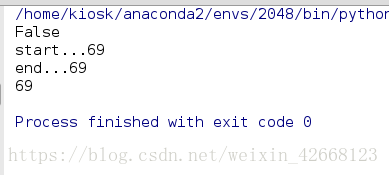
通过submit来提交任务
当然进程池中也是拥有map方法的
from concurrent.futures import ProcessPoolExecutor
def job(id):
    print('start...%s'%(id))
    print('end...%s'%(id))
    return id

## map
pool=ProcessPoolExecutor(max_workers=4)
for res in pool.map(job,range(1,100)):
    print(res)
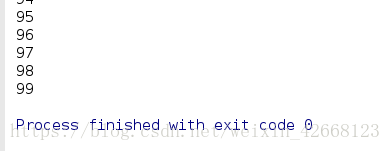
同线程一样,map函数可以使得代码更加的整洁,同时也可以提高代码的效率
四 多线程、多进程应用案例
1)题目1: 计算1~100000之间所有素数和, 要求如下:
- 编写函数判断一个数字是否为素数,
- 使用内置函数sum()统计所有素数和。
- 对比1: 对比使用多进程和不使用多进程两种方法的速度。
- 对比2:对比开启4个多进程和开启10个多进程两种方法的速度
from math import sqrt

import multiprocessing

from mytime import timeit


# def sum_prime():
#     res = [p for p in range(2, 100000) if 0 not in
#            [p % d for d in range(2, int(sqrt(p)) + 1)]]
#
#     sum(res)
def sum_prime():
    primelist=[]
    for i in range(2,100000):
        for j in range(2, i):
            if i % j == 0:
                break
        else:
            primelist.append(i)
    sum(primelist)


@timeit
def has_process_4():
    processes = []
    for i in range(4):
        p = multiprocessing.Process(target=sum_prime())
        processes.append(p)
        p.start()
    [process.join() for process in processes]


@timeit
def no_has_process():
    sum_prime()


@timeit
def has_process_10():
    processes = []
    for i in range(10):
        p = multiprocessing.Process(target=sum_prime())
        processes.append(p)
        p.start()
    [process.join() for process in processes]


if __name__ == '__main__':
    has_process_4()
    no_has_process()
    # has_process_10()
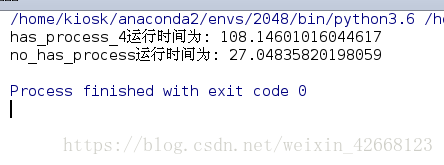
使用多进程和不使用多进程两种方法的速度
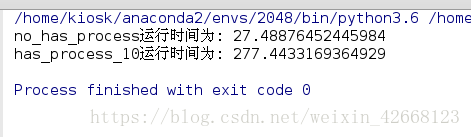
开启4个多进程和开启10个多进程两种方法的速度
2)题目2: 使用生产者消费者模型, 多线程爬取指定个url网页信息,并多线程写入mysql数据库中;
要求如下:
- 理论上url地址信息通过其他程序获取, 此处从一个文件urls.txt中读取;
- 如果url地址访问不成功, bytesCount存储为0;
- 数据库存储的表头要求: id(唯一标识码), url, bytesCount
- 获取url中字节数最多的10个url(自行查找相关的SQL语句);
- 附加: 对比多进程和多线程的速度
import random
import threading
from queue import Queue
from urllib.request import urlopen

import pymysql
import time


class Producer(threading.Thread):
    def __init__(self,queue):
        super(Producer, self).__init__()
        self.queue=queue
    def run(self):
        with open('urls.txt')as f:
            for line in f:
                url=line.strip()
                self.queue.put(url)
                urllist.append(url)
                id=url.split('.')[1]
                idlist.append(id)
            return idlist,urllist
class Consumer(threading.Thread):
    def __init__(self,queue):
        super(Consumer, self).__init__()
        self.queue=queue
    def run(self):
        while True:
            get_url=self.queue.get
            try:
                text=urlopen(get_url).read().decode('utf-8')
            except Exception:
                bytesCount=0
                countlist.append(bytesCount)
            else:
                bytesCount=len(text)
                countlist.append(bytesCount)
            return countlist
def write_mysql():
    conn = pymysql.connect(host='172.25.254.69', user='hello',
                           password='hello', charset='utf8', autocommit=True)
    cur=conn.cursor()
    # cur.execute('create database urls;')
    conn.select_db('urls')
    cur.execute('create table url(id varchar(30),url varchar(60),bytesCount int);')
    insert_sqli='insert into url values(%s,%s);'
    cur.executemany(insert_sqli,countlist)
    insert_sql = 'insert into url values(%s,%s);'
    cur.executemany(insert_sql,urllist)
    insert_sq = 'insert into url values(%s,%s);'
    cur.executemany(insert_sq,countlist)
    cur.close()
    conn.close()
urllist = []
idlist = []
countlist = []
if __name__ == '__main__':
    queue=Queue()
    p=Producer(queue)
    c=Consumer(queue)
    p.start()
    c.start()
    p.join()
    c.join()
    write_mysql()
    print(urllist)
    print(idlist)
    print(countlist)


 被折叠的 条评论
为什么被折叠?
被折叠的 条评论
为什么被折叠?
 到【灌水乐园】发言


