


1.简介
Nginx是一个高性能的HTTP和反向代理web服务器,可以在大多数 Unix Linux OS 上编译运行,并有 Windows 移植版等等。
此文档为单机部署,如果想要搭建Nginx高可用,请参考Keepalived部署文档
2.安装 Nginx
- 下载地址:http://nginx.org/download 或者官网下载:http://nginx.org/en/download.html,这里下载的版本为:nginx-1.22.1.tar.gz
- 进入目录下
    cd /opt
    将下载的压缩包上传到目录下
    解压: tar -zxvf nginx-1.22.1.tar.gz
    要使用nginx之前要先确保服务器是否安装以下服务:gcc zlib zlib-devel pcre-devel openssl openssl-devel,如没有,必须先安装:安装命令:zypper  install gcc zlib zlib-devel pcre-devel openssl openssl-devel
    安装好依赖之后,进入解压的nginx目录下
    cd /opt/nginx/nginx-1.22.1
    ./configure
    make  &&  make install
- 以便于更好的方便管理,将配置文件整合起来存放
cd /usr/local/nginx/conf
vim nginx.conf

#user  nobody;
worker_processes     auto;
worker_cpu_affinity  auto;
worker_rlimit_nofile 50000;

error_log  /opt/nginx/logs/error.log warn;
pid        /opt/nginx/logs/nginx.pid;

events {
    worker_connections  10240;
}

stream {
    include conf.tcp4/*.conf;
}

http {
    server_tokens off;
    include       mime.types;
    default_type  application/octet-stream;
    charset       utf-8;

    log_format  main  '[$time_local] $status $remote_addr - $remote_user $request_method $scheme://$host$request_uri '
                      '$body_bytes_sent "$http_referer" '
                      '"$http_user_agent" "$http_x_forwarded_for"';

    access_log  /opt/nginx/logs/access.log  main;

    sendfile        on;
    #tcp_nopush     on;

    keepalive_timeout  65;

    #gzip  on;

    client_max_body_size 1000m;
    client_header_buffer_size 32k;
    large_client_header_buffers 4 32k;
    client_body_buffer_size 1024k;

    fastcgi_buffers 8 32K;
    fastcgi_buffer_size 32K;

    include conf.http/*.conf;
}
- 创建两个存放文件夹:conf.proxy , conf.http ,
mkdir conf.proxy conf.http
#创建代理文件
vim commonProxy.conf

proxy_set_header X-Real-IP $remote_addr;
proxy_set_header Host $http_host;
proxy_set_header X-Forwarded-For $proxy_add_x_forwarded_for;
proxy_set_header X-Forwarded-Proto $scheme;
proxy_method $request_method;
proxy_read_timeout 300;
proxy_set_header Upgrade $http_upgrade;
proxy_set_header Connection "upgrade";
proxy_http_version 1.1;
# limit_req zone=LimitReqZone burst=100 nodelay;
# add_header X-Frame-Options SAMEORIGIN;
#创建http文件
vim 192.168.19.150.conf


upstream FZ_FTP {
    server 192.168.19.10:8080;
}

server{
    listen       80;
    server_name  192.168.19.150;

    location /ftp{
        include conf.proxy/commonProxy.conf;
        proxy_pass http://FZ_FTP/ftp;
    }
}
3.启动nginx
    #安装完之后的目录,安装在了/usr/local/nginx
    cd /usr/local/nginx/sbin
    #启动nginx
    ./nginx
    如下图所示,即成功

- 配置nginx系统启动命令脚本文件
    vim /etc/systemd/system/nginx.service
    [Unit]
    Description=nginx service
    After=network.target

    [Service]
    Type=forking
    ExecStart=/usr/local/nginx/sbin/nginx
    ExecReload=/usr/local/nginx/sbin/nginx -s reload
    ExecStop=/usr/local/nginx/sbin/nginx -s quit
    PrivateTmp=true

    [Install]
    WantedBy=multi-user.target

    :wq  #保存退出
- 给脚本赋予执行权限
#给脚本文件服务执行权限:
chmod a+x nginx.service
#然后就可以使用:
systemctl start/stop/enable/restart nginx
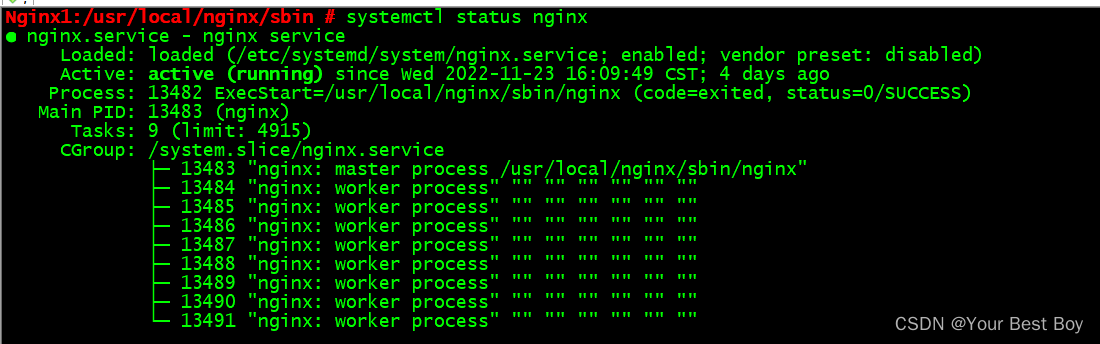
#如图所示:
 4.nginx增加其他模块
- 如果Nginx需要添加其他模块,比如ssl,stream,lua等。注意:lua模块需要安装配套的配置
下载安装LuaJIT-2.0.4.tar.gz
cd /opt
wget -c http://luajit.org/download/LuaJIT-2.0.4.tar.gz
tar xzvf LuaJIT-2.0.4.tar.gz
cd LuaJIT-2.0.4
make && make install
make install PREFIX=/usr/local/luajit

#添加环境变量!
export LUAJIT_LIB=/usr/local/luajit/lib
export LUAJIT_INC=/usr/local/luajit/include/luajit-2.0
export PATH=$PATH:$LUAJIT_LIB:$LUAJIT_INC

#保存退出,使其立即生效
source /etc/profile
- 验证
可参考博客:https://blog.youkuaiyun.com/qq_44466102/article/details/126072940
验证lua是否安装成功:luajit -v, 出现如图所示 即成功

#执行以下内容下载lua-nginx-module
wget https://github.com/openresty/lua-nginx-module/archive/v0.10.15.tar.gz
tar -zxvf v0.10.15.tar.gz

cd nginx-1.20.1/
#确保当前服务器已经安装gcc等编译c的环境,如果缺少相关依赖需要自行补全,执行
./configure --prefix=/usr/local/nginx --with-http_ssl_module --with-http_flv_module --with-http_stub_status_module --with-http_gzip_static_module --with-http_realip_module --with-pcre   --with-stream --add-module=/opt/nginx/lua-nginx-module-0.10.15   --with-http_stub_status_module   --with-http_sub_module
#注意已经安装过nginx预编译版本的小伙伴需要把 --prefix的目录指向你已安装nginx的目录,使用yum安装的小伙伴需要把--prefix的目录指向/usr/share/nginx
#未安装过的自己指定一个自己喜欢的目录执行
#--add-module 这个可是设置多个 例如     --add-module=1   --add-module=2  --add-module=3 会同时添加 1,2,3 进入nginx
#已经安装过的小伙伴到make执行完后一定要停下,否则回影响正在运行的nginx
make
#未安装过的小伙伴可以继续执行
make install
nginx + lua就已经安装完成了

#进入当前目录的objs
cd objs/
#可以看到当前目录中有一个shell的文件,这个就是我们已经集成好lua后编译的nginx执行程序
#注意,备份原nginx可执行程序,yum方式安装的nginx在下面的目录,其他方式安装的在nginx的主目录
cd /usr/local/nginx/sbin/
mv nginx nginx.bak
#把刚才编译好的可执行文件直接拿过来,直接覆盖当前nginx可执行程序
cp nginx /usr/local/nginx/sbin/
- 查看nginx都安装了哪些模块:
cd /usr/local/nginx/sbin/
#执行
./nginx -V
#如图所示

- 安装nginx + lua 完成,启动测试
#启动nginx ,yum方式安装的nginx会自动注册到系统服务管理中,其他方式需要手动注册文件
systemctl start nginx
#查看状态
systemctl status nginx
#报错
error while loading shared libraries: libluajit-5.1.so.2: cannot open shared object file: No such file or directory
#libluajit-5.1.so.2 这个文件找不到。直接给这个文件添加一个软连接
ln -s /usr/local/lib/libluajit-5.1.so.2 /lib64/
#重启查看状态
systemctl restart nginx
systemctl status nginx
#无报错 启动成功
有需要安装其他模块,参考链接
- lua脚本测试
vim 192.168.19.150TestLua.conf

server {
        listen       80;
        server_name  192.168.19.9;
        location /lua{
                default_type 'text/plain';
                content_by_lua 'ngx.say("hello,lua!!!192.168.19.9")';
        }
}


 1618
1618

 被折叠的 条评论
为什么被折叠?
被折叠的 条评论
为什么被折叠?
 到【灌水乐园】发言


