


前言
在 Vue 3 开发中,父子组件传值是构建动态应用的基础。Vue 3 引入了 Composition API 和新的语法特性,使得组件通信更加灵活和直观。本文将详细讲解 Vue 3 中父子组件传值的核心方法,包括 props、自定义事件、provide/inject,并结合实战案例展示实现过程,助力开发者高效完成组件间数据交互。
Vue 3 父子组件传值实战指南
一、为什么需要父子组件传值
Vue 的组件化设计将 UI 拆分为独立模块,父子组件间的通信是数据流动的关键场景。例如:
- 父传子:父组件传递配置数据给子组件(如标题、列表)。
- 子传父:子组件通知父组件用户操作(如点击事件)。
- 双向通信:实现复杂交互逻辑。
Vue 3 提供了多种工具支持这些需求,理解其原理和应用场景是编写高质量代码的第一步。
二、父子组件传值实战
2.1 使用 props 实现父传子
案例:传递用户信息
假设父组件需要将用户信息传递给子组件展示。
父组件(Parent.vue):
<template>
  <div>
    <h1>父组件</h1>
    <Child :user="userInfo" />
  </div>
</template>

<script setup>
import Child from './Child.vue';
import { ref } from 'vue';

const userInfo = ref({
  name: '张三',
  age: 25
});
</script>
子组件(Child.vue):
<template>
  <div>
    <h2>子组件</h2>
    <p>姓名: {{ user.name }}</p>
    <p>年龄: {{ user.age }}</p>
  </div>
</template>

<script setup>
defineProps({
  user: {
    type: Object,
    required: true
  }
});
</script>
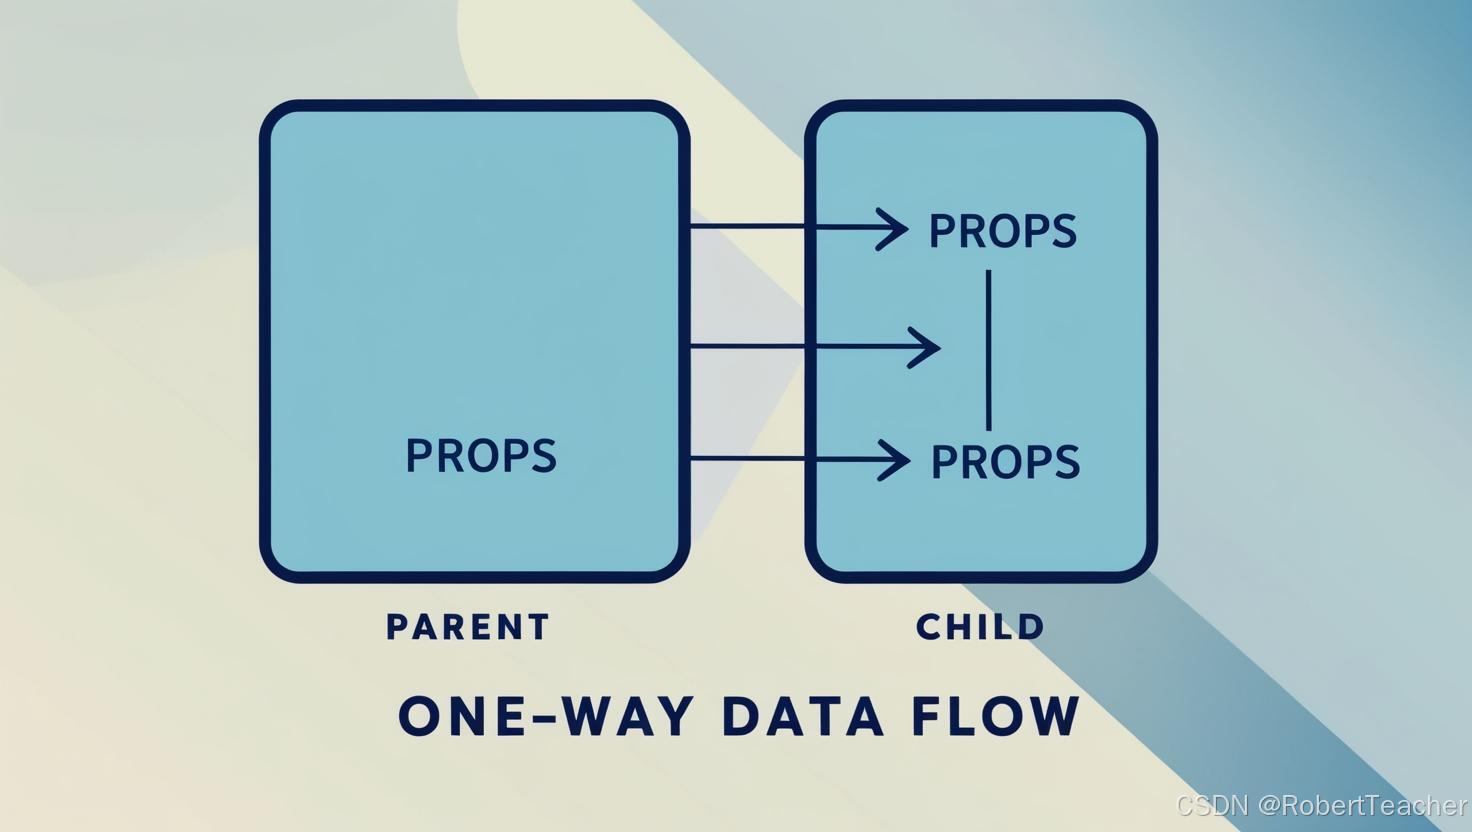
原理与优化
- props 定义:使用 defineProps(Vue 3 新特性),无需显式 export default,简洁高效。
- 类型校验:通过type 和 required 确保传入数据符合预期。
- 响应式:父组件的 ref 数据变化会自动反映到子组件。
图示:props 数据流
2.2 使用自定义事件实现子传父
案例:子组件通知父组件更新计数器
子组件点击按钮,通知父组件增加计数。
父组件(Parent.vue):
<template>
  <div>
    <h1>父组件计数: {{ count }}</h1>
    <Child @increment="handleIncrement" />
  </div>
</template>

<script setup>
import Child from './Child.vue';
import { ref } from 'vue';

const count = ref(0);
const handleIncrement = () => {
  count.value++;
};
</script>
子组件(Child.vue):
<template>
  <button @click="emitIncrement">增加计数</button>
</template>

<script setup>
const emit = defineEmits(['increment']);
const emitIncrement = () => {
  emit('increment');
};
</script>
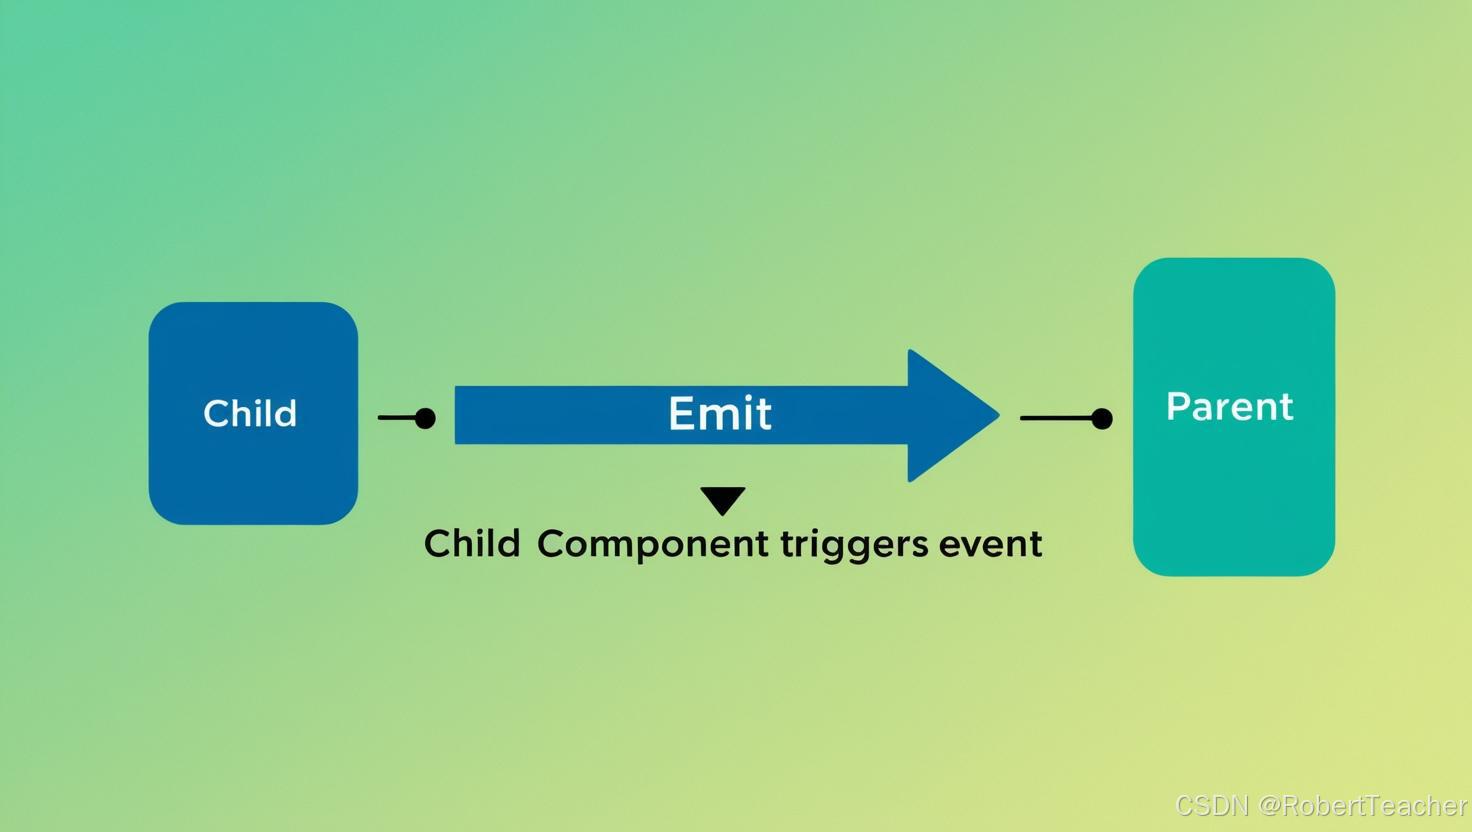
原理与优化
- defineEmits:Vue 3 新语法,声明自定义事件,替代 this.$emit。
- 事件命名:推荐使用 kebab-case(如 increment-count),增强可读性。
- 单向数据流:子组件不直接修改父组件数据,而是通过事件通知。
图示:自定义事件通信
2.3 使用 provide/inject 实现深层传值
案例:跨层级传递主题配置
父组件提供主题数据,深层子组件直接使用。
父组件(Parent.vue):
<template>
  <div>
    <h1>父组件</h1>
    <Child />
  </div>
</template>

<script setup>
import Child from './Child.vue';
import { provide, ref } from 'vue';

const theme = ref('dark');
provide('theme', theme);
</script>
子组件(Child.vue):
<template>
  <div :class="themeClass">
    <h2>子组件</h2>
    <GrandChild />
  </div>
</template>

<script setup>
import GrandChild from './GrandChild.vue';
import { inject, computed } from 'vue';

const theme = inject('theme');
const themeClass = computed(() => theme.value === 'dark' ? 'dark-theme' : 'light-theme');
</script>

<style scoped>
.dark-theme {
  background: #333;
  color: #fff;
}
.light-theme {
  background: #fff;
  color: #333;
}
</style>
孙组件(GrandChild.vue):
<template>
  <p>主题: {{ theme }}</p>
</template>

<script setup>
import { inject } from 'vue';

const theme = inject('theme');
</script>
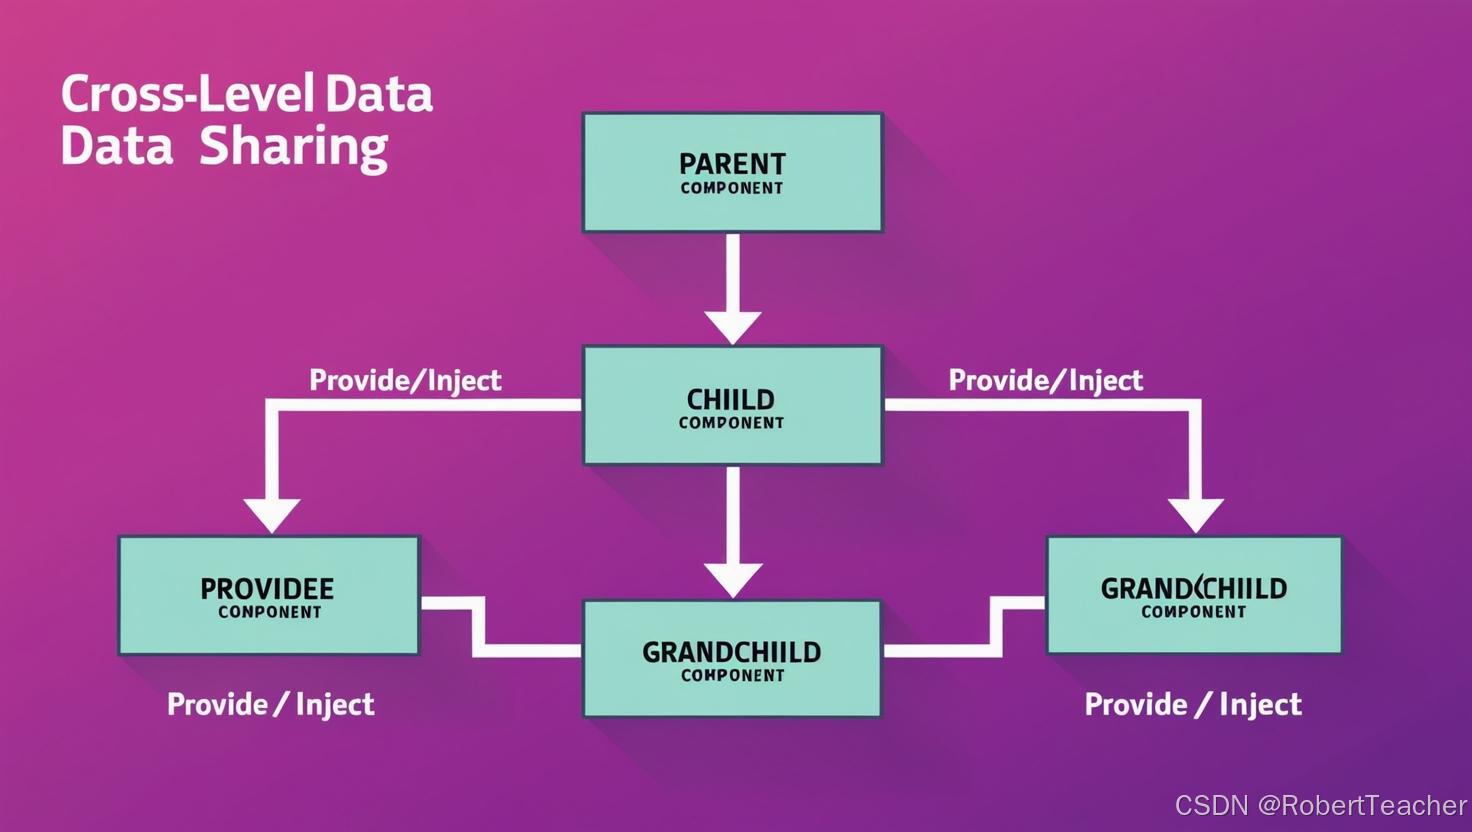
原理与优化
- provide/inject:适合跨多层组件传值,避免逐级 props。
- 响应式:通过 ref 确保数据变化传播到所有注入点。
- 场景:常用于全局配置(如主题、权限)。
图示:provide/inject 数据流
三、常见问题与解决方案
- Props 不响应式?
- 确保父组件数据使用 ref 或 reactive,避免直接传递普通对象。
- 事件未触发?
- 检查 defineEmits 是否正确声明事件名,父组件监听是否匹配。
- Inject 失败?
- 确认 provide 在祖先组件中定义,且键名一致。
图示:常见问题排查流程

四、性能优化建议
- Props 精简:避免传递过大数据对象,尽量传递必要字段。
- 事件解绑:动态组件销毁时移除监听器(如 onUnmounted)。
- Provide 缓存:对于静态数据,使用 readonly 防止意外修改。
五、总结
Vue 3 的父子组件传值通过 props、自定义事件 和 provide/inject 实现了灵活的数据流动:
- props:简单直接,适合单向数据传递。
- emit:轻量高效,适合子组件通知父组件。
- provide/inject:跨层级共享,适合复杂场景。
结合实战案例,我们展示了如何在实际项目中应用这些技术。希望本文能为你的 Vue 3 开发提供实用参考。欢迎在评论区分享你的经验或疑问!


 2万+
2万+

 被折叠的 条评论
为什么被折叠?
被折叠的 条评论
为什么被折叠?
 到【灌水乐园】发言


