


 本文详细介绍了如何将Swagger2与SpringBoot进行整合,包括添加Maven依赖、配置SwaggerConfig、编写API接口,以及处理SpringBoot应用启动后的访问和Security配置,确保Swagger2文档在Spring Security环境下正常工作。
文章目录
一、学习资料
二、pom.xml 添加 Maven 依赖
<!-- Swagger 自动化接口测试工具-->
<dependency>
        <groupId>io.springfox</groupId>
       <artifactId>springfox-swagger2</artifactId>
       <version>2.8.0</version>
</dependency>
<dependency>
       <groupId>io.springfox</groupId>
       <artifactId>springfox-swagger-ui</artifactId>
       <version>2.8.0</version>
</dependency>
三、创建配置类SwaggerConfig
@Configuration
@EnableSwagger2 //启用Swagger2
public class SwaggerConfig {
@Bean
public Docket api() {
return new Docket(DocumentationType.SWAGGER_2)
.apiInfo(apiEndPointsInfo()) //自定义信息
.select() // 选择那些路径和api会生成document
.apis(RequestHandlerSelectors.basePackage("com.example.music.controller"))//api接口包扫描路径
.paths(PathSelectors.regex("/.*")) // 可以根据url路径设置哪些请求加入文档,忽略哪些请求(对根下所有路径进行)
.apis(RequestHandlerSelectors.any())// 对所有api进行监控
.paths(Predicates.not(PathSelectors.regex("/error.*")))//不显示错误的接口地址
.build();
}
private ApiInfo apiEndPointsInfo() {
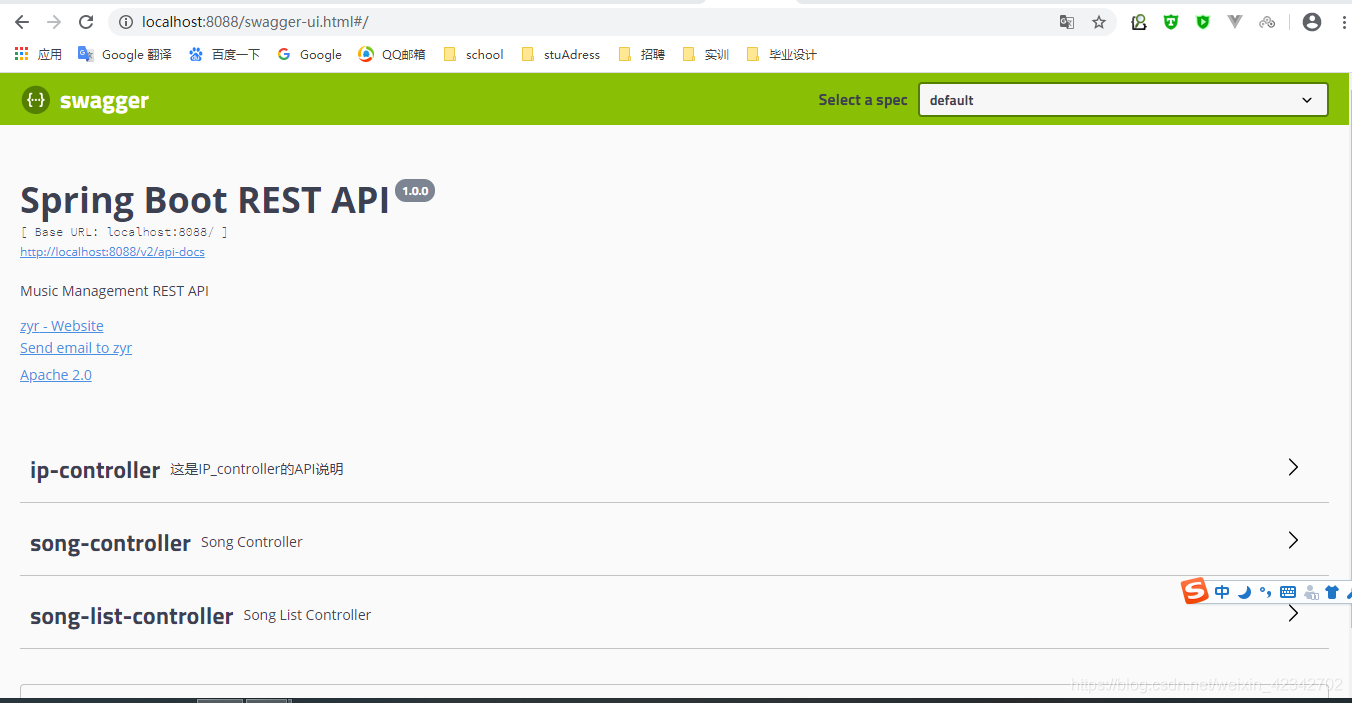
return new ApiInfoBuilder().title("Spring Boot REST API") //标题
.description("Music Management REST API") //描述
.contact(new Contact("zyr", "https://github.com/ZhengYongrong", "994509352@qq.com"))
.license("Apache 2.0")
.licenseUrl("http://www.apache.org/licenses/LICENSE-2.0.html")
.version("1.0.0")
.build();
}
}
四、API 接口编写
@Api(description = "这是IP_controller的API说明")
@RestController
public class IpController {

    @Autowired
    IpUtils ipUtils;
    @AccessLimit(seconds = 5, maxCount = 20, needLogin = true)
    @GetMapping("/IP")
    @ApiOperation(value = "IP访问",notes ="naotes",produces="application/json")
    public String getIP(HttpServletRequest httpServletRequest){
        if(ipUtils.redisIP(httpServletRequest)){
            return "访问正常";
        }else {
            return "拒绝访问,防止DOSS攻击!";
        }
    }
}
五、启动 SpringBoot 应用
SpringBoot 启动成功后,访问 http://localhost:8080/swagger-ui.html
六、在拦截器中统一过滤掉所有文件
registry.addInterceptor(getInterfaceAuthCheckInterceptor()).addPathPatterns("/**")
//这个是为了swagger做的过滤
.excludePathPatterns("/**/*.css", "/**/*.js", "/**/*.png", "/**/*.jpg", "/**/*.jpeg", "/*.html", "/**/*.html","/swagger-resources/**")
七、在 Security 中的配置
Spring Boot 项目中如果集成了 Spring Security,在不做额外配置的情况下,Swagger2 文档会被拦截。解决方法是在 Security 的配置类中重写 configure 方法添加白名单即可:
@Override
public void configure ( WebSecurity web) throws Exception {
    web.ignoring()
      .antMatchers("/swagger-ui.html")
      .antMatchers("/v2/**")
      .antMatchers("/swagger-resources/**");
}


 被折叠的 条评论
为什么被折叠?
被折叠的 条评论
为什么被折叠?
 到【灌水乐园】发言


