


 本文介绍了如何在SpringBoot项目中集成ApacheCXF,包括添加依赖、配置WebService、创建接口和实现、以及使用Postman测试SOAP服务。展示了如何使用CXF创建支持多种协议的服务并配置线程池和日志拦截。
一、Apache CXF是什么?
Apache CXF 是一个开源的 Services 框架,CXF 帮助您利用 Frontend 编程 API 来构建和开发 Services ,像 JAX-WS 。这些 Services 可以支持多种协议,比如:SOAP、XML/HTTP、RESTful HTTP 或者 CORBA ,并且可以在多种传输协议上运行,比如:HTTP、JMS 或者 JBI,CXF 大大简化了 Services 的创建,同时它继承了 XFire 传统,一样可以天然地和 Spring 进行无缝集成。
二、SpringBoot集成CXF
1、POM依赖
<?xml version="1.0" encoding="UTF-8"?>
<project xmlns="http://maven.apache.org/POM/4.0.0"
         xmlns:xsi="http://www.w3.org/2001/XMLSchema-instance"
         xsi:schemaLocation="http://maven.apache.org/POM/4.0.0 http://maven.apache.org/xsd/maven-4.0.0.xsd">
    <modelVersion>4.0.0</modelVersion>

    <groupId>com.syx</groupId>
    <artifactId>cxf-learn</artifactId>
    <version>1.0-SNAPSHOT</version>
    <properties>
        <maven.compiler.source>8</maven.compiler.source>
        <maven.compiler.target>8</maven.compiler.target>
        <project.build.sourceEncoding>UTF-8</project.build.sourceEncoding>
        <cxf.version>3.2.4</cxf.version>
    </properties>

    <parent>
        <groupId>org.springframework.boot</groupId>
        <artifactId>spring-boot-starter-parent</artifactId>
        <version>2.4.4</version>
        <relativePath/> <!-- lookup parent from repository -->
    </parent>


    <dependencies>
    <dependency>
        <groupId>org.springframework.boot</groupId>
        <artifactId>spring-boot-starter</artifactId>
    </dependency>

        <dependency>
            <groupId>org.springframework.boot</groupId>
            <artifactId>spring-boot-starter-web</artifactId>
        </dependency>
        <!-- webService-->
        <dependency>
            <groupId>org.springframework.boot</groupId>
            <artifactId>spring-boot-starter-web-services</artifactId>
        </dependency>
        <dependency>
            <groupId>org.apache.cxf</groupId>
            <artifactId>cxf-spring-boot-starter-jaxws</artifactId>
            <version>3.2.4</version>
        </dependency>

        <dependency>
            <groupId>org.hibernate</groupId>
            <artifactId>hibernate-validator</artifactId>
            <version>5.4.1.Final</version>
        </dependency>
        <dependency>
            <groupId>org.apache.commons</groupId>
            <artifactId>commons-lang3</artifactId>
            <version>3.12.0</version>
        </dependency>
    </dependencies>

</project>
2、WebService配置
该配置用于发布WebService服务同时配置了业务线程池及服务的输入输出拦截器,用于监控服务交易情况。
package com.cxf.config;

import com.cxf.endpoint.Service;
import org.apache.commons.lang3.concurrent.BasicThreadFactory;
import org.apache.cxf.bus.spring.SpringBus;
import org.apache.cxf.interceptor.LoggingInInterceptor;
import org.apache.cxf.interceptor.LoggingOutInterceptor;
import org.apache.cxf.jaxws.EndpointImpl;
import org.springframework.beans.factory.annotation.Autowired;
import org.springframework.context.annotation.Bean;
import org.springframework.context.annotation.Configuration;

import javax.jws.WebService;
import javax.xml.ws.Endpoint;
import java.util.Collections;
import java.util.concurrent.LinkedBlockingQueue;
import java.util.concurrent.ThreadPoolExecutor;
import java.util.concurrent.TimeUnit;

/**
 * Author whh
 * Date 2023/12/07/ 22:39
 * <p></p>
 */
@Configuration
public class WebServiceConfig {

    @Autowired
    private SpringBus bus;

    @Autowired
    private Service service;
    @Bean
    public Endpoint endpoint() {
        EndpointImpl endpoint = new EndpointImpl(bus,service);
        endpoint.setInInterceptors(Collections.singletonList(new LoggingInInterceptor()));
        endpoint.setOutInterceptors(Collections.singletonList(new LoggingOutInterceptor()));

        //将serviceName作为线程池前缀
        WebService annotation = service.getClass().getAnnotation(WebService.class);
        String prefix = annotation.serviceName();
        ThreadPoolExecutor executor = new ThreadPoolExecutor(
                10,
                50,
                2L,
                TimeUnit.SECONDS,
                new LinkedBlockingQueue<>(),
                new BasicThreadFactory.Builder().namingPattern(prefix+"-thread-pool-%d").daemon(true).build(),
                new ThreadPoolExecutor.CallerRunsPolicy());

        //设置线程池
        endpoint.setExecutor(executor);
        endpoint.publish("/api");
        return endpoint;
    }
}
3、WebService接口
package com.cxf.endpoint;

import javax.jws.WebMethod;
import javax.jws.WebParam;
import javax.jws.WebService;

/**
 * Author whh
 * Date 2023/12/07/ 22:22
 * <p></p>
 */
@WebService(targetNamespace = "http://com.cxf.endpoint.Service")
public interface Service {
    @WebMethod
    String sayHello(@WebParam(name = "name")String name);
}
4、WebService接口实现类
package com.cxf.endpoint;

import org.springframework.stereotype.Component;

import javax.jws.WebService;

/**
 * Author whh
 * Date 2023/12/07/ 22:35
 * <p></p>
 */

@WebService(serviceName = "Service",
        targetNamespace = "http://com.cxf.endpoint.Service",//指定你想要的名称空间,通常使用使用包名反转
        endpointInterface = "com.cxf.endpoint.Service")
@Component
public class ServiceImpl implements Service {
    @Override
    public String sayHello(String name) {

        System.out.println(Thread.currentThread().getName());
        return "Hello,"+name;
    }
}
5、配置文件
server:
  servlet:
    context-path: /primal
  port: 8080


cxf:
  path: /cxf
6、启动类
package com.cxf;

import org.springframework.boot.SpringApplication;
import org.springframework.boot.autoconfigure.SpringBootApplication;

/**
 *
 * Author whh
 * Date 2023/12/07/ 21:36
 * <p></p>
 */
@SpringBootApplication
public class MainApp {

    public static void main(String[] args) {
        SpringApplication.run(MainApp.class);
    }

}
7、查看项目暴露的service列表
访问地址 http://localhost:8080/primal/cxf/
可以看到咱们这个项目中发布的一个service

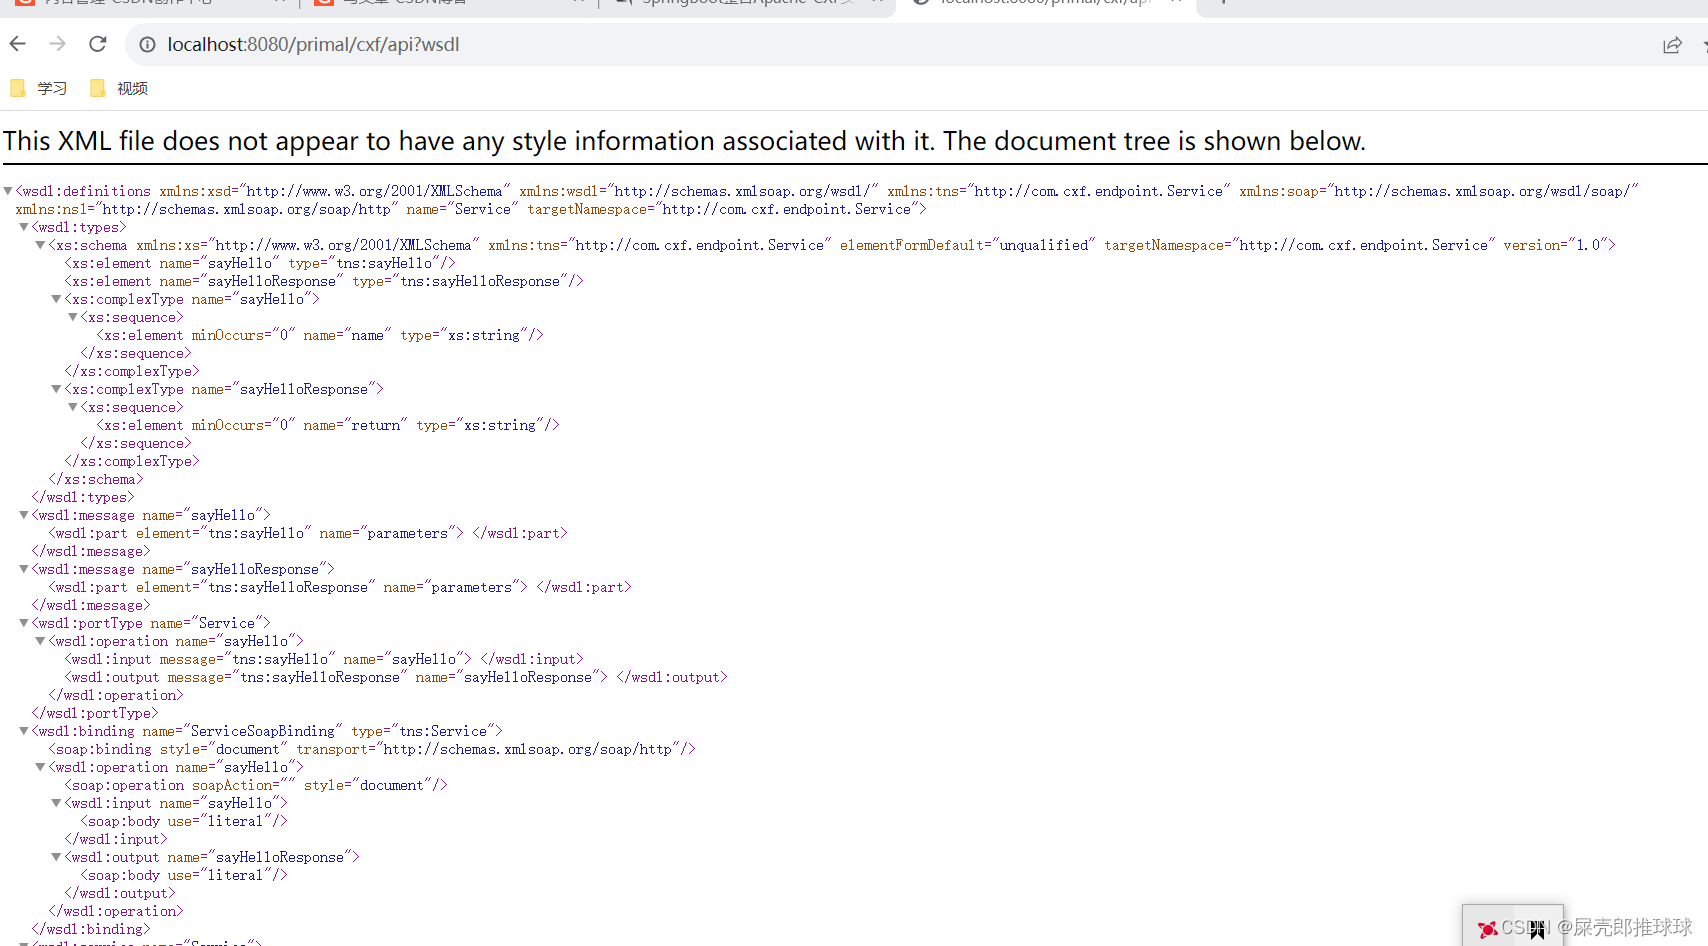
8、查看具体某个service的wsdl文档
访问地址 http://localhost:8080/primal/cxf/api?wsdl
即查看api对应的wsdl文档
9、测试
import com.cxf.endpoint.Service;
import org.apache.cxf.endpoint.Client;
import org.apache.cxf.frontend.ClientProxy;
import org.apache.cxf.jaxws.JaxWsProxyFactoryBean;
import org.apache.cxf.transport.http.HTTPConduit;
import org.apache.cxf.transports.http.configuration.HTTPClientPolicy;

/**
 * Author whh
 * Date 2023/12/07/ 22:58
 * <p></p>
 */
public class MainTest {


    public static void main(String[] args) {

        String address = "http://127.0.0.1:8080/primal/cxf/api/Service";
        // 代理工厂
        JaxWsProxyFactoryBean jaxWsProxyFactoryBean = new JaxWsProxyFactoryBean();
        // 设置代理地址
        jaxWsProxyFactoryBean.setAddress(address);
        // 设置接口类型
        jaxWsProxyFactoryBean.setServiceClass(Service.class);
        // 创建一个代理接口实现
        Service xmlEndPoint = (Service) jaxWsProxyFactoryBean.create();

        Client proxy = ClientProxy.getClient(xmlEndPoint);
        HTTPConduit conduit = (HTTPConduit) proxy.getConduit();
        HTTPClientPolicy policy = new HTTPClientPolicy();
        policy.setConnectionTimeout(5000);
        policy.setReceiveTimeout(5000);
        conduit.setClient(policy);

        String service = xmlEndPoint.sayHello("123");

        System.out.println(service);

    }
}
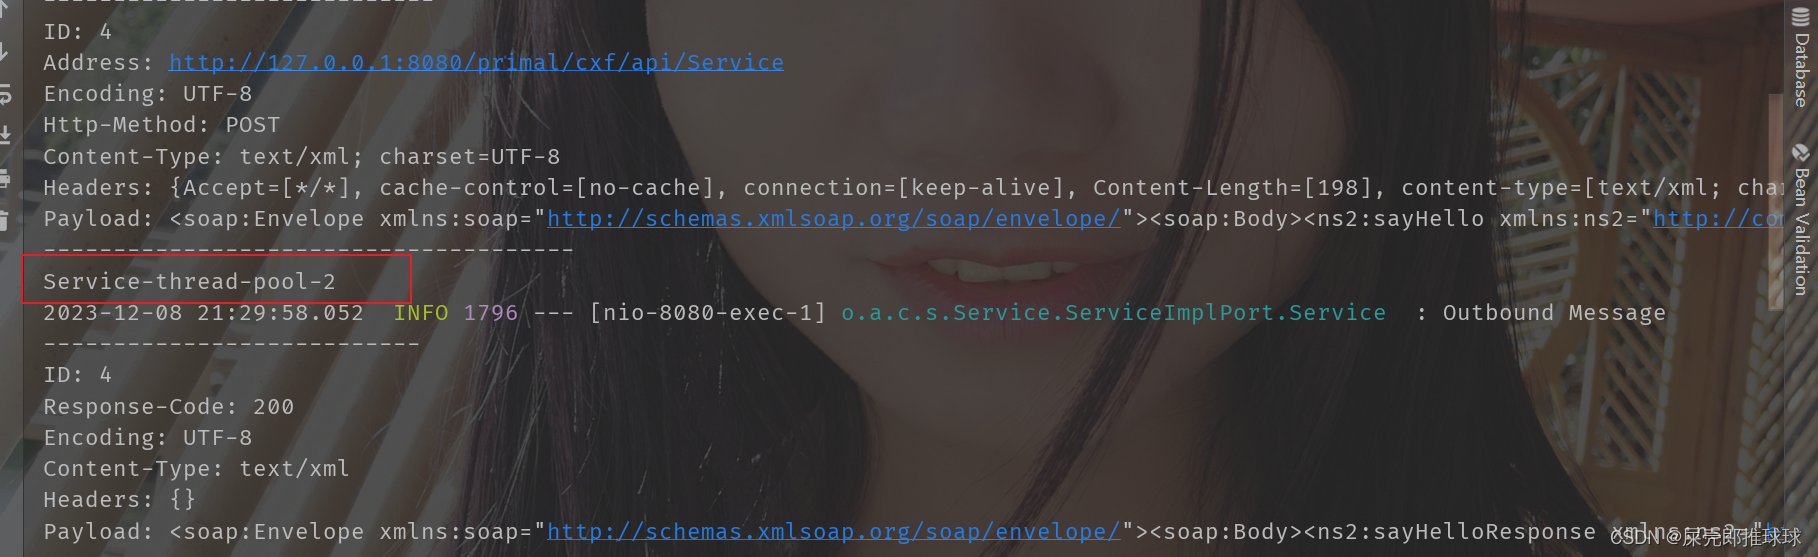
从上图中的日志可看出在处理业务逻辑的时候使用的是我们配置的业务线程池。
10、postman发送soap报文测试
请求报文:
<soap:Envelope xmlns:soap="http://schemas.xmlsoap.org/soap/envelope/">
     <soap:Body>
          <ns2:sayHello xmlns:ns2="http://com.cxf.endpoint.Service">
               <name>123</name>
          </ns2:sayHello>
     </soap:Body>
</soap:Envelope>


 7516
7516

 被折叠的 条评论
为什么被折叠?
被折叠的 条评论
为什么被折叠?
 到【灌水乐园】发言


