


pytorch基础学习(一)
0. 安装
操作系统:windows10 PC
python: 3.7
仅供学习,在自己的PC机上安装pytorch。需要预先安装好python,不再赘述。
修改pip源
win+r 打开 %HOMEPATH% 文件夹,在该文件夹下pip文件夹,在pip文件夹下新建pip.ini文件,即可修改pip源,内容如下:
timeout = 6000
index-url = http://mirrors.aliyun.com/pypi/simple/
trusted-host = mirrors.aliyun.com
安装pytorch
打开 官网 ,往下拉即可看到安装方法,根据自己的环境选择即可。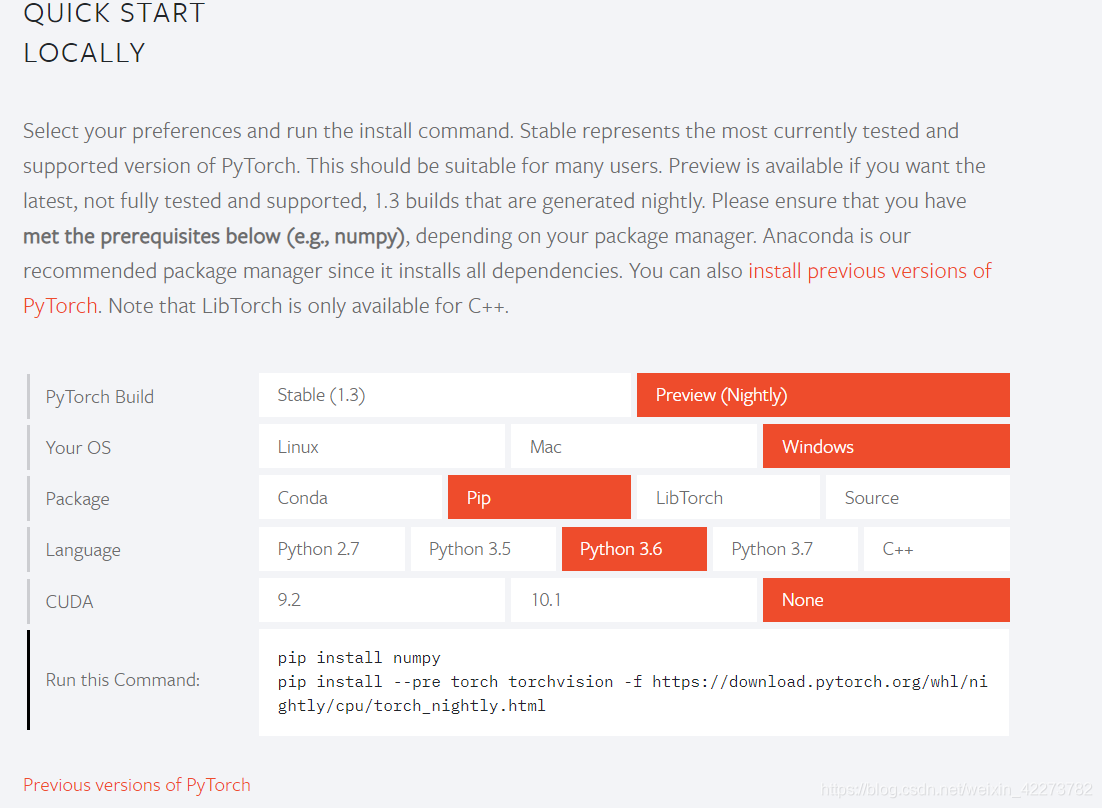
首先需要安装前置依赖:
pip install numpy
pip install --pre torch torchvision -f https://download.pytorch.org/whl/nightly/cpu/torch_nightly.html
再安装pytorch:
pip3 install torch==1.3.1+cpu torchvision==0.4.2+cpu -f https://download.pytorch.org/whl/torch_stable.html
1. 张量的创建和操作
创建未初始化矩阵,并初始化
a = torch.empty(3, 3)      # 创建一个3*3的未初始化矩阵
nn.init.zeros_(a)          # 初始化a为0
nn.init.constant_(a, 3)    # 初始化a为3
nn.init.uniform_(a)        # 初始化为uniform分布
随机数矩阵
a = torch.rand(3, 3)        # 均匀分布。3*3矩阵, [0, 1)的随机数
b = torch.rand_like(a)      # 创建和 a 的size一样的随机数矩阵
torch.randint(1, 9, (3, 3))  # 3*3的整数矩阵(1-9之间的数值)
torch.randn(3, 3)		# 标准正态分布
torch.normal()		# 指定均值和标准差的正态分布
torch.linspace(start, end, steps=100, out=None)     # 返回一个1维张量,包含在区间start和end上均匀间隔的step个点
tensor类型和形状
a = torch.Tensor([1, 2, 3])
b = torch.eye(3, 4)
c = torch.ones(3, 3)
d = torch.zeros(5, 3, dtype=torch.long)
h, w = b.size()
print(b.view(2, 6))
print(torch.reshape(b, (2, 6)))
print(d.dtype == torch.int64)
tensor和numpy的相互转换
b = a.numpy()		# tensor转numpy

c = np.ones((3, 3))
d = torch.from_numpy(c) 	# numpy转tensor


 被折叠的 条评论
为什么被折叠?
被折叠的 条评论
为什么被折叠?
 到【灌水乐园】发言


