


 本文介绍了RN版本大于0.40.0时集成JPush的步骤。首先安装依赖,接着导入库,此步骤会自动添加JPush依赖库并开启推送功能。然后进行文件配置,在AppDelegate.h和AppDelegate.m文件中添加相关代码。最后还提及了js调用及其他参考链接。
一.安装依赖
RN版本大于0.40.0
$ npm install jpush-react-native --save
// jpush-react-native 1.4.4 版本以后需要同时安装 jcore-react-native
$ npm install jcore-react-native --save
link
$ react-native link jpush-react-native
$ react-native link jcore-react-native
二.导入库
link后可以在Xcode的库文件中看到已经添加的库
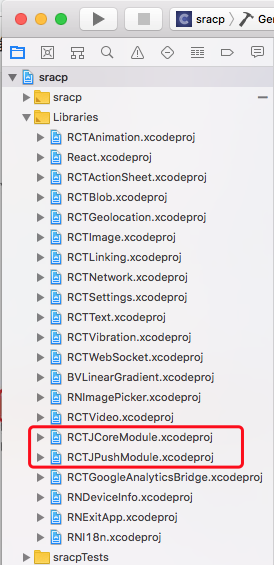
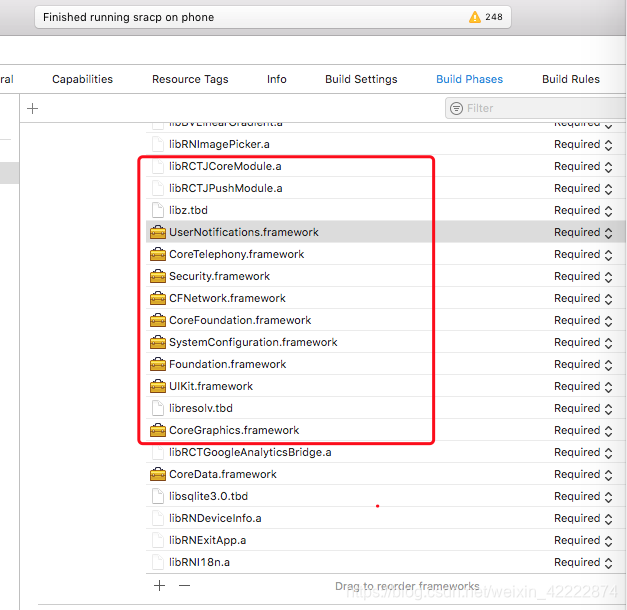
同时这个步骤还会自动把 JPush 所依赖的库自动添加到工程中,可以看到
TARGETS -> Build phases -> Link Binary With Libraries 多了几个系统库,如下图所示
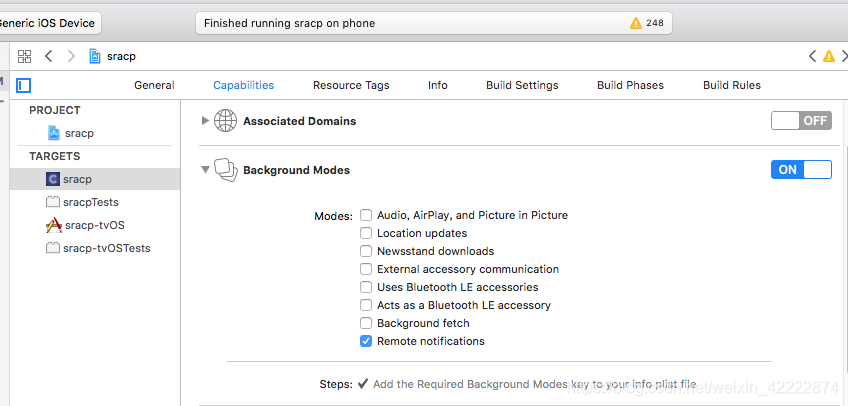
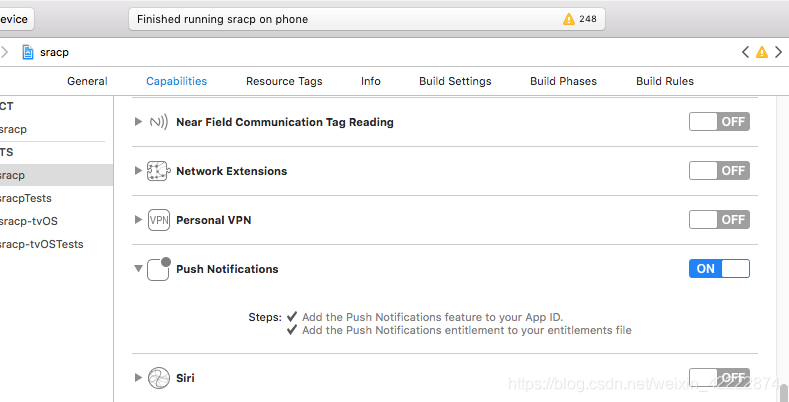
开启推送功能
三.文件配置
1.AppDelegate.h文件
#import <RCTJPushModule.h>
#ifdef NSFoundationVersionNumber_iOS_9_x_Max
#import <UserNotifications/UserNotifications.h>
#endif
static NSString *appKey = @"";//填写appkey

static NSString *channel = @"nil";//一般为nil

static BOOL isProduction =  true;//平时测试时为false ,生产时填写true
2.AppDelegate.m文件
导入
#import "AppDelegate.h"
#import "JPUSHService.h"
在 AppDelegate.m 的 didRegisterForRemoteNotificationsWithDeviceToken 方法中添加 [JPUSHService registerDeviceToken:deviceToken];
- (void)application:(UIApplication *)application didRegisterForRemoteNotificationsWithDeviceToken:(NSData *)deviceToken
{
  [JPUSHService registerDeviceToken:deviceToken];
}
为了在收到推送点击进入应用能够获取该条推送内容需要在 AppDelegate.m didReceiveRemoteNotification 方法里面添加 [[NSNotificationCenter defaultCenter] postNotificationName:kJPFDidReceiveRemoteNotification object:userInfo] 方法,注意:这里需要在两个方法里面加一个是 iOS7 以前的一个是 iOS7 即以后的,如果 AppDelegate.m 没有这个两个方法则直接复制这两个方法,在 iOS10 的设备则可以使用 JPush 提供的两个方法;如下所示
- (void)application:(UIApplication *)application didReceiveRemoteNotification:(NSDictionary *)userInfo
{// 取得 APNs 标准信息内容
  [[NSNotificationCenter defaultCenter] postNotificationName:kJPFDidReceiveRemoteNotification object:userInfo];
}
//iOS 7 Remote Notification
- (void)application:(UIApplication *)application didReceiveLocalNotification:(UILocalNotification *)notification
{
  [[NSNotificationCenter defaultCenter] postNotificationName:kJPFDidReceiveRemoteNotification object: notification.userInfo];
  }
  // iOS 10 Support
  - (void)jpushNotificationCenter:(UNUserNotificationCenter *)center willPresentNotification:(UNNotification *)notification withCompletionHandler:(void (^)(NSInteger))completionHandler
{
  NSDictionary * userInfo = notification.request.content.userInfo;
  if ([notification.request.trigger isKindOfClass:[UNPushNotificationTrigger class]]) {
    [JPUSHService handleRemoteNotification:userInfo];
//    NSLog(@"推送消息%@",userInfo);
    //    userInfo[@"aps"][@"badge"](NSInteger);
//    if (userInfo[@"groupId"]) {   }
 // 可以在这里设置自定义监听
      例如  [[NotificationManager alloc] didReceiveNotification:userInfo withKey:DidReceiveProfilePage];


    [[NSNotificationCenter defaultCenter] postNotificationName:kJPFDidReceiveRemoteNotification object:userInfo];
  }

  completionHandler(UNNotificationPresentationOptionAlert);
}
}
// iOS 10 Support
- (void)jpushNotificationCenter:(UNUserNotificationCenter *)center didReceiveNotificationResponse:(UNNotificationResponse *)response withCompletionHandler:(void (^)())completionHandler {
// Required
NSDictionary * userInfo = response.notification.request.content.userInfo;
if([response.notification.request.trigger isKindOfClass:[UNPushNotificationTrigger class]]) {
[JPUSHService handleRemoteNotification:userInfo];
//可以在在这里设置自定义监听
例如:[[NotificationManager alloc] didReceiveNotification:userInfo withKey:DidReceiveChatRoom];

[[NSNotificationCenter defaultCenter] postNotificationName:kJPFDidReceiveRemoteNotification object:userInfo];
}
completionHandler();  // 系统要求执行这个方法
}
didFinishLaunchingWithOptions方法内加入
- (BOOL)application:(UIApplication *)application didFinishLaunchingWithOptions:(NSDictionary *)launchOptions
{
  if ([[UIDevice currentDevice].systemVersion floatValue] >= 10.0) {
    JPUSHRegisterEntity * entity = [[JPUSHRegisterEntity alloc] init];
    entity.types = UNAuthorizationOptionAlert|UNAuthorizationOptionBadge|UNAuthorizationOptionSound;
    [JPUSHService registerForRemoteNotificationConfig:entity delegate:self];
  }else if ([[UIDevice currentDevice].systemVersion floatValue] >= 8.0) {
    //可以添加自定义categories
    [JPUSHService registerForRemoteNotificationTypes:(UNAuthorizationOptionBadge | UNAuthorizationOptionSound | UNAuthorizationOptionAlert)
                                          categories:nil];
  }else {
    //categories 必须为nil
    [JPUSHService registerForRemoteNotificationTypes:(UNAuthorizationOptionBadge | UNAuthorizationOptionSound | UNAuthorizationOptionAlert)
                                          categories:nil];
  }

  [JPUSHService setupWithOption:launchOptions appKey:appKey
                        channel:nil apsForProduction:isProduction];
  //其实这里是引用AppDelegate.h文件设置的值
  NSURL *jsCodeLocation;
  }
四.js调用
import {NativeModules,NativeAppEventEmitter} from 'react-native';
NativeAppEventEmitter.addListener(
     'ReceiveNotification',
     (message) => {
                //下面就是发送过来的内容,可以用stringfy打印发来的消息
               console.log("content: " + JSON.stringify(message));
}
//NativeAppEventEmitter不能添加监听就用以下方法
var nativeBridge = NativeModules.NotificationManager;
const NativeModule = new NativeEventEmitter(nativeBridge);
NativeModule.addListener(
     'ReceiveNotification',
     (message) => {
                //下面就是发送过来的内容,可以用stringfy打印发来的消息
               console.log("content: " + JSON.stringify(message));
}
NativeModule.addListener(
     'DidReceiveChatRoom',
     (message) => {
                可以根据if
                跳转指定页面
                this.props.navigation.navigate('PublicChatRoom')
}
其他参考
链接:link


 8053
8053

 被折叠的 条评论
为什么被折叠?
被折叠的 条评论
为什么被折叠?
 到【灌水乐园】发言


