


 本文详细介绍如何在IDEA中创建SpringMvc-maven项目,包括配置Maven信息、添加Spring依赖、配置web.xml和applicationContext.xml文件,以及测试类的编写。
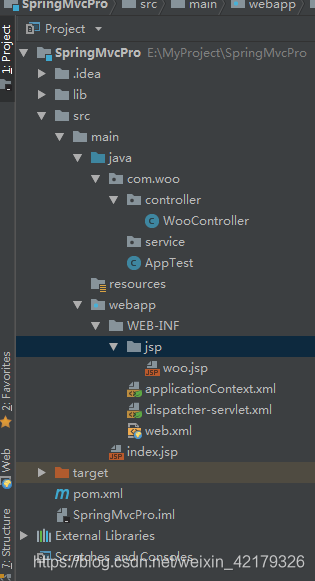
idea新建Spring Mvc-maven 项目
首先附上目录结构图:
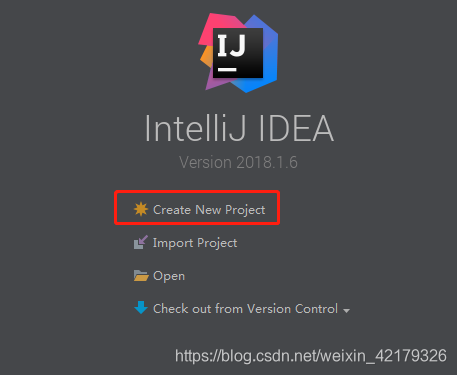
1、create new project
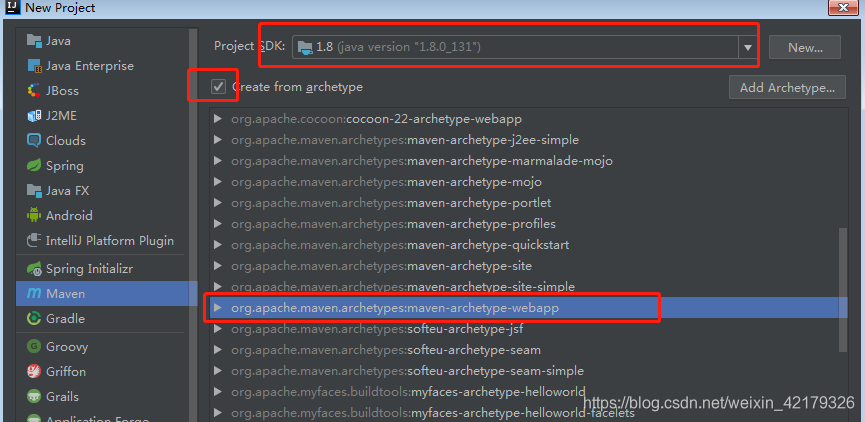
2、maven org.apache.maven.archetypes:maven-archetype-webapp
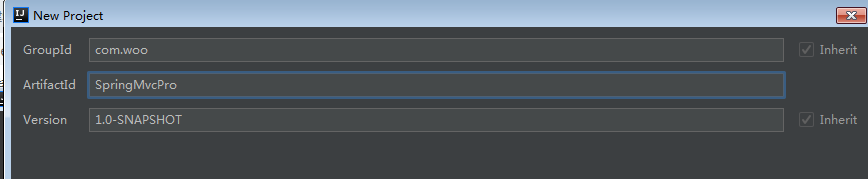
3、编写GroupId,ArtifactId,Version (1.0-SNAPSHOT),自己随意起名
4、配置maven信息
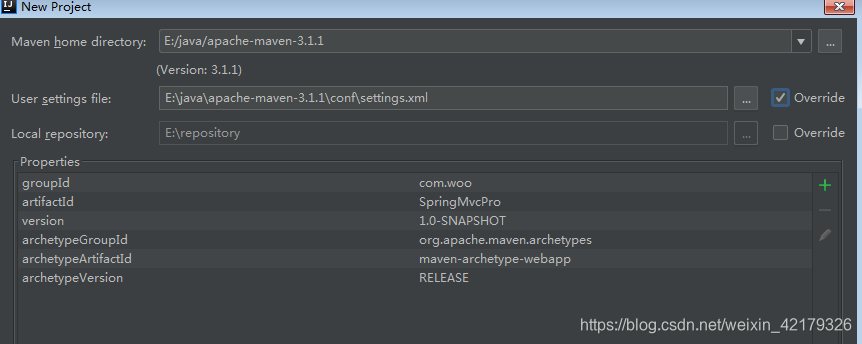
5、选择项目路径,完成

6、右键工程名,选择add framework support,选择spring mvc,然后编译器就会开始构建spring mvc的环境了。
7、在pom.xml中添加 Spring 依赖
<!--spring依赖-->
    <dependency>
      <groupId>org.springframework</groupId>
      <artifactId>spring-core</artifactId>
      <version>4.1.3.RELEASE</version>
    </dependency>
    <dependency>
      <groupId>org.springframework</groupId>
      <artifactId>spring-context</artifactId>
      <version>4.1.3.RELEASE</version>
    </dependency>
    <dependency>
      <groupId>org.springframework</groupId>
      <artifactId>spring-webmvc</artifactId>
      <version>4.1.3.RELEASE</version>
    </dependency>

    <dependency>
      <groupId>org.springframework</groupId>
      <artifactId>spring-web</artifactId>
      <version>4.1.3.RELEASE</version>
    </dependency>
    <dependency>
      <groupId>org.springframework</groupId>
      <artifactId>spring-orm</artifactId>
      <version>3.2.4.RELEASE</version>
    </dependency>
    <dependency>
      <groupId>org.springframework</groupId>
      <artifactId>spring-beans</artifactId>
      <version>4.1.3.RELEASE</version>
    </dependency>
    <dependency>
      <groupId>org.springframework</groupId>
      <artifactId>spring-aop</artifactId>
      <version>4.1.3.RELEASE</version>
    </dependency>
8、配置web.xml文件
<!DOCTYPE web-app PUBLIC
 "-//Sun Microsystems, Inc.//DTD Web Application 2.3//EN"
 "http://java.sun.com/dtd/web-app_2_3.dtd" >

<web-app  xmlns="http://xmlns.jcp.org/xml/ns/javaee"
          xmlns:xsi="http://www.w3.org/2001/XMLSchema-instance"
          xsi:schemaLocation="http://xmlns.jcp.org/xml/ns/javaee http://xmlns.jcp.org/xml/ns/javaee/web-app_3_1.xsd"
          version="3.1">
  <display-name>Archetype Created Web Application</display-name>

    <!-- 在Spring框架中是如何解决从页面传来的字符串的编码问题的呢?
  下面我们来看看Spring框架给我们提供过滤器CharacterEncodingFilter
   这个过滤器就是针对于每次浏览器请求进行过滤的,然后再其之上添加了父类没有的功能即处理字符编码。
    其中encoding用来设置编码格式,forceEncoding用来设置是否理会 request.getCharacterEncoding()方法,设置为true则强制覆盖之前的编码格式。-->
    <filter>
        <filter-name>encodingFilter</filter-name>
        <filter-class>org.springframework.web.filter.CharacterEncodingFilter</filter-class>
        <init-param>
            <param-name>encoding</param-name>
            <param-value>UTF-8</param-value>
        </init-param>
        <init-param>
            <param-name>forceEncoding</param-name>
            <param-value>true</param-value>
        </init-param>
    </filter>
    <filter-mapping>
        <filter-name>encodingFilter</filter-name>
        <url-pattern>/*</url-pattern>
    </filter-mapping>
    <!--2、部署applicationContext的xml文件-->
    <!--如果在web.xml中不写任何参数配置信息,默认的路径是"/WEB-INF/applicationContext.xml,
    在WEB-INF目录下创建的xml文件的名称必须是applicationContext.xml。
    如果是要自定义文件名可以在web.xml里加入contextConfigLocation这个context参数:
    在<param-value> </param-value>里指定相应的xml文件名,如果有多个xml文件,可以写在一起并以“,”号分隔。
    也可以这样applicationContext-*.xml采用通配符,比如这那个目录下有applicationContext-ibatis-base.xml,
    applicationContext-action.xml,applicationContext-ibatis-dao.xml等文件,都会一同被载入。
    在ContextLoaderListener中关联了ContextLoader这个类,所以整个加载配置过程由ContextLoader来完成。-->
    <context-param>
        <param-name>contextConfigLocation</param-name>
        <param-value>/WEB-INF/applicationContext.xml</param-value>
        <!--<param-value>classpath:spring/spring-*.xml</param-value>-->
    </context-param>
    <!-- 项目中使用Spring 时,applicationContext.xml配置文件中并没有BeanFactory,要想在业务层中的class 文件中直接引用Spring容器管理的bean可通过以下方式-->
    <!--1、在web.xml配置监听器ContextLoaderListener-->
    <!--ContextLoaderListener的作用就是启动Web容器时,自动装配ApplicationContext的配置信息。因为它实现了ServletContextListener这个接口,在web.xml配置这个监听器,启动容器时,就会默认执行它实现的方法。
    在ContextLoaderListener中关联了ContextLoader这个类,所以整个加载配置过程由ContextLoader来完成。
    它的API说明
    第一段说明ContextLoader可以由 ContextLoaderListener和ContextLoaderServlet生成。
    如果查看ContextLoaderServlet的API,可以看到它也关联了ContextLoader这个类而且它实现了HttpServlet这个接口
    第二段,ContextLoader创建的是 XmlWebApplicationContext这样一个类,它实现的接口是WebApplicationContext->ConfigurableWebApplicationContext->ApplicationContext->
    BeanFactory这样一来spring中的所有bean都由这个类来创建
     IUploaddatafileManager uploadmanager = (IUploaddatafileManager)    ContextLoaderListener.getCurrentWebApplicationContext().getBean("uploadManager");
     -->
    <listener>
        <listener-class>org.springframework.web.context.ContextLoaderListener</listener-class>
    </listener>
    <!--配置DispatcherServlet-->
    <servlet>
        <servlet-name>dispatcher</servlet-name>
        <servlet-class>org.springframework.web.servlet.DispatcherServlet</servlet-class>
        <!--<init-param>-->
        <!--<param-name>contextConfigLocation</param-name>-->
        <!--其中<param-value>**.xml</param-value> 这里可以使用多种写法-->
        <!--1、不写,使用默认值:/WEB-INF/<servlet-name>-servlet.xml-->
        <!--2、<param-value>/WEB-INF/classes/dispatcher-servlet.xml</param-value>-->
        <!--3、<param-value>classpath*:dispatcher-servlet.xml</param-value>-->
        <!--4、多个值用逗号分隔-->
        <!--<param-value>classpath:spring/dispatcher-servlet.xml</param-value>-->
        <!--</init-param>-->
        <load-on-startup>1</load-on-startup>
    </servlet>
    <!--servlet拦截配置,拦截以后缀“form”结束的请求-->
    <servlet-mapping>
        <servlet-name>dispatcher</servlet-name>
        <url-pattern>/</url-pattern>
    </servlet-mapping>
</web-app>
9、配置applicationContext.xml文件
<?xml version="1.0" encoding="UTF-8"?>
<beans xmlns="http://www.springframework.org/schema/beans"
       xmlns:xsi="http://www.w3.org/2001/XMLSchema-instance"
       xmlns:p="http://www.springframework.org/schema/p"
       xmlns:tx="http://www.springframework.org/schema/tx"
       xmlns:context="http://www.springframework.org/schema/context"
       xmlns:mvc="http://www.springframework.org/schema/mvc"
       xsi:schemaLocation="http://www.springframework.org/schema/beans
        http://www.springframework.org/schema/beans/spring-beans.xsd
        http://www.springframework.org/schema/tx
        http://www.springframework.org/schema/tx/spring-tx-4.0.xsd
        http://www.springframework.org/schema/context
        http://www.springframework.org/schema/context/spring-context-4.0.xsd
        http://www.springframework.org/schema/mvc
        http://www.springframework.org/schema/mvc/spring-mvc-4.0.xsd">

    <!--使用注解驱动 开启注解-->
    <!--使DispatchServlet开启基于annotation的HandlerMapping-->
    <mvc:annotation-driven/>
    <!--指明 controller 所在包,并扫描其中的注解-->
    <context:component-scan base-package="com.woo.*"/>
    <!--激活@Required、@Autowired、JSR 250's、@PostConstruct等标注-->
    <context:annotation-config/>
    <!-- 静态资源(js、image等)的访问 -->
    <mvc:default-servlet-handler/>
    <!-- 定义视图解析器 对模型视图名称的解析,即在模型视图名称添加前后缀:/WEB-INF/jsp/文件夹下的jsp文件 -->
    <bean id="viewResolver" class="org.springframework.web.servlet.view.InternalResourceViewResolver">
        <property name="prefix">
            <value>/WEB-INF/jsp/</value>
        </property>
        <property name="suffix">
            <value>.jsp</value>
        </property>
    </bean>


</beans>
10、配置dispatcher-servlet.xml文件
<?xml version="1.0" encoding="UTF-8" ?>
<beans xmlns="http://www.springframework.org/schema/beans"
       xmlns:xsi="http://www.w3.org/2001/XMLSchema-instance"
       xmlns:context="http://www.springframework.org/schema/context"
       xmlns:mvc="http://www.springframework.org/schema/mvc" xmlns:p="http://www.springframework.org/schema/p"
       xsi:schemaLocation="http://www.springframework.org/schema/beans
        http://www.springframework.org/schema/beans/spring-beans-4.1.xsd
        http://www.springframework.org/schema/context
        http://www.springframework.org/schema/context/spring-context-4.1.xsd
        http://www.springframework.org/schema/mvc
        http://www.springframework.org/schema/mvc/spring-mvc-4.1.xsd">


    <!--
    <tx:annotation-driven transaction-manager="transactionManager"/>
    -->
</beans>
11、配置tomcat服务器
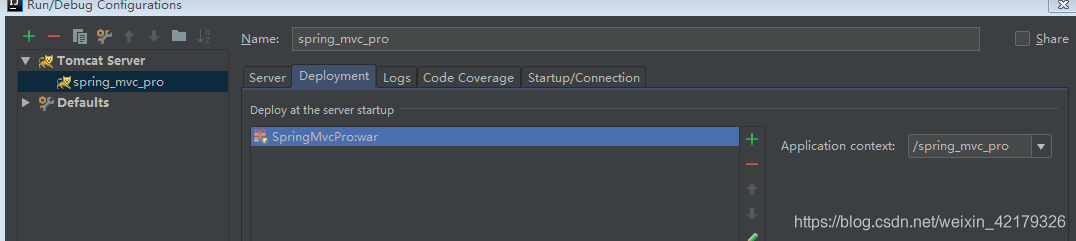
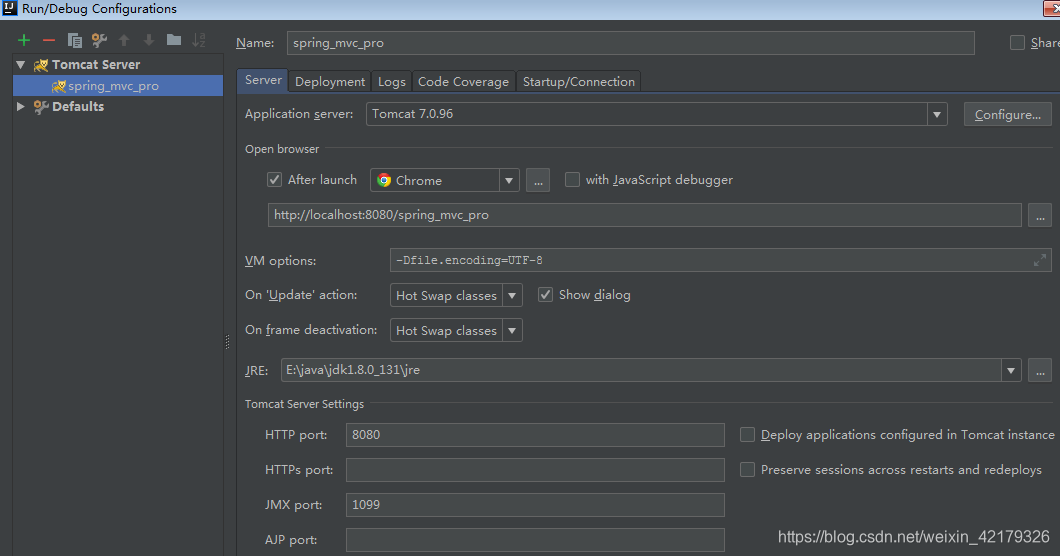
12、编写测试类,
package com.woo.controller;

import org.springframework.stereotype.Controller;
import org.springframework.web.bind.annotation.RequestMapping;
import org.springframework.web.bind.annotation.RequestMethod;
import org.springframework.web.bind.annotation.ResponseBody;
import org.springframework.web.servlet.ModelAndView;

@Controller
public class WooController {
    @RequestMapping(value = "/woo",method = RequestMethod.GET)
    public String wooTest(){
        System.out.println("wooHelloWord-----");
        return "woo";
    }

    @RequestMapping(value = "/woo1")
    public ModelAndView wooTest1(){
        System.out.println("wooHelloWord-----1");
        ModelAndView view = new ModelAndView();
        view.setViewName("woo");
        return view;
    }
    @RequestMapping(value = "/woo2")
    @ResponseBody
    public String wooTest2(){
        System.out.println("wooHelloWord-----2");
        return "woo2";
    }
}
13、测试
(或者 maven - package,生成war包,放到tomcat-webapp路径下,启动tomcat,也可访问)


 8082
8082

 被折叠的 条评论
为什么被折叠?
被折叠的 条评论
为什么被折叠?
 到【灌水乐园】发言


