


目前,在优快云包含个人博客中,关于mongodb集群部署是非常多的,这篇主要是针对于多台机器,部署mongodb副本集,并通过Java代码进行验证,其中,Java代码使用主流的SpringBoot架构。
首先,我们进行mongodb的下载,下载地址为:
https://download.youkuaiyun.com/download/weixin_41986096/11539922
可以将mongodb下载后放在任意一个文件夹中,进行解压。我们是放在了
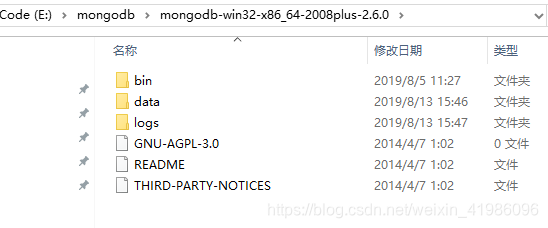
本文主要采用mongodb在windows中实现副本集集群,由三个节点组成的 副本集 为网络故障或是其他的系统故障提供了足够的冗余。该副本集也有足够的分布式读操作的能力。副本集应该保持奇数个节点,这也就保证了 选举 可以正常的进行
在生产环境的部署中,我们应该尽可能将副本集中得节点置于不同的机器上。当使用虚拟机的时候,我们应该将 mongod实例置于拥有冗余电源和冗余网络的机器上。我们应该将每个节点部署在独立的机器上,并使用标准的MongoDB端口 27017 。使用 bind_ip 参数来限制访问MongoDB的应用程序的地址。
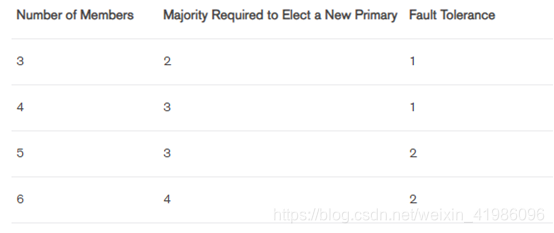
副本集的容错性是指可以变为不可用,并且在该集中仍保留足够的成员以选择主要成员的成员数。换言之,这是一个群体中成员的数量与选举初选所需的多数投票成员之间的差异。没有主副本集,副本集就不能接受写操作。容错是副本集大小的一个影响,但这种关系不是直接的。见下表:
目录结构的准备:
准备三台机器为windows服务器。首先将mongodb拷贝到每一个服务器中,我们是拷贝到了E:\mongodb\ 下进行解压文件
启动mongodb看是否能正常启动,可使用mongodb 工具进行连接测试
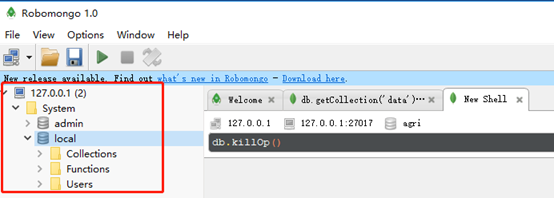
工具下载地址:
https://download.youkuaiyun.com/download/weixin_41986096/11540214
这里将三台服务器分别定义为A B C 服务器,方便阐述。
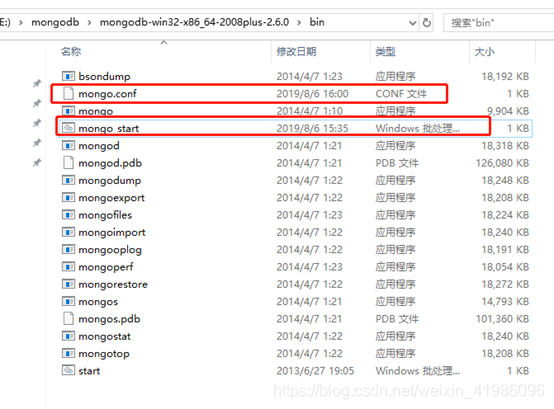
在A B C 服务器的E:\mongodb\mongodb-win32-x86_64-2008plus-2.6.0\bin中分别编写mongodb的启动脚本,如果已经有启动脚本,建议删除。
脚本如下所示:
mongod --port 27017 --dbpath ..\data\agri\ --logpath ..\logs\mongo.log --logappend --replSet mySet| port | Mongodb的监听端口 |
| dbpath | 数据文件存储路径 |
| logpath | 系统日志存放路径 |
| replSet | 副本集名称,我用的是mySet,其他的节点 |
| logappend | 日志的写入模式是追加,不是默认的覆盖模式 |
分别在E:\mongodb\mongodb-win32-x86_64-2008plus-2.6.0\data\下建立文件夹agri,名称可以随便起,只要和脚本配置文件路径保持一致就行。
注意:dbpath 在配置前,必须保证是空文件夹
以上脚本配置可以通过bat文件来完成,也可以建立配置文件来完成,具体配置如下:
建立mongo.conf文件,进行如下配置:
#数据库地址

dbpath = E:\mongodb\mongodb-win32-x86_64-2008plus-2.6.0\data\agri

#数据库端口号

port = 27017

#数据库所在服务器

bind_ip = 192.168.191.228

#日志地址

logpath = E:\mongodb\mongodb-win32-x86_64-2008plus-2.6.0\logs\mongo.log

#日志追加

logappend = true

#副本集名称

replSet = mySet
启动文件mongo_start.bat文件配置如下:
mongod --config mongo.conf
如上步骤,在A B C 三台服务器上分别建立启动脚本和配置文件
连接Mongod实例:
分别启动A B C 三台服务器,并在A 服务器中找到E:\mongodb\mongodb-win32-x86_64-2008plus-2.6.0\bin位置,开启cmd窗口,执行mongod命令设置对应的副本集配置:
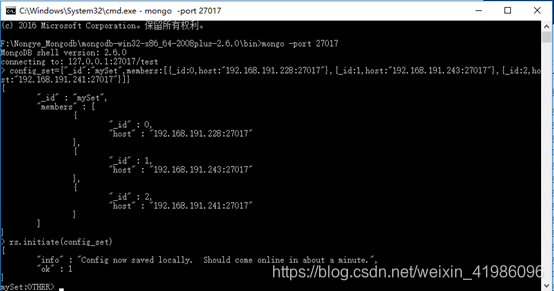
首先输入mongo -port 27017 连接mongodb库
连接成功输入副本集配置信息:
config_set={"_id":"mySet",members:[{_id:0,host:"192.168.191.228:27017"},{_id:1,host:"192.168.191.243:27017"},{_id:2,host:"192.168.191.241:27017"}]}然后执行rs.initiate(config_set)
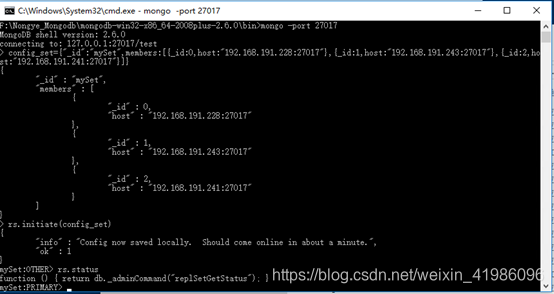
测试连接A B C 服务器三个库:

能正常连接
SpringBoot 进行代码测试:
首先我们建立一个SpringBoot的项目,在pom中引入需要的jar包:
<dependency>
   <groupId>org.springframework.boot</groupId>
   <artifactId>spring-boot-starter-data-mongodb</artifactId>
</dependency>
<dependency>
   <groupId>org.projectlombok</groupId>
   <artifactId>lombok</artifactId>
</dependency>
在application.properties中加入相关配置信息
#mongodb

# 单机模式 mongodb://name:pass@ip:port/database

# 集群模式 mongodb://user:pwd@ip1:port1,ip2:port2/database

#spring.data.mongodb.uri=mongodb://127.0.0.1:27017/agri

spring.data.mongodb.uri=mongodb://192.168.191.228:27017,192.168.191.243:27017,192.168.191.241:27017/agri
建立需要存储文本信息的实体
package com.herbert.accident.entity;

import lombok.AllArgsConstructor;
import lombok.Builder;
import lombok.Data;
import lombok.NoArgsConstructor;
import org.springframework.data.annotation.CreatedDate;
import org.springframework.data.annotation.Id;
import org.springframework.data.mongodb.core.index.Indexed;
import org.springframework.data.mongodb.core.mapping.Document;
import org.springframework.data.mongodb.core.mapping.Field;
import java.io.Serializable;
import java.util.Date;

@Document(collection="data")//集合名

@Data

@Builder

@NoArgsConstructor

@AllArgsConstructor

public class NotifyMsg implements Serializable {

    private static final long serialVersionUID = -8985545025018238754L;

    @Id
    String id;

    /**
     * 消息类型
     */
    @Indexed
    String notifyType;

    /**
     * 消息单号
     */
    @Indexed
    String notifyNo;

    /**
     * 消息通知日期
     */
    String notifyDate;


    /**
     * 消息体
     */

    @Field("data")//可指定存储时的字段名
    String notifyMsg;

    /**
     * 创建时间
     */
    @CreatedDate
    Date gmtCreate;

}
建立需要存储文本信息的Server接口
package com.herbert.accident.service;

import com.herbert.accident.entity.NotifyMsg;

import java.util.List;

/**
 * @author :
 * @date :Created in 2019/8/7 15:54
 * @description:
 * @modified By:
 * @version: $
 */
public interface NotifyMsgService {

    /**
     * 保存数据
     *
     */
    NotifyMsg saveNotifyMsg(NotifyMsg msg);

    /**
     * 根据消息号查找
     *
     */
    NotifyMsg findNotifyMsgByNo(String notifyNo);

    /**
     * 根据消息日期查找
     *
     */
    List<NotifyMsg> findNotifyMsgByDate(String notifyDate);

    /**
     * 根据id进行删除 返回删除的对象
     *
     */
    NotifyMsg delNotifyMsgById(String id);

}
建立接口的实现类
package com.herbert.accident.service.impl;


import com. herbert.accident.entity.NotifyMsg;

import com. herbert.accident.service.NotifyMsgService;

import org.springframework.beans.factory.annotation.Autowired;

import org.springframework.data.mongodb.core.MongoTemplate;

import org.springframework.data.mongodb.core.query.Criteria;

import org.springframework.data.mongodb.core.query.Query;

import org.springframework.stereotype.Service;


import java.util.List;


/**

 * @author :

 * @date :Created in 2019/8/7 15:55

 * @description:

 * @modified By:

 * @version: $

 */


@Service

public class NotifyMsgServiceImpl implements NotifyMsgService {


    @Autowired

    MongoTemplate mongoTemplate;


    @Override

    public NotifyMsg saveNotifyMsg(NotifyMsg msg) {

        //使用 save和insert都可以进行插入

        //区别:当存在"_id"时

        //insert 插入已经存在的id时 会异常

        //save 则会进行更新

        //简单来说 save 就是不存在插入 存在更新

        mongoTemplate.insert(msg);

        mongoTemplate.save(msg);


        return msg;

    }


    @Override

    public NotifyMsg findNotifyMsgByNo(String notifyNo) {

        //根据Criteria 改造查询条件

        Query query = new Query(Criteria.where("notifyNo").is(notifyNo));

        return mongoTemplate.findOne(query, NotifyMsg.class);

    }


    @Override

    public List<NotifyMsg> findNotifyMsgByDate(String notifyDate) {

        //查找 notifyDate 根据Criteria 改造查询条件

        Query query = new Query(Criteria.where("notifyDate").is(notifyDate));

        return mongoTemplate.find(query, NotifyMsg.class);

    }


    @Override

    public NotifyMsg delNotifyMsgById(String id) {

        //查找 id 根据Criteria 改造查询条件

        Query query = new Query(Criteria.where("id").is(id));

        return mongoTemplate.findAndRemove(query, NotifyMsg.class);

    }

}
建立请求访问的Controller
package com.herbert.accident.controller;/**

 * Created by Herbert on 2019/8/7.

 */


import com.herbert.accident.entity.NotifyMsg;

import com.herbert.accident.service.NotifyMsgService;

import lombok.extern.slf4j.Slf4j;

import org.springframework.beans.factory.annotation.Autowired;

import org.springframework.web.bind.annotation.*;


import java.util.List;


/**

 * @author :

 * @date :Created in 2019/8/7 15:56

 * @description:

 * @modified By:

 * @version: $

 */

@RestController

@RequestMapping("/template")

@Slf4j

public class MongoTemplateController {


    @Autowired

    NotifyMsgService notifyMsgService;


    @PostMapping("/add")

    public NotifyMsg add(NotifyMsg msg) {

        log.info("mongoTemplate方式新增:{}", msg);

        return notifyMsgService.saveNotifyMsg(msg);

    }


    @PostMapping("del/{id}")

    public NotifyMsg del(@PathVariable String id) {

        log.info("mongoTemplate方式删除:{}", id);

        return notifyMsgService.delNotifyMsgById(id);

    }


    @GetMapping("/find/{no}")

    public NotifyMsg findNotifyMsgByNo(@PathVariable String no){

        log.info("mongoTemplate方式查找:notifyNo-{}", no);

        return notifyMsgService.findNotifyMsgByNo(no);

    }


    @GetMapping("/find/list/{date}")

    public List<NotifyMsg> findNotifyMsgByDate(@PathVariable String date){

        log.info("mongoTemplate方式查找:notifyDate-{}", date);

        return notifyMsgService.findNotifyMsgByDate(date);

    }

}
我们进行请求测试,测试工具这边使用的是postman测试
启动服务后:
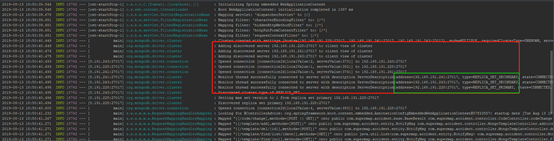
上面启动已经标明主节点和子节点
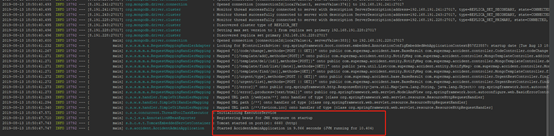
启动成功标志:
下来我们进行访问接口
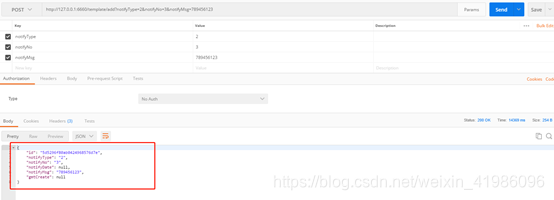
访问接口保存数据:
接口类型为POST请求
http://127.0.0.1:6660/template/add?notifyType=2¬ifyNo=3¬ifyMsg=789456123
请求成功:
访问接口查询上次保存的数据:
接口类型为GET请求
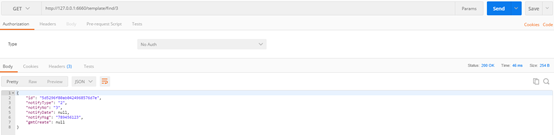
现在我们随意关闭A B C中的一个Mongodb,继续访问刚才保存的数据:
接口类型为GET请求

![]()
副本集 为网络故障或是其他的系统故障依然可以访问到原始保存的数据。
需要注意问题:
1:在建立dbpath数据文件存储路径的时候,该路径下必须为空文件夹
2:创建副本集脚本执行的时候,确保和副本集名称保持一致
3:尽量使用默认标准的MongoDB端口 27017
欢迎关注微信公众号:


 1717
1717

 被折叠的 条评论
为什么被折叠?
被折叠的 条评论
为什么被折叠?
 到【灌水乐园】发言


