


 本文介绍了一种在iOS应用中使用SwiftUI实现自定义弹窗的方法,通过创建UIWindow,可以将弹窗独立于当前控制器布局,支持从上、下、左、右、中心五个方向弹出,并提供了遮罩效果和动画过渡。
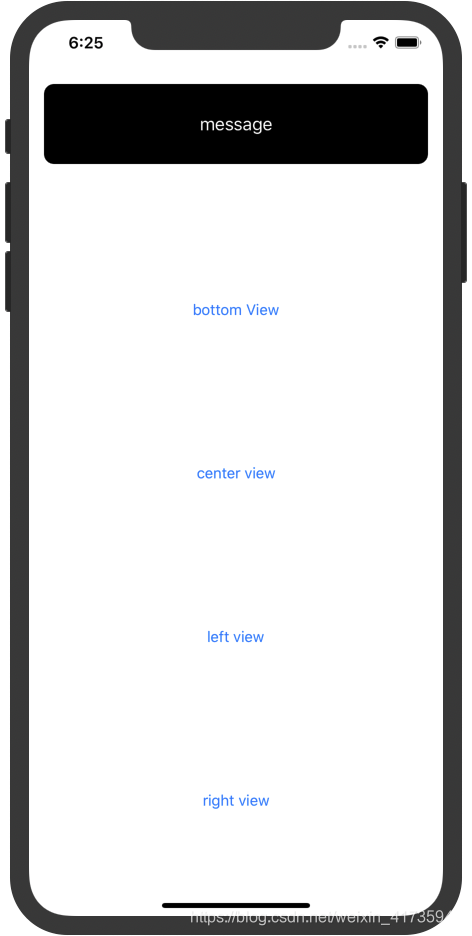
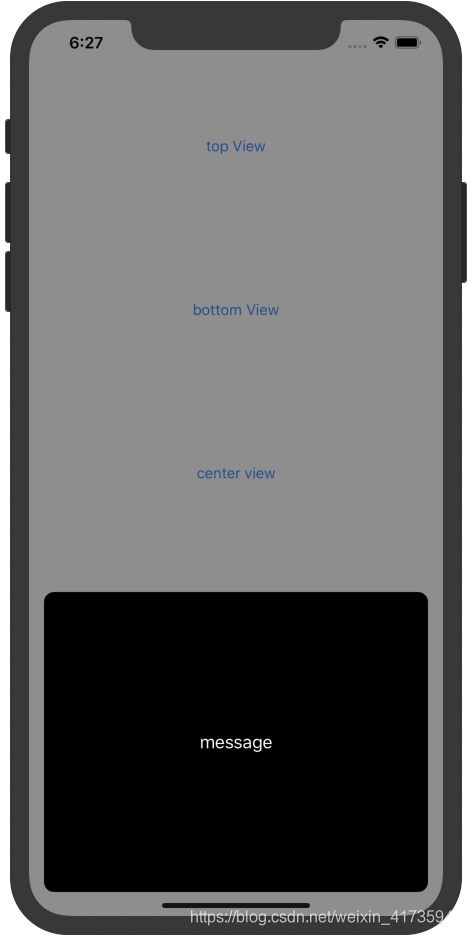
这个方案是直接创建新的UIWindow,和系统弹窗类似,使用时不受controller本身的布局影响
运行截图:
代码:
import UIKit

class ATAction {
    enum ActionPosition {
        case top
        case center
        case bottom
        case left
        case right
    }

    static var contentView:UIView = UIView()
    static var startFrame = CGRect.zero

    static var positionType:ActionPosition = .center

    static var actionWindow:UIWindow?

    static func custom(contentView:UIView, type: ActionPosition, size:CGSize, mask:Bool){
        self.contentView = contentView

        let screenBounds = UIScreen.main.bounds
        let width = size.width
        let height = size.height
        let animateTime:TimeInterval = 0.21

        let ContentViewController = UIViewController()
        //毛玻璃背景
//        let visualEffectView = UIVisualEffectView(frame: screenBounds)
//        visualEffectView.effect = UIBlurEffect(style: .light)
//        ContentViewController.view.addSubview(visualEffectView)

        let backButton = UIButton(frame: ContentViewController.view.bounds)
        backButton.addTarget(self, action: #selector(dismiss), for: UIControl.Event.touchUpInside)
        ContentViewController.view.addSubview(backButton)

        ContentViewController.view.addSubview(contentView)

        switch type {
        case .top:
            let toTop:CGFloat = screenBounds.height >= 812 ? 64 : 20
            let x = (screenBounds.width - width)/2
            self.startFrame = CGRect(x: x, y: 0 - height, width: width, height: height)
            contentView.frame = self.startFrame
            UIView.animate(withDuration: animateTime) {
                contentView.frame = CGRect(x: x, y: toTop, width: width, height: height)
            }
            self.positionType = .top
        case .center:
            self.startFrame = CGRect(x: (screenBounds.width - width)/2, y: screenBounds.height/2 - height/2, width: width, height: height)
            contentView.frame = self.startFrame
            contentView.alpha = 0
            UIView.animate(withDuration: animateTime) {
                contentView.alpha = 1
            }
            self.positionType = .center
        case .bottom:
            let toBottom:CGFloat = screenBounds.height >= 812 ? 24 : 10
            let x = (screenBounds.width - width)/2
            self.startFrame = CGRect(x: x, y: screenBounds.height, width: width, height: height)
            contentView.frame = self.startFrame
            UIView.animate(withDuration: animateTime) {
                contentView.frame = CGRect(x: x, y: screenBounds.height - height - toBottom, width: width, height: height)
            }
            self.positionType = .bottom
        case .left:
            let y = (screenBounds.height - height)/2
            self.startFrame = CGRect(x: 0 - width, y: y, width: width, height: height)
            contentView.frame = self.startFrame
            UIView.animate(withDuration: animateTime) {
                contentView.frame = CGRect(x: 0, y: y, width: width, height: height)
            }
            self.positionType = .left
        case .right:
            let y = (screenBounds.height - height)/2
            self.startFrame = CGRect(x: screenBounds.width, y: y, width: 0, height: height)
            contentView.frame = self.startFrame
            UIView.animate(withDuration: animateTime) {
                contentView.frame = CGRect(x: screenBounds.width - width, y: y, width: width, height: height)
            }
            self.positionType = .right
        }

        if #available(iOS 13.0, *) {
            let windowScene = UIApplication.shared.connectedScenes.filter {
                $0.activationState == .foregroundActive
            }.first
            if let windowScene = windowScene as? UIWindowScene {
                self.actionWindow = UIWindow(windowScene: windowScene)
                self.actionWindow?.frame = UIScreen.main.bounds
            }
        }
        else {
            self.actionWindow = UIWindow(frame: screenBounds)
        }

        if mask == true {
            self.actionWindow!.backgroundColor = UIColor.init(red: 0.2, green: 0.2, blue: 0.2, alpha: 0.5)
        }
        self.actionWindow!.windowLevel = UIWindow.Level(rawValue: 4000000.0)
        self.actionWindow!.rootViewController = ContentViewController
        self.actionWindow!.makeKeyAndVisible()
    }

    static func notification(image:UIImage?, msg:String){
        let screenBounds = UIScreen.main.bounds
        let titleLabel = UILabel()
        titleLabel.text = msg
        titleLabel.textAlignment = .center
        titleLabel.layer.cornerRadius = 10
        titleLabel.layer.masksToBounds = true
        self.custom(contentView: titleLabel, type: .top, size: CGSize(width: 200, height: screenBounds.width - 40), mask: false)
    }

    @objc static func dismiss(){
        UIView.animate(withDuration: 0.2, animations: {
            self.contentView.frame = startFrame
            if positionType == .center {
                self.contentView.alpha = 0
            }
            self.actionWindow!.backgroundColor = UIColor.init(red: 0.2, green: 0.2, blue: 0.2, alpha: 0)
        }) { (finished) in
            if finished == true {
                self.contentView.alpha = 1
                self.actionWindow?.isHidden = true
                self.actionWindow = nil

            }
        }

    }


}
使用
import UIKit

class ViewController: UIViewController {

    let contentView = UIButton()

    override func viewDidLoad() {
        super.viewDidLoad()
        contentView.setTitle("message", for: UIControl.State.normal)
        contentView.backgroundColor = UIColor.black
        contentView.layer.cornerRadius = 10
        contentView.layer.masksToBounds = true
    }

    @IBAction func addAction(_ sender: Any) {

        ATAction.custom(contentView: contentView, type: .top, size: CGSize.init(width: self.view.bounds.width - 30, height: 80), mask: false)
    }
    @IBAction func bottomPopClick(_ sender: Any) {
        ATAction.custom(contentView: contentView, type: .bottom, size: CGSize.init(width: self.view.bounds.width - 30, height: 300), mask: true)
    }
    @IBAction func centerPopClick(_ sender: Any) {
        ATAction.custom(contentView: contentView, type: .center, size: CGSize.init(width: 240, height: 128), mask: true)
    }
    @IBAction func leftPopClick(_ sender: Any) {
        ATAction.custom(contentView: contentView, type: .left, size: CGSize.init(width: 200, height: self.view.bounds.height), mask: true)
    }
    @IBAction func rightPopClick(_ sender: Any) {
        ATAction.custom(contentView: contentView, type: .right, size: CGSize.init(width: 200, height: self.view.bounds.height), mask: true)
    }

}


 被折叠的 条评论
为什么被折叠?
被折叠的 条评论
为什么被折叠?
 到【灌水乐园】发言


