


 本文介绍了如何在Spring Boot项目中整合MyBatis,分别提供了全注解版和使用配置文件的方法。全注解版只需标记@Mapper,创建Service即可进行数据库交互。配置文件版则需要设置XML映射文件和MyBatis配置,并在YAML文件中配置相关参数。
分为全注解版和配置版。
其实全注解版比较简单。
全注解版
1.在配置文件中配置数据源信息 ,注意,根据需要可以开启驼峰映射(一般选择开启)
spring.datasource.url=jdbc:mysql://localhost:3306/spring_cache
spring.datasource.username=root
spring.datasource.password=
spring.datasource.driver-class-name=com.mysql.jdbc.Driver
#开启驼峰映射
mybatis.configuration.map-underscore-to-camel-case=true
logging.level.com.jiangyi.springboot01cache.mapper=debug
 2.使用注解版的mybatis
        1.使用@MapperScan()来扫描包。在主运行类上使用。
@MapperScan("com.jiangyi.springboot01cache.mapper")
@SpringBootApplication
@EnableCaching
public class SpringBoot01CacheApplication {

    public static void main(String[] args) {
        SpringApplication.run(SpringBoot01CacheApplication.class, args);
    }

}
3.创建包:使用@Mapper 注解来标志:
@Mapper
public interface EmployeeMapper {
    @Select("select * from employee where id=#{id}")
    public Employee getEmpById(Integer id);

    @Update("update employee set lastName=#{lastName},email=#{email},gender=#{gender},id=#{dId} where id=#{id}")
    public void updateEmp(Employee employee);

    @Delete("delete from employee where id=#{id}")
    public void deleteEmpById(Integer id);

    @Insert("insert into employee(lastName,email,gender,d_id) values(#{lastName},#{email},#{gender},#{dId})")
    public void insertEmployee(Employee employee);
}
4.创建service:
@Service
public class EmployeeService {
    @Autowired
    EmployeeMapper employeeMapper;

    @Cacheable(cacheNames = {"emp"})
    public Employee getEmp(Integer id){
        System.out.println("查询"+id+"号员工");
        Employee emp = employeeMapper.getEmpById(id);
        return emp;
    }
}
后面就可以直接调用service里面的方法来与数据库交互了。
使用配置文件
去github上搜索mybatis,可以看到配置xml文件的模板。也可以去我的博客上有归纳。
创建相关的:
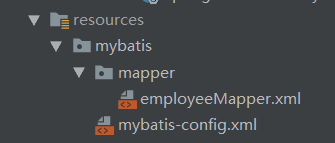
employeeMapper.xml:
<!DOCTYPE mapper

        PUBLIC "-//mybatis.org//DTD Mapper 3.0//EN"

        "http://mybatis.org/dtd/mybatis-3-mapper.dtd">

<mapper namespace="com.jiangyi.springboot06.mapper.EmployeeMapper">

    <!--public Employee getEmpById(Integer id);


    public void insertEmp(Employee employee);-->

    <select id="getEmpById" resultType="com.jiangyi.springboot06.bean.Employee">

        select * from employee where id=#{id}

    </select>


    <insert id="insertEmp">

        insert into employee(lastName,email,gender,d_id) values (#{lastName},#{email},#{gender},#{dId})

    </insert>


</mapper>
mybatis-config.xml:
<!DOCTYPE configuration PUBLIC "-//mybatis.org//DTD Config 3.0//EN" "http://mybatis.org/dtd/mybatis-3-config.dtd">

<configuration>

<settings>

    <!--启用驼峰映射-->

    <setting name="mapUnderscoreToCamelCase" value="true"/>

</settings>

</configuration>
当然在yaml配置文件里面也需要配置;
mybatis:

  config-location: classpath:mybatis/mybatis-config.xml

  mapper-locations: classpath:mybatis/mapper/*.xml
OK了。。。。。。。。。。。。。。。。。。。。


 1424
1424

 被折叠的 条评论
为什么被折叠?
被折叠的 条评论
为什么被折叠?
 到【灌水乐园】发言


