


 本文详细介绍了Spring Boot的各个核心概念,从概述到实战,包括快速入门、Java配置、属性注入、多YAML配置、自动配置原理、Lombok使用、端口配置、静态资源处理、Spring MVC拦截器、事务管理、连接池、Mybatis整合、通用Mapper和JUnit测试,最后讲解了Spring Boot项目的部署方法。通过实例解析,帮助读者深入理解并掌握Spring Boot的使用。
一、SpringBoot概述
Spring Boot是一个便捷搭建基于spring工程的脚手架,作用是帮助开发人员快速搭建大型spring项目,简化工程的配置、依赖管理,实现开发人员把时间都集中在业务开发上。
特点:
- 创建独立的Spring应用,为所有Spring的开发者提供一个非常快速的、广泛接受的入门体验
- 直接嵌入应用服务器,如tomcat、jetty等,不需要去部署war包
- 提供固定的启动器依赖去简化组件的配置,实现开箱即用(启动器其实就是springboot提供的一个jar包),通过自己设置参数(.properties或.yml配置文件),即可快速使用
- 自动配置spring和其他有需要的第三方依赖
- 提供了一些大型项目中常见的非功能性特性,如内嵌服务器、安全、指标、健康监测、外部化配置等
- 绝对没有代码生成,也无需XML配置
二、快速入门
实现步骤:
- 创建Maven工程
- pom文件中设置父工程和启动器
- 编写启动引导类
- 编写controller
- 测试
pom.xml配置:
<!--指定父工程-->
    <parent>
        <groupId>org.springframework.boot</groupId>
        <artifactId>spring-boot-starter-parent</artifactId>
        <version>2.1.5.RELEASE</version>
    </parent>
    <groupId>com.it</groupId>
    <artifactId>spring_boot</artifactId>
    <version>1.0-SNAPSHOT</version>

    <!--指定jdk版本-->
    <properties>
        <java.version>1.8</java.version>
    </properties>

    <!--导入web启动器-->
    <dependencies>
        <dependency>
            <groupId>org.springframework.boot</groupId>
            <artifactId>spring-boot-starter-web</artifactId>
            <version>2.1.5.RELEASE</version>
        </dependency>
    </dependencies>
启动引导类:
import org.springframework.boot.SpringApplication;
import org.springframework.boot.autoconfigure.SpringBootApplication;

/**
 * Springboot项目都有一个启动引导类,是工程的入口
 */
@SpringBootApplication
public class Application {
    public static void main(String[] args) {
        SpringApplication.run(Application.class,args);
    }
}
controller代码:
import org.springframework.web.bind.annotation.GetMapping;
import org.springframework.web.bind.annotation.RequestMapping;
import org.springframework.web.bind.annotation.RestController;

@RestController
@RequestMapping("/hello")
public class ApplicationController {

    @GetMapping("/heihei")
    public String hello(){
        return "hello!!!";
    }
}
测试:
访问地址 localhost:8080/hello/heihei,访问结果:

三、java代码配置应用
1、相关注解
@configuration:声明这是一个配置类,代替XML文件
@PropertySource:指定外部文件
@Value:属性注入
@Bean:声明在方法上,表明将方法的返回值注入容器,代替bean标签
2、实现步骤
①、添加依赖
②、创建数据库环境和jdbc.properties配置文件
③、编写配置类
④、在controller中注入datasource测试
pom依赖:
<dependency>
     <groupId>com.alibaba</groupId>
     <artifactId>druid</artifactId>
     <version>1.1.14</version>
</dependency>
jdbc.properties配置文件:
jdbc.driverClassName=com.mysql.jdbc.Driver
jdbc.url=jdbc:mysql://127.0.0.1:3306/health
jdbc.username=root
jdbc.password=root
启动引导类:
import org.springframework.boot.SpringApplication;
import org.springframework.boot.autoconfigure.SpringBootApplication;

/**
 * Springboot项目都有一个启动引导类,是工程的入口
 */
@SpringBootApplication
public class Application {
    public static void main(String[] args) {
        SpringApplication.run(Application.class,args);
    }
}
jdbc配置类:
import com.alibaba.druid.pool.DruidDataSource;
import org.springframework.beans.factory.annotation.Value;
import org.springframework.context.annotation.Bean;
import org.springframework.context.annotation.Configuration;
import org.springframework.context.annotation.PropertySource;

import javax.sql.DataSource;

@Configuration
@PropertySource("classpath:jdbc.properties")
public class JdbcProperties {
    @Value("${jdbc.driverClassName}")
    String driverClassName;
    @Value("${jdbc.url}")
    String url;
    @Value("${jdbc.username}")
    String username;
    @Value("${jdbc.password}")
    String password;

    @Bean
    public DataSource getDatasource(){
        DruidDataSource druidDataSource = new DruidDataSource();
        druidDataSource.setPassword(password);
        druidDataSource.setUsername(username);
        druidDataSource.setUrl(url);
        druidDataSource.setDriverClassName(driverClassName);
        return druidDataSource;
    }
}
controller测试类
import org.springframework.beans.factory.annotation.Autowired;
import org.springframework.web.bind.annotation.GetMapping;
import org.springframework.web.bind.annotation.RequestMapping;
import org.springframework.web.bind.annotation.RestController;

import javax.sql.DataSource;

@RestController
@RequestMapping("/hello")
public class ApplicationController {
    @Autowired
    private DataSource dataSource;

    @GetMapping("/heihei")
    public String hello(){
        System.out.println(dataSource);
        return "hello!!!";
    }
}
四、Spring Boot的属性注入
上面的案例实现了java配置方式注入,不过属性注入使用的是@Value注解。这种方式虽然可行,但是不够强大,因为它只能注入基本类型值。在Spring Boot中,提供了一种新的属性注入方式,支持各种java基本数据类型及复杂类型的注入
1、新建一个JdbcProperties类,用于属性注入
import org.springframework.boot.context.properties.ConfigurationProperties;

/**
 * ConfigurationProperties:表名当前类是配置类
 * prefix:读取配置文件中指定前缀的值,在类上定义各个属性,名称必须与属性文件中jdbc. 后面部分一致
 */
@ConfigurationProperties(prefix = "jdbc")
public class JdbcProperties {
    private String url;
    private String username;
    private String password;
    private String driverClassName;
    //getter和setter代码略
}
2、修改jdbc.properties文件名为application.properties
3、新建JdbcConfig类使用JdbcProperties注入的数据
import com.alibaba.druid.pool.DruidDataSource;
import org.springframework.boot.context.properties.EnableConfigurationProperties;
import org.springframework.context.annotation.Bean;
import org.springframework.context.annotation.Configuration;

import javax.sql.DataSource;

@Configuration
@EnableConfigurationProperties(JdbcProperties.class)//来声明要使用JdbcProperties 这个类的对象
public class JdbcConfig {
    @Bean
    public DataSource getDataSource(JdbcProperties jdbc){
        DruidDataSource dataSource = new DruidDataSource();
        dataSource.setUrl(jdbc.getUrl());
        dataSource.setDriverClassName(jdbc.getDriverClassName());
        dataSource.setUsername(jdbc.getUsername());
        dataSource.setPassword(jdbc.getPassword());
        return dataSource;
    }
}
4、controller中依然使用Autowired注入datasource对象测试
注入方式优化:
JdbcProperties类去掉@ConfigurationProperties(prefix = “jdbc”)注解
JdbcConfig类去掉@EnableConfigurationProperties(JdbcProperties.class)注解,在方法上增加@ConfigurationProperties(prefix = “jdbc”)注解
import com.alibaba.druid.pool.DruidDataSource;
import org.springframework.boot.context.properties.ConfigurationProperties;
import org.springframework.context.annotation.Bean;
import org.springframework.context.annotation.Configuration;

import javax.sql.DataSource;

@Configuration
public class JdbcConfig {
    @Bean
    @ConfigurationProperties(prefix = "jdbc")
    public DataSource getDataSource(){
        return new DruidDataSource();
    }
}
五、多个yml文件配置
1、yml配置文件的特征:
①、树状层级结构展示配置项
②、配置项之间如果有关系的话需要分行空两格
③、配置项如果有值的话需要在冒号后空一格再写配置项值
jdbc:
  driverClassName: com.mysql.jdbc.Driver
  url: jdbc:mysql://127.0.0.1:3306/health
  username: root
  password: root
2、多个yml配置文件在springboot中是被允许的,这些配置文件的名称必须为application-*.yml,并且这些配置文件必须要在application.yml配置文件中激活后才可以使用
#激活配置文件;需要指定其它的配置文件名称
spring:
  profiles:
    active: abc,def
3、如果properties和yml配置文件同时存在在springboot项目中,name这两类配置文件都有效,在两个配置文件中如果存在同名的配置项的话会以properties文件的为准
六、自动配置原理
1、在META-INF\spring.factories文件中定义了很多自动配置类,可以根据在pom.xml文件中添加的启动器依赖自动配置组件
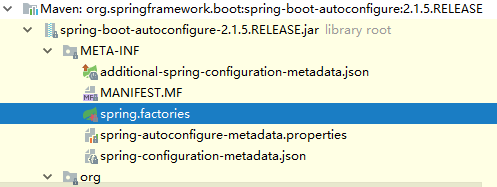
2、如果要修改自动配置组件的默认参数,可参照以下方法(redis为例)
spring-boot-autoconfigure-2.1.5RELEASE.jar–》org.springframework.boot.autoconfigure.data.redies.RedisProperties
七、lombok使用
1、lombok是什么:在编写pojo时经常需要编写构造函数和getter/setter方法,属性多的时候实体看很臃肿,使用lombok插件可以很好地解决这个问题
2、使用:需要在idea工具中下载lombok插件,在pom.xml文件中添加依赖
<dependency>
     <groupId>org.projectlombok</groupId>
     <artifactId>lombok</artifactId>
</dependency>
@Setter :注解在类或字段,注解在类时为所有字段生成setter方法,注解在字段上时只为该字段生成setter方法。
@Getter :同上
@ToString :注解在类,添加toString方法。
@EqualsAndHashCode: 注解在类,生成hashCode和equals方法。
@NoArgsConstructor: 注解在类,生成无参的构造方法。
@AllArgsConstructor: 注解在类,生成包含类中所有字段的构造方法。
@Data: 注解在类,生成setter/getter、equals、canEqual、hashCode、toString方法,如为final属性,则不会为该属性生成setter方法。
@Slf4j: 注解在类,生成log变量
八、Spring Boot修改端口和访问静态文件
1、修改端口:
在application.yml文件中添加如下配置
#tomcat端口
server:
  port: 80
2、添加静态文件
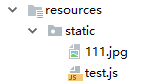
3、访问地址:
http://localhost/test.js
SpringBoot中静态文件可放置路径如下:
private static final String[] CLASSPATH_RESOURCE_LOCATIONS = {
			"classpath:/META-INF/resources/", "classpath:/resources/",
			"classpath:/static/", "classpath:/public/" };
九、Spring Boot整合SpringMvc拦截器
实现步骤
- 编写拦截器类,实现HandlerIntercepter接口
- 编写配置类实现WebMvcConfigurer
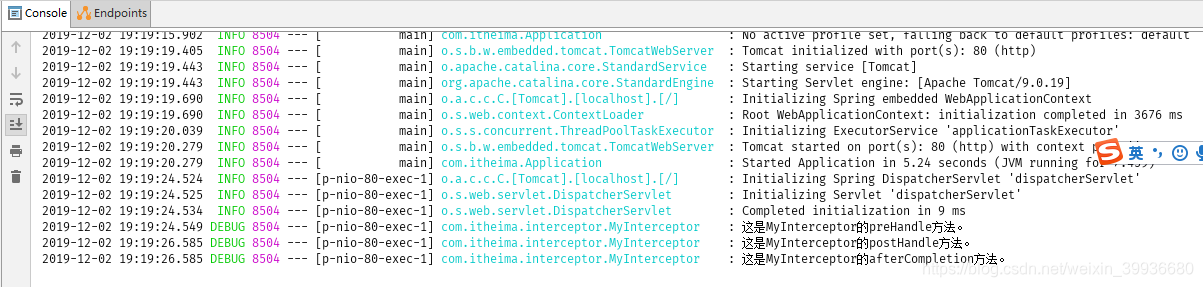
拦截器类:
package com.it.interceptor;

import lombok.extern.slf4j.Slf4j;
import org.springframework.web.servlet.HandlerInterceptor;
import org.springframework.web.servlet.ModelAndView;

import javax.servlet.http.HttpServletRequest;
import javax.servlet.http.HttpServletResponse;

@Slf4j
public class MyInterceptor implements HandlerInterceptor {
    @Override
    public boolean preHandle(HttpServletRequest request, HttpServletResponse response, Object handler) throws Exception {
        log.debug("这是MyInterceptor的preHandle方法。");
        Thread.sleep(2000);
        return true;
    }

    @Override
    public void postHandle(HttpServletRequest request, HttpServletResponse response, Object handler, ModelAndView modelAndView) throws Exception {
        log.debug("这是MyInterceptor的postHandle方法。");
    }

    @Override
    public void afterCompletion(HttpServletRequest request, HttpServletResponse response, Object handler, Exception ex) throws Exception {
        log.debug("这是MyInterceptor的afterCompletion方法。");
    }
}
配置类(注意拦截路径的写法,拦截所有要写**,之前测试的时候写了一个星号,拦截器一直不起作用):
package com.it.config;

import com.it.interceptor.MyInterceptor;
import org.springframework.context.annotation.Bean;
import org.springframework.context.annotation.Configuration;
import org.springframework.web.servlet.config.annotation.InterceptorRegistry;
import org.springframework.web.servlet.config.annotation.WebMvcConfigurer;

@Configuration
public class MvcConfig implements WebMvcConfigurer {

    //注册拦截器
    @Bean
    public MyInterceptor myInterceptor(){
        return new MyInterceptor();
    }

    //添加拦截器到spring mvc拦截器链
    @Override
    public void addInterceptors(InterceptorRegistry registry) {
        registry.addInterceptor(myInterceptor()).addPathPatterns("/**");
    }
}
在application.yml中设置日志记录级别:
#设置log记录级别
logging:
  level:
    com.it: debug
    org.springframework: info
最后,访问controller地址测试:
十、Spring Boot整合事务管理和连接池
SpringBoot默认使用Hikari连接池,使用@Transactional注解进行事务控制
实现步骤:
- 导入坐标
- 在application.yml配置文件中添加数据库连接配置
- 在service方法上添加@Transactional注解进行事务控制
spring:
  datasource:
    driver-class-name: com.mysql.jdbc.Driver
    url: jdbc:mysql://127.0.0.1:3306/health
    username: root
    password: root
十一、Spring Boot整合Mybatis
实现步骤:
- 导入mybatis官方的启动器
- 配置Mybatis:实体类别名包,日志,映射文件等
- 创建mapper接口类及包扫描
pom.xml配置:
		<!--mybatis -->
        <dependency>
            <groupId>org.mybatis.spring.boot</groupId>
            <artifactId>mybatis-spring-boot-starter</artifactId>
            <version>2.0.1</version>
        </dependency>
application.yml配置文件:
mybatis:
  # 实体类别名包路径
  type-aliases-package: com.it.pojo
  # 映射文件路径
  # mapper-locations: classpath:mappers/*.xml
  configuration:
#    配置日志
    log-impl: org.apache.ibatis.logging.stdout.StdOutImpl
Mapper接口配置:可以在类名上添加@Mapper注解,但是这样每创建一个mapper文件就需要配置一次注解,替代方法是在启动器类上添加mapper文件扫描
@SpringBootApplication
@MapperScan("com.it.mapper")
public class Application {
    public static void main(String[] args) {
        SpringApplication.run(Application.class,args);
    }
}
十二、Spring Boot整合通用Mapper
通用Mapper:可以实现自动拼接sql语句;所有的mapper都不需要编写任何方法也就是不用编写sql语句。可以提高开发效率。
实现步骤:
- 添加依赖
- 修改启动器类mapper注解
- 创建UserMapper接口类继承Mapper
<User> - 创建UserService类调用注入userMapper并调用通用sql
- 创建Controller类调用service
- 访问测试
pom.xml:
		<dependency>
            <groupId>tk.mybatis</groupId>
            <artifactId>mapper-spring-boot-starter</artifactId>
            <version>2.1.5</version>
        </dependency>
启动器类:
package com.it;

import org.springframework.boot.SpringApplication;
import org.springframework.boot.autoconfigure.SpringBootApplication;
import tk.mybatis.spring.annotation.MapperScan;

/**
 * Springboot项目都有一个启动引导类,是工程的入口
 */
@SpringBootApplication
//@MapperScan("com.itheima.mapper")
@MapperScan("com.itheima.mapper")
public class Application {
    public static void main(String[] args) {
        SpringApplication.run(Application.class,args);
    }
}
UserMapper:
package com.it.mapper;

import com.it.pojo.User;
import tk.mybatis.mapper.common.Mapper;

public interface UserMapper extends Mapper<User> {
}
UserService:
package com.it.service;

import com.it.mapper.UserMapper;
import com.it.pojo.User;
import org.springframework.beans.factory.annotation.Autowired;
import org.springframework.stereotype.Service;
import org.springframework.transaction.annotation.Transactional;

@Service
public class UserService {
    @Autowired
    private UserMapper userMapper;

    @Transactional
    public User getUserById(Long id){
        return userMapper.selectByPrimaryKey(id);
    }
}
User实体类:
package com.it.pojo;
import lombok.Data;
import tk.mybatis.mapper.annotation.KeySql;
import javax.persistence.Id;
import javax.persistence.Table;
import java.util.Date;
//在编译阶段会根据注解自动生成对应的方法;data包含get/set/hashCode/equals/toString等方法
@Data
//指定实体类对应数据库中的表名
@Table(name = "tb_user")
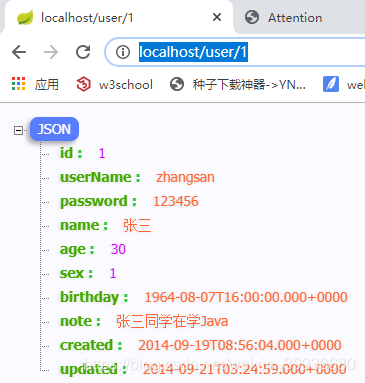
public class User {
//主键
@Id
//主键回填
@KeySql(useGeneratedKeys = true)
private Long id;
private String userName;
private String password;
private String name;
private Integer age;
private Integer sex;
private Date birthday;
private String note;
private Date created;
private Date updated;
}
Controller:
package com.it.controller;

import com.it.pojo.User;
import com.it.service.UserService;
import org.springframework.beans.factory.annotation.Autowired;
import org.springframework.web.bind.annotation.GetMapping;
import org.springframework.web.bind.annotation.PathVariable;
import org.springframework.web.bind.annotation.RequestMapping;
import org.springframework.web.bind.annotation.RestController;

@RestController
@RequestMapping("/user")
public class ApplicationController {
    @Autowired
    private UserService userService;

    @GetMapping("/{id}")
    public User hello(@PathVariable("id") Long id){
        return userService.getUserById(id);
    }
}
测试链接:http://localhost/user/1
十三、Spring Boot整合junit
实现步骤:
- 添加依赖
- 创建测试类
pom.xml
		<dependency>
            <groupId>org.springframework.boot</groupId>
            <artifactId>spring-boot-starter-test</artifactId>
        </dependency>
测试类(可以在要测试的service类名上ctrl+shift+t快捷键生成测试类):
package com.it.service;

import org.junit.runner.RunWith;
import org.springframework.beans.factory.annotation.Autowired;
import org.springframework.boot.test.context.SpringBootTest;
import org.springframework.test.context.junit4.SpringRunner;

@RunWith(SpringRunner.class)
@SpringBootTest
public class UserServiceTest {
    @Autowired
    private UserService userService;

    @org.junit.Test
    public void getUserById() {
        System.out.println(userService.getUserById((long) 2));
    }
}
十四、Spring整合redis
实现步骤:
- 添加依赖
- 创建测试类测试
pom.xml:
		<dependency>
            <groupId>org.springframework.boot</groupId>
            <artifactId>spring-boot-starter-data-redis</artifactId>
        </dependency>
junit测试类(使用RedisTemplate):
package com.it.redis;

import org.junit.Test;
import org.junit.runner.RunWith;
import org.springframework.beans.factory.annotation.Autowired;
import org.springframework.boot.test.context.SpringBootTest;
import org.springframework.data.redis.core.RedisTemplate;
import org.springframework.test.context.junit4.SpringRunner;

import java.util.List;
import java.util.Set;

@RunWith(SpringRunner.class)
@SpringBootTest
public class RedisTest {

    @Autowired
    private RedisTemplate redisTemplate;

    @Test
    public void test(){
        //string 字符串
        redisTemplate.opsForValue().set("str", "heima");
        redisTemplate.boundValueOps("str").set("heima");
        System.out.println("str = " + redisTemplate.opsForValue().get("str"));

        //hash 散列
        redisTemplate.boundHashOps("h_key").put("name", "heima");
        redisTemplate.boundHashOps("h_key").put("age", 13);
        //获取所有域
        Set set = redisTemplate.boundHashOps("h_key").keys();
        System.out.println(" hash散列的所有域:" + set);
        //获取所有值
        List list = redisTemplate.boundHashOps("h_key").values();
        System.out.println(" hash散列的所有域的值:" + list);

        //list 列表
        redisTemplate.boundListOps("l_key").leftPush("c");
        redisTemplate.boundListOps("l_key").leftPush("b");
        redisTemplate.boundListOps("l_key").leftPush("a");
        //获取全部元素
        list = redisTemplate.boundListOps("l_key").range(0, -1);
        System.out.println(" list列表中的所有元素:" + list);

        // set 集合
        redisTemplate.boundSetOps("s_key").add("a", "b", "c");
        set = redisTemplate.boundSetOps("s_key").members();
        System.out.println(" set集合中的所有元素:" + set);

        // sorted set 有序集合
        redisTemplate.boundZSetOps("z_key").add("a", 30);
        redisTemplate.boundZSetOps("z_key").add("b", 20);
        redisTemplate.boundZSetOps("z_key").add("c", 10);
        set = redisTemplate.boundZSetOps("z_key").range(0, -1);
        System.out.println(" zset有序集合中的所有元素:" + set);
    }
}
十五、Spring Boot项目部署
1、添加maven插件
	<build>
        <plugins>
            <plugin>
                <groupId>org.springframework.boot</groupId>
                <artifactId>spring-boot-maven-plugin</artifactId>
            </plugin>
        </plugins>
    </build>
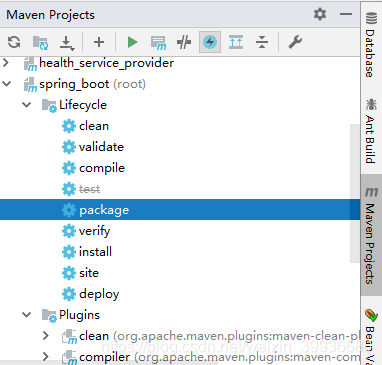
2、打包项目
3、使用java -jar 包名 来运行jar包


 365
365

 被折叠的 条评论
为什么被折叠?
被折叠的 条评论
为什么被折叠?
 到【灌水乐园】发言


