


 本文详细介绍了为何需要分库分表,shardingsphere的技术路线,包括shardingsphere-proxy的使用,以及如何配置MySQL版本、数据源和分片规则。通过SpringBoot集成示例,展示了如何在实际项目中应用shardingsphere进行数据库管理和优化。
shardingsphere-proxy保姆教程
一、为什么要分库分表
单表数量到3000万以上,就要考虑分库分表了,否则查询很慢。我个人碰到的项目是物联网的一个项目,7000辆车,每天大概3000万条记录。几天之后就不能查询了。
二、shardingsphere的技术路线
有两种技术路线
(1)shardingsphere-jdbc
需要在spring boot中集成,编写相关的配置。如果分片策略用默认的4种,那可以只改配置就好了。如果分片策略很特殊,可以通过实现抽象类,写自定义的方法进行分片分库。
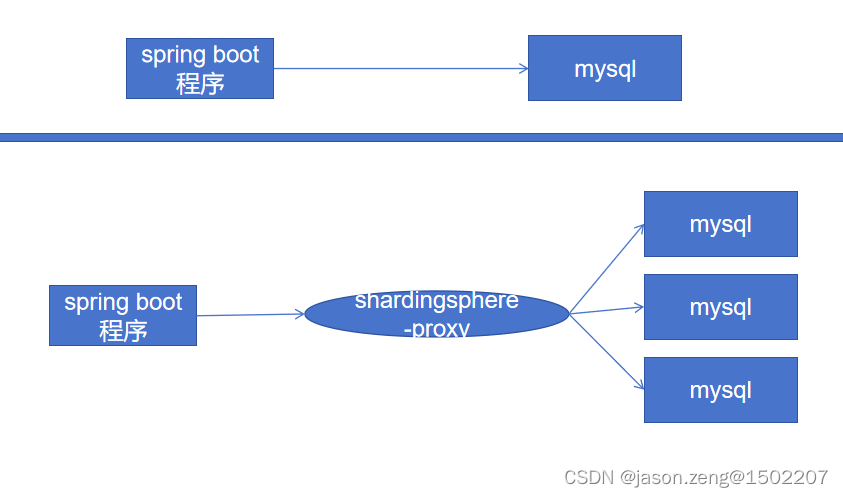
(2)shardingsphere-proxy
这种方法相当于一个代理,原来程序连接到这个代理就可以实现分片和分库。程序不需要任何改变。
三、初步理解一些概念
我用shardingphere-jdbc的一个配置来理解一下数据库分库分表的策略。
主要基本概念包含
(1)表:逻辑表、真实表、数据节点、绑定表、广播表、单表
(2)分片:分片键、分片算法、分片策略
(3)行表达式:实现动机、语法说明、配置节点、配置算法
(4)分布式主键:实现动机、UUID主键、SNOWFLAKE主键
spring.application.name=demo

#spring.datasource.driver-class-name=com.mysql.cj.jdbc.Driver
#spring.datasource.username=root
#spring.datasource.password=123456
#spring.datasource.url=jdbc:mysql://localhost:3306/mytest?serverTimezone=GMT

#spring.jpa.generate-ddl=true
spring.jpa.show-sql=true

###以下部分定义了两个数据库连接
spring.shardingsphere.datasource.names=ds0,ds1
#ds0
spring.shardingsphere.datasource.ds0.type=com.zaxxer.hikari.HikariDataSource
spring.shardingsphere.datasource.ds0.driver-class-name=com.mysql.cj.jdbc.Driver
spring.shardingsphere.datasource.ds0.username=root
spring.shardingsphere.datasource.ds0.password=123456
spring.shardingsphere.datasource.ds0.jdbc-url=jdbc:mysql://localhost:3306/mytest?serverTimezone=GMT
#ds1
spring.shardingsphere.datasource.ds1.type=com.zaxxer.hikari.HikariDataSource
spring.shardingsphere.datasource.ds1.driver-class-name=com.mysql.cj.jdbc.Driver
spring.shardingsphere.datasource.ds1.username=root
spring.shardingsphere.datasource.ds1.password=123456
spring.shardingsphere.datasource.ds1.jdbc-url=jdbc:mysql://localhost:3306/mytest1?serverTimezone=GMT

###以下部分定义了逻辑表、真实表、数据节点
spring.shardingsphere.sharding.tables.bus_info_sub.actual-data-nodes=ds$->{0..1}.bus_info_sub$->{0..1}
###分片键、分片算法
spring.shardingsphere.sharding.tables.bus_info_sub.key-generator.column=id
spring.shardingsphere.sharding.tables.bus_info_sub.key-generator.type=SNOWFLAKE
###行表达式,分库算法
spring.shardingsphere.sharding.tables.bus_info_sub.database-strategy.inline.sharding-column=id
spring.shardingsphere.sharding.tables.bus_info_sub.database-strategy.inline.algorithm-expression=ds$->{id%2}
###行表达式,分表算法
spring.shardingsphere.sharding.tables.bus_info_sub.table-strategy.inline.sharding-column=id
spring.shardingsphere.sharding.tables.bus_info_sub.table-strategy.inline.algorithm-expression=bus_info_sub$->{id%2}
请仔细阅读以上代码的注解部分,对于充分理解shardingsphere有非常重要的意义。
理解好了,我们再看shardingsphere-proxy的配置。
四、shardingsphere-proxy、mysql的版本。
特别注意:mysql的版本需要5.7.20以上。
特别注意:mysql的版本需要5.7.20以上。
特别注意:mysql的版本需要5.7.20以上。
重要的事情说三遍
附下载地址:https://downloads.mysql.com/archives/community/
我这里shardingsphere用的是4.1.1版本。
附下载地址:https://archive.apache.org/dist/shardingsphere/
五、shardingsphere-proxy准备工作。
(1)windows不需要安装,下载后解压就可以。
├── LICENSE
├── NOTICE
├── README.txt
├── bin # 启动停止脚本
├── conf # 服务配置,分库分表、读写分离、数据加密等功能的配置文件
├── lib # Jar 包
└── licenses
(2)将 MySQL 的 JDBC 驱动复制到 ext-lib 包
下载驱动 mysql-connector-java-8.0.11.jar 放入 ext-lib 包。因为初始目录中并没有 ext-lib,需要自行创建。
六、配置
先看我的配置
conf目录下的server.yaml、config-sharding.yaml
#orchestration:
#  orchestration_ds:
#    orchestrationType: registry_center,config_center,distributed_lock_manager
#    instanceType: zookeeper
#    serverLists: localhost:2181
#    namespace: orchestration
#    props:
#      overwrite: false
#      retryIntervalMilliseconds: 500
#      timeToLiveSeconds: 60
#      maxRetries: 3
#      operationTimeoutMilliseconds: 500
#

#单机的话,把这两节的注释打开。
authentication:
  users:
    root:				#账号
      password: 123456  #密码
    sharding:
      password: sharding
      authorizedSchemas: sharding_db

props:
  max.connections.size.per.query: 1
  acceptor.size: 16  # The default value is available processors count * 2.
  executor.size: 16  # Infinite by default.
  proxy.frontend.flush.threshold: 128  # The default value is 128.
    # LOCAL: Proxy will run with LOCAL transaction.
    # XA: Proxy will run with XA transaction.
    # BASE: Proxy will run with B.A.S.E transaction.
  proxy.transaction.type: LOCAL
  proxy.opentracing.enabled: false
  proxy.hint.enabled: false
  query.with.cipher.column: true
  sql.show: false
  allow.range.query.with.inline.sharding: false
基本上就改root,password这里。
schemaName: sharding_db

dataSources:
  ds_0:
    url: jdbc:mysql://localhost:3306/sharding_db?serverTimezone=UTC&useSSL=false
    username: root
    password: 123456
    connectionTimeoutMilliseconds: 30000
    idleTimeoutMilliseconds: 60000
    maxLifetimeMilliseconds: 1800000
    maxPoolSize: 50
#  ds_1:
#    url: jdbc:mysql://192.168.50.10:3306/sharding_db1?serverTimezone=UTC&useSSL=false
#    username: root
#    password: 123456
#    connectionTimeoutMilliseconds: 30000
#    idleTimeoutMilliseconds: 60000
#    maxLifetimeMilliseconds: 1800000
#    maxPoolSize: 50

shardingRule:
  tables:
    businfo_k2k:
      actualDataNodes: ds_0.businfo_k2k${0..1}
      tableStrategy:
        inline:
          shardingColumn: id
          algorithmExpression: businfo_k2k${id%2}
      keyGenerator:
        type: SNOWFLAKE
        column: id
    businfo_sub_k2k:
      actualDataNodes: ds_0.businfo_sub_k2k${0..1}
      tableStrategy:
        inline:
          shardingColumn: id
          algorithmExpression: businfo_sub_k2k${id%2}
      keyGenerator:
        type: SNOWFLAKE
        column: id
这个文件的内容,是否跟spring boot的配置似曾相识。请看上面第三节的内容。
七、测试
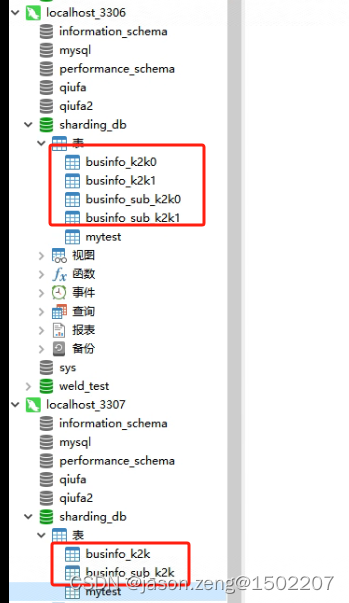
运行下面程序的start.bat启动shardingsphere-proxy,端口3307

3306端口的是真实表,3307是通过shardingsphere-proxy的逻辑表。
八、官网重要内容
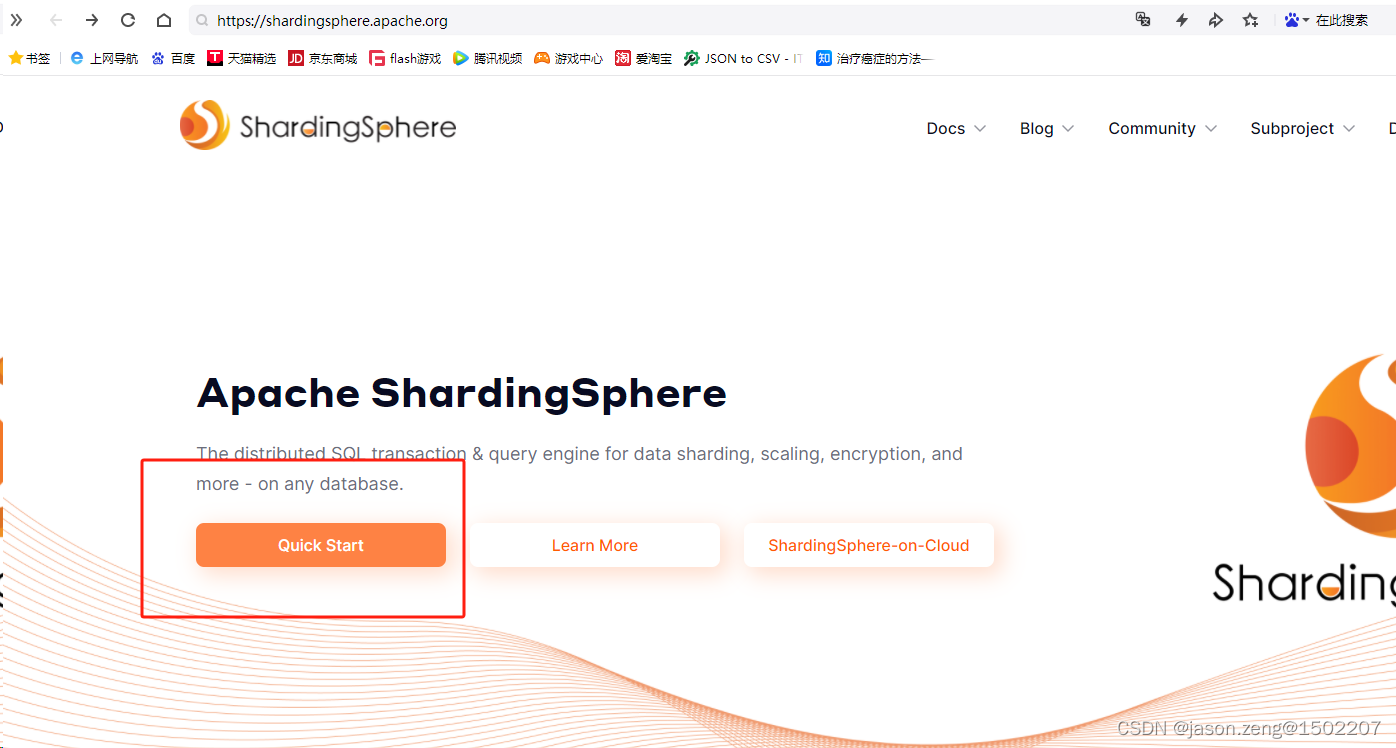
最重要的是怎么看官网:
方法一:注意默认是5.x版本的。
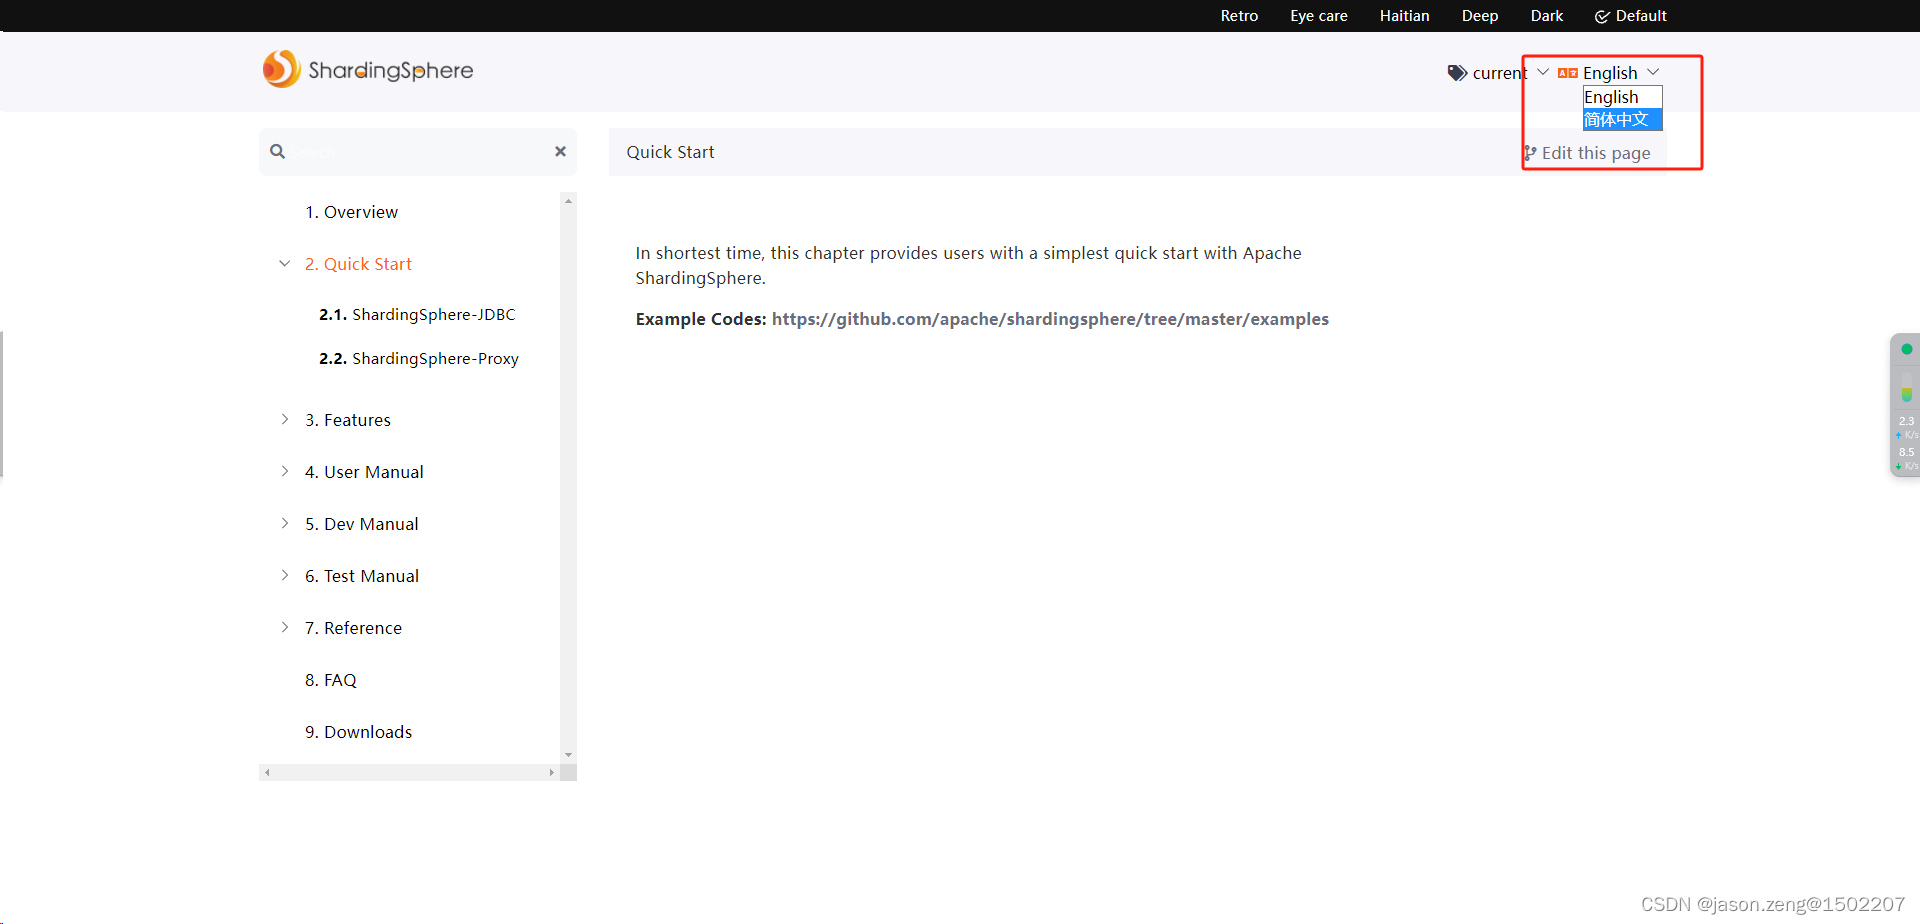
以上这里可以切换到中文,以及对应的版本号。
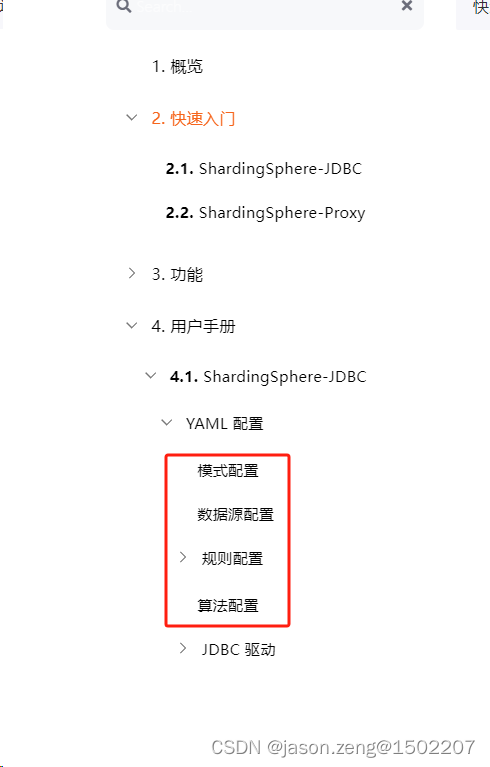
重点看:模式配置,数据源配置,规则配置。
方法二:
访问下面这个网址。
https://shardingsphere.apache.org/document/
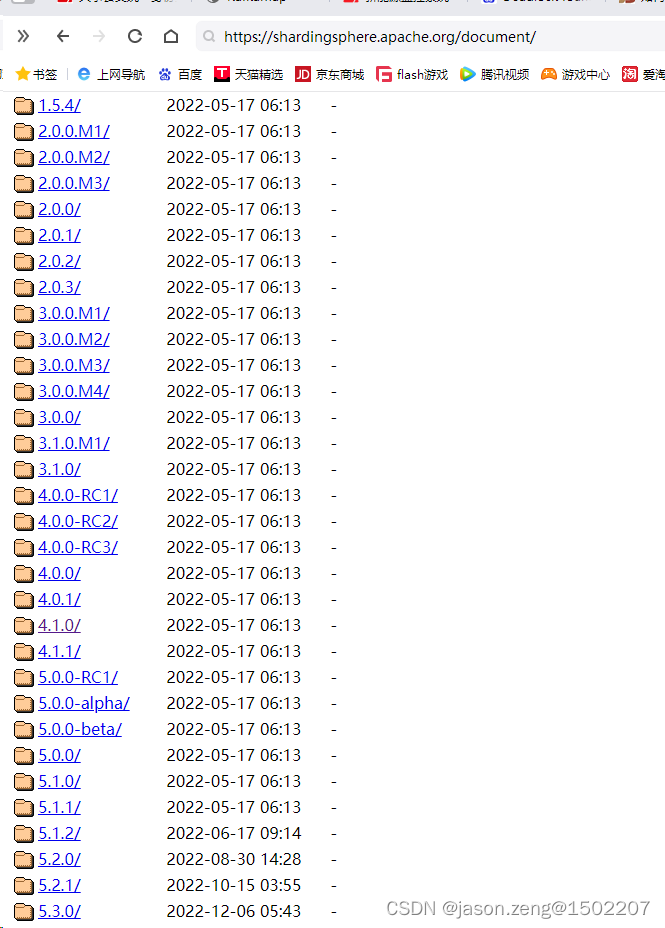
找到你要的版本,点进去看就ok了。重点的章节是:模式配置,数据源配置,规则配置。
同样的,看shardingsphere-jdbc的配置。这就代表shardingsphere-proxy的配置。
同样的,看shardingsphere-jdbc的配置。这就代表shardingsphere-proxy的配置。
同样的,看shardingsphere-jdbc的配置。这就代表shardingsphere-proxy的配置。


 792
792

 被折叠的 条评论
为什么被折叠?
被折叠的 条评论
为什么被折叠?
 到【灌水乐园】发言


