第5章 歌手页面开发
包括歌手数据的抓取和处理、Singer 类的封装、类通讯录组件 listview开发和应用。
5-1 歌手页面布局和设计讲解
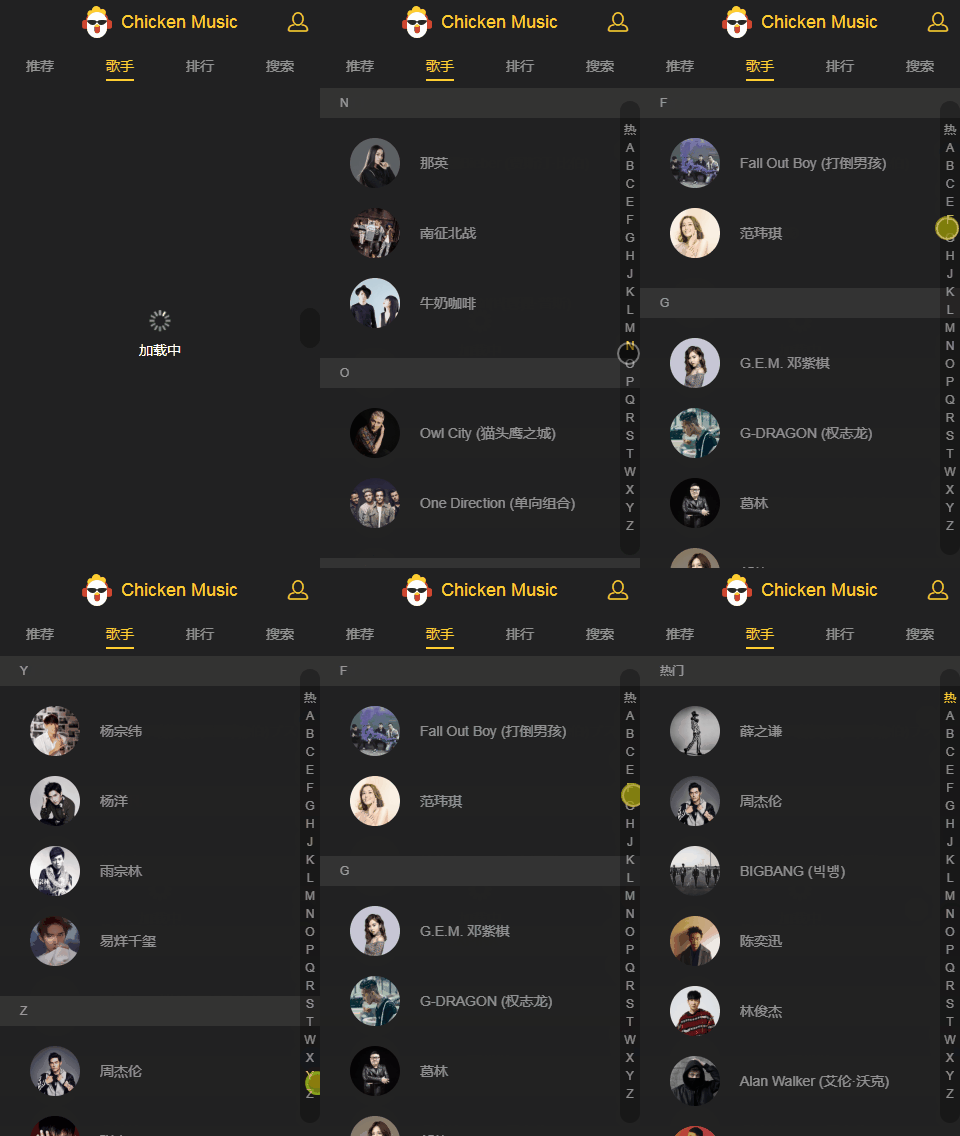
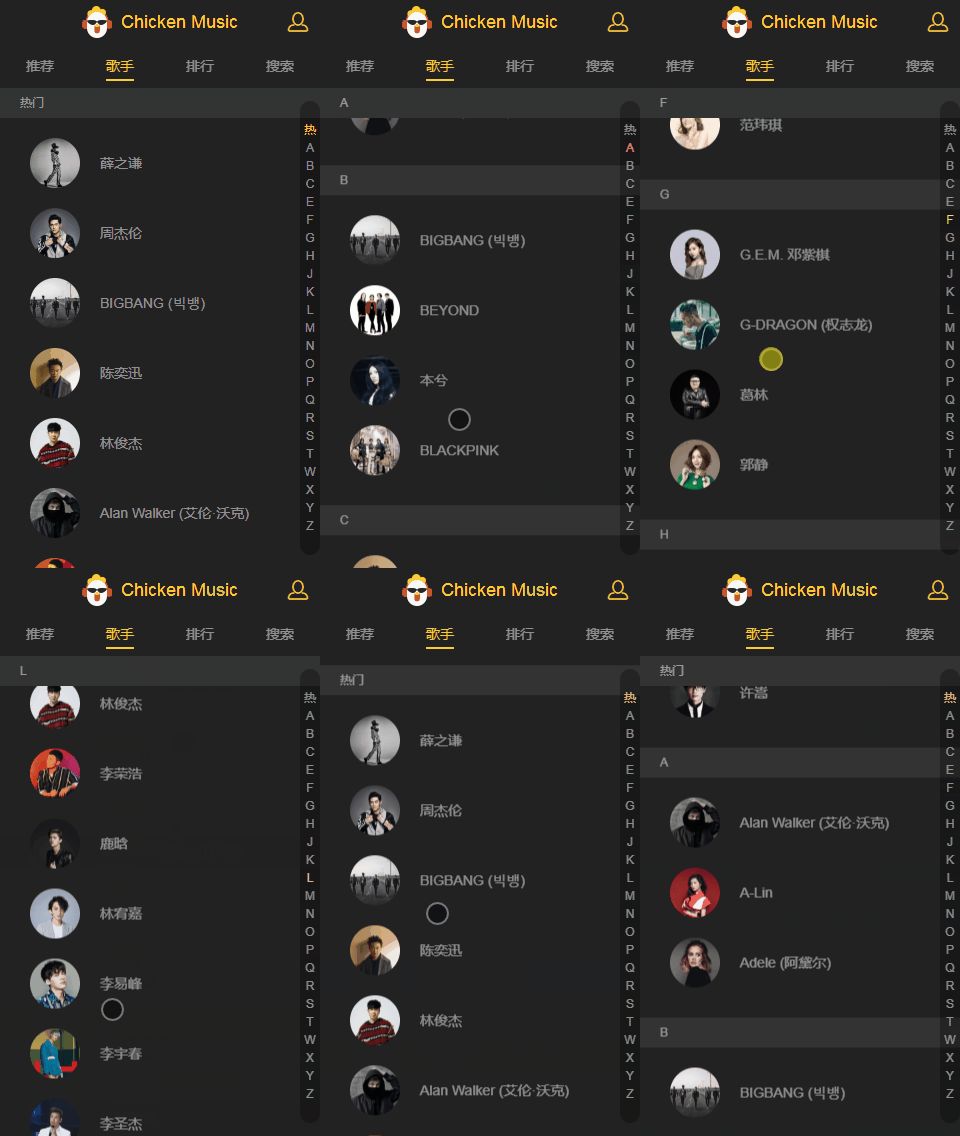
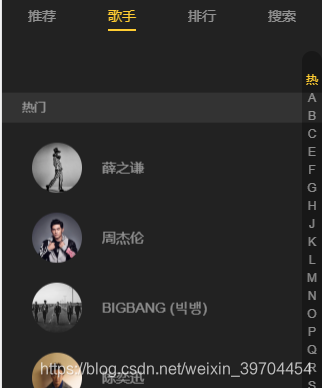
做一个类似于通讯录的功能,当滑动左边的列表,右侧的相应的字母分类加上选中的样式,当点击右侧的字母的时候,滑动到左侧相应的项,头部标题固定。


5-2 歌手数据接口抓取
src\api\singer.js
import {commonParams,options} from './config'
import jsonp  from 'common/js/jsonp.js'

export function getsingerList(){
const url = 'https://c.y.qq.com/v8/fcg-bin/v8.fcg'
const data=Object.assign({},commonParams,{
    channel: 'singer',
    page: 'list',
    key: 'all_all_all',
    pagesize: 100,
    pagenum: 1,
    hostUin: 0,
    needNewCode: 0,
    platform: 'yqq',
    g_tk: 1664029744,
})
return jsonp(url,data,options)
在singer.vue中请求数据
created(){
    this._getsingerList()
},
methods:{
 _getsingerList(){
    getsingerList().then(res=>{
        if(res.code===ERR_OK){
        	console.log(res.data.list)
            //将数据做过滤,过滤出我们需要的数据,我们将前10当是热门的数据
            // this._normalizeSinger(res.data.list)
        }
    }).catch(err=>{
        console.log(err);
    })
},
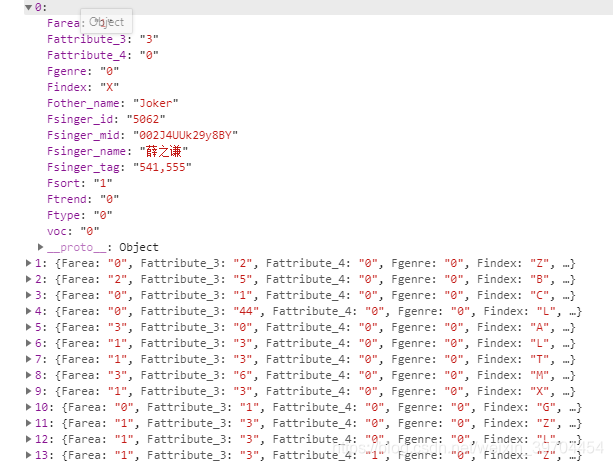
得到的数据如下

5-3 歌手数据处理和 Singer 类的封装
对歌手数据进行处理
 _normalizeSinger(list){
            //首先我们先对数据进行分类
            let map={
                hot:{
                   title: HOT_NAME,
                   items: []
                }
            }
            //首先我们先得到热门的歌曲,我们将得到的数据的前十条作为热门数据
            list.forEach((item,index) => {
                //在这里我们得到了热门的歌手
                if(index<HOT_SINGER_LEN){
                  map.hot.items.push({
                       id: item.Fsinger_mid,
                       name: item.Fsinger_name,
                       avatar: `https://y.gtimg.cn/music/photo_new/T001R300x300M000${item.Fsinger_mid}.jpg?max_age=2592000`
                  });
                }
                //在这里我们得到各个字母的的分类的歌手
                let key=item.Findex;
                if(!map[key]){
                    //当没有当前的字母项,我们创建一个
                    map[key]={
                        title: key,
                        items: []
                    }
                }
                //把相应的项添加到map[key]中
                map[key].items.push({
                     id: item.Fsinger_mid,
                    name: item.Fsinger_name,
                    avatar: `https://y.gtimg.cn/music/photo_new/T001R300x300M000${item.Fsinger_mid}.jpg?max_age=2592000`
                })

            });
        }
我们发现在push歌手信息的时候,avatar的计算是根据id而得到的,我们希望构造一个歌手类,通过传入id和name得到我们想要的数据格式。提高代码的复用性
common\js\singer.js
export default class Singer {
    constructor({name,id}){
        this.name=name,
        this.id=id
        this.avatar = `https://y.gtimg.cn/music/photo_new/T001R300x300M000${id}.jpg?max_age=2592000`
    }
}
做调整
//引入歌手类文件
import Singer from 'common/js/singer'

 //对歌手数据进行处理
        _normalizeSinger(list){
            //首先我们先对数据进行分类
            let map={
                hot:{
                   title: HOT_NAME,
                   items: []
                }
            }
            //首先我们先得到热门的歌曲,我们将得到的数据的前十条作为热门数据
            list.forEach((item,index) => {
                //在这里我们得到了热门的歌手
                if(index<HOT_SINGER_LEN){
                  map.hot.items.push(new Singer({
                       id: item.Fsinger_mid,
                       name: item.Fsinger_name,
                    })
                  );
                }
                //在这里我们得到各个字母的的分类的歌手
                let key=item.Findex;
                if(!map[key]){
                    //当没有当前的字母项,我们创建一个
                    map[key]={
                        title: key,
                        items: []
                    }
                }
                //把相应的项添加到map[key]中
                map[key].items.push(new Singer({
                       id: item.Fsinger_mid,
                       name: item.Fsinger_name,
                    })
                )

            });

            console.log(map);
        }
我们发现这个顺序是杂乱无章的,我们其实希望的是按照顺序排列,并且数据的结构是一个数组,现在我们来处理一下这些数据。对上面的数据进行排序 热门>A>B>C…
let hot=[]
let ret=[]
//对数据进行分类,分成字母类数组和热门类数组
for(let key in map){
    let val=map[key];
    if(val.title.match(/[a-zA-Z]/)){
          ret.push(val);
    }else if(val.title===HOT_NAME){
        hot.push(val);
    }
}
//数组的字母类数组进行排序
ret.sort((a,b)=>{
    return a.title.charCodeAt(0) - b.title.charCodeAt(0)
})
return hot.concat(ret);
在_getsingerList()中得到ingerList
this.singerList=this._normalizeSinger(res.data.list)
5-4 listview 基础组件的开发和应用-滚动列表实现
得到ingerList之后,我们就可以做滚动列表了,把data传入到scroll里面
引入scroll
import scroll from '../scroll/scroll'
<template>
    <scroll :data="data" class="listview">
          <ul>
              <li class="list-group" v-for="(item,index) in data" :key="index">
              <h2 class="list-group-title">{{item.title}}</h2>
              <ul>
                  <li class="list-group-item" v-for="singer in item.items" :key="singer.id">
                    <img class="avatar" v-lazy="singer.avatar">
                    <span class="name">{{singer.name}}</span>
                  </li>
              </ul>
              </li>
          </ul>
    </scroll>
</template>
5-5 listview 基础组件的开发和应用-右侧快速入口实现(1)
布局
//计算属性中
shortcut(){////得到title的集合数组,‘热门’取1个字
    let arr=[];
    this.data.forEach(item => {
      arr.push(item.title.substr(0,1));
    });
    return arr
}
 <!-- 右侧点点部分-->
  <div class="list-shortcut">
      <ul>
        <li :data-index="index" class="item" v-for="(item,index) in shortcut" :key="index">
          {{item}}
        </li>
      </ul>
  </div>
5-6 listview 基础组件的开发和应用-右侧快速入口实现(2)
触摸右侧标题
为了得到当前触摸的是哪一个点点,我们给加上了属性data-index
<div class="list-shortcut">
      <ul  @touchstart="onShortcutTouchStart" @touchmove.stop.prevent="onShortcutTouchMove">
        <li
            v-for="(item,index) in shortcut"
            :key="index"
            :data-index="index" class="item"
            :class="{current:index==currentIndex}"
        >
          {{item}}
        </li>
      </ul>
  </div>
当我们点击ul的时候我们需要获取到当前的点击元素的data-index来判断点击的是哪一个元素,那么怎么获取到data-index 这个属性呢,我们在dom,.js中export一个getData的方法。来设置或者获取属性
//给元素添加属性或者得到属性的值
export function getData(el,attrname,value){
    let prefix='data-'
    let  name=prefix+attrname
    if(value){
        el.setAttribute(name,value);
    }else{
        return el.getAttribute(name);
    }
}
在scroll组件中定义两个方法
  scrollTo() {
        // 滚动到指定的位置;这里使用apply 将传入的参数,传入到this.scrollTo()
        this.scroll && this.scroll.scrollTo.apply(this.scroll, arguments)
    },
    scrollToElement(){
        //滚动到指定的元素
        this.scroll && this.scroll.scrollToElement.apply(this.scroll, arguments)
    }
在listview的右侧字母列表中,绑定触摸事件。在触摸事件中记录开始的位置,和当前点击的位置。用this.touch来记录位置信息。
去到对应的项
onShortcutTouchStart(e) {
 	let anchorIndex=getData(e.target,'index')
  //记录开始的位置
  this.touch.y1=e.touches[0].pageY;//开始的y坐标
   this.touch.anchorIndex=anchorIndex;
  //去到listHeigth数组的某一项
  this._scollTo(anchorIndex);
},
listHeigth用来存 左侧的每一个项的 的clientHeight。这样我们可以计算当前的元素索引在左侧的哪个区间。
 watch: {
    data(){
      setTimeout(()=>{
          this.listHeigth=[];
          let height=0;
          this.listHeigth.push(0);
          let list=[...this.$refs.listGroup];
          for(let i=0;i<list.length;i++){
              height+=list[i].clientHeight;
              this.listHeigth.push(height);
          }
      },20)
    }
  },


 //滑动到哪里
  _scollTo(index){
    this.$refs.listview.scrollTo(0,-this.listHeigth[index],0);
    this.currentIndex=index;
  }
当手指滑动的时候,计算y2 和 y1的差值/字母块的高度,得到需要偏移多少个字母块,再加上当前的位置,得到需要滚动到的index,再滚动到相应的位置。
因为scroll本身可以滑动,当我们滑动右侧的时候,我们会阻止默认行为,阻止事件冒泡
@touchmove.stop.prevent="onShortcutTouchMove"
//计算手机放下的位置,和move之后的位置,比较,让左边的滚动,用this.touch来记录位置信息
  onShortcutTouchMove(e){
       this.touch.y2=e.touches[0].pageY;//开始的y坐标
       let delta=(this.touch.y2-this.touch.y1)/CUTHEIGHT | 0//向下取整。获取到最接近的值
       let anchorIndex=parseInt(this.touch.anchorIndex)+delta
       this._scollTo(anchorIndex);
  },
5-7 listview 基础组件的开发和应用-右侧快速入口实现(3)
当我们滑动左侧的时候,我们需要监听我们当前滑动的纵向y的值,来判断当前滑动的是哪一个区间,来确定应该指向的索引
所以在scroll组件中,我们可以props一个listenScroll
listenScroll:{
    type:Boolean,
    default:false
}
在_initScroll中去判断,当_initScroll为true的时候,即需要监听better-scroll的滚动时间,当为true的时候,需要派发一个滚动的事件,并且将相关数据emit给父组件。
在sroll.vue中并不需要写获取pos之后需要做的操作。sroll.vue只需要负责分发事件就可以。
 //判断是否需派发一个scroll事件
 if(this.listenScroll){//派发一个scroll事件
    let me=this;
    this.scroll.on('scroll',(pos)=>{
        //给父组件分发一个getScrollY事件。并且传递pos.y参数
        me.$emit('scroll',pos)
    })
 }
在listview中确定是否需要listenScroll
created(){
      //当不需要渲染到dom上,不需要实时监听的,我们不必要放在data上
      this.listenScroll=true;//是否监听滚动事件
      this.listHeight=[]
  },
在listview中定义scrollY,用来定义一个变量scrollY,实时记录歌手列表Y轴滚动的位置pos.y,
 data(){
    return{
        currentIndex:0,
        probeType:3,
        touch:{},//放右侧的字母的touchmove的位置信息
        scrollY:-1,
        diff: -1 //fixed title的偏移位置
    }
  },
注意。scroll组件中设置了probeType的默认值为1:滚动的时候会派发scroll事件,会截流,只能监听缓慢的滚动,监听不到swipe快速滚动
解决:需要在中传递:probeType=“3” 除了实时派发scroll事件,在swipe的情况下仍然能实时派发scroll事件
在listview中绑定scroll事件
 <scroll
      class="listview"
      ref="listview"
      :data="data"
      :probeType="probeType"
      :listenScroll="listenScroll"
      @scroll="scroll"
     >
     ...
     </scroll>
 //接受到子组件的pos.y
  scroll(pos){
      this.scrollY=pos.y;//获取到y值。并且给了scrollY
  },
注意:私有方法如_scrollTo()一般放在下面,公共方法或绑定事件的方法如scroll()放在上面
实时监听scrollY的变化,遍历listHeight得到每个group元素的【高度区间】上限height1和下限height2,对比scrollY和每个group元素的高度区间height2-height1,确定当前滚动位置currentIndex,映射到DOM中
 //监听scrollYDE变化
   scrollY(newY) {
          const listHeight = this.listHeight
          if(!listHeight){
            return
          }
          //当滚动到顶部,newY>0
          if(newY > 0) {
            this.currentIndex = 0
            return
          }
          //在中间部分滚动,遍历到最后一个元素,保证一定有下限,listHeight中的height比元素多一个
          for(let i = 0; i < listHeight.length-1; i++){
            let height1 = listHeight[i]
            let height2 = listHeight[i+1]

            //diff=下项+已经移动的距离
            //得到fixed title上边界距顶部的偏移距离 = 歌手列表title height下限 + newY(上拉为负值)
            this.diff = height2 + newY;

            if(-newY >= height1 && -newY < height2) {
                this.currentIndex = i
                //  console.log(this.currentIndex)
                return
            }
          }
          //当滚动到底部,且-newY大于最后一个元素的上限
          //currentIndex 比listHeight中的height多一个, 比元素多2个
          this.currentIndex = listHeight.length - 2
    },
5-8 listview 基础组件的开发和应用-右侧快速入口实现(4)
优化处理
touch事件都是加在父元素div class="list-shortcut"上的,点击头尾–“热”“Z”之前和之后的边缘区块,会发现也是可以点击的,但它没有对应显示的歌手列表,这个点击是没有意义的。touchmove一直在执行,这个事件一直没有结束,它的Y值就会变大,这样算出来的delta加上之前的touch.anchorIndex得到的值就可能会超
解决:
 //滑动到哪里
  _scollTo(index){
    //做边界处理
    //当点击的不是右侧的热门和字母块,
    if(!index && index !== 0){
      return
    }
    //当touchmove一直在执行
    if(index < 0){
      index = 0
    }else if(index > this.listHeight.length - 2){
      index = this.listHeight.length - 2
    }
    this.$refs.listview.scrollTo(0,-this.listHeight[index],0);
    this.currentIndex=index;
  },
5-9 listview 基础组件的开发和应用-滚动固定标题实现(上)
当滚动列表,顶部的标题部分固定,展示当前滚动到的列表项的标题。当滚动到下一项时,展示到下一项的标题
  <!-- 头部固定处理 -->
  <div class="list-fixed" v-show="fixedTitle" ref="fixedTitle">
      <div class="fixed-title">{{fixedTitle}}</div>
  </div>
当向下拉使得左侧列表往下移动的时候,我们希望fixedTitle是隐藏起来的,不能出现两个一样的标题。我们需要做边界处理,这种情况下的this.scrollY是大于0的

fixedTitle(){
  //做边界处理
  if(this.scrollY>0){
      return ''
  }
  return this.data[this.currentIndex] ?  this.data[this.currentIndex].title : ''
}
 .list-fixed
      position: absolute
      top: 0
      left: 0
      width: 100%
      .fixed-title
        height: 30px
        line-height: 30px
        padding-left: 20px
        font-size: $font-size-small
        color: $color-text-l
        background: $color-highlight-background
5-10 listview 基础组件的开发和应用-滚动固定标题实现(下)
优化:歌手列表的title上边界滚动到fixed title下边界时,给fixed title添加一个上移效果,使两个title过渡顺滑
定义一个diff数据来记录偏移位置
 data(){
    return{
        currentIndex:0,
        probeType:3,
        touch:{},//放右侧的字母的touchmove的事件
        scrollY:-1,
        diff: -1 //fixed title的偏移位置
    }
  },
在监听scrollY的时候实时得到diff
diff=下项+已经移动的距离
得到fixed title上边界距顶部的偏移距离 = 歌手列下限+已经移动的距离newY(上拉为负值)
scrollY(newY) {
          const listHeight = this.listHeight
          if(!listHeight){
            return
          }
          //当滚动到顶部,newY>0
          if(newY > 0) {
            this.currentIndex = 0
            return
          }
          //在中间部分滚动,遍历到最后一个元素,保证一定有下限,listHeight中的height比元素多一个
          for(let i = 0; i < listHeight.length-1; i++){
            let height1 = listHeight[i]
            let height2 = listHeight[i+1]

            //diff=下项+已经移动的距离
            //得到fixed title上边界距顶部的偏移距离 = 歌手列表title height下限-已经移动的距离+ newY(上拉为负值)
            this.diff = height2 + newY;

            if(-newY >= height1 && -newY < height2) {
                this.currentIndex = i
                //  console.log(this.currentIndex)
                return
            }
          }
          //当滚动到底部,且-newY大于最后一个元素的上限
          //currentIndex 比listHeight中的height多一个, 比元素多2个
          this.currentIndex = listHeight.length - 2
    },
浮动的标题的高度
const TITLE_HEIGHT = 30;//浮动的标题的高度
监听固定的标题的底部距离下一项的距离
  diff(newVal){
  //当距离大于0,并且当前的距离小于30,即下一项还没完全和固定标题粘合。
    let fixedTop=(newVal>0 && newVal<TITLE_HEIGHT) ? newVal - TITLE_HEIGHT : 0
    if(this.fixedTop === fixedTop){
        return
    }
    this.fixedTop = fixedTop
     this.$refs.fixedTitle.style.transform = `translate3d(0, ${fixedTop}px, 0)`
}
5-11 loading组件
实时歌手列表的数据也是通过异步获取的,我们在此也需要加上一个loading的组件
  <!-- loading部分 -->
<div class="loading-container" v-show="!data.length">
  <loading></loading>
</div>
.loading-container
    position: absolute
    width: 100%
    top: 50%
    transform: translateY(-50%)
</div>


 278
278

 被折叠的 条评论
为什么被折叠?


