


 该文介绍了如何通过WindowsAPI和自动化元素来捕获并显示来自其他应用程序的pictureBox控件中的图片。作者首先尝试通过自动化元素获取图片,但未找到直接方法,于是转向使用截屏技术。通过调用用户32和GDI32库的函数,成功实现了窗口区域的截图,并将截图应用到自己的pictureBox控件中。
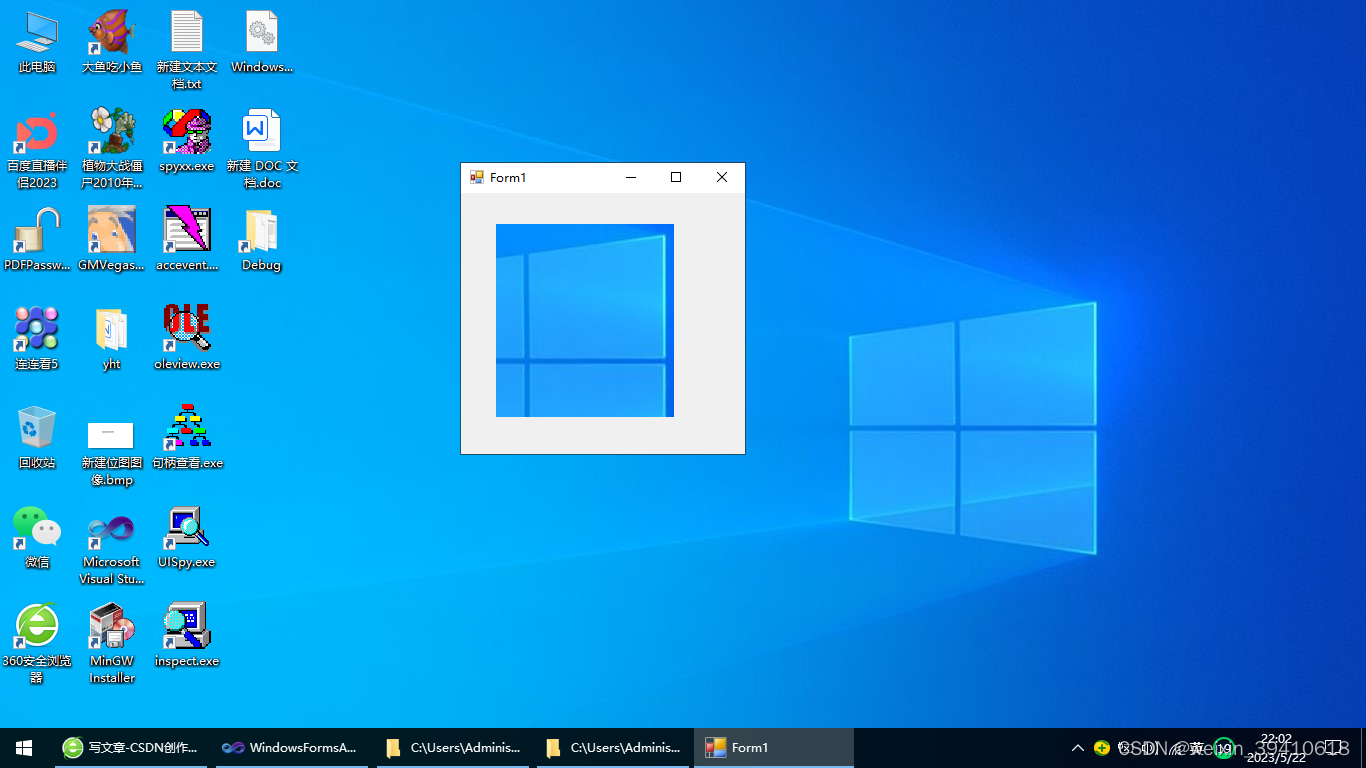
为了有一个叫做其他的应用程序,笔者专门制作了一个带有pictureBox控件的程序,并且设置背景了默认的图片。看到下图了吧,这就是咱们所谓的其他程序(三方程序)。要在咱们的应用程序,也显示那张图片,笔者开始感觉比较简单,后来发现即使用antumation抓了控件句柄,没有任何现成的方法提供给我们来操作图片。因此笔者想到是不是能够通过截屏来获得同样的效果。果不其然,网上的大牛们用稍加修改的windows api 赐予笔者小试牛刀的机会,还真特么就实现了。
好了就不买关子了,还是用代码说话吧。
using System;
using System.Collections.Generic;
using System.ComponentModel;
using System.Data;
using System.Drawing;
using System.Drawing.Imaging;
using System.Linq;
using System.Text;
using System.Windows.Forms;
using System.Windows.Automation;
using System.Threading;
using System.Runtime.InteropServices;

namespace WindowsFormsApplication4
{
    public partial class Form11 : Form
    {
        public Form11()
        {
            InitializeComponent();
        }

        private void button1_Click(object sender, EventArgs e)
        {
            AutomationElement r = AutomationElement.RootElement;
            Condition c0 = new PropertyCondition(AutomationElement.NameProperty, "Form1");
            AutomationElement w = r.FindFirst(TreeScope.Children, c0);

            Thread.Sleep(800);
            Condition c1 = new PropertyCondition(AutomationElement.AutomationIdProperty, "pictureBox1");
            AutomationElement pic = w.FindFirst(TreeScope.Children, c1);
            IntPtr pich = (IntPtr)pic.Current.NativeWindowHandle;

            System.Windows.Rect rect = pic.Current.BoundingRectangle;

            ScreenCapture sc = new ScreenCapture();


            RECT rect1 = new RECT();
            rect1.x1 = (int)0;
            rect1.y1 = (int)0;
            rect1.x2 = (int)rect.BottomRight.X;
            rect1.y2 = (int)rect.BottomRight.Y;

            Bitmap bitm = sc.CaptureWindow(pich, rect1);

            Image img = Image.FromHbitmap(bitm.GetHbitmap());
            this.pictureBox1.Image = img;
            /*

            TreeNode tn = new TreeNode();
            Condition cc = new PropertyCondition(AutomationElement.IsControlElementProperty, true);

            TreeWalker walker = new TreeWalker(cc);

            walkElements(w, tn, walker);
            ts(tn);
            */
            if (pic == null)
            {
                Console.WriteLine("Error!");
            }
            else {
                Console.WriteLine("Ok!");
            }

        }

        private void ts(TreeNode r) {
            foreach (TreeNode e in r.Nodes) {
                Console.WriteLine(e.ToString());
                ts(e);
            }
        }

        private void walkElements(AutomationElement r, TreeNode t, TreeWalker w)
        {

            AutomationElement e = w.GetFirstChild(r);
            while (e != null)
            {
                TreeNode cTN = t.Nodes.Add(e.Current.Name);
                walkElements(e, cTN, w);
                e = w.GetNextSibling(e);
            }
        }

        private void pictureBox1_Click(object sender, EventArgs e)
        {

        }
    }


    public struct RECT
    {
        public int x1;
        public int y1;
        public int x2;
        public int y2;
    }


    // 下面这个类完全来自于 【博客园】 【C#菜鸟之行】名为【c# 图片窗口区域截图代码】的文章
    // 超链接为 https://www.cnblogs.com/daming1233/p/6389021.html

    class ScreenCapture
    {
        [DllImport("user32.dll")]
        private static extern IntPtr GetDC(IntPtr hwnd);
        [DllImport("user32.dll")]
        private static extern IntPtr ReleaseDC(IntPtr hc, IntPtr hDest);
        [DllImport("user32.dll")]
        private static extern IntPtr GetWindowDC(IntPtr hwnd);
        [DllImport("user32.dll")]
        private static extern IntPtr GetForegroundWindow();
        [DllImport("user32.dll")]
        private static extern IntPtr GetWindowRect(IntPtr hWnd, out RECT rect);
        [DllImport("user32.dll")]
        private static extern bool PrintWindow(IntPtr hwnd, IntPtr hdcBlt, UInt32 nFlags);
        [DllImport("user32.dll")]
        private static extern IntPtr GetDesktopWindow();

        [DllImport("gdi32.dll")]
        private static extern IntPtr CreateDC(
             string lpszDriver,         // driver name驱动名
             string lpszDevice,         // device name设备名
             string lpszOutput,         // not used; should be NULL
             IntPtr lpInitData          // optional printer data
         );
        [DllImport("gdi32.dll")]
        private static extern int BitBlt(
             IntPtr hdcDest, // handle to destination DC目标设备的句柄
             int nXDest,   // x-coord of destination upper-left corner目标对象的左上角的X坐标
             int nYDest,   // y-coord of destination upper-left corner目标对象的左上角的Y坐标
             int nWidth,   // width of destination rectangle目标对象的矩形宽度
             int nHeight, // height of destination rectangle目标对象的矩形长度
             IntPtr hdcSrc,   // handle to source DC源设备的句柄
             int nXSrc,    // x-coordinate of source upper-left corner源对象的左上角的X坐标
             int nYSrc,    // y-coordinate of source upper-left corner源对象的左上角的Y坐标
             CopyPixelOperation dwRop   // raster operation code光栅的操作值
         );
        //static extern int BitBlt(IntPtr hdcDest, int xDest, int yDest, int
        //wDest, int hDest, IntPtr hdcSource, int xSrc, int ySrc, CopyPixelOperation rop);

        [DllImport("gdi32.dll")]
        private static extern IntPtr CreateCompatibleDC(
         IntPtr hdc // handle to DC
         );
        [DllImport("gdi32.dll")]
        private static extern IntPtr CreateCompatibleBitmap(
             IntPtr hdc,         // handle to DC
             int nWidth,      // width of bitmap, in pixels
             int nHeight      // height of bitmap, in pixels
         );
        [DllImport("gdi32.dll")]
        private static extern IntPtr SelectObject(
             IntPtr hdc,           // handle to DC
             IntPtr hgdiobj    // handle to object
         );
        [DllImport("gdi32.dll")]
        private static extern int DeleteDC(
            IntPtr hdc           // handle to DC
         );


        /// <summary>
        /// 抓取屏幕(层叠的窗口)
        /// </summary>
        /// <param name="x">左上角的横坐标</param>
        /// <param name="y">左上角的纵坐标</param>
        /// <param name="width">抓取宽度</param>
        /// <param name="height">抓取高度</param>
        /// <returns></returns>
        public Bitmap CaptureScreen(int x, int y, int width, int height)
        {
            Bitmap bmp = new Bitmap(width, height);
            using (Graphics g = Graphics.FromImage(bmp))
            {
                g.CopyFromScreen(new Point(x, y), new Point(0, 0), bmp.Size);
                g.Dispose();
            }
            //bit.Save(@"capture2.png");
            return bmp;
        }

        /// <summary>
        /// 抓取整个屏幕
        /// </summary>
        /// <returns></returns>
        public Bitmap CaptureScreen()
        {
            Size screenSize = Screen.PrimaryScreen.Bounds.Size;
            return CaptureScreen(0, 0, screenSize.Width, screenSize.Height);
        }

        /// <summary>
        /// 全屏截图
        /// </summary>
        /// <returns></returns>
        public Image CaptureScreenI()
        {
            return CaptureWindow(GetDesktopWindow());
        }

        /// <summary>
        /// 全屏指定区域截图
        /// </summary>
        /// <returns></returns>
        public Image CaptureScreenI(RECT rect)
        {
            return CaptureWindow(GetDesktopWindow(), rect);
        }

        /// <summary>
        /// 指定窗口截图
        /// </summary>
        /// <param name="handle">窗口句柄. (在windows应用程序中, 从Handle属性获得)</param>
        /// <returns></returns>
        public Bitmap CaptureWindow(IntPtr hWnd)
        {
            IntPtr hscrdc = GetWindowDC(hWnd);
            RECT rect = new RECT();
            return CaptureWindow(hWnd, rect);
        }

        /// <summary>
        /// 指定窗口区域截图
        /// </summary>
        /// <param name="handle">窗口句柄. (在windows应用程序中, 从Handle属性获得)</param>
        /// <param name="rect">窗口中的一个区域</param>
        /// <returns></returns>
        public Bitmap CaptureWindow(IntPtr hWnd, RECT rect)
        {
            // 获取设备上下文环境句柄
            IntPtr hscrdc = GetWindowDC(hWnd);

            // 创建一个与指定设备兼容的内存设备上下文环境(DC)
            IntPtr hmemdc = CreateCompatibleDC(hscrdc);
            IntPtr myMemdc = CreateCompatibleDC(hscrdc);

            // 返回指定窗体的矩形尺寸
            RECT rect1;
            GetWindowRect(hWnd, out rect1);

            // 返回指定设备环境句柄对应的位图区域句柄
            IntPtr hbitmap = CreateCompatibleBitmap(hscrdc, rect1.x2 - rect1.x1, rect1.y2 - rect1.y1);
            IntPtr myBitmap = CreateCompatibleBitmap(hscrdc, rect.x2 - rect.x1, rect.y2 - rect.y1);

            //把位图选进内存DC
            // IntPtr OldBitmap = (IntPtr)SelectObject(hmemdc, hbitmap);
            SelectObject(hmemdc, hbitmap);
            SelectObject(myMemdc, myBitmap);

            /
            //
            // 下面开始所谓的作画过程,此过程可以用的方法很多,看你怎么调用 API 了
            //
            /

            // 直接打印窗体到画布
            PrintWindow(hWnd, hmemdc, 0);

            // IntPtr hw = GetDesktopWindow();
            // IntPtr hmemdcClone = GetWindowDC(myBitmap);

            BitBlt(myMemdc, 0, 0, rect.x2 - rect.x1, rect.y2 - rect.y1, hmemdc, rect.x1, rect.y1, CopyPixelOperation.SourceCopy | CopyPixelOperation.CaptureBlt);
            //SelectObject(myMemdc, myBitmap);

            Bitmap bmp = Bitmap.FromHbitmap(myBitmap);
            DeleteDC(hscrdc);
            DeleteDC(hmemdc);
            DeleteDC(myMemdc);
            return bmp;
        }

        /// <summary>
        /// 指定窗口截图 保存为图片文件
        /// </summary>
        /// <param name="handle"></param>
        /// <param name="filename"></param>
        /// <param name="format"></param>
        public void CaptureWindowToFile(IntPtr handle, string filename, ImageFormat format)
        {
            Image img = CaptureWindow(handle);
            img.Save(filename, format);
        }

        /// <summary>
        /// 全屏截图 保存为文件
        /// </summary>
        /// <param name="filename"></param>
        /// <param name="format"></param>
        public void CaptureScreenToFile(string filename, ImageFormat format)
        {
            Image img = CaptureScreen();
            img.Save(filename, format);
        }

        /// <summary>
        /// 设置 RECT 的左下右上
        /// </summary>
        /// <param name="rect">给出要设定的 RECT</param>
        /// <param name="left">左边</param>
        /// <param name="bottom">下边</param>
        /// <param name="right">右边</param>
        /// <param name="top">上边</param>
        public void SetRECT(ref RECT rect, int x1, int y1, int x2, int y2)
        {
            rect.x1 = x1;
            rect.y1 = y1;
            rect.x2 = x2;
            rect.y2 = y2;

        }

        /// <summary>
        /// 合并图片
        /// </summary>
        /// <param name="bmp1">图片1</param>
        /// <param name="bmp2">图片2</param>
        public Bitmap HBpic(Bitmap bmp1, Bitmap bmp2)
        {
            Bitmap newBmp = new Bitmap(bmp1.Width, bmp1.Height + bmp2.Height);
            var g = Graphics.FromImage(newBmp);
            g.DrawImage(bmp1, 0, 0);
            g.DrawImage(bmp2, 0, bmp1.Height);

            return newBmp;
        }


    }
}
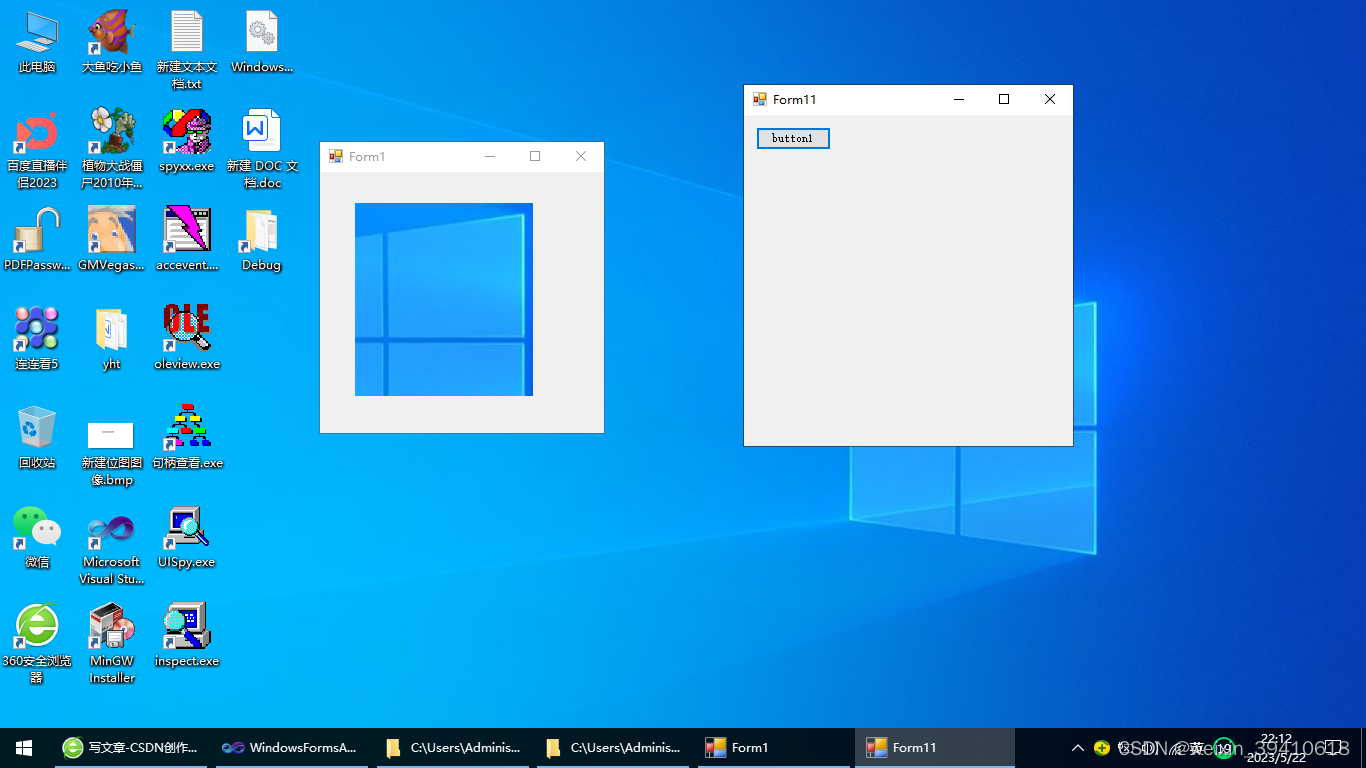
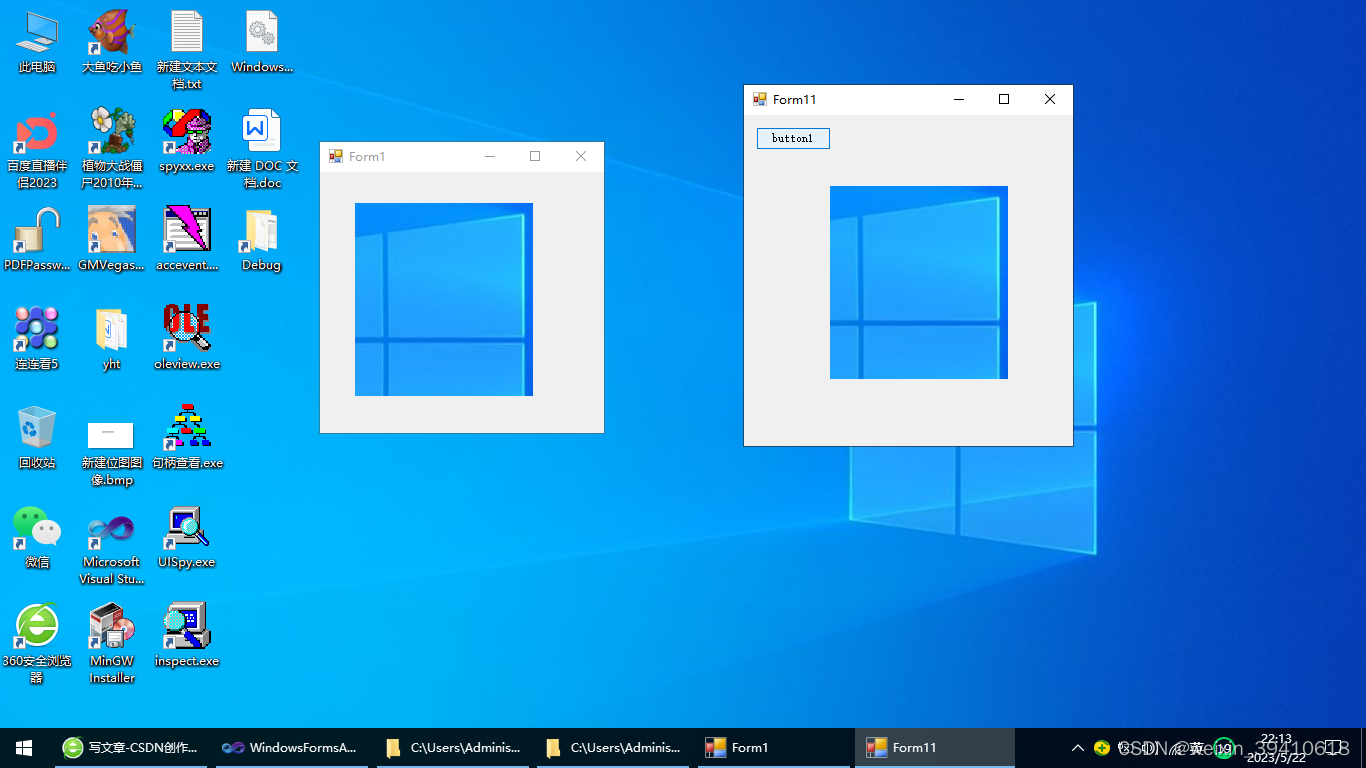
效果图用两张来展示吧,其一是未按button前的,其二是按了button后的。


 被折叠的 条评论
为什么被折叠?
被折叠的 条评论
为什么被折叠?
 到【灌水乐园】发言


