


概述
桌面应用是个人兴趣,但不是很擅长。这里接着上一篇的内容,上一篇主要是springboot,jpa,swing集成到一起,启动是否正常。这一篇主要是应用的具体实现,页面编写。基本的todo的添加,完成,展示。页面的布局,设计自己的组件,拖拽移动,修改窗口的大小,保存配置信息。便签功能就是复制一个todo。
效果展示
整个应用功能挺简单的,已经基本完善了,设计理念就是简单,用一句话描述就是,将一些标记放到桌面上任意位置不动,快速添加标记todo,快速去掉完成的todo,不需要做任何的其他操作。还有一些不完善的地方,第一个是一些控件的不美观,第二个是鼠标移动到窗口之后才展示右上角的控制按钮,移出后消失,虽然做了一个简单的但效果不理想,会闪烁,就注释掉了。以后可能会完善😎😏。

知识点
话不多说先上图,这里主要代码,下面会详细讲一下。
textField/textArea 提示文字
功能介绍,在输入框中开始展示一个颜色比较淡的提示文字,然后鼠标点进去之后清除。并且当没有输入任何内容之后点击鼠标会恢复提示文字。
package com.mucong.easytodo.util;

import javax.swing.*;
import java.awt.*;
import java.awt.event.FocusEvent;
import java.awt.event.FocusListener;

public class JTextFieldFocusTipListner implements FocusListener {
    private String tip;
    private JTextArea textField;

    public JTextFieldFocusTipListner(String tip, JTextArea textField) {
        this.tip = tip;
        this.textField = textField;
        this.textField.setForeground(Color.gray);
        this.textField.setText(tip);
    }

    @Override
    public void focusGained(FocusEvent e) {
        String temp = textField.getText();
        if(temp.equals(tip)) {
            textField.setText("");
            textField.setForeground(Color.WHITE);
        }

    }

    @Override
    public void focusLost(FocusEvent e) {
        String temp = textField.getText();
        if(temp.equals("")) {
            textField.setForeground(Color.GRAY);
            textField.setText(tip);
        }

    }
}
自定义button
通过这个案例可以定义自己各种按钮,这里定义的是一个圆环按钮。
import com.mucong.easytodo.constant.ColorTheme;

import javax.swing.*;
import java.awt.*;
import java.awt.geom.Ellipse2D;

/**
 * 圆环按钮
 */
public class RoundButton extends JButton {

    private Shape shape = null;

    public RoundButton(String label) {
        super(label);
        Dimension size = getPreferredSize();
        size.width = size.height = Math.max(size.width, size.height);
        setPreferredSize(size);
        setContentAreaFilled(false);
    }

    protected void paintComponent(Graphics g) {
        if (getModel().isArmed()) {
            g.setColor(Color.LIGHT_GRAY);
        } else {
            g.setColor(getBackground());
        }
        g.fillOval(0, 0, getSize().width - 1, getSize().height - 1);
        g.setColor(ColorTheme.BLACK);
        g.fillOval(3, 3, getSize().width - 1-6, getSize().height - 1-6);
        super.paintComponents(g);
    }

    protected void paintBorder(Graphics g) {
        g.setColor(getForeground());
        g.drawOval(0, 0, getSize().width - 1, getSize().height - 1);
    }

    public boolean contains(int x, int y) {
        if ((shape == null) || (!shape.getBounds().equals(getBounds()))) {
            shape = new Ellipse2D.Float(0, 0, getWidth(), getHeight());
        }
        return shape.contains(x, y);
    }

}
h2数据库操作配置
使用的springboot相对来说比较简单,也是我选择springboot来实现的原因,只需要配置一个实体类(Task实体类),继承JpaRepository接口就可以了🥷
spring:
  datasource:
    driver-class-name: org.h2.Driver
    url: jdbc:h2:file:./data;AUTO_SERVER=TRUE
    username: sa
    password:
    schema: classpath:db/schema.sql
    data: classpath:db/data.sql
    sql-script-encoding: UTF-8
  jpa:
    database: h2
    show-sql: true
    hibernate:
      ddl-auto: update
//这里是应用展示所有的todo的地方,首先从数据库中查询所有状态为todo的,然后封装成控件添加到应用面板中。
public void loadTask() {
        java.util.List<Task> tasks = taskRespository.findAll(Example.of(new Task().setTaskState(TaskStateEnum.TODO)));
        if (tasks.isEmpty()) {
            createTaskList();
            ptextField.setBackground(ColorTheme.BLACK);
            ptextField.setBorder(null);
            ptextField.setEnabled(false);
            taskList.add(ptextField);
            textField = null;
            taskList.updateUI();
            return;
        }
        createTaskList();
        taskList.removeAll();
        for (Task task : tasks) {
            taskList.add(new TaskDialog.TaskItemPane(1, task));
        }
        ptextField.setBackground(ColorTheme.BLACK);
        ptextField.setBorder(null);
        ptextField.setEnabled(false);
        taskList.add(ptextField);
        textField = null;
        taskList.updateUI();
        scrollPane.getVerticalScrollBar().setValue(scrollPane.getVerticalScrollBar().getMaximum());
    }
	//添加新的todo,同时重新加载
	private void creatTask(String text) {
        Task t = new Task();
        t.setName(text);
        t.setCreateAt(new Date());
        t.setTaskState(TaskStateEnum.TODO);
        taskRespository.save(t);
        mainPane.updateHis();
    }
    //完成todo,修改状态为complete
	public void cplTask(TaskDialog.TaskItemPane itemPane) {
        taskList.remove(itemPane);
        itemPane.taskInfo.setTaskState(TaskStateEnum.COMPLETE);
        taskRespository.save(itemPane.taskInfo);
        loadTask();
    }
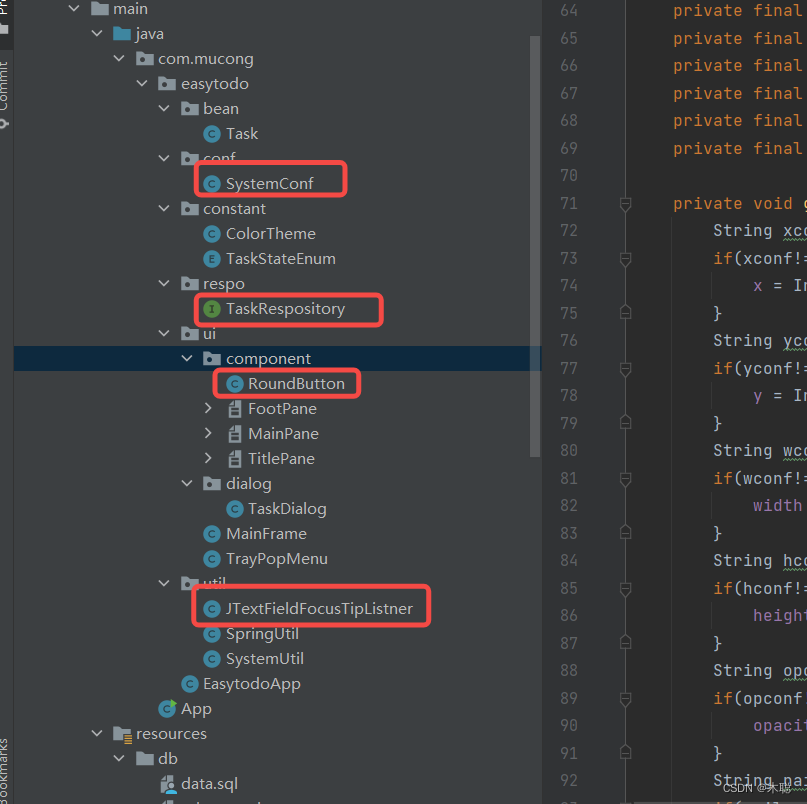
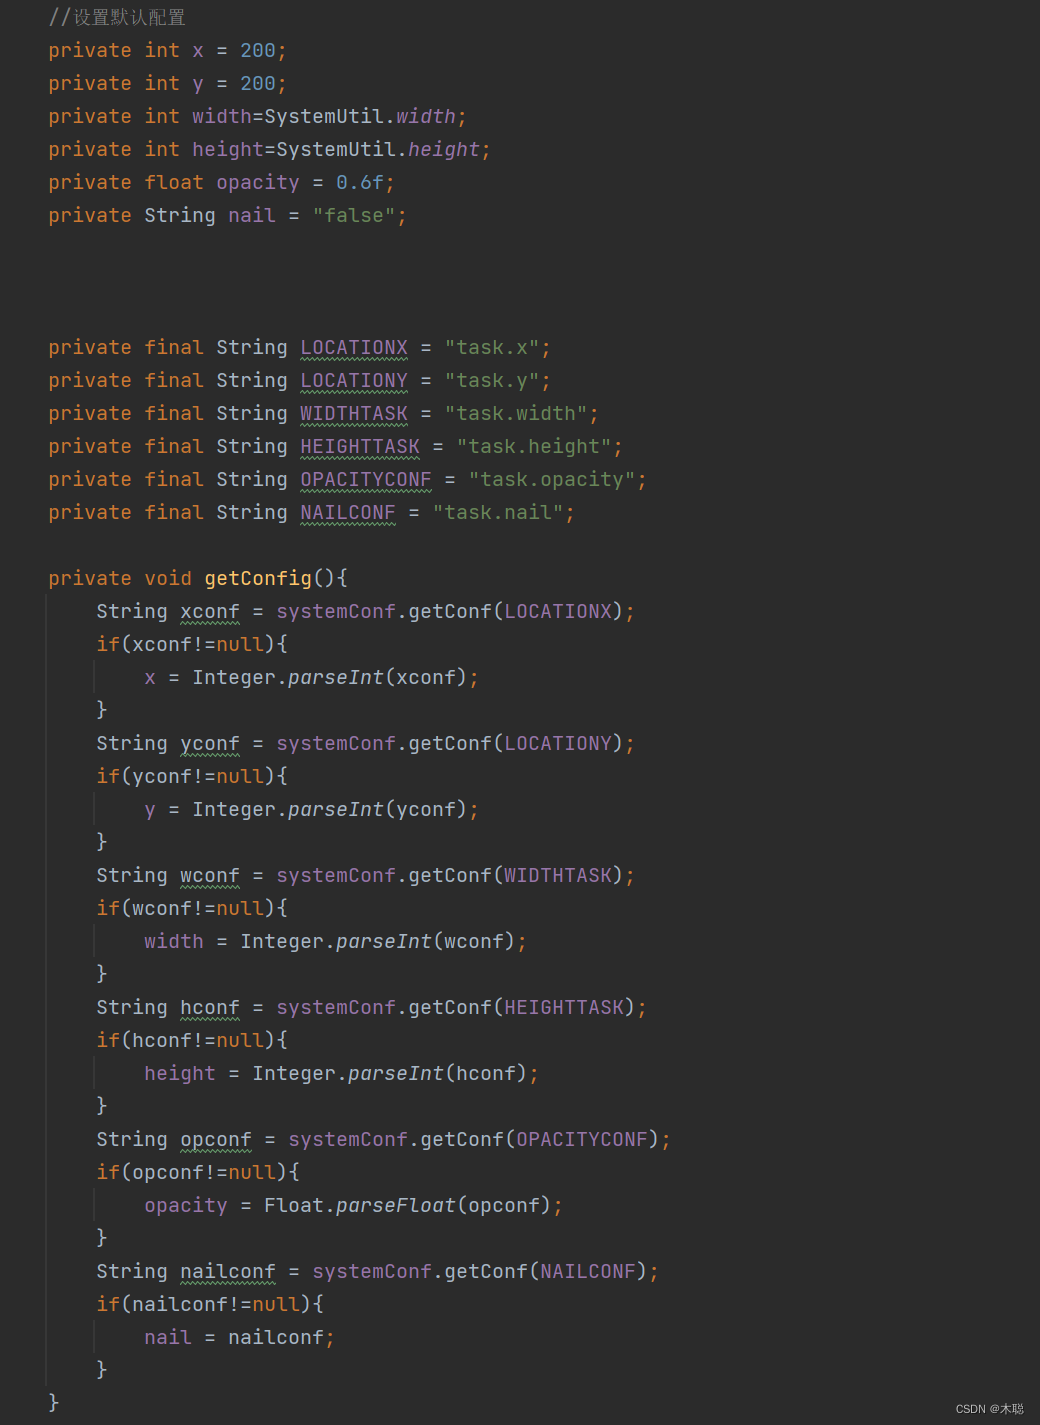
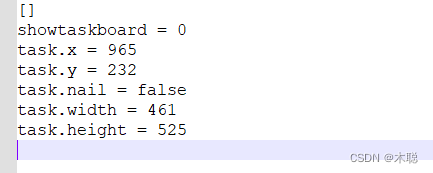
配置文件保存
一般的应用都会有一个设置功能,并且重新启动后还能还原以前设置的功能,这个应用需要记录窗口的位置大小,是否固定等配置。下次启动之后出现在老地方。
import cn.hutool.core.io.FileUtil;
import cn.hutool.setting.Setting;
import org.springframework.stereotype.Component;

import java.io.File;
import java.nio.charset.StandardCharsets;

@Component("SystemConf")
public class SystemConf {
    public static final String USER_HOME = System.getProperty("user.home");
    public static final String CONFIG_PATH = USER_HOME + File.separator + ".easytodo";

    public final static String SHOW_TASK = "showtaskboard";
    public final static String SHOW_NOTES = "shownotesboard";

    Setting setting;
    private String settingPath = CONFIG_PATH + File.separator + "config" + File.separator + "system.setting";

    public SystemConf() {
        setting = new Setting(FileUtil.touch(settingPath), StandardCharsets.UTF_8,false);
    }

    public void setConf(String key,String value){setting.put(key,value);}
    public String getConf(String key){
        return setting.get(key);
    }


    public void save(){
        setting.store(settingPath);
    }


}
控件的大小随外部变化
这个功能是挺复杂的,我这边采用了一个比较取巧的方式,用的是BorderLayout的自动收放,将控件放到center中,就能自动变化大小。
窗口的拖拽移动和改变大小
窗口使用了半透明,所以原本窗口的操作都没有了需要自己实现。
主要用到鼠标的移动事件和点击事件
拖拽移动:首先记录点击的坐标,然后拖拽的时候移动的相对与点击坐标的位移,同步修改主窗口的位置。
拖拽改变大小:首先记录拖拽的位置,然后根据拖动不同位置调整大小和位置,记录位置的方式通过光标,当鼠标移动到指定位置,使用不同的坐标记录resize_cursor,在拖拽的时候,根据不同的光标进行操作。
dragMouseLsr = new MouseAdapter() {
            @Override
            public void mousePressed(MouseEvent e) {
                super.mousePressed(e);
                dragx = e.getX();
                dragy = e.getY();
            }

            @Override
            public void mouseReleased(MouseEvent e) {
                super.mouseReleased(e);
                Point point = taskFrame.getLocation();
                if(point.x != x || point.y != y){
                    saveLocation();
                }
                if(width != taskFrame.getWidth()||height != taskFrame.getHeight()){
                    saveSize();
                }
            }
        };
        dragListner = new MouseMotionAdapter() {
            @Override
            public void mouseMoved(MouseEvent e) {
                super.mouseMoved(e);
                double left = Math.abs(e.getPoint().getX());
                double top = Math.abs(e.getPoint().getY());
                double buttom = Math.abs(taskFrame.getSize().getHeight() - e.getPoint().getY());
                double right = Math.abs(taskFrame.getSize().getWidth() - e.getPoint().getX());
                double blur = 2.0;
                if (left <blur && top < blur){
                    taskFrame.setCursor(Cursor.getPredefinedCursor(Cursor.NW_RESIZE_CURSOR));
                }else if(left < blur && buttom < blur){
                    taskFrame.setCursor(Cursor.getPredefinedCursor(Cursor.SW_RESIZE_CURSOR));
                }else if(left < blur){
                    taskFrame.setCursor(Cursor.getPredefinedCursor(Cursor.W_RESIZE_CURSOR));
                }else if(right < blur && top < blur){
                    taskFrame.setCursor(Cursor.getPredefinedCursor(Cursor.NE_RESIZE_CURSOR));
                }else if(right < blur && buttom < blur){
                    taskFrame.setCursor(Cursor.getPredefinedCursor(Cursor.SE_RESIZE_CURSOR));
                }else if(right < blur){
                    taskFrame.setCursor(Cursor.getPredefinedCursor(Cursor.E_RESIZE_CURSOR));
                }else if(top < blur){
                    taskFrame.setCursor(Cursor.getPredefinedCursor(Cursor.N_RESIZE_CURSOR));
                }else if(buttom < blur){
                    taskFrame.setCursor(Cursor.getPredefinedCursor(Cursor.S_RESIZE_CURSOR));
                }else{
                    taskFrame.setCursor(null);
                }


            }

            @Override
            public void mouseDragged(MouseEvent e) {
                super.mouseDragged(e);
                if(taskFrame.getCursor().getType() == Cursor.DEFAULT_CURSOR){
                    Point point = taskFrame.getLocation();
                    int offsetx = e.getX() - dragx;
                    int offsety = e.getY() - dragy;
                    taskFrame.setLocation(point.x + offsetx, point.y + offsety);
                    return;
                }
                Dimension dimension = taskFrame.getSize();
                switch (taskFrame.getCursor().getType()) {
                    case Cursor.E_RESIZE_CURSOR:
                        dimension.setSize(e.getX(), dimension.getHeight());
                        taskFrame.setSize(dimension);
                        break;
                    case Cursor.S_RESIZE_CURSOR:
                        dimension.setSize(dimension.getWidth(), e.getY());
                        taskFrame.setSize(dimension);
                        break;
                    case Cursor.SE_RESIZE_CURSOR:
                        dimension.setSize(e.getX(), e.getY());
                        taskFrame.setSize(dimension);
                        break;
                    case Cursor.N_RESIZE_CURSOR:
                        dimension.setSize(dimension.getWidth(), dimension.getHeight() - e.getY());
                        taskFrame.setSize(dimension);
                        taskFrame.setLocation(taskFrame.getLocationOnScreen().x, taskFrame.getLocationOnScreen().y + e.getY());
                        break;
                    case Cursor.W_RESIZE_CURSOR:
                        dimension.setSize(dimension.getWidth() - e.getX(), dimension.getHeight());
                        taskFrame.setSize(dimension);
                        taskFrame.setLocation(taskFrame.getLocationOnScreen().x + e.getX(), taskFrame.getLocationOnScreen().y);
                        break;
                    case Cursor.NE_RESIZE_CURSOR:
                        dimension.setSize(e.getX(), dimension.getHeight() - e.getY());
                        taskFrame.setSize(dimension);
                        taskFrame.setLocation(taskFrame.getLocationOnScreen().x, taskFrame.getLocationOnScreen().y + e.getY());
                        break;
                    case Cursor.NW_RESIZE_CURSOR:
                        dimension.setSize(dimension.getWidth() - e.getX(), dimension.getHeight() - e.getY());
                        taskFrame.setSize(dimension);
                        taskFrame.setLocation(taskFrame.getLocationOnScreen().x + e.getX(), taskFrame.getLocationOnScreen().y + e.getY());
                        break;
                    case Cursor.SW_RESIZE_CURSOR:
                        dimension.setSize(dimension.getWidth() - e.getX(), e.getY());
                        taskFrame.setSize(dimension);
                        taskFrame.setLocation(taskFrame.getLocationOnScreen().x + e.getX(), taskFrame.getLocationOnScreen().y);
                        break;
                }
            }
        };
窗口固定
功能描述:固定窗口在当前位置,不能移动也不能改变大小。
功能实现:取消监听移动和修改大小的监听,在这个项目中有点复杂,因为涉及到scrollpane,外部组件的监听不能同步到内部,所以在内部还需要加上监听。具体在代码中有实现。
private void nailSet() {
        if("true".equals(nail)){
            this.removeMouseListener(dragMouseLsr);
            this.removeMouseMotionListener(dragListner);
        }else{
            this.addMouseListener(dragMouseLsr);
            this.addMouseMotionListener(dragListner);
        }
    }
打包成应用程序
需要在pom文件中添加配置,这里使用的是java packager,可以设置linux,windows,mac,只需要提供相应的jre。
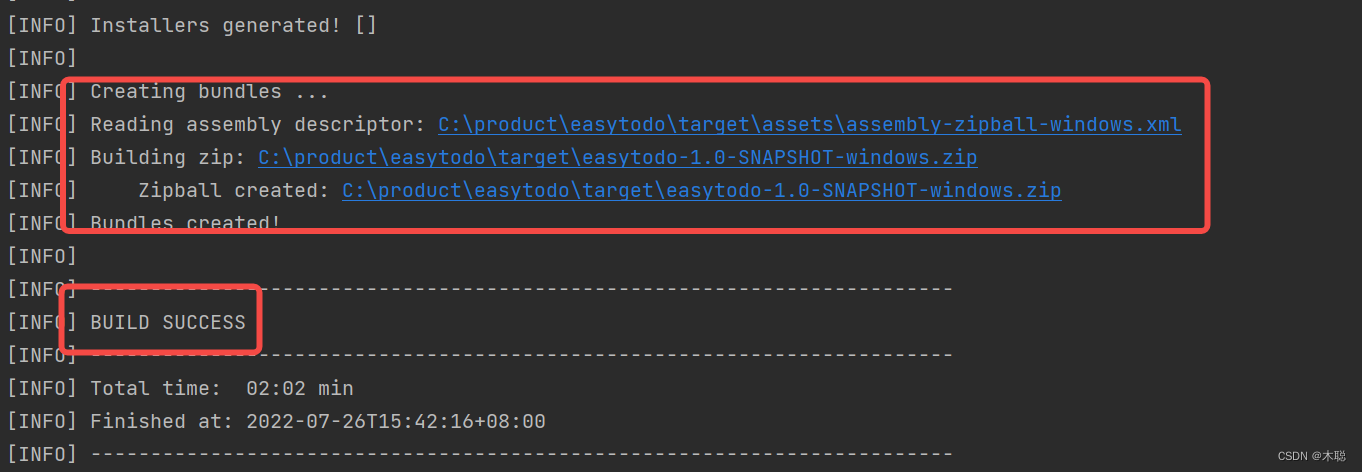
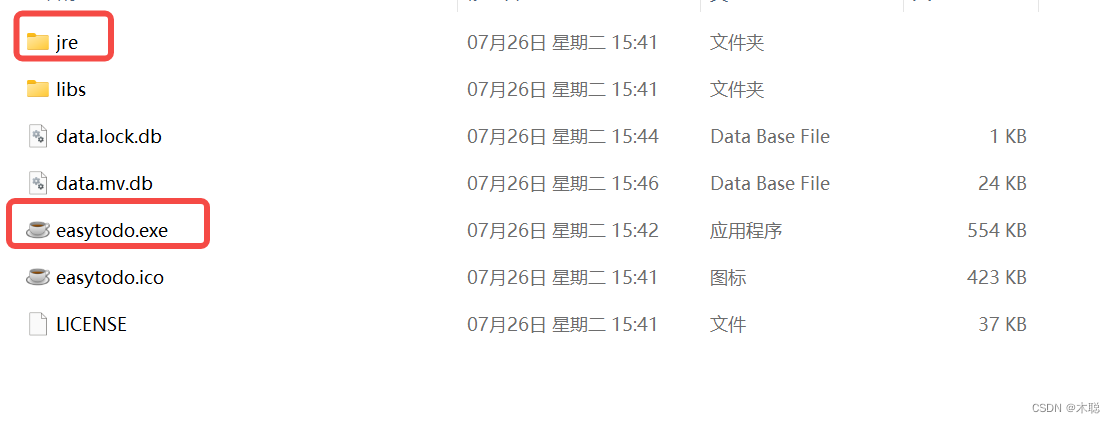
这里打包成windows应用,配置jre后直接执行 mvn packege ,等一会就有一个压缩包,里面已经包含了jre了。
解压easytodo-1.0-SNAPSHOT-windows.zip文件,里面有个exe文件执行就可以了。
<build>
<plugins>
<plugin>
<groupId>io.github.fvarrui</groupId>
<artifactId>javapackager</artifactId>
<version>1.6.3</version>
<configuration>
<bundleJre>true</bundleJre>
<mainClass>com.mucong.App</mainClass>
<generateInstaller>true</generateInstaller>
</configuration>
<executions>
<execution>
<id>bundling-for-windows</id>
<phase>package</phase>
<goals>
<goal>package</goal>
</goals>
<configuration>
<platform>windows</platform>
<createZipball>true</createZipball>
<jrePath>C:/Program Files/Java/jre1.8.0_321</jrePath>
<!-- <administratorRequired>true</administratorRequired>-->
<winConfig>
<!-- general properties -->
<generateSetup>true</generateSetup>
<generateMsi>true</generateMsi>
<generateMsm>true</generateMsm>
<!-- setup generation properties -->
<setupMode>installForAllUsers</setupMode>
<createDesktopIconTask>true</createDesktopIconTask>
<disableDirPage>false</disableDirPage>
<disableFinishedPage>false</disableFinishedPage>
<setupLanguages>
<english>compiler:Default.isl</english>
<!-- <spanish>compiler:Languages\Chinese.isl</spanish>-->
</setupLanguages>
</winConfig>
</configuration>
</execution>
<!-- <execution>-->
<!-- <id>bundling-for-linux</id>-->
<!-- <phase>package</phase>-->
<!-- <goals>-->
<!-- <goal>package</goal>-->
<!-- </goals>-->
<!-- <configuration>-->
<!-- <platform>linux</platform>-->
<!-- <createTarball>true</createTarball>-->
<!--<!– <jdkPath>X:\\path\to\linux\jdk</jdkPath>–>-->
<!-- </configuration>-->
<!-- </execution>-->
<!-- <execution>-->
<!-- <id>bundling-for-mac</id>-->
<!-- <phase>package</phase>-->
<!-- <goals>-->
<!-- <goal>package</goal>-->
<!-- </goals>-->
<!-- <configuration>-->
<!-- <platform>mac</platform>-->
<!-- <createTarball>true</createTarball>-->
<!-- <!– <jdkPath>X:\\path\to\mac\jdk</jdkPath>–>-->
<!-- </configuration>-->
<!-- </execution>-->
</executions>
</plugin>
</plugins>
</build>
总结
关于springboot+jpa+swing搭建应用项目已经结束了,因为还有工作,平时挤压一些时间,累计花费时间应该有3天,不管什么简单的功能,对我来说都挺有趣的,javafx和swing我选择了swing,以前用过javafx,相对来说写起来简单点,但是对这个应用来说并不占优势。而且特别喜欢swing里面的一个ideaui,这里没有用到。所有的页面配色都是自己设计的,包含页面图标都是自己画的。算是一个完整的app设计开发。当然专业的应用程序会比这个复杂很多,每个步骤都会有专业的负责,但是通过这个项目可以了解整个流程,建议大家也试着自己设计一个应用程序,并且实现它,在这个过程中了解每个步骤之间的关系,其他岗位主要做什么,关心什么,往深入的想什么是devOps,解决了什么问题,最后希望大家以后在工作中更好的交流😂😂。


 1146
1146

 被折叠的 条评论
为什么被折叠?
被折叠的 条评论
为什么被折叠?
 到【灌水乐园】发言


