


 本文详细介绍了Flutter中的Expended组件,它用于在Row、Column或Flex中创建可填充父组件剩余空间的子组件。通过设置flex属性,可以调整子组件占据的空间比例。示例代码展示了如何在Row中使用Expended,以确保文字不超出屏幕并保持布局整洁。总结了Expended的使用注意事项,强调其通常与Row和Column配合使用。
一切皆组件!!!
前言
本文详细讲解Expended的用法。Expended往往与row和clomn 组合使用。否则运行报错,但应用可以正常运行
一、Expended是什么?
/// Creates a widget that expands a child of a [Row], [Column], or [Flex]
/// so that the child fills the available space along the flex widget's
/// main axis.
官方文档:Expended是继承Flexible类的组件(继承关系:Expended=>Flexible=>ParentDataWidget),用于创建一个 [Row]、[Column] or [Flex]中的子组件,该子组件可以在父组件的主轴方向灵活扩展,以填满父组件的剩余空间。
所以Expended往往与row、clomn和 Flex组合使用。否则报错,如下
════════ Exception caught by widgets library ══════════════
Incorrect use of ParentDataWidget.
二、使用步骤
1、属性
const Expanded({
Key? key,
int flex = 1,
required Widget child,
}) : super(key: key, flex: flex, fit: FlexFit.tight, child: child);
}
child 子组件,不多解释。
flex int类型,弹性系数。多个Expanded使用时,可分配子组件在父组件剩余空间的所占空间比例。
2、代码如下(示例):
class _ExpandedWidgetsState extends State<ExpandedWidgets> {
  @override
  Widget build(BuildContext context) {
    // return Text('data');
    return Container(
        height: 200,
        alignment: Alignment.center,
        color: Colors.orange,
        child: Row(
          children: [
            SizedBox(width: 5),
            Text(
              '¥',
              style: TextStyle(
                color: Colors.red,
                fontSize: 10,
                // backgroundColor: Colors.red
              ),
            ),
            Text(
              '30',
              style: TextStyle(
                color: Colors.red,
                fontSize: 13,
                // backgroundColor: Colors.red
              ),
            ),
            SizedBox(width: 5),
            Text(
              '销量',
              style: TextStyle(
                fontSize: 10,
                // backgroundColor: Colors.red
              ),
            ),
            SizedBox(width: 5),
            Text(
              '2000',
              style: TextStyle(
                fontSize: 10,
                // backgroundColor: Colors.red
              ),
            ),
            Expanded(//最后两个组件使用Expanded,将剩余空间分成3份,第一个占1/3,第两个占2/3
              flex: 1,
              child: Text(
                  //最后一个组件放在Expanded中,沿着Row的主轴方向填充满父组件。可以不放在Expanded里,对比看下效果
                  "最后一个组件放在Expanded中,沿着Row的主轴方向填充满父组件。可以不放在Expanded里,对比看下效果",
                  style: TextStyle(
                    fontSize: 10,
                    color: Colors.white,
                    fontFamily: "PingFang",
                  )),
            ),
            Expanded(//
              flex: 2,
              child: Container(
                child: Text("我是flex: 1组件",
                    style: TextStyle(
                        fontSize: 10,
                        color: Colors.white,
                        fontFamily: "PingFang",
                        backgroundColor: Colors.green)),
                color: Colors.red,
              ),
            )
          ],
        ));
  }
}
3、运行结果如图:
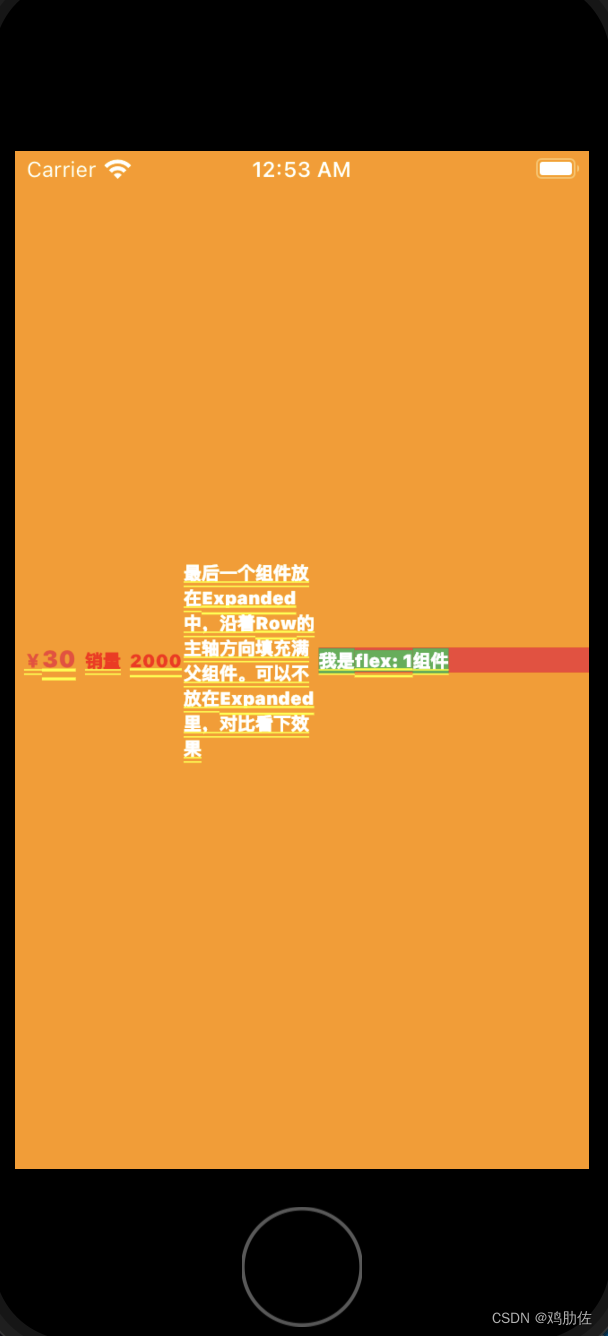
最后一个组件不放在Expanded中,文字过长,超出屏幕会报错,不过不影响运行:
════════ Exception caught by rendering library ═══════
The following assertion was thrown during layout:
A RenderFlex overflowed by 273 pixels on the right.
总结
Expended的用法很简单,注意下与row和clomn 组合使用,就没什么问题。


 被折叠的 条评论
为什么被折叠?
被折叠的 条评论
为什么被折叠?
 到【灌水乐园】发言


