


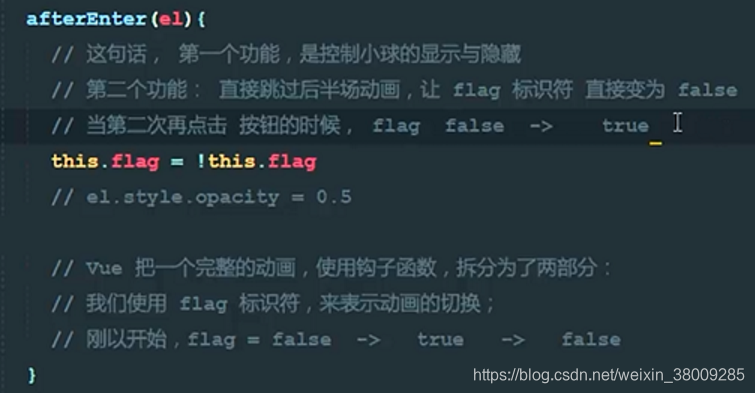
1、小球动画flag标识符的作用分析
2、组件定义方式的复习
3、父组件向子组件传递data数据和methods方法
注意:父组件传递给子组件的属性名可以直接用,不需要再data中再次定义
(1)父组件向子组件传值和data与props的区别
data://注意:子组件中的data数据,并不是通过父组件传递过来的,而是子组件自身私有的,
//比如:子组件通过Ajax请求回来的数据,都可以放到data身上
//data中的数据是在子组件中可读可写
props://注意:组件中所有props中的数据,都是通过父组件传递给子组件的
//把父组件传递过来的parentmeg属性,先在props数组中定义之后才能使用
//props中的数据是在子组件中只读,不可修改
(2)父组件向子组件传递methods方法
<template>
<div>
<!--<!–父组件,可以引用子组件时通过属性绑定(v-bind:)的形式-->
<!--把需要传递给子组件的数据,以数据绑定的形式,传递到子组件内部,供子组件使用–>-->
<!--<!–parentmeg 是自定义的属性,名字自己起–>-->
<!--<com1 v-bind:parentmeg="meg"></com1>-->
<!--父组件向子组件传递方法,使用的是事件绑定机制;v-on,
当我们自定义一个事件属性之后,子组件就能够通过某些方式来调用
传递进去的方法-->
<!--@func="show()",表示先执行show函数,将返回的数据传给func-->
<!--注意:func并不能直接在子组件中用,而是在子组件中定义一个函数再去触发-->
<com2 @func="show"></com2>
</div>
</template>
<script>
export default {
name: 'day_four',
data () {
return {
// meg:'这是父组件'
}
},
methods: {
show (data, data2) {
console.log('调用了父组件上的show方法' + data + data2)
}
},
components: {
// com1:{
// //结论:子组件默认无法访问父组件中的data中的数据和methods中的方法
// template:'<h4>{{parentmeg}}</h4>',
// //注意:组件中所有props中的数据,都是通过父组件传递给子组件的
// //把父组件传递过来的parentmeg属性,先在props数组中定义之后才能使用
// //props中的数据是在子组件中只读,不可修改
// props:['parentmeg'],
// data(){
// //注意:子组件中的data数据,并不是通过父组件传递过来的,而是子组件自身私有的,
// //比如:子组件通过Ajax请求回来的数据,都可以放到data身上
// //data中的数据是在子组件中可读可写
// return{
// title:'hello'
// }
// }
// }
com2: {
template: '<div><h3>这是com2子组件</h3><button @click="mymeyhod">子组件事件</button></div>',
methods: {
mymeyhod () {
//$emit:表示触发,调用
//第一个参数:函数名;第二个往后的参数就是父组件函数需要的参数
this.$emit('func', 123, 456)
}
}
}
}
}
</script>
<style scoped>
</style>
4、组件传值-子组件通过事件调用(函数)向父组件传值
<template>
  <div>
    <com2 @func="show"></com2>
  </div>
</template>

<script>
  export default {
    name: 'day_four',
    data () {
      return {
        datamsg:null
      }
    },
    methods: {
      show (data) {
        console.log('调用了父组件上的show方法')
        this.datamsg = data
        console.log(this.datamsg)
      }
    },
    components: {
      com2: {
        template: '<div><h3>这是com2子组件</h3><button @click="mymeyhod">子组件事件</button></div>',
        data(){
          return{
            meg:{
              name:'子组件数据',
              age:12
            }
          }
        },
        methods: {
          mymeyhod () {
            //$emit:表示触发,调用
            //第一个参数:函数名;第二个往后的参数就是父组件函数需要的参数
            //利用函数参数,将子组件的数据传递给父组件
            this.$emit('func', this.meg)
          }
        }
      }
    }
  }
</script>
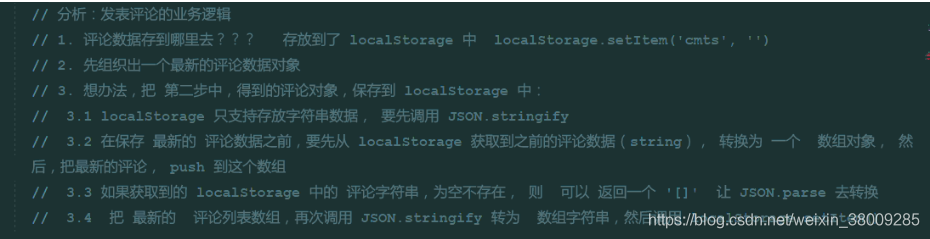
5、组件案例-发表评论功能实现
父组件:
<template>
    <div>
      <div class="form-group">
        <label>评论人</label>
        <input type="text" class="form-control" v-model="name">
      </div>

      <div>
        <label>评论内容:</label>
        <textarea class="form-control" v-model="content"></textarea>
      </div>
      <br>
      <div>
         <button class="btn btn-primary" @click="add">发表评论</button>
        <br><br>
      </div>
    </div>
</template>

<script>
  export default {
    name: 'myList',
    data(){
      return{
        name:'',
        content:''
      }
    },
    methods:{
      add(){
        //数据储存到本地缓存
        var comment = {id: Date.now(), name: this.name, content: this.content}
      //  从localstorage中货物所有的评论;localstorage是本地缓存
        var list = JSON.parse(localStorage.getItem('cmts') || '[]')
        list.unshift(comment)
        localStorage.setItem('cmts', JSON.stringify(list))
        this.name = this.content =  ''
        this.$emit('parentshow')
      }
    }
  }
</script>
子组件(mylist.vue):
<template>
    <div>
      <div class="form-group">
        <label>评论人</label>
        <input type="text" class="form-control" v-model="name">
      </div>

      <div>
        <label>评论内容:</label>
        <textarea class="form-control" v-model="content"></textarea>
      </div>
      <br>
      <div>
         <button class="btn btn-primary" @click="add">发表评论</button>
        <br><br>
      </div>
    </div>
</template>

<script>
  export default {
    name: 'myList',
    data(){
      return{
        name:'',
        content:''
      }
    },
    methods:{
      add(){
        //数据储存到本地缓存
        var comment = {id: Date.now(), name: this.name, content: this.content}
      //  从localstorage中货物所有的评论;localstorage是本地缓存
        var list = JSON.parse(localStorage.getItem('cmts') || '[]')
        list.unshift(comment)
        localStorage.setItem('cmts', JSON.stringify(list))
        this.name = this.content =  ''
        this.$emit('parentshow')
      }
    }
  }
</script>
6、使用ref获取DOM元素和组件引用
<template>
  <div>
    <button @click="getelement">获取元素</button>
    <h3 id="myh1" ref="myh3">hello world</h3>
    <hr>
    <login ref="mylogin"></login>
  </div>
</template>

<script>
  var login = {
    template:'<h4>这是登录组件</h4>',
    data(){
      return{
        msg:'哈哈哈'
      }
    },
    methods:{
      show(){
        console.log(this.msg)
      }
    }
  }

  export default {
    data(){
      return{

      }
    },
    methods:{
      getelement(){
        //ref = reference(引用)
        //this.$refs是一个对象,id="myh1" ref="myh3"之间的名称可以不一致
        // console.log(this.$refs.myh3.innerText)
        // console.log(this.$refs)

      //  利用ref去输出子组件数据和调用方法
        console.log(this.$refs.mylogin.msg)
        this.$refs.mylogin.show()
      }
    },
    components:{
      login:login
    }
  }
</script>
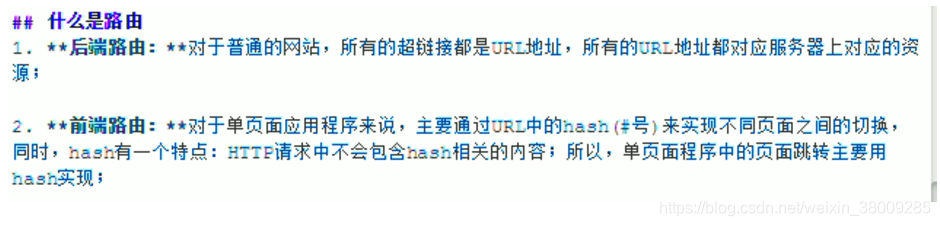
7、路由-前后端路由的概念
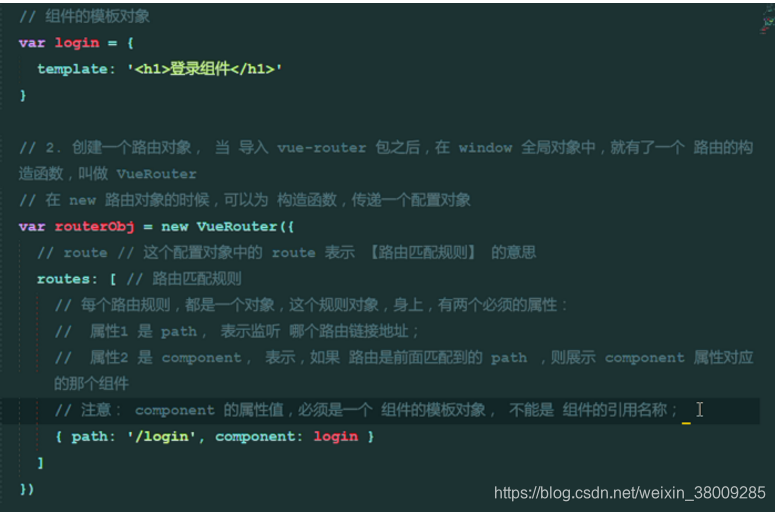
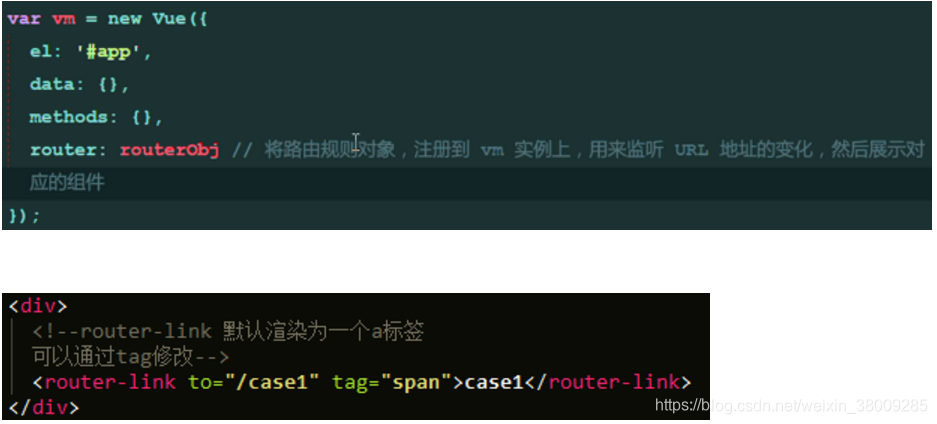
8、路由-vue-router的基本使用

9、路由redirect重定向的使用

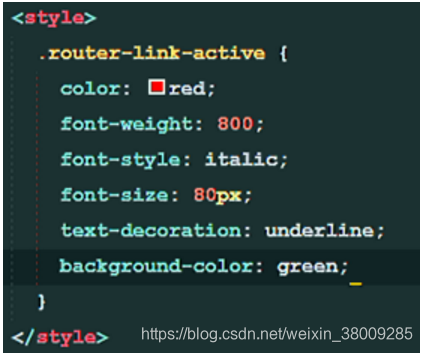
10、设置选中路由高亮的两种方式
方法1:
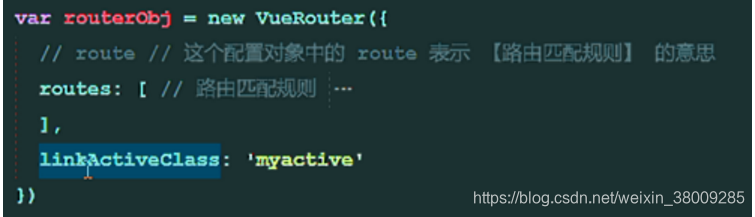
方法2:自定义默认类
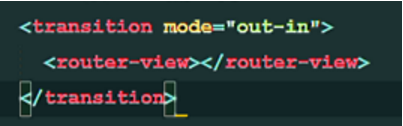
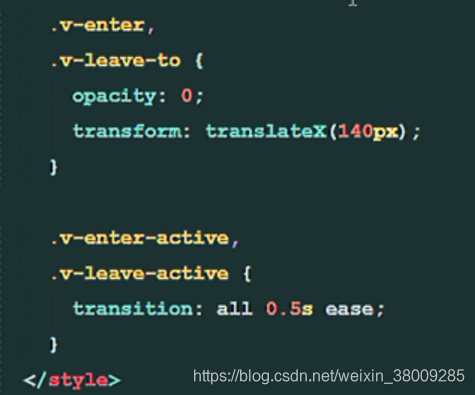
11、为路由切换启动动画
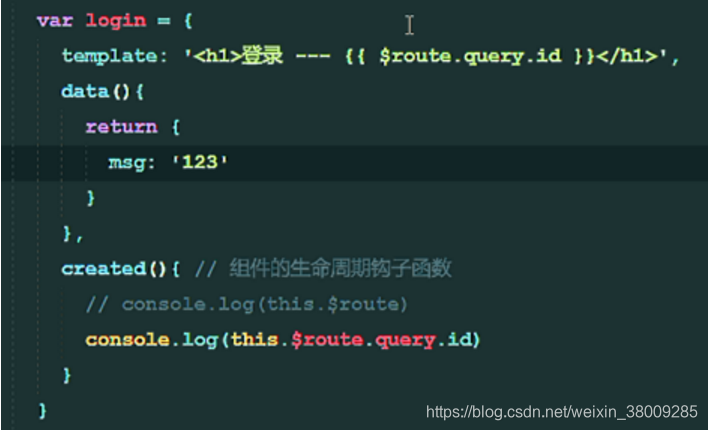
12、路由传参-使用query方式传递参数(可多个)
方法1:

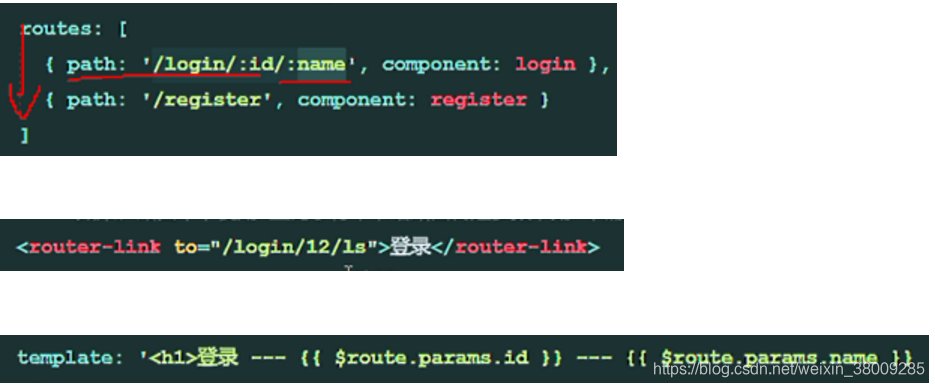
13、路由传参–使用params方式传递路由参数
修改path属性
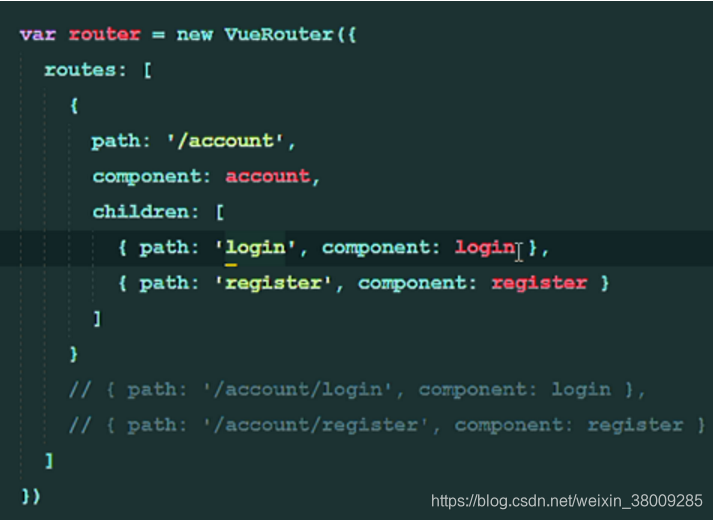
14、使用children属性实现路由嵌套

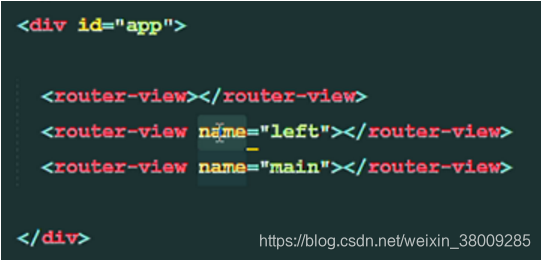
15、使用命名视图实现经典布局
命名视图的名称是一个字符串,只有:属性才是变量
.html文件设计
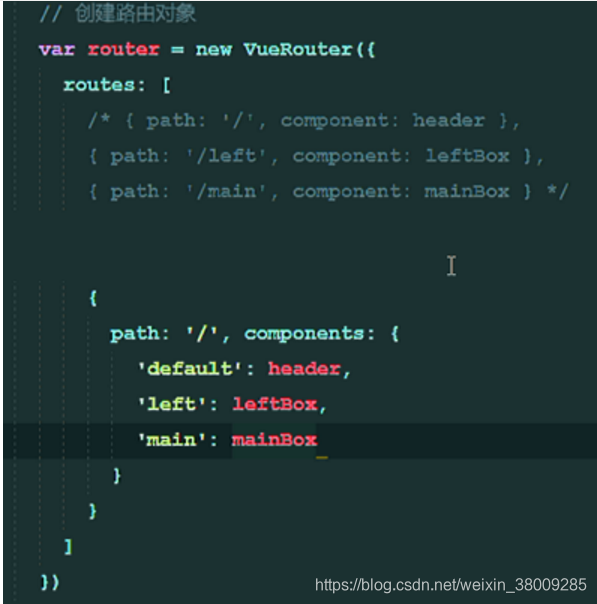
.vue文件设置
<template>
  <div id="app">
    <div id="header">
      头部
    </div>
    <div class="w">
      <div id="left"><my-component></my-component></div>
      <div id="main"><router-view></router-view></div>
    </div>
    <div id="footer">尾部</div>
  </div>
</template>

<script>
export default {
  name: 'App',
</script>

<style>
#app {
  font-family: 'Avenir', Helvetica, Arial, sans-serif;
  -webkit-font-smoothing: antialiased;
  -moz-osx-font-smoothing: grayscale;
  text-align: center;
  color: #2c3e50;
}
  #header{
    width: 100%;
    height: 100px;
    background-color: pink;
  }
  #left{
    width:20%;
    height: calc(100vh - 200px);
    background-color: red;
    float: left;
  }
  .w{
    display:table;
    clear:both;
    width:100%;
  }
  #main{
    width:80%;
    height: calc(100vh - 200px);
    float: right;
    overflow: hidden;
  }
  #footer{
    width: 100%;
    height: 100px;
    background-color: yellow;
  }
</style>


 被折叠的 条评论
为什么被折叠?
被折叠的 条评论
为什么被折叠?
 到【灌水乐园】发言


