


<?xml version="1.0" encoding="UTF-8"?>
<beans xmlns="http://www.springframework.org/schema/beans"
       xmlns:xsi="http://www.w3.org/2001/XMLSchema-instance"
       xmlns:p="http://www.springframework.org/schema/p"
       xmlns:context="http://www.springframework.org/schema/context"
       xmlns:jms="http://www.springframework.org/schema/jms"
       xmlns:amq="http://activemq.apache.org/schema/core" xmlns:aop="http://www.springframework.org/schema/aop"
       xsi:schemaLocation="http://www.springframework.org/schema/beans
                       http://www.springframework.org/schema/beans/spring-beans.xsd
                       http://www.springframework.org/schema/context
                       http://www.springframework.org/schema/context/spring-context.xsd
                       http://www.springframework.org/schema/jms
                       http://www.springframework.org/schema/jms/spring-jms.xsd
                       http://activemq.apache.org/schema/core
                       http://activemq.apache.org/schema/core/activemq-core.xsd
                       http://www.springframework.org/schema/aop
                       http://www.springframework.org/schema/aop/spring-aop.xsd">

    <context:annotation-config/>

    <context:component-scan base-package="activemq"></context:component-scan>

    <aop:aspectj-autoproxy></aop:aspectj-autoproxy>
    <bean id="DataSourceAspect" class="activemq.controller.common.DataSourceAspect"></bean>

    <aop:config>
        <aop:aspect ref="DataSourceAspect">
            <aop:pointcut id="tx" expression="execution(* activemq.controller..*.*(..))"></aop:pointcut>
            <aop:before method="before" pointcut-ref="tx"></aop:before>
        </aop:aspect>
    </aop:config>

    <bean id = "dataSource1" class = "org.apache.commons.dbcp.BasicDataSource"
          destroy-method = "close">
        <property name="driverClassName" value="com.mysql.jdbc.Driver"/>
        <property name="url" value="jdbc:mysql://localhost:3307/test"/>
        <property name="username" value="root"/>
        <property name="password" value=""/>
    </bean>

    <bean id = "dataSource2" class = "org.apache.commons.dbcp.BasicDataSource"
          destroy-method = "close">
        <property name="driverClassName" value="com.mysql.jdbc.Driver"/>
        <property name="url" value="jdbc:mysql://localhost:3308/test"/>
        <property name="username" value="root"/>
        <property name="password" value=""/>
    </bean>

    <bean id="sqlSessionFactory" class="org.mybatis.spring.SqlSessionFactoryBean">
        <property name="dataSource" ref="dataSource"/>
        <property name="mapperLocations" value="classpath:activemq/controller/mapper/*.xml"/>
    </bean>

    <bean id="dataSource" class="activemq.controller.common.DynamicDataSource">
        <property name="targetDataSources">
            <map>
                <entry key="master" value-ref="dataSource1"></entry>
                <entry key="slave_1" value-ref="dataSource2"></entry>
            </map>
        </property>
        <property name="defaultTargetDataSource" ref="dataSource1"></property>
    </bean>

    <bean class="org.mybatis.spring.mapper.MapperScannerConfigurer">
        <property name="basePackage" value="activemq.controller.dao"/>
        <property name="sqlSessionFactoryBeanName" value="sqlSessionFactory"/>
    </bean>


    <import resource="mvc-config.xml"></import>
</beans>
首先配置两个数据源。为了方便我这里就没有使用properties文件,直接在这里写上了。
这里配置的时候有几个坑,记录一下。
1.Spring配置错误java.lang.NoClassDefFoundError: org/springframework/jdbc/datasource/TransactionAwareDataS
java.lang.NoSuchFieldException[dataSource]
<property name="dataSource" ref="dataSource"/>是这行的ref我写成了value
2.mapper.xml文件not found
原因:classes下编译不到
解决办法是在pom文件里加入,使其编译到。
<build>
<resources>
<resource>
<directory>src/main/java</directory>
<includes>
<include>**/*.xml</include>
</includes>
</resource>
</resources>
</build>
3.org.springframework.beans.factory.BeanCreationException: Error creating bean with name 'mqTest' defined in file
切点表达式写的有问题,execution(* activemq.controller.test.*.*(..))
之前错误写法 execution(* activemq.controller.test.*.(..))
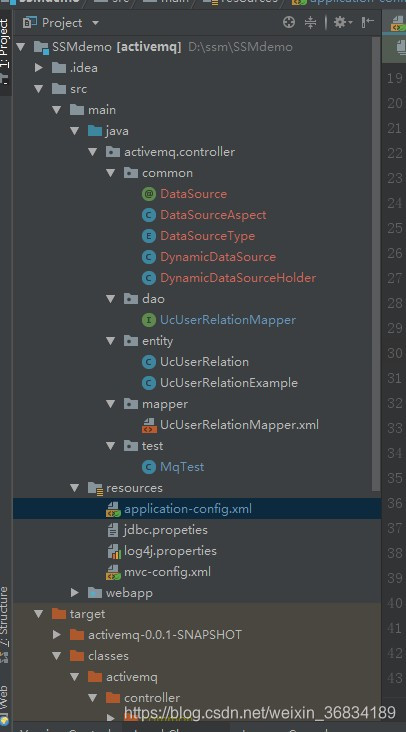
个人项目目录结构
DynamicDataSource
package activemq.controller.common;

import org.springframework.jdbc.datasource.lookup.AbstractRoutingDataSource;

/**
 * @Author xty
 * @Description
 * @Date 14:01 2018/11/02
 */
public class DynamicDataSource extends AbstractRoutingDataSource {
    @Override
    protected Object determineCurrentLookupKey() {
        return DynamicDataSourceHolder.getDataSource();
    }
}
自己创建切换数据源的类,继承spring提供的AbstractRoutingDataSource 实现其中的方法来获取数据源。
DynamicDataSourceHolder
package activemq.controller.common;

import java.util.concurrent.atomic.AtomicInteger;

/**
 * @Author xty
 * @Description
 * @Date 14:10 2018/11/02
 */
public class DynamicDataSourceHolder {

    public static final ThreadLocal<String> holder = new ThreadLocal<String>();

    private static AtomicInteger counter = new AtomicInteger(-1);
    //写库
    private static final String MASTER = "master";

    //读库
    private static final String SLAVE = "slave_1";
    private static final String SLAVE2 = "slave_2";

    public static void setDataSource(DataSourceType dataSourceType) {
        if (dataSourceType == DataSourceType.MASTER) {
            holder.set(MASTER);
            System.out.println("====================master");
        } else {
            holder.set(SLAVE);
            System.out.println("=====================slave");
        }
    }

    //三个数据源
  /*  public static void setDataSource(DataSourceType dataSourceType){
        if (dataSourceType == DataSourceType.MASTER){
            holder.set(MASTER);
        }else if(dataSourceType == DataSourceType.SLAVE){
            holder.set(roundRobinSlaveKey());
        }
    }*/
    //轮询

    public static String getDataSource(){
        return holder.get();
    }

    private static String roundRobinSlaveKey() {
        Integer i = counter.incrementAndGet() % 2;
        if (counter.get()>9999){
            counter.set(-1);
        }
        if (i == 0) {
            return SLAVE;
        } else {
            return SLAVE2;
        }

    }


}
这个方法实现了set 和 get数据源的方法。个人使用了两个数据源,当三个数据源的时候实现方法也在上实现了。
当多个读库的时候,roundRobinSlaveKey方法中的%后的数字根据读库的数量来手动调整
为了防止并发问题使用了AtomicInteger 。
下面看一下怎么将DataSource动态set
DataSource
/**
 *
 * @author xty
 * @date 2018/11/2 17:25
 */
@Retention(RetentionPolicy.RUNTIME)
@Target({ElementType.METHOD})
public @interface DataSource {
    DataSourceType value() default DataSourceType.MASTER;

}
使用了自定义注解的方式。
DataSourceAspect
package activemq.controller.common;

import org.aspectj.lang.JoinPoint;
import org.aspectj.lang.reflect.MethodSignature;
import java.lang.reflect.Method;

/**
 * @Author xty
 * @Description
 * @Date 17:44 2018/11/02
 */
public class DataSourceAspect {

    public void before(JoinPoint point) throws NoSuchMethodException {
       /* Object target = point.getTarget();
        String method = point.getSignature().getName();
        Class classz = target.getClass();*/
        /*Class<?>[] parameterTypes = ((MethodSignature)point.getSignature()).getMethod().getParameterTypes();
        Method m = classz.getMethod(method,parameterTypes);*/
        MethodSignature methodSignature = (MethodSignature) point.getSignature();
        Method method = methodSignature.getMethod();
        if (method!=null && method.isAnnotationPresent(DataSource.class)){
            DataSource dataSource = method.getAnnotation(DataSource.class);
            DynamicDataSourceHolder.setDataSource(dataSource.value());
        }

    }
}
JoinPoint使用切点,before方法在方法前使用此方法。利用反射来获取此方法上的注解,判断是否含有DataSource注解。有则调用set方法,写入数据源。
配置aop
 <aop:aspectj-autoproxy></aop:aspectj-autoproxy>
    <bean id="DataSourceAspect" class="activemq.controller.common.DataSourceAspect"></bean>

    <aop:config>
        <aop:aspect ref="DataSourceAspect">
            <aop:pointcut id="tx" expression="execution(* activemq.controller..*.*(..))"></aop:pointcut>
            <aop:before method="before" pointcut-ref="tx"></aop:before>
        </aop:aspect>
    </aop:config>
controll
/**
 * @Author xty
 * @Description
 * @Date 18:55 2018/10/24
 */
@Controller
@RequestMapping("/mq")
public class MqTest {

    @Autowired
    private UcUserRelationMapper ucUserRelationMapper;

    @RequestMapping("/test")
    public String test1(){
        UcUserRelation UcUserRelation = new UcUserRelation();
        UcUserRelation.setId(Long.parseLong("11111"));
        UcUserRelation.setCreateBy(Long.parseLong("1"));
        ucUserRelationMapper.insertSelective(UcUserRelation);
        return "succ";
    }

}
mapper
    /**
     * This method was generated by MyBatis Generator.
     * This method corresponds to the database table uc_user_relation
     *
     * @mbg.generated
     */
    @DataSource(DataSourceType.SLAVE)
    int insertSelective(UcUserRelation record);
在这个方法上打上@DataSource注解。启动项目后切换数据源 就能操作不同的数据库了。
之前把注解打到了controller层,注解调用不到,目前没想通什么原因(可能是没扫描到)。不过一般流程不会像我一样偷懒的。


 576
576

 被折叠的 条评论
为什么被折叠?
被折叠的 条评论
为什么被折叠?
 到【灌水乐园】发言


