


 本文详细介绍了如何在CentOS 6.6系统上手动编译安装MySQL 5.6,并进行必要的配置,包括安装依赖库、下载MySQL源码、编译安装、初始化数据库、创建开机启动脚本以及设置用户和权限等步骤。
MySQL 安装
本教程的系统平台:CentOS release 6.6 (Final) 64位。
一、安装编译工具及库文件
yum-y install gcc gcc-c++make autoconf libtool-ltdl-devel gd-devel freetype-devel libxml2-devel libjpeg-devel libpng-devel openssl-devel curl-devel bison patch unzip libmcrypt-devel libmhash-devel ncurses-devel sudo bzip2 flex libaio-devel
二、 安装cmake 编译器
cmake 版本:cmake-3.1.1。
1、下载地址:http://www.cmake.org/files/v3.1/cmake-3.1.1.tar.gz
$ wget http://www.cmake.org/files/v3.1/cmake-3.1.1.tar.gz

2、解压安装包
$ tar zxvf cmake-3.1.1.tar.gz
3、进入安装包目录
$ cd cmake-3.1.1
4、编译安装
$./bootstrap
$ make&&make install
三、安装 MySQL
MySQL版本:mysql-5.6.15。
1、下载地址: http://dev.mysql.com/get/Downloads/MySQL-5.6/mysql-5.6.15.tar.gz
$ wget http://dev.mysql.com/get/Downloads/MySQL-5.6/mysql-5.6.15.tar.gz

2、解压安装包
$ tar zxvf mysql-5.6.15.tar.gz
3、进入安装包目录
$ cd mysql-5.6.15
4、编译安装
$ cmake-DCMAKE_INSTALL_PREFIX=/usr/local/webserver/mysql/-DMYSQL_UNIX_ADDR=/tmp/mysql.sock-DDEFAULT_CHARSET=utf8-DDEFAULT_COLLATION=utf8_general_ci-DWITH_EXTRA_CHARSETS=all-DWITH_MYISAM_STORAGE_ENGINE=1-DWITH_INNOBASE_STORAGE_ENGINE=1-DWITH_MEMORY_STORAGE_ENGINE=1-DWITH_READLINE=1-DWITH_INNODB_MEMCACHED=1-DWITH_DEBUG=OFF-DWITH_ZLIB=bundled-DENABLED_LOCAL_INFILE=1-DENABLED_PROFILING=ON-DMYSQL_MAINTAINER_MODE=OFF-DMYSQL_DATADIR=/usr/local/webserver/mysql/data-DMYSQL_TCP_PORT=3306$ make&&make install
5、查看mysql版本:
$/usr/local/webserver/mysql/bin/mysql--version

到此,mysql安装完成。
MySQL 配置
1、创建mysql运行使用的用户mysql:
$/usr/sbin/groupadd mysql
$/usr/sbin/useradd-g mysql mysql
2、创建binlog和库的存储路径并赋予mysql用户权限
$ mkdir-p/usr/local/webserver/mysql/binlog/www/data_mysql
$ chown mysql.mysql/usr/local/webserver/mysql/binlog/ /www/data_mysql/
3、创建my.cnf配置文件
将/etc/my.cnf替换为下面内容
$ cat/etc/my.cnf[client]port=3306socket=/tmp/mysql.sock[mysqld]replicate-ignore-db=mysql
replicate-ignore-db=test
replicate-ignore-db=information_schema
user=mysql
port=3306socket=/tmp/mysql.sock
basedir=/usr/local/webserver/mysql
datadir=/www/data_mysql
log-error=/usr/local/webserver/mysql/mysql_error.log
pid-file=/usr/local/webserver/mysql/mysql.pid
open_files_limit=65535back_log=600max_connections=5000max_connect_errors=1000table_open_cache=1024external-locking=FALSE
max_allowed_packet=32Msort_buffer_size=1Mjoin_buffer_size=1Mthread_cache_size=600#thread_concurrency = 8query_cache_size=128Mquery_cache_limit=2Mquery_cache_min_res_unit=2kdefault-storage-engine=MyISAMdefault-tmp-storage-engine=MYISAM
thread_stack=192Ktransaction_isolation=READ-COMMITTED
tmp_table_size=128Mmax_heap_table_size=128Mlog-slave-updates
log-bin=/usr/local/webserver/mysql/binlog/binlog
binlog-do-db=oa_fb
binlog-ignore-db=mysql
binlog_cache_size=4Mbinlog_format=MIXED
max_binlog_cache_size=8Mmax_binlog_size=1Grelay-log-index=/usr/local/webserver/mysql/relaylog/relaylog
relay-log-info-file=/usr/local/webserver/mysql/relaylog/relaylog
relay-log=/usr/local/webserver/mysql/relaylog/relaylog
expire_logs_days=10key_buffer_size=256Mread_buffer_size=1Mread_rnd_buffer_size=16Mbulk_insert_buffer_size=64Mmyisam_sort_buffer_size=128Mmyisam_max_sort_file_size=10Gmyisam_repair_threads=1myisam_recover
interactive_timeout=120wait_timeout=120skip-name-resolve#master-connect-retry = 10slave-skip-errors=1032,1062,126,1114,1146,1048,1396#master-host = 192.168.1.2#master-user = username#master-password = password#master-port = 3306server-id=1loose-innodb-trx=0loose-innodb-locks=0loose-innodb-lock-waits=0loose-innodb-cmp=0loose-innodb-cmp-per-index=0loose-innodb-cmp-per-index-reset=0loose-innodb-cmp-reset=0loose-innodb-cmpmem=0loose-innodb-cmpmem-reset=0loose-innodb-buffer-page=0loose-innodb-buffer-page-lru=0loose-innodb-buffer-pool-stats=0loose-innodb-metrics=0loose-innodb-ft-default-stopword=0loose-innodb-ft-inserted=0loose-innodb-ft-deleted=0loose-innodb-ft-being-deleted=0loose-innodb-ft-config=0loose-innodb-ft-index-cache=0loose-innodb-ft-index-table=0loose-innodb-sys-tables=0loose-innodb-sys-tablestats=0loose-innodb-sys-indexes=0loose-innodb-sys-columns=0loose-innodb-sys-fields=0loose-innodb-sys-foreign=0loose-innodb-sys-foreign-cols=0slow_query_log_file=/usr/local/webserver/mysql/mysql_slow.log
long_query_time=1[mysqldump]quick
max_allowed_packet=32M
4、初始化数据库
$/usr/local/webserver/mysql/scripts/mysql_install_db--defaults-file=/etc/my.cnf--user=mysql
显示如下信息:
InstallingMySQLsystem tables...2015-01-2620:18:510[Warning]TIMESTAMPwithimplicitDEFAULT valueisdeprecated.Pleaseuse--explicit_defaults_for_timestamp server option(see documentationformore details).OKFillinghelp tables...2015-01-2620:18:570[Warning]TIMESTAMPwithimplicitDEFAULT valueisdeprecated.Pleaseuse--explicit_defaults_for_timestamp server option(see documentationformore details).OK...
5、创建开机启动脚本
$ cd/usr/local/webserver/mysql/$ cp support-files/mysql.server/etc/rc.d/init.d/mysqld
$ chkconfig--add mysqld
$ chkconfig--level35mysqld on
6、启动mysql服务器
$ service mysqld start

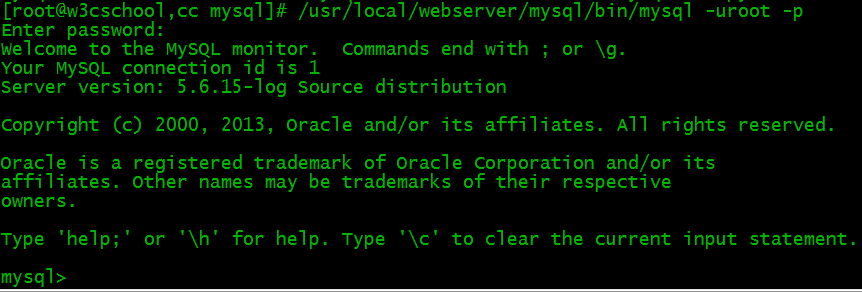
7、连接 MySQL
$/usr/local/webserver/mysql/bin/mysql-u root-p
修改MySQL用户密码
mysqladmin-u用户名-p旧密码password新密码
或进入mysql命令行
SET PASSWORD FOR'用户名'@'主机'=PASSWORD(‘密码');
创建新用户并授权:
grant all privileges on*.*to用户名@'%'identifiedby'密码'withgrant option;
其他命令
启动:service mysqld start
停止:service mysqld stop
重启:service mysqld restart
重载配置:service mysqld reload


 被折叠的 条评论
为什么被折叠?
被折叠的 条评论
为什么被折叠?
 到【灌水乐园】发言


